Many moons, many opportunities
One of the great things about night photography is the variety of lighting situations we have throughout each month, from complete darkness (around the new moon) to extremely bright conditions (around the full moon).
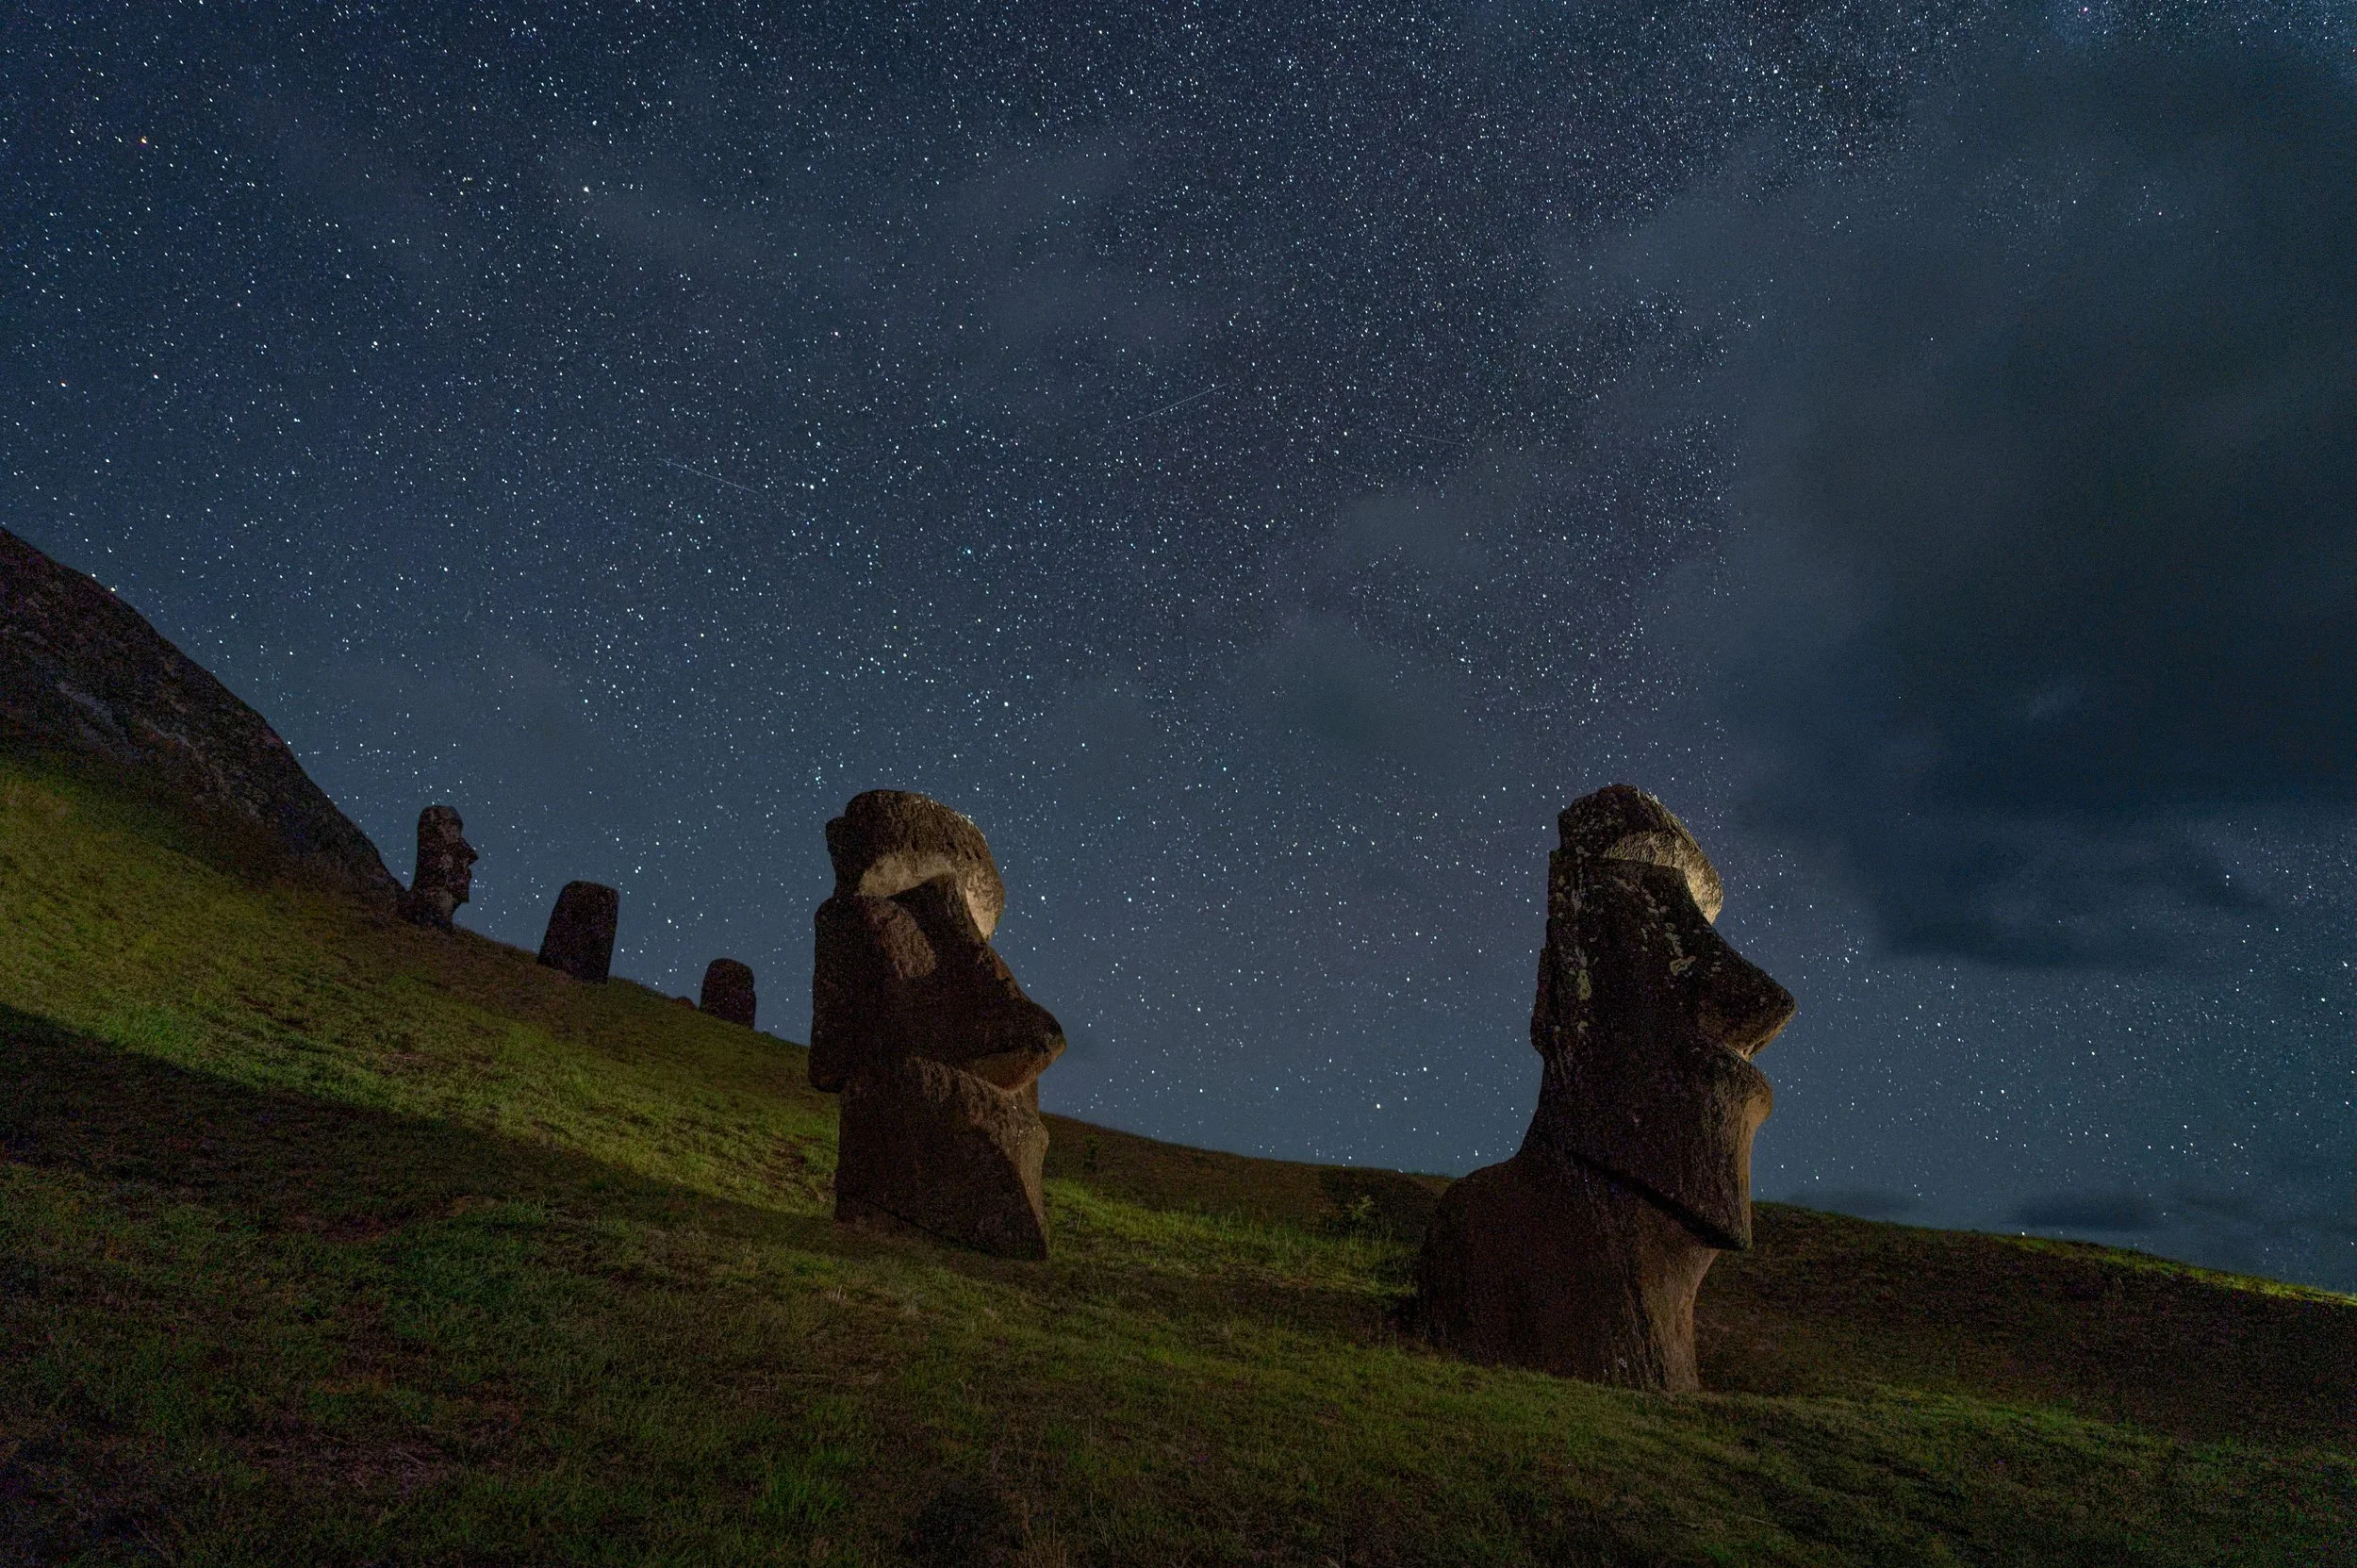
Photographing around the new moon is great for capturing skies chock full of stars. The skies have little or no light, which allows us to shoot with wide-open apertures that allow even the dimmest stars to be seen. This is also a great moon phase for capturing the Milky Way or shooting long star trails.
New moon. Stitched panorama. Fuji X-T2 with 10-24mm f/4 lens at 16mm. 30 seconds, f/4, ISO 6400.
The rest of the month, however, is marked by some amount of moonlight. These moon phases provide the night photographer with endless opportunities for light painting.
Quarter moon (sometimes referred to as half moon). Fuji X-T2 with 16mm f/1.4 lens. 4 minutes, f/5.6, ISO 100.
Full moon. Nikon D4s with a 24mm f/2.8 lens. 3 minutes, f/8, ISO 100.
Can you light paint under new moons? Sure. But you do have to provide all of the lighting. Illuminating the entire foreground of a scene can be quite challenging. Sticking to smaller, more manageable subjects will ensure a better chance of success.
When the moon is up (and is more than just a sliver), it bathes the earth in a faint, soft light. On the other hand, when the moon moves toward full, it’s so bright that our images can look like they were made during the day! Using the moonlight to help illuminate our foreground is a great strategy to create stunning astro-landscape photographs. And if you want to level up those images, you can add in some light painting—either as a fill light or as a key light.
Getting Started
Here are the four basic steps to creating a light-painted night scene:
- Compose.
- Focus.
- Determine ambient light exposure.
- Add light painting.
1. Compose
It all begins with finding your composition. Regrettably, in this techie genre of photography, we often spend more time thinking about our settings than we do our composition. Spend some time here. Try out different options before you commit.
2. Focus
Once you’ve found your composition, it’s time to get your focus. For more on this, see Chris Nicholson’s recent blog post “Staying Sharp: 8 Ways to Focus in the Dark.”
3. Determine Ambient Light Exposure
With your scene composed and properly focused, it’s time to set an exposure for the ambient light. What is ambient light, you ask? Ambient light is the available light in the scene. This is the sun during daytime exposures, the city lights in a nightime urban environment, your living room lamps if you are shooting indoors at night, or (in our case) the moonlight.
Getting your exposure correct for the ambient moonlight is critical. Each situation and phase of the moon will provide different light conditions, so test out different exposures rather than depending on formulas.
The easiest way to gain an accurate ambient exposure is to run a series of test shots at high ISOs. These test shots will take only seconds and will save you a ton of time. They can also alert you to composition issues in your scene long before you start into your minutes-long exposures. Once you determine your ambient exposure at a high ISO, it’s time to calculate the longer lower ISO exposure. For example, the original test shot of the image below was made at 4 seconds, f/5.6, ISO 6400, while the final low-ISO setting as seen below was 4 minutes, f/5.6, ISO 100.
Compose, focus, ambient light exposure. Fuji X-T2 with 16mm f/4 lens. 4 minutes, f/5.6, ISO 100.
Add in light painting. 4 minutes, f/5.6, ISO 100.
Final image. 21 stacked exposures, each shot at 4 minutes, f/5.6, ISO 100.
4. Add Light Painting
Now comes the fun part: crafting the light. Whether you are using a flashlight, an LED panel such as the Luxli Viola, or something as subtle as a tea lights, you can choose how best to balance your added light to the existing (ambient) light.
How do we do this? One of the simplest ways is to employ the age-old practice of lighting used by countless painters, photographers and videographers: using a key light and fill light.
- Key Light: Also called the “main light.” This is the primary source of illumination. It is the brightest light in the scene. Wherever this light doesn’t reach becomes darker shadows.
- Fill Light: This is the secondary source of illumination used to “fill” in the darker areas of the scene not illuminated by the key light. It’s usually one to two stops darker than the key light.
In this portrait above, the key light is to camera-left. This makes the image brighter on the left side. Notice the highlight under the model’s right eye and cheek. The fill light is at camera-right and pulled back a bit further to make the light a little less bright. Below is the diagram of this lighting setup.
While this image was made in the studio, you can accomplish the same type of lighting outdoors at night. The moonlight can be your key light and you can fill in the shadows with your light painting tool of choice. Or you can you use your light painting tool as the key light and the moon can you be your fill.
It’s all about the balance. If the light painting you are doing is subtle and the moonlight dominates the scene, then the moon is the key and the flashlight is the fill. If you the moonlight exposure is not as bright as the light you add in, then your painting becomes the key light.
Two Examples
I began with a 3-second exposure at f/8 and ISO 6400 to compose the scene and gain focus. Next I converted the high ISO test exposure to 3 minutes, f/8, ISO 100. The evening features a full moon, so the scene could have been brighter, but this exposure made the moonlit scene behind the truck a little darker than usual.
If I hadn’t been planning to light paint the scene, I would have made the exposure brighter, and the moon would have been the key light (not to mention the only light). But, by keeping it a little darker, I allowed the moon to become the fill light. The 3-minute exposure gave me plenty of time to walk around and paint the truck. The truck is the brightest element of the composition, so this makes my light painting the key light.
Moon as fill light, flashlight as key. Nikon D4 with 35mm f/2 lens. 3 minutes, F/8, ISO 100.
In this next example, I used the full moon as the key light and my flashlight as the fill. I first set up my composition. Then I focused. Then I started my high ISO test exposures, and converted my result to a low-ISO, long-exposure setting. I settled on 3 minutes, f/5.6, ISO 6400.
This created a natural-looking scene. The sky seemed bright, but not quite as bright as the middle of the day, and the distant mountain had a nice bright glow to it. The tree and the rock formation in the foreground, however, were in complete darkness, so they recorded as pure black. Time for the flashlight!
Standing to the right and little forward of the tree, I shined my Coast HP5R back at the formation. Adding too much light made the formation and the tree brighter than the background, which was not the affect I was looking for. After several attempts at light painting, I settled on an amount of illumination that kept the foreground just a bit darker than the background.
Moon as key light, flashlight as fill. Nikon D4s with 24mm f/2.8 lens. 3 minutes, F/5.6, ISO 200.
Bringing it into the Field
When you are out under a moonlit sky, try a brighter ambient exposure with less flashlight to keep the moon as the key light. Then try less ambient exposure and more flashlight so that the latter becomes the key light.
There is no right or wrong—only the way you want to interpret the scene!