Note: This is the first in a three-part series about one of the most common questions we get: How do you deal with light pollution? We have three answers: with filters, with post-processing, with creativity. In this week’s blog post, Matt Hill discusses the first of those solutions: light pollution filters.
Light pollution is a reality. It affects humans’ quality of life. And it’s not addressed in a serious manner by most local governments.
When it comes to night photography, it’s purely up to individual aesthetic if light pollution is positive, negative or neutral.
I like to think of the problem as a coffee metaphor. Would you make coffee without a filter? No. That would be sacrilege (and like drinking mud). The same principle applies to photography. There are certain situations wherein a filter does exactly the right job and is therefore necessary. Neutral density and polarizers are perfect examples.
But as light pollution filters are relatively new to the photography world, the question stands about whether they fall into the same category. So I set out to understand if and when light pollution filters are useful. After some deep testing experimenting in post-processing and hours thinking about the issues, I have some observations and suggestions for you.
The bottom line is this: Yes, light pollution filters are very helpful in certain situations. Read on to find out when I’d suggest using them.
Note: This will not address deep-sky light pollution filters used typically for strict astrophotography. I focused on what we do best: astro-landscape and suburban/urban night photography.
The Problem(s)
1. exactly what light pollution filters do is not clearly described.
The manufacturers of light pollution filters claim they remove unwanted color casts from night photography. But very few, if any, provide graphs or data showing which wavelengths of light are blocked. On top of that, very few laypeople know what the heck those mean anyway—so maybe that’s why they aren’t just readily available on the manufacturers’ websites.
In short, the makers say that the filters block a yellow glow. And most often they claim the glow comes from sodium lights. But there are distinctions in this range. As we see in Figure 1, low-pressure sodium vapor lamps typically emit at 589 nm (nanometers).
Figure 1. Source: Wikipedia
The Irix website provides the chart in Figure 2, which clearly shows 589.3 nm as the wavelength being narrowly blocked with only 15 percent transmittance. This means only 15 percent of the light at that wavelength passes through the filter. And it slopes up on either side, so some other nearby wavelengths (colors) are also affected.
Figure 2. Source: Irix.
By comparing the two charts—the emitted light spectrum and the filter’s blocking profile—we see that this is a very specific filter. In fact, it has only one job: to block light at a very narrow wavelength.
Mercury vapor lamps are trickier to filter for, since there are many wavelengths and uses for them. But when used as overhead street lighting, they typically show as blue (435.8 nm) and green (546.1 nm) to our eyes. There is a yellow-orange variant too, which emits at 578.2 nm. This latter one is likely also blocked using (what I can discern as being) typical light pollution filters.
Figure 3. Source: Wikipedia.
We also need to consider the LED revolution. Many cities and townships are in the process of (or have completed) converting all street lamps from the often-beautiful mixed-color lighting to very consistent and “clean” LED lighting. The color temperatures from LEDs may vary widely from warm to slightly cooler than daylight. They also emit more of the color spectrum and will thus render colors better (though not as well as a true tungsten light source). Keep reading to see examples.
So it feels like this wave of light pollution filters is about 10 years too late. But is it?
2. how to best use light pollution filters is not clearly described.
Not one manufacturer source that I researched suggests a white balance setting, nor any post-processing settings. None even mention the filter factor (i.e., how much light the filter eats and how much to compensate for it).
It seems to me that photographic lens filters are a sunset product. Meaning, they are mostly outdated and unnecessary except for the aforementioned specialty filters that have very narrow, specific jobs that cannot be reproduced by post-processing. Their effect must be in-camera. Because this category of products is basically fading away, there are very few passionate manufacturer advocates who put energy into clearly explaining what the filters are for and how to use them. This is a personal gripe I have and my own observation. But it makes sense, right? I wish more technical and instructional information existed in the filter market in general, and definitely for such a new type of filter that’s been generating such buzz.
3. Using filters is inconvenient.
Screw-on filters are a PITA to mount and unmount. I get so anxious doing it. Especially since I often have my camera over a precipice, railing or bridge. I dread that the filter will fall out of my hand or not thread properly and splash/crash.
Some forward-thinking manufacturers now use a magnetic mount system. I have not tested this, but the premise of it addresses my pain directly. My concern (again, having not used it) whether the filter remains in place if I forget it’s on and move my tripod around with the camera mounted. I am not sure how strong those magnets are.
Drop-in filters are also painful to use. Resin filters damage the optical quality of your images too much to even consider. And glass drop-in filters, even though they are chemically hardened, are still glass and therefore fragile. So transporting them to the shoot location and them keeping them safe as you move around is another concern.
Bottom line: You have to care about the problem to use the solution.
The Gear
For these tests I used the following camera gear:
Irix 15mm f/2.4 Firefly lens with Nikon F Mount
Irix IFH-100 filter holder for 100mm filters
Testing Methods
I shot one control and two tests with the following process:
Photograph without a filter at Tungsten white balance.
Photograph with an Irix screw-in filter.
Photograph with a Benro drop-in filter.
To avoid bumping the camera, I gently screwed in the Irix filter, shot, unscrewed it, and then used the quick-mount Irix filter holder with the Benro glass filter in it. Minor camera movements happened—despite my process.
Locations
I chose a few locations with varying light pollution. I did not go to a place without light pollution, as that would negate the need for the filters.
Athens, New York—Bortle 4 (rural/suburban transition)
Catskill, New York—Bortle 5 (suburban)
Astoria, New York—Bortle 8-9 (city sky / inner city sky)
Let’s Talk About Color
Visible light occurs between 400 and 750 nm. Some light sources emit full-spectrum light (such as tungsten lighting) and some emit less of the color spectrum (such as sodium vapor).
So I brought along my favorite tool for getting a) the most accurate color in-camera, b) a reliable color reference for comparison and c) a reliable neutral for color balancing. That tool? The X-Rite ColorChecker Passport Photo 2.
Color management is not voodoo. And color science is not as daunting as it seems.
Here is how I use it:
Building a camera profile
When I want to make sure I have the colors represented as closely as possible to correct, I photograph the object in Figure 4:
Figure 4. The X-Rite ColorChecker Passport Photo 2.
From Lightroom, using the ColorChecker plugin, I export that image to build a profile (Figure 5).
Figure 5.
Then after restarting Lightroom, under “Profile” in the Basic panel of the Develop Module, I choose the new camera profile.
Figure 6.
The process of building a camera profile is simply one of asking science to place all the color values where they should be (Figure 7). Know this: You may want to build camera profiles for different light sources, such as midday sun, moon, flash, flashlight, sodium vapor, etc. Even if you don’t use a white balance adjustment, the colors will render more true to life.
Figure 7. It’s science. Color science. And don’t the colors look more “right” as you both profile and apply a white balance?
Let’s compare them side by side without a profile and without color balance adjustments, as seen in Figure 8:
Figure 8. Nikon Z 6 with an Irix 15mm f/2.4 lens. Tungsten white balance; 30, 50 & 50 seconds (left to right), f/2.5, ISO 125.
It’s easy to see what a sodium vapor light source does to color when you have a series of calibrated color patches. None of them look right without correction. That’s because that light source is not full spectrum, so different-colored objects reflect it differently.
And when you put a filter on the lens to filter out that light source, you are compounding a problem again. First, the light source didn’t emit at full spectrum, so expecting it to render anything “naturally” is not just unreasonable, it’s impossible. The color patches above demonstrate this. You can come closer via profiling and white balancing, but never true to a full-spectrum light source.
Figure 9. Note the dramatic change in contrast on the stone bench arm beneath the ColorChecker Passport, as well as the neutralization and color change in the streetlamps in the background.
But when you apply a light pollution filter to block that spectrum, you can prevent it from affecting (or, polluting) your image.
That’s when these light pollution filters become viable. Even necessary.
I provide all the above to help you understand the side-effects of filtering out that spectrum and the ideal ways to approach correcting this. I will explain what I have learned.
OK, let’s get out of the science weeds and into the practical application.
One more note before we continue: I love my ColorChecker Passport Photo 2 for daylight and flash camera profiling. It’s invaluable. But for night photography it falls short; often due to the partial spectrum light sources we use. I highly recommend owning one but its applications for night photography are limited to primarily white balancing. It was, however, an excellent tool to demonstrate the color shifts and missing color spectrum.
Light Pollution Filters in the Field
The first time I saw a practical benefit for a light pollution filter was when facing … well, light pollution. (Amazing, right?)
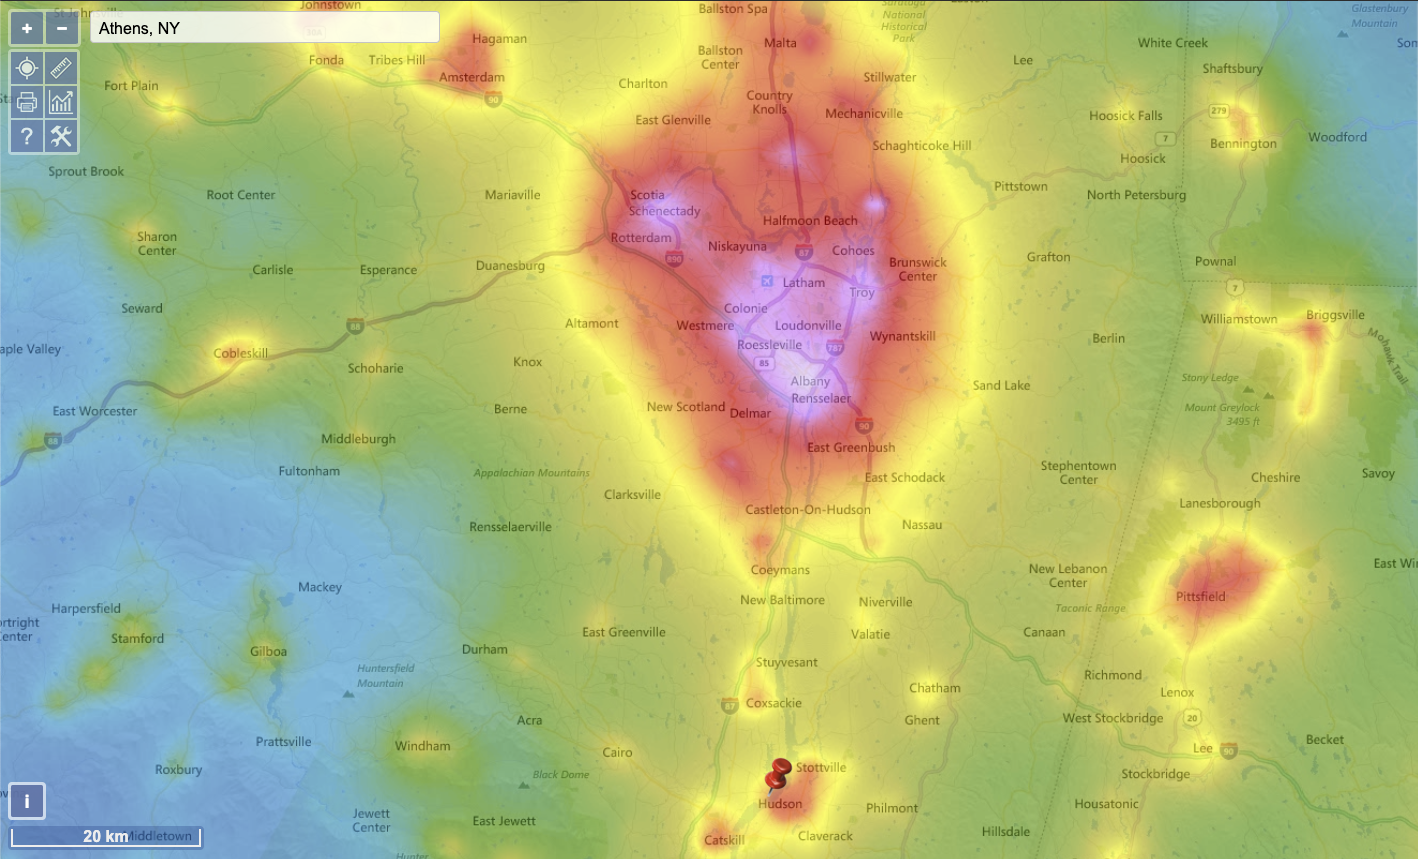
When photographing the Perseids this year, I set up my Nikon D750 as a second camera facing due north from Athens, New York, toward Albany, New York. That city is 45 miles north and yes, it brightened the sky.
Figure 10. Nikon D750 with an Irix 15mm f/2.4 lens, no filter. White balance 3200 K, 260 seconds, f/2.8, ISO 100. Note the warm clouds and cool sky.
Figure 11. Nikon D750 with an Irix 15mm f/2.4 lens, with an Irix Edge Light Pollution Filter. White balance 3200 K, 257 seconds, f/2.8, ISO 100.
Figure 12. Nikon D750 with an Irix 15mm f/2.4 lens, with a Benro TrueNight filter. White balance 3200 K, 252 seconds, f/2.8, ISO 100.
All of the images in Figures 10 to 12 were “cooked to taste” in Lightroom.
With the Irix and Benro filters, a few things happened:
The clouds became neutral.
The haze in the sky decreased dramatically.
The Benro filter seemed to be even more aggressive in neutralizing the yellows.
I noticed about one-half to two-thirds of a stop of light loss, and I often increased exposure time to compensate.
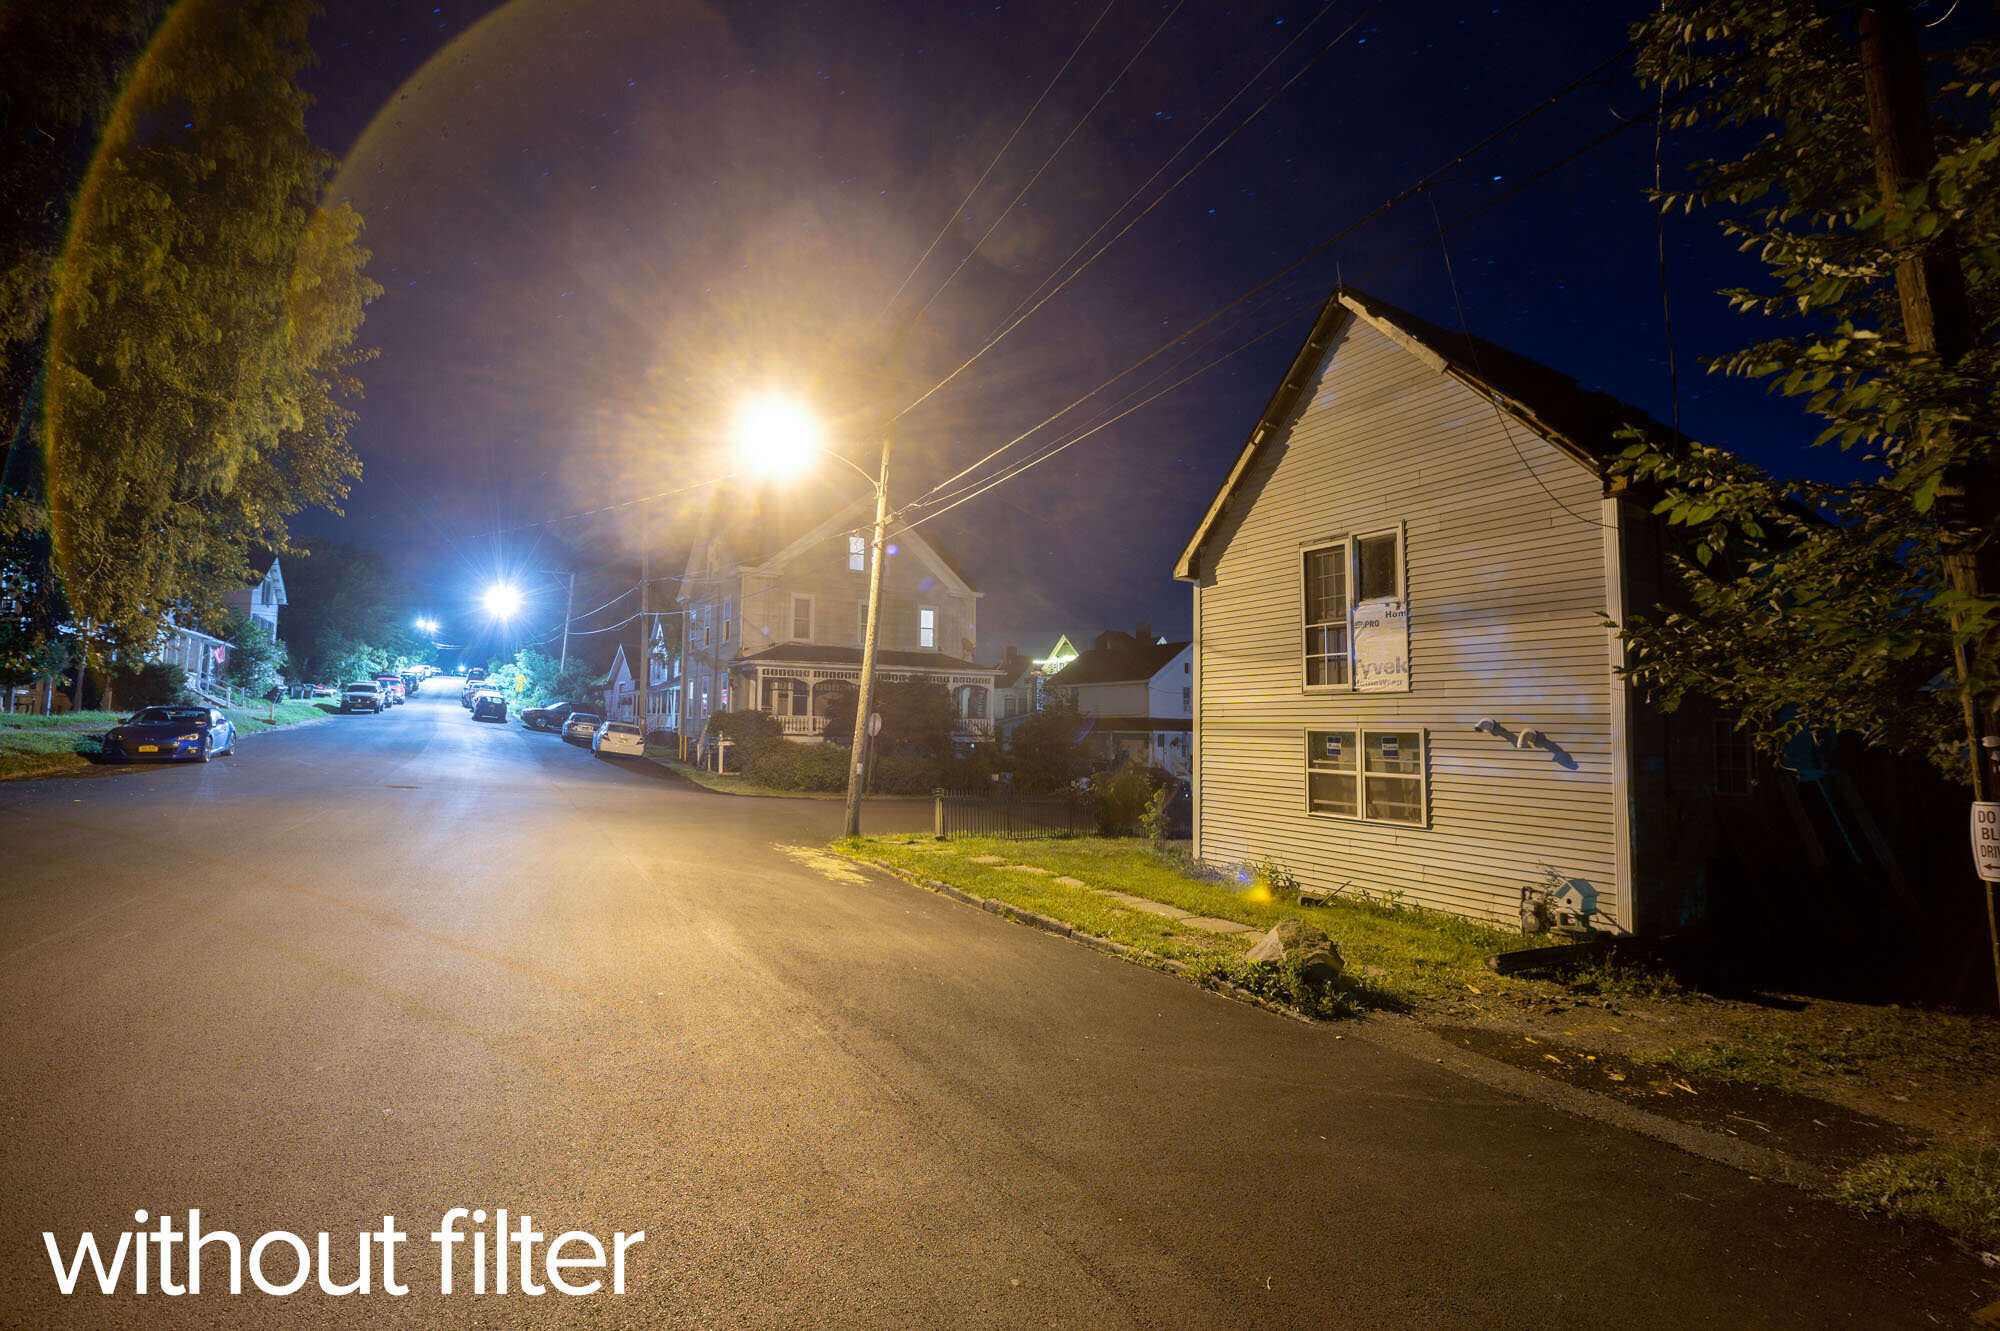
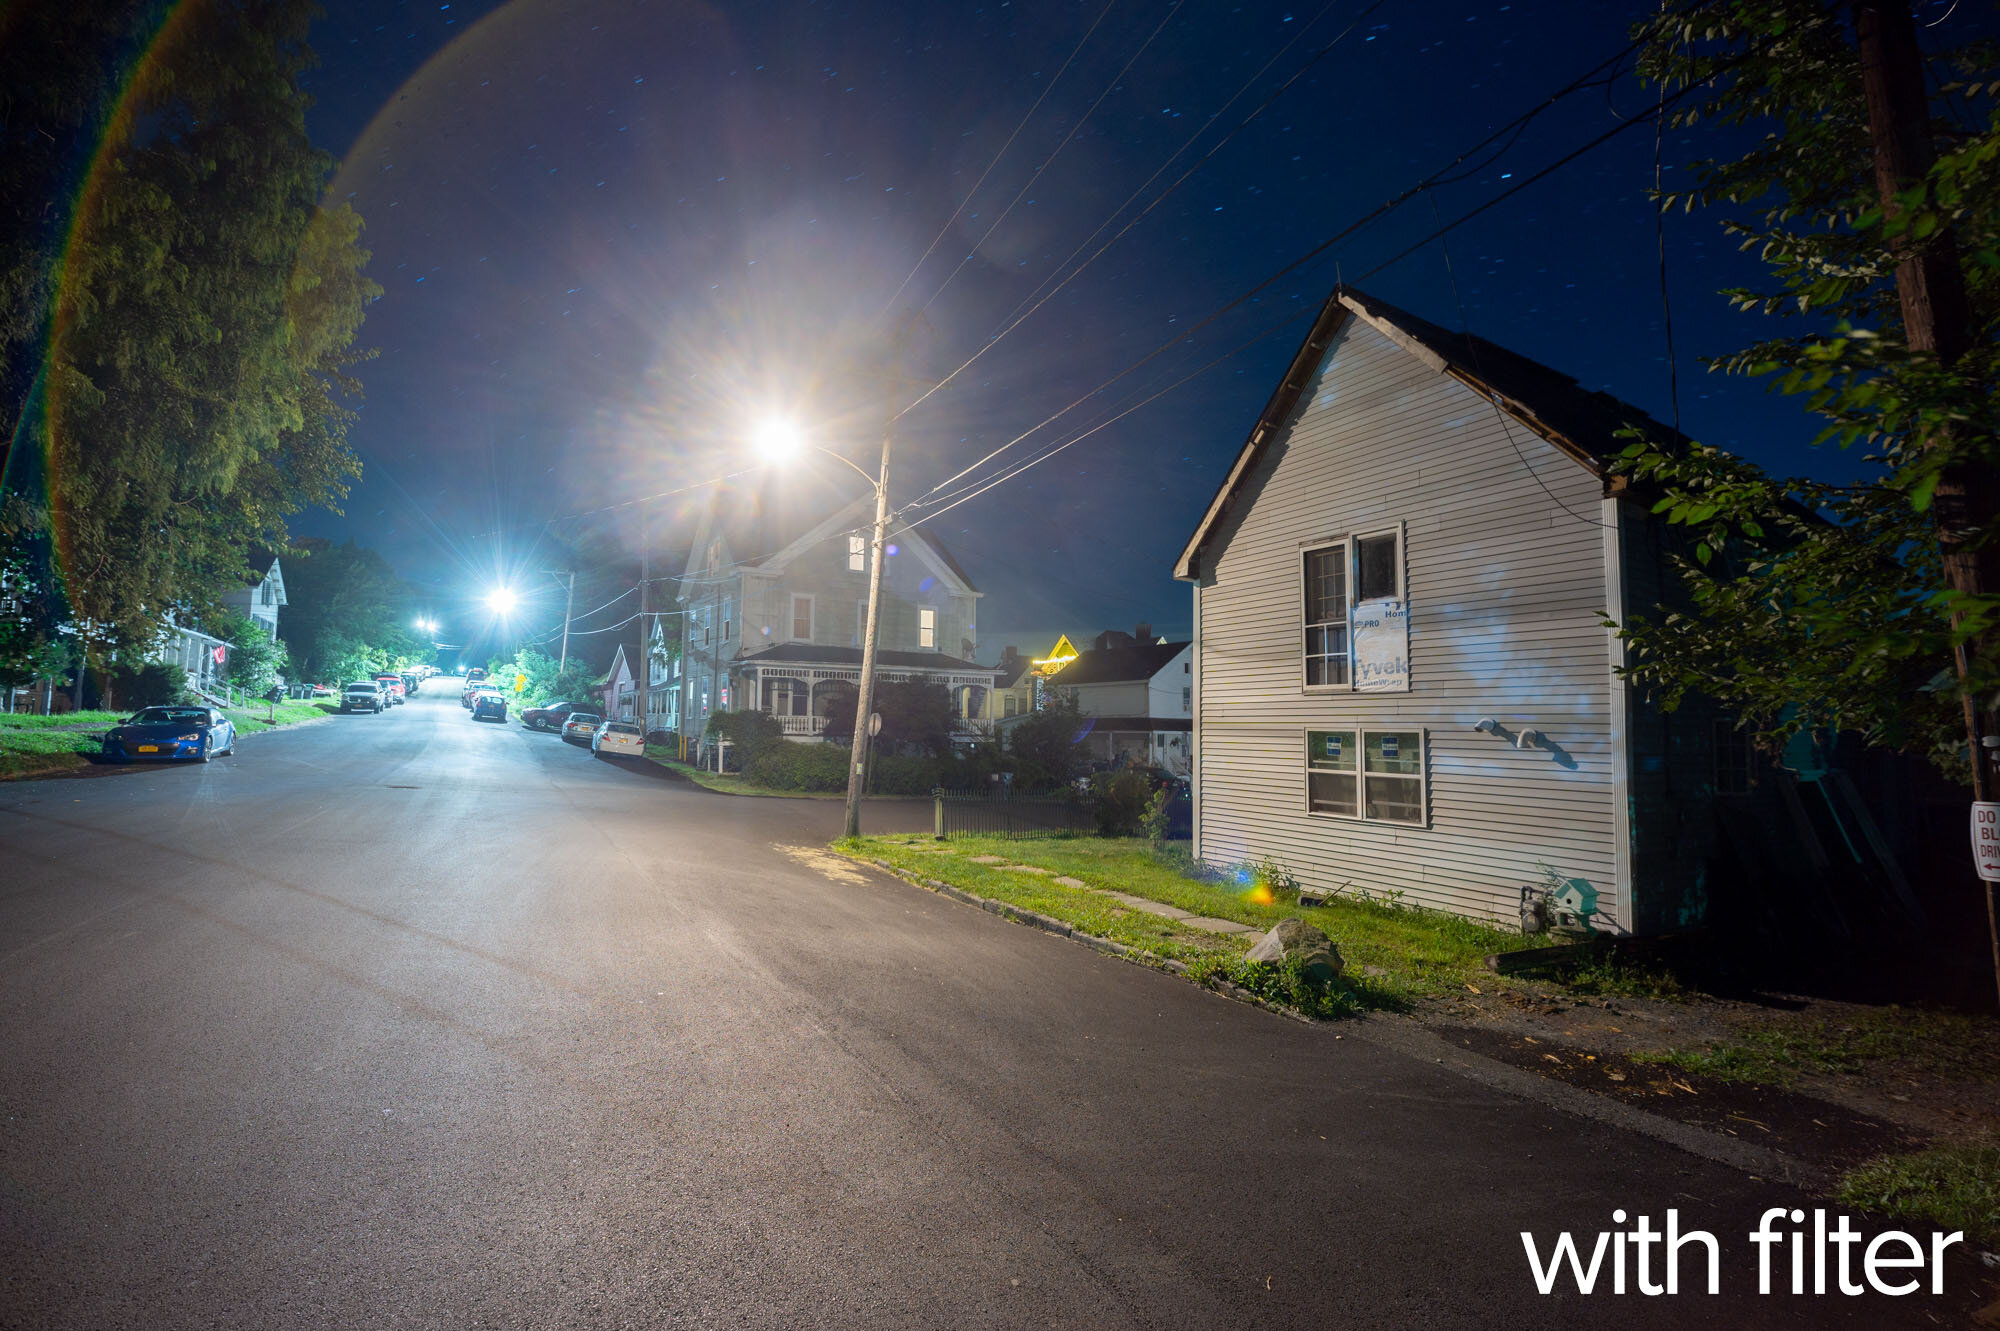
The second point above piqued my curiosity. So as I tested more, I looked for evidence of haze being removed from the sky, but found instead that the strong yellow cast from a sodium vapor streetlight was completely removed from the light on the side of the house (Figure 13). This has major implications for urban night photographers because white balance and post-processing do not offer great solutions for color correcting sodium vapor lights, due to their limited spectral emissions as noted earlier.
Figure 13. Nikon Z 6 with an Irix 15mm f/2.4 lens, with no filter (left) and an Irix Edge Light Pollution Filter (right). 61 seconds, f/4, ISO 800.
Here is a Lightroom screen capture zoomed in:
Figure 14.
Note I did not go turn off that light source. I put on the Irix filter. That’s it.
So now I am thinking to myself: All those times I sighed heavily when trying to color correct an image that had heavy orange/yellow streetlights in it—this filter could have prevented a headache.
Figure 15 shows the light source that was hitting the side of that house, without and with a filter (for effect!). It’s not an artful shot, but check out the contrast on the blacktop, as well as the contrast in the sky and on the side of the house:
Figure 15. Nikon Z 6 with an Irix 15mm f/2.4 lens. 61 seconds (left) and 86 seconds, f/4, ISO 100.
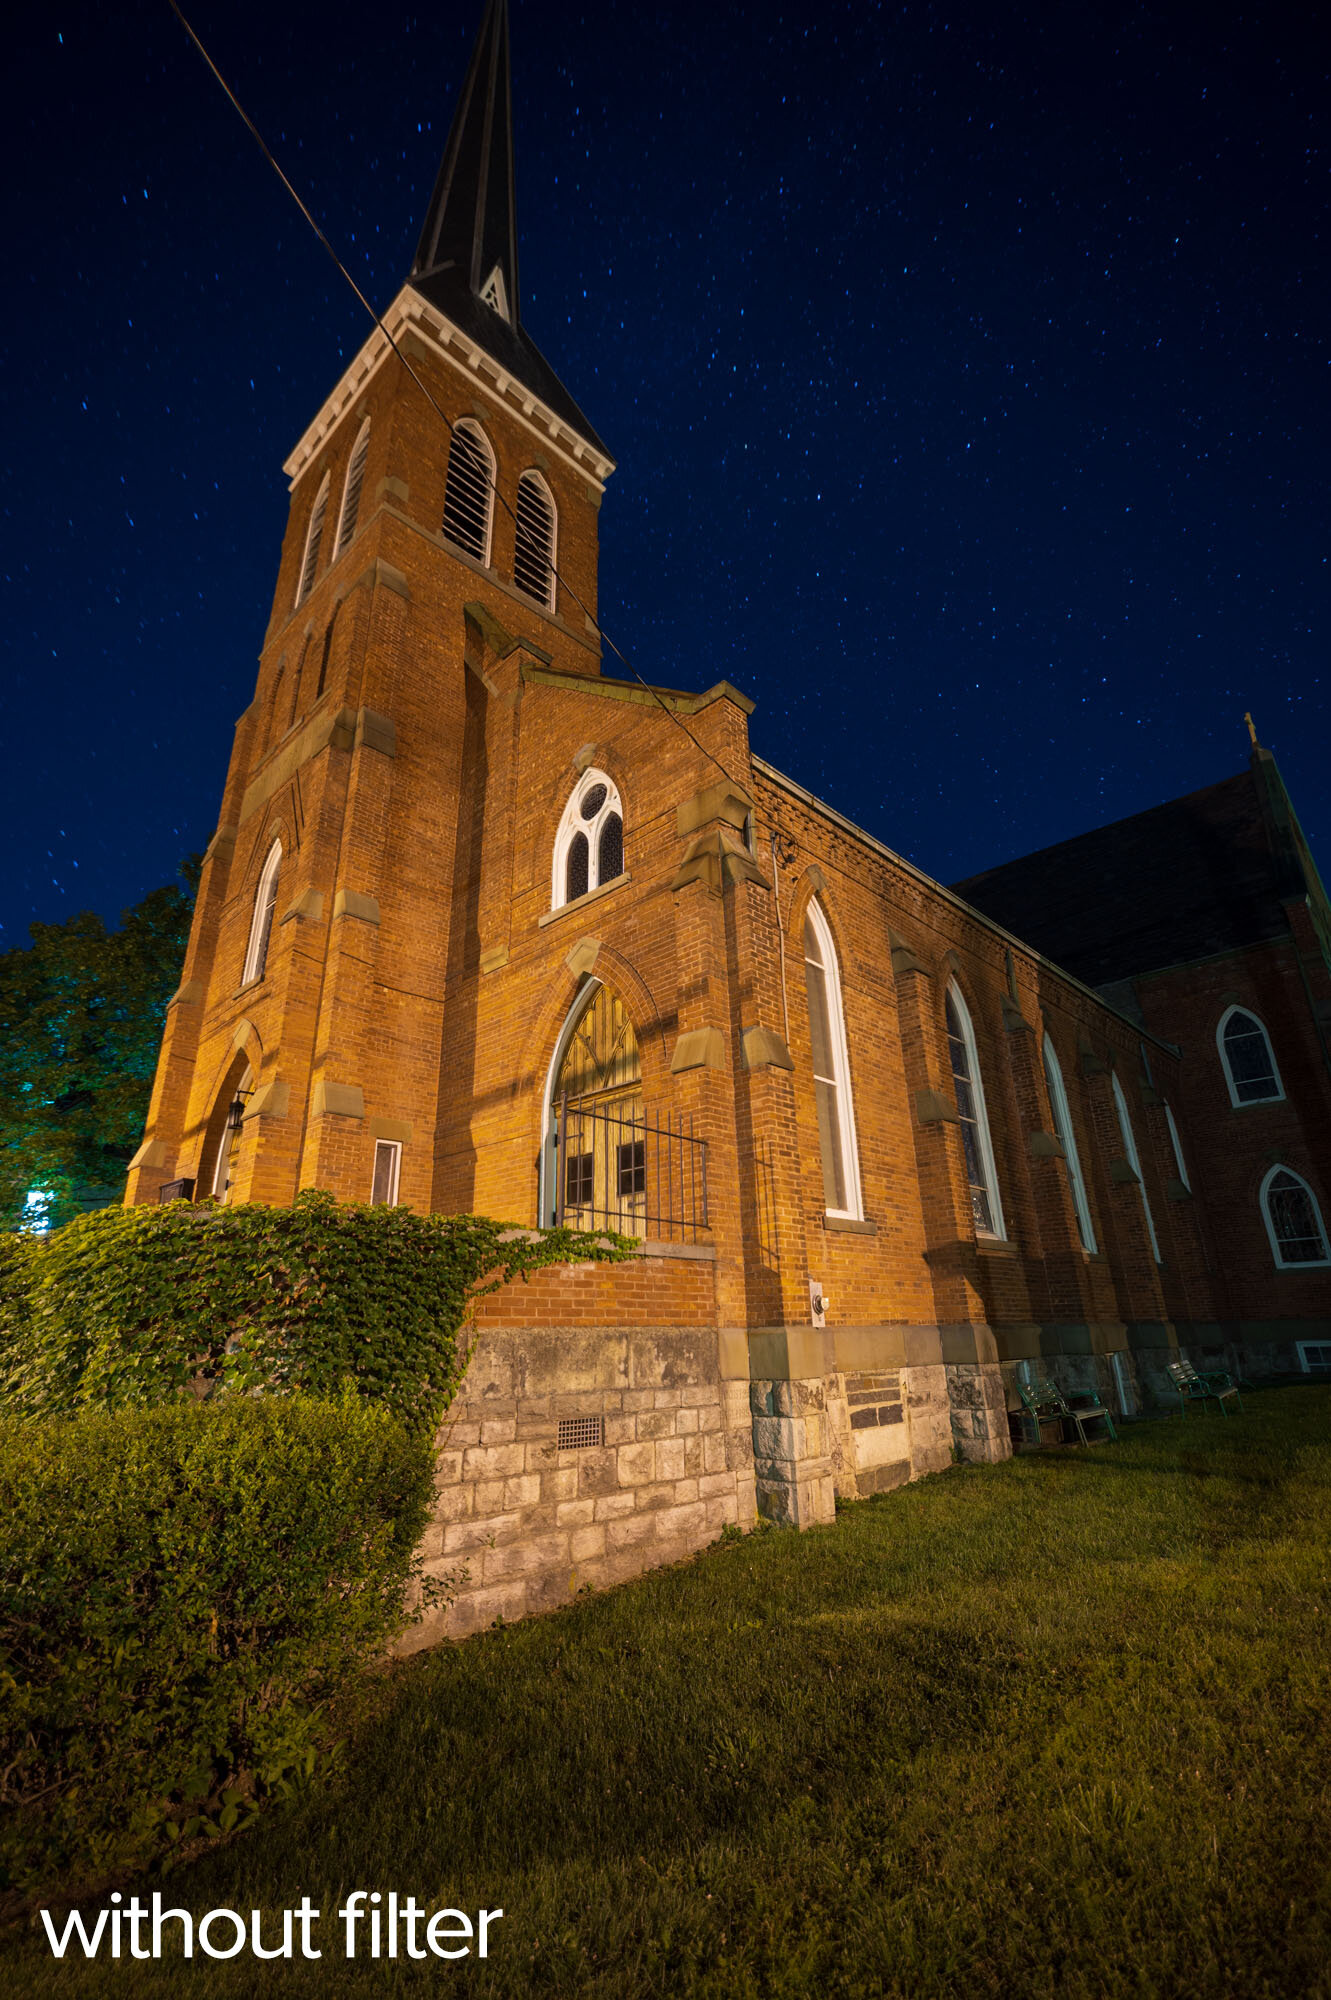
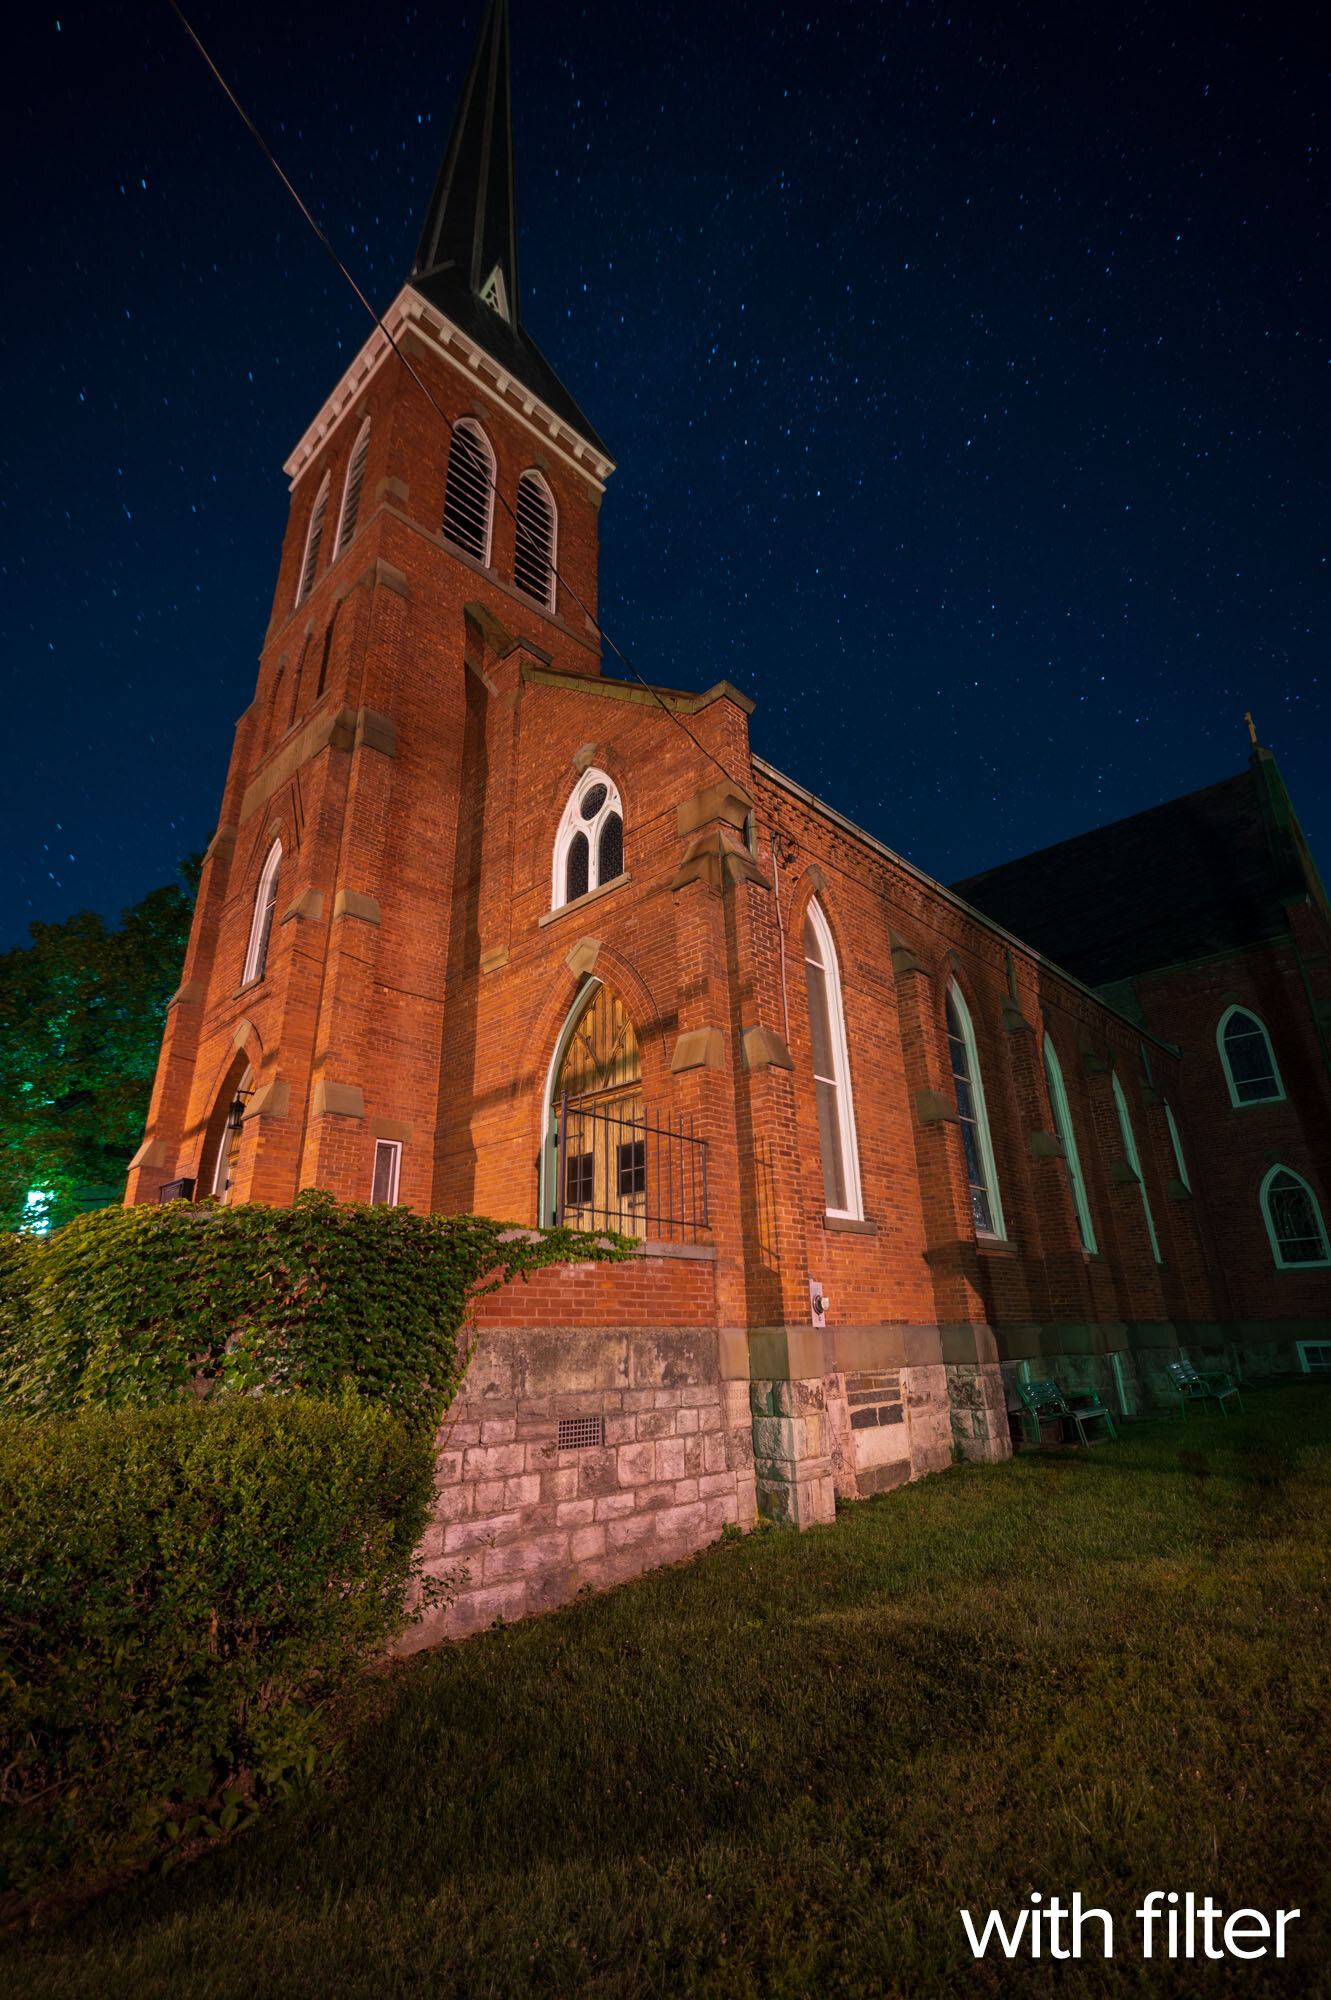
Figure 16 shows how you can make a brick church look a little more like a church:
Figure 16. Nikon Z 6 with an Irix 15mm f/2.4 lens. 60 seconds, f/2.8, ISO 100.
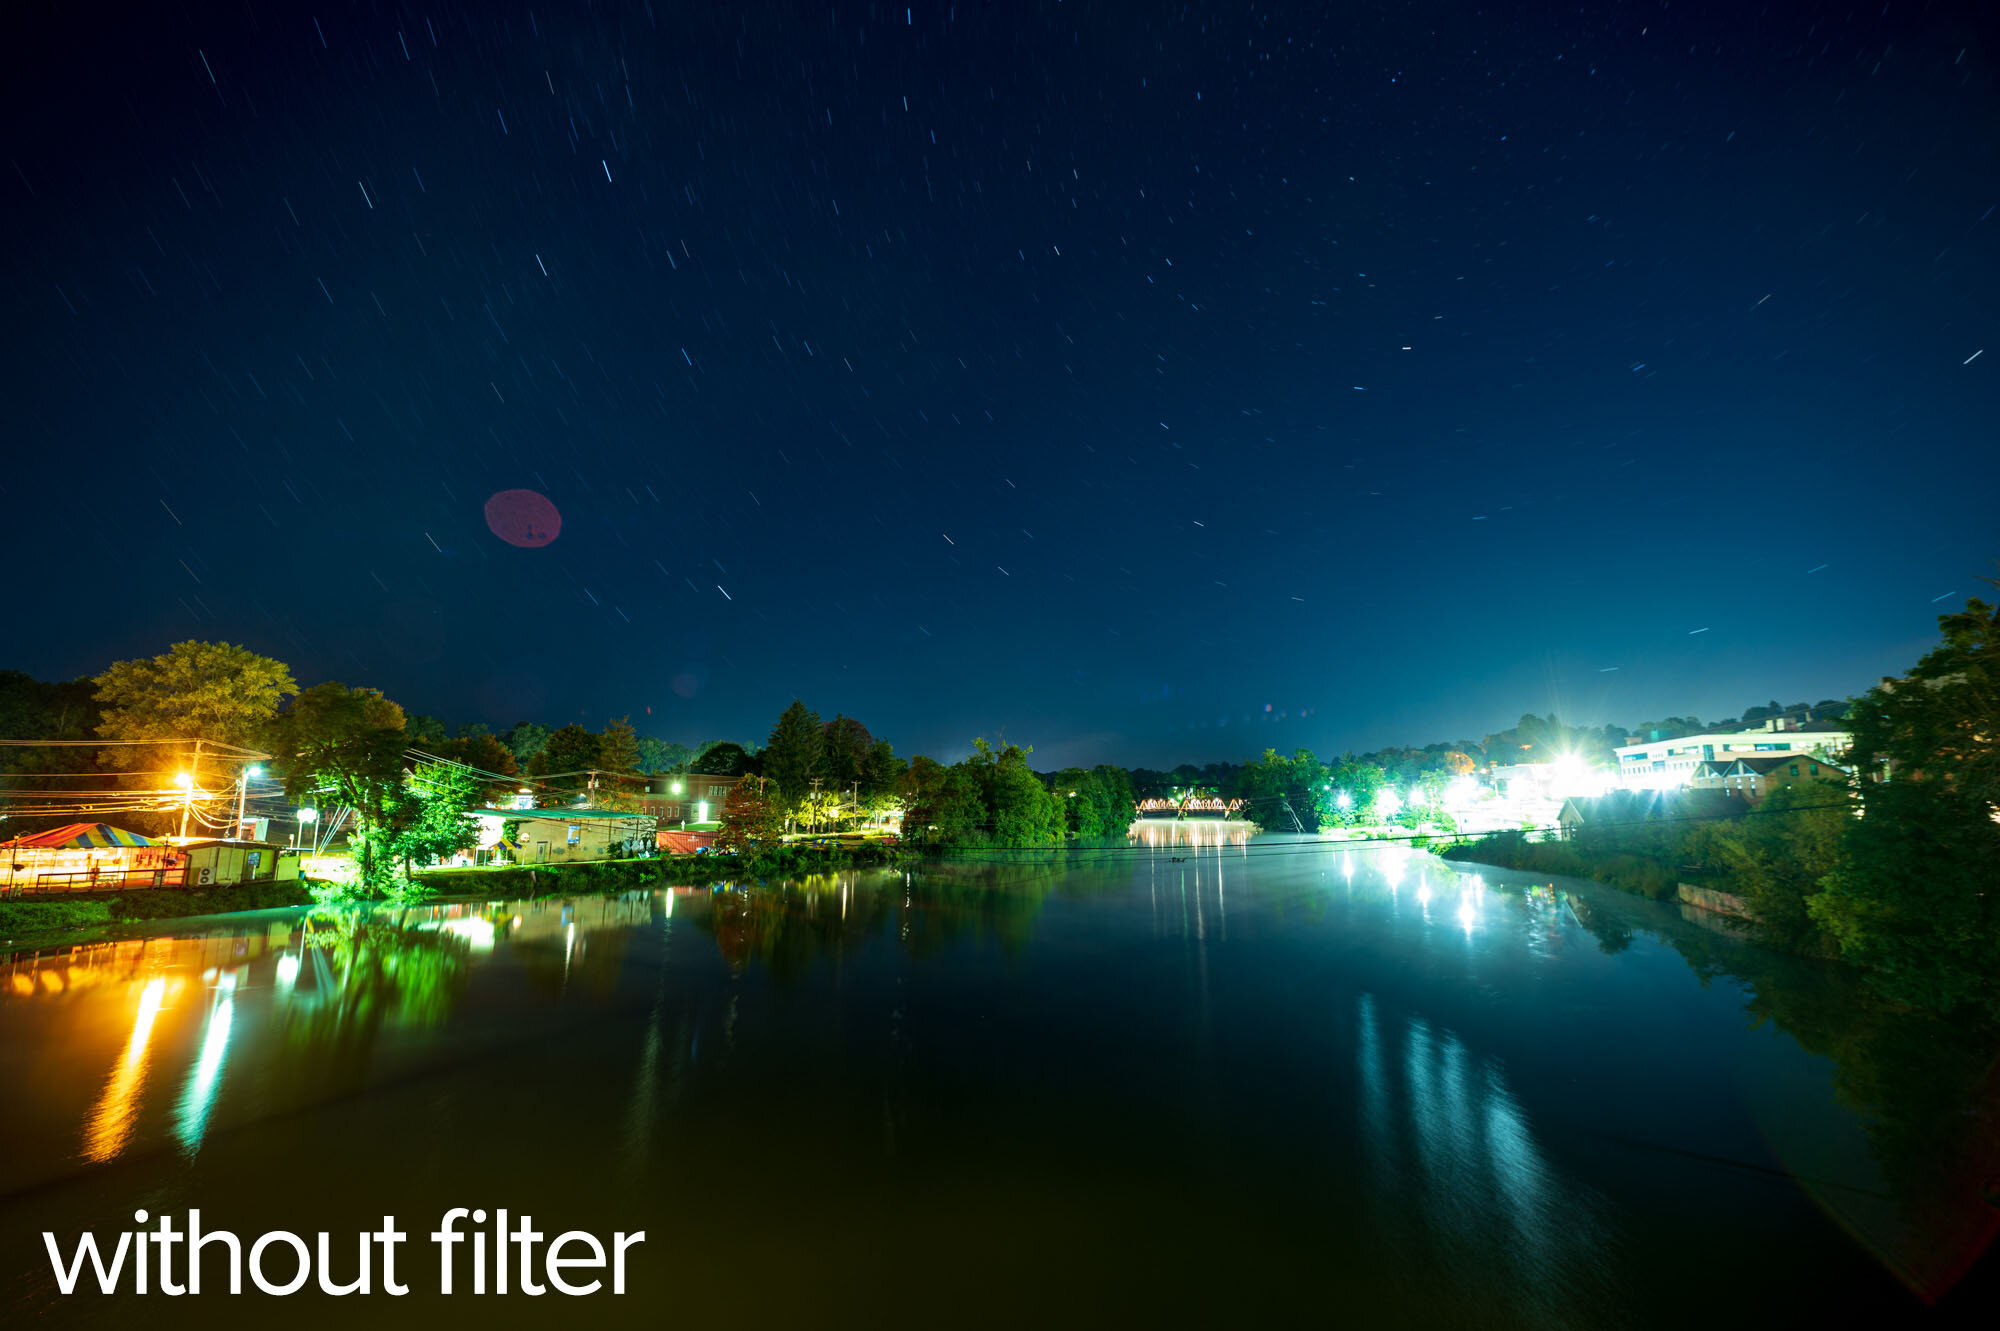
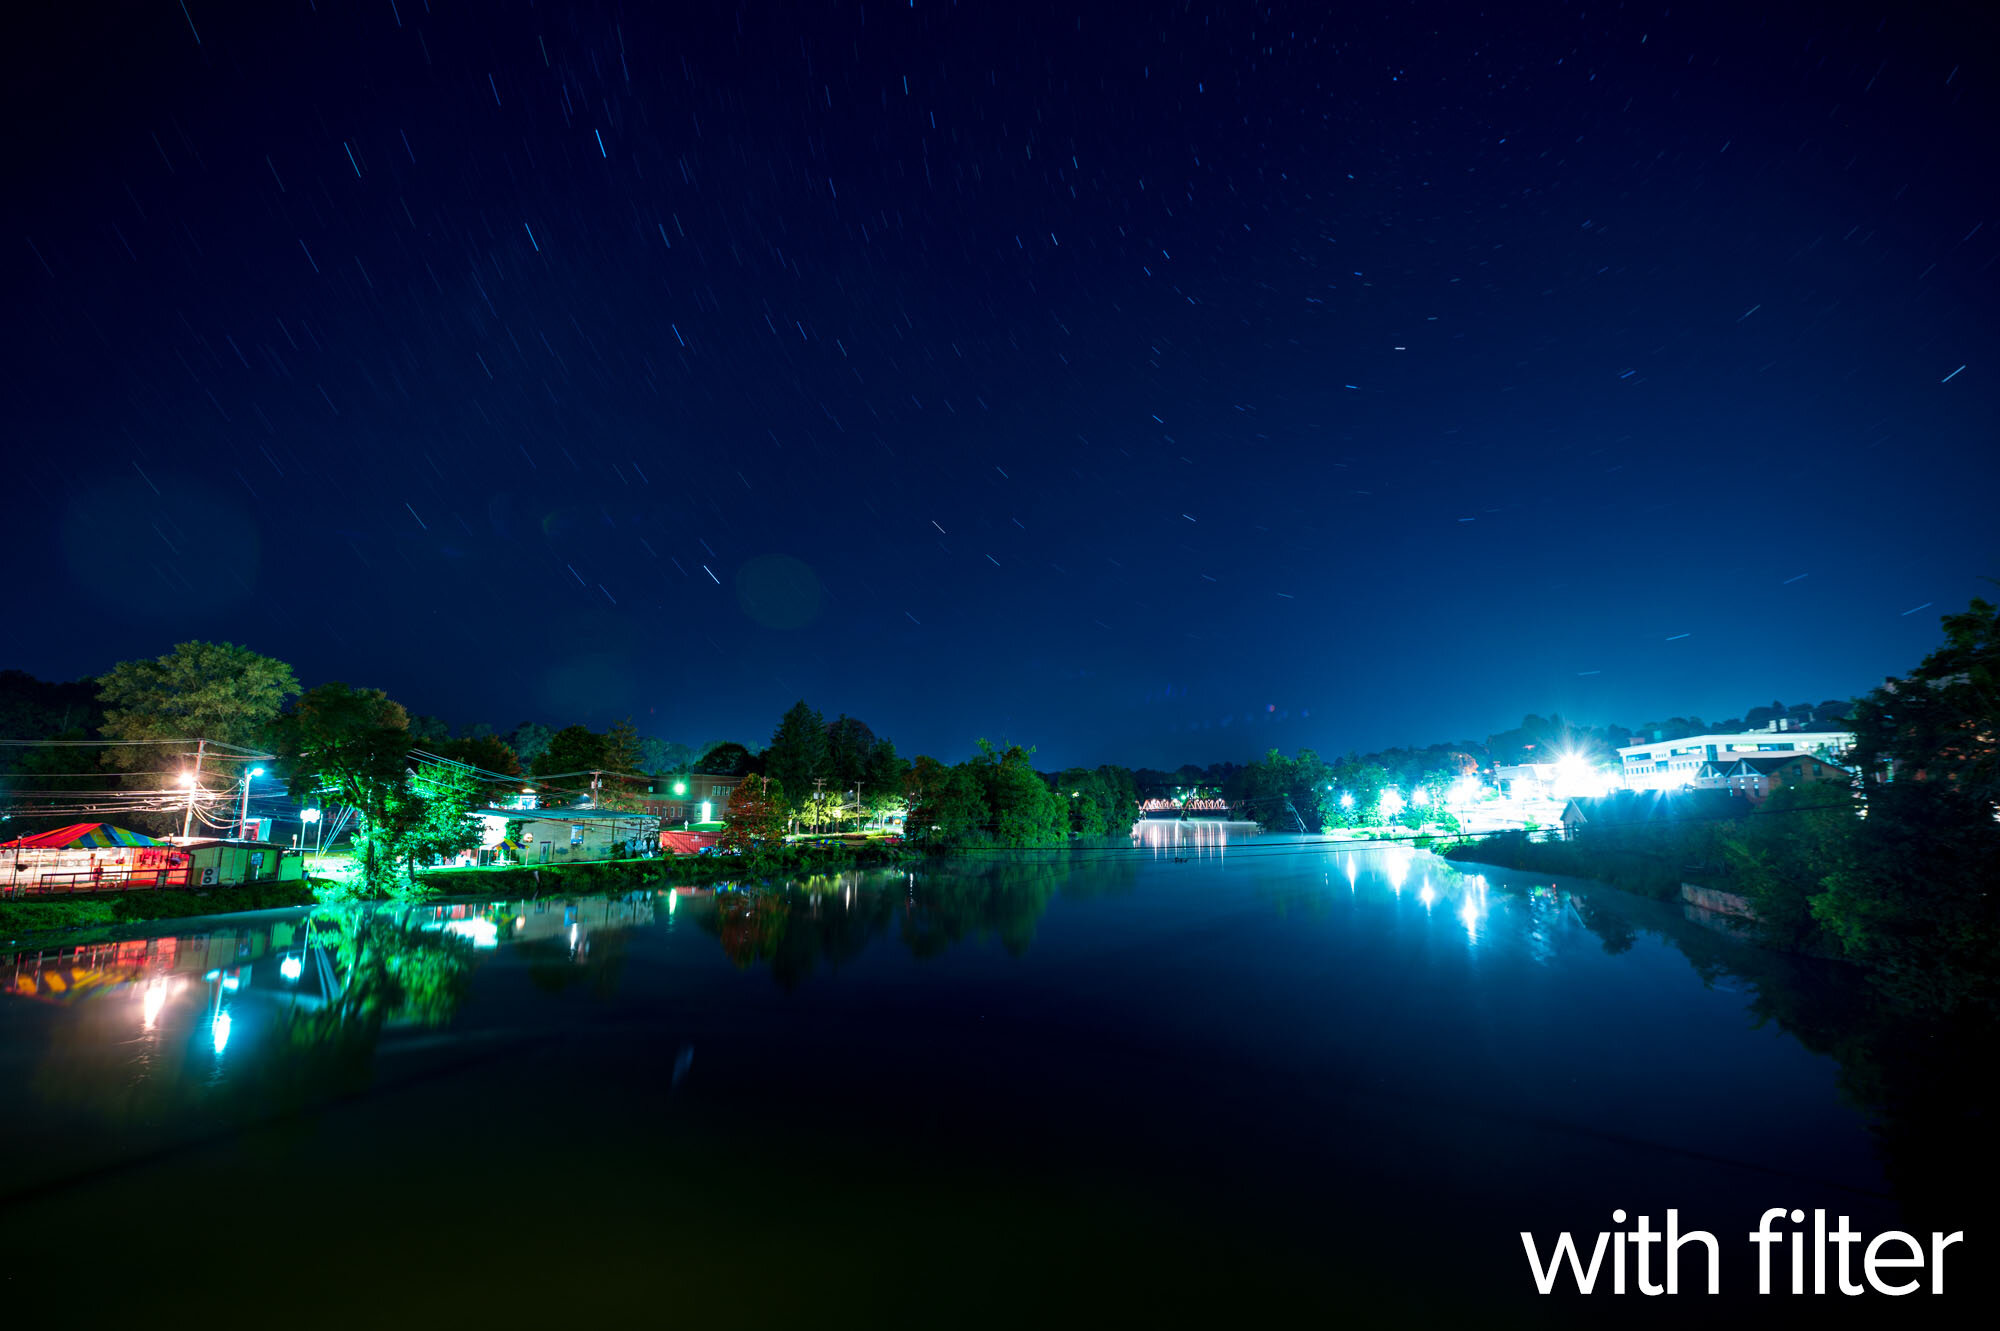
The pair in Figure 17 is especially dramatic. Notice how the yellow glow in the water foreground disappears, along with many reflections. But the sky gets more contrast as the yellow/orange is removed:
Figure 17. Nikon Z 6 with an Irix 15mm f/2.4 lens. 441 seconds, f/4, ISO 100.
Now, in Figure 18, an example that addresses the burning question in our night photographer hearts: “Will it help my Milky Way images?” I processed each of these individually to taste. Applying the ColorChecker camera profile to the no-filter image helped. It did not help the others, so I applied the Adobe Landscape profile and processed to them look similar. They probably look the best they can:
Figure 18. Nikon Z 6 with an Irix 15mm f/2.4 lens. 10 seconds, f/2.8, ISO 6400.
The examples in Figure 19 have mixed light sources. The lamp on the side of this building is a CFL (compact fluorescent) bulb. The light hitting the side of the building is from multiple sodium vapor streetlamps. Note that the fill light almost disappears, yet the CFL lamp remains unaffected. Wavelength filtration at its finest.
Figure 19. Nikon Z 6 with an Irix 15mm f/2.4 lens. 15, 25 and 25 seconds (from left to right), f/11, ISO 400.
Finally, I decided to pay a visit to the mecca of light pollution, New York City. I visited Astoria Park’s waterfront and shot downstream toward the Hellgate and RFK bridges. I think I got just about every kind of light source one can get in a single frame.
Figure 20. Nikon Z 6 with an Irix 15mm f/2.4 lens. 8, 13 and 13 seconds (from left to right), f/5.6, ISO 800.
I processed those (Figure 20) to be similar to each other. I found that the skies in the images shot with filters were a bit duller, so I had to boost the luminance and sometimes tweak the hue. Otherwise, global adjustments were all that were necessary.
To me, the shot without the filter seems better. But this was just this night at that location with those skies.
In Conclusion
Using and testing light pollution filters, I learned:
If you have some particular man-made lights that are vexing, and you have a filter that can block them, light pollution filters are useful.
If you like your clouds to be a neutral cast, light pollution filters are useful.
Your image ends up being more blue, which will require additional post-processing.
I can imagine that this helps immensely in situations where the horrid orange yellow light makes skin tones look terrible or prevents you from editing a color image properly.
It’s surprising to just be able to subtract that light source without affecting much else.
If you absolutely hate carrying filters and using them, none of this matters. 🙂 But if you find any of the above effects attractive, perhaps you will make room in your bag.
Big thanks to Irix for their support. We use their lenses all the time and love them. Getting to know their other products has been a privilege.
Also thanks to Benro for loaning us the TrueNight glass filter.
If you want to learn more about light pollution, please visit or join the International Dark-Sky Association. They provide a wealth of educational materials, conversation starters and resources for those who want to help address the light pollution issues that affect nearly everyone on the planet. Please consider becoming a member or donating money to support the pursuit of dark skies.
Questions?
I hope so! Lay ’em on in the comments below, on our Facebook page, or via email to adventure@nationalparksatnight.com. In the future I plan on doing a big shootout of all the light pollution filters I can get my hands on. So what you ask now will help me develop a better testing schema.
Thanks! Seize the night.
Ready for another solution to light pollution? Read “How to Deal With Light Pollution, Part II: Post-Production.”


