
If you send questions, we’ll send answers. Want proof? See Exhibits 1 through 5 below.
This installment of our “Five Questions” series features inquiries about websites for finding dark skies, light stands, PC computers for photo editing, filter vignetting and a lighting effect.
If you have any questions you would like to throw our way, please contact us anytime. Questions could be about gear, national parks and other photo locations, post-processing techniques, field etiquette, or anything else related to night photography. #SeizeTheNight!
1. Tools for Seeking Dark Skies
Question:
A few of the presenters at the Night Photo Summit referenced the website ClearDarkSky for help in planning night sky photography. Assuming that I will probably have to drive at least two hours one way to reach a certified dark sky preserve from my home, just to photograph only stars and the Milky Way, is it sufficient to just look at the darkness and cloud cover on that website? I see that Dark Sky has similar information, but its forecast components appear to be more related to telescope viewing. — Ray B.

Answer:
You can always make a photograph in any condition. Obviously, the darker the sky, the more stars you will see, and the more of the Milky Way you will see in your images. Are you primarily interested in photographing the sky, or the landscape, or both? There are many dark-sky websites you can check (I like DarkSiteFinder), but don’t get too hung up on Bortle numbers—just go out and make some images.
If you’re just doing astro-landscape photography, then find a spot with an interesting landscape/foreground that doesn’t have any artificial light in the immediate area, and see what you get. I think it’s more important to make interesting pictures than to have the darkest sky possible.
On the other hand, if you are mainly interested in photographing the sky and celestial objects (i.e., astrophotography), then use any one of those websites to find the darkest spot within a comfortable driving distance, and go for it.
This screenshot above from DarkSiteFinder has a pin where I live. Even though I’m on the outskirts of an urban area, I can easily see the Milky Way with the naked eye, and it shows up even better in-camera because the light pollution is to the north and Milky Way to the south. — Lance
2. Night Light Stands
Question:
I have been playing with my Luxli Fiddle light but could use a stand to position it better. What type of stand do you use? — M. West
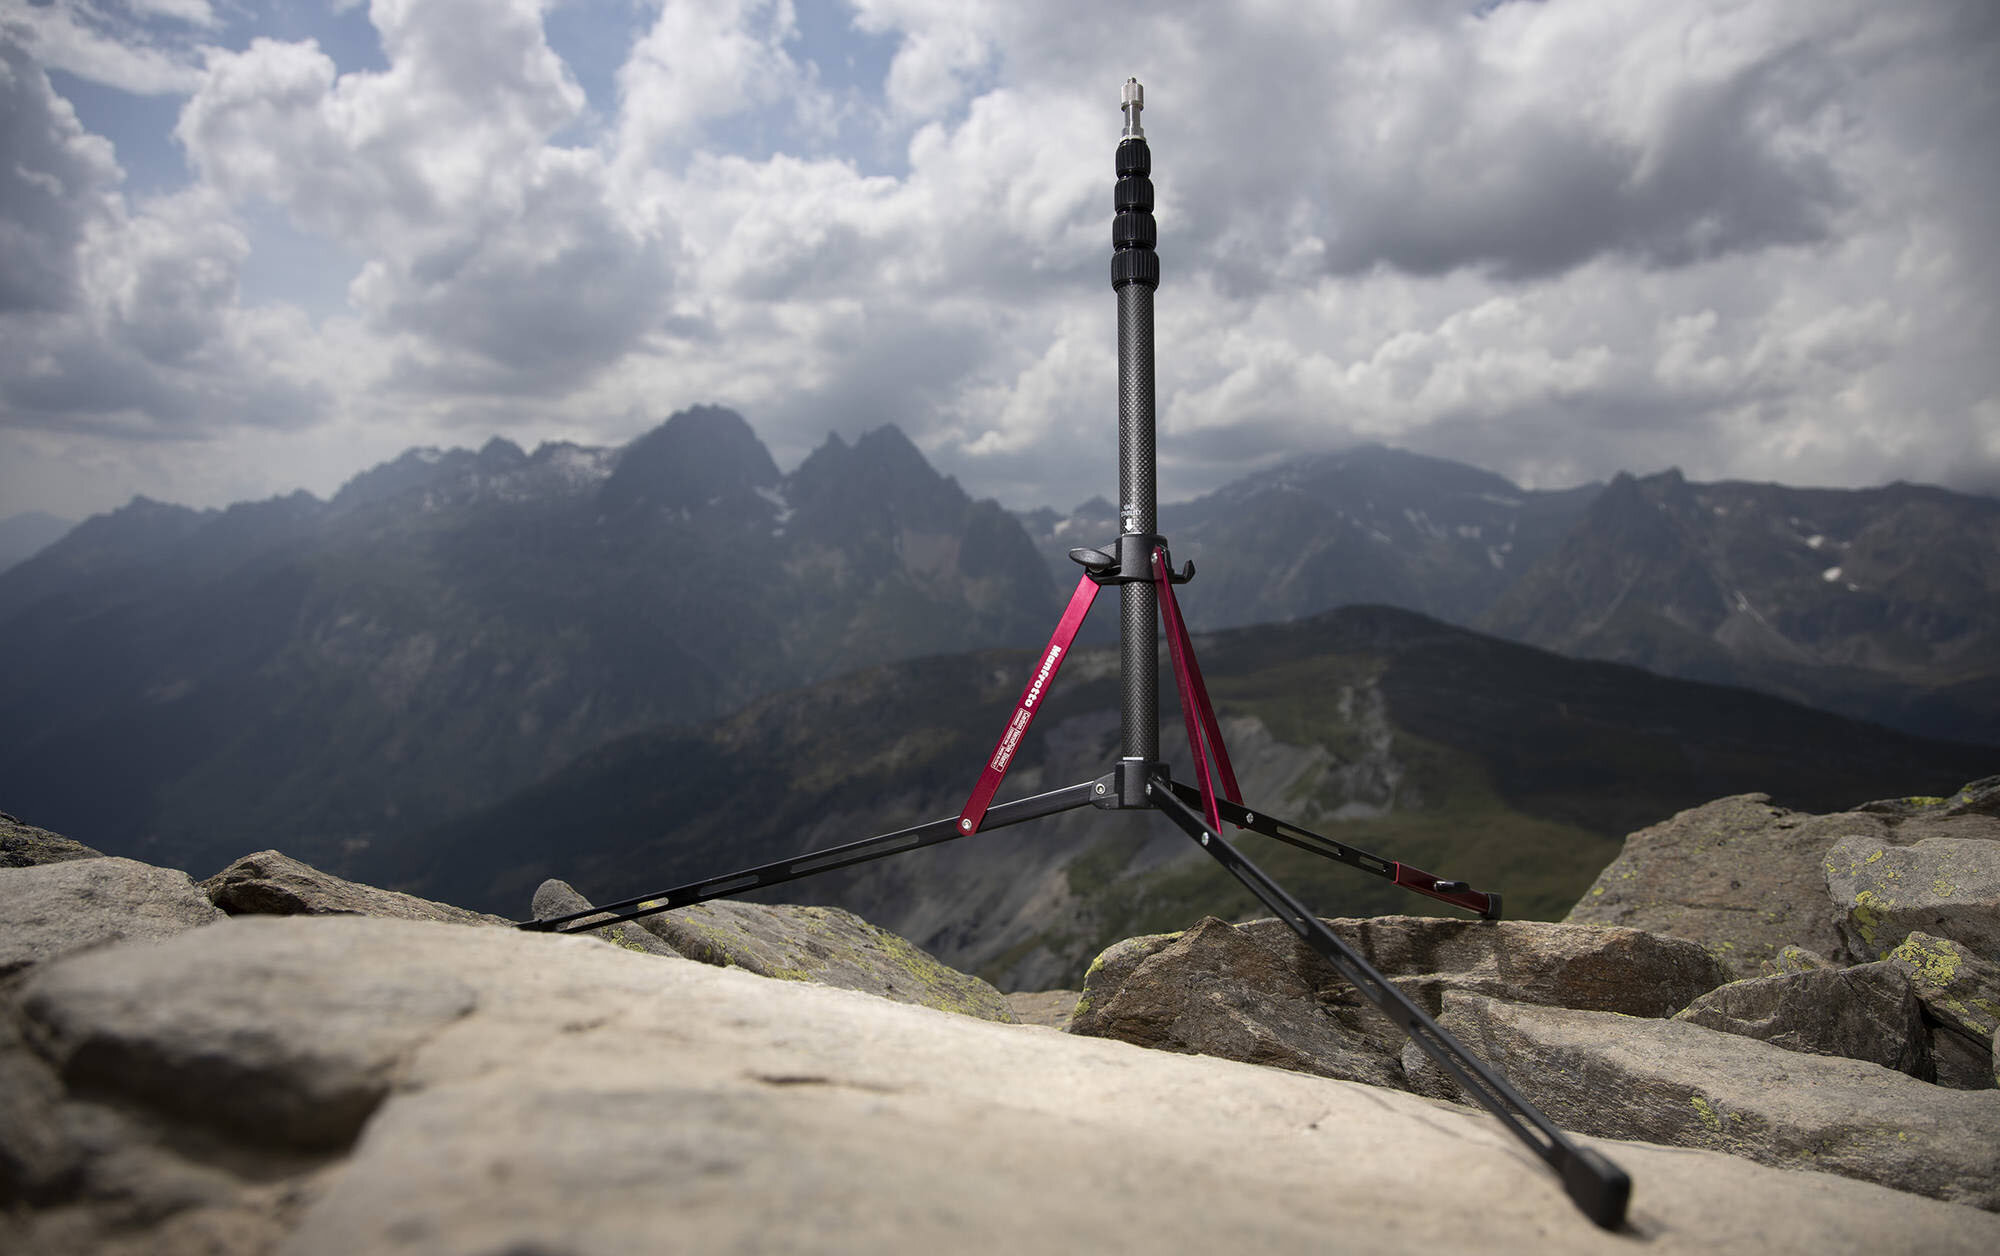
Answer:
A compact and travel light stand is a perfect complement for your Luxli Fiddle. You’ll be able to set it up, finesse the position and then leave it there for repeatability. It has been a game-changing way for many of us at National Parks at Night to level up our Low-level Light Painting. (Though if you’re shooting in national parks, note that many of them require a Special Use Permit for light stands.)
Below is a breakdown of our favorite compact light stands that are easy to pack for your night adventures (you can all their specs compared at this link):
The Impact Reverse is the least expensive and the most basic.
The Manfrotto options offer an adjustable leg, which is helpful on uneven terrain. The Nano Plus will also hold bigger lights if you have any strobes. The Nanopole will let you easily pull out the center column and to use as a boom arm. The Carbon Fiber is the lightest but also most expensive of those mentioned.
While your Luxli Fiddle will screw directly into the light stands with the included 1/4-inch adapter, you will want to add a mini-ball head adapter so you can adjust your light easily. — Gabe
3. PC Preferences
Question:
I’m wondering about your recommendation for a laptop of the non-Apple variety. Do you recommend using a desktop or laptop with external monitor? Space and money are at a premium. — I.B.

Answer:
My personal approach is that I have both a desktop and a laptop.
The desktop is my workhorse—that’s where all my power is (i.e., RAM, higher-grade processor, terabytes of storage space, etc.). My laptop has enough power to run Lightroom and Photoshop effectively when I’m traveling, but doesn’t have all the bells and whistles of my desktop. The reason is that an all-powerful desktop PC is notably less expensive than its performance equivalent in a laptop, and the aforementioned strategy gives me a combined system with “enough” power when I’m on the road and full power when I’m home.
However, that’s not necessarily the best “space and money” option overall. Instead of two computers, you could get just a somewhat-better-than-adequate laptop that you can connect to your larger display when home, as you suggested. For photo editing, I personally recommend a laptop that meets or exceeds these specifications:
a calibratable 15-inch display (larger is better for photo editing, but is also heavier for travel)
HD (1920 x 1080) resolution or greater (but not 4K, unless you’re also doing video work)
2 GHz processor with 64-bit support
16 GB RAM
2 GB video memory
1 TB internal SSD hard drive
I suggest checking B&H Photo to see what kind of system you can put together for your budget. Go to their Laptops page and enter your desired specs in the left margin, then browse your options, looking for what might fit your budget. Alternatively, just call B&H and speak with someone from the computer team. They’re excellent at guiding you toward a solution based on your needs, and they can even custom-build a desktop or laptop computer. In my experience with B&H for over 25 years, they will not guide you toward something more expensive that you don’t need.
For what it’s worth, since last fall I’ve been using an MSI Creator 15, and I recently obtained an MSI Creator Z16 (pictured above) that I’m eager to take out for a spin. — Chris
4. Perseid Vignettes
Question:
I’m hoping to shoot the Perseids in August and wondered about the Breakthrough Photography filter for light pollution. Do you know it and whether it vignettes? — Wendy K.

Answer:
I have not used that particular filter, but I can confidently say that it should not cause vignetting. Light pollution filters inhibit particular color wavelengths that are commonly associated with light pollution. The only way they would vignette is if they have a deep profile that can be seen through a too-wide-angle lens, which good design should prevent.
This is a great year for photographing the Perseids, as they’ll peak on nights when the moon isn’t visible. For more information on how to shoot a meteor shower, be sure to check out our Great Balls of Fire e-book. — Matt
5. Cape Cod Lighting Effect
Question:
I recently saw a presentation you did, and I have a question about the image Chris showed of the dune shack at Cape Cod National Seashore. Was a special “effect” in editing applied to that picture, or was it just your lighting? — K. O’Donnell

Dune shack, Cape Cod National Seashore. © 2017 Chris Nicholson. Nikon D5 with a Nikon 14-24mm f/2.8 lens, light painted with a Coast HP7R flashlight. 20 seconds, f/4, ISO 1600.
Answer:
No special effects or trick editing—I only lit and shot it. There was some post-processing, of course, but just to tweak exposure and contrast.
That said, I’m not sure if you’re referring to the color of the background or the illumination of the shack, so I’ll address both:
The warm tones of the background are caused by the lights of nearby Provincetown bouncing off the clouds. Some night photographers avoid light pollution at all costs; I try to embrace it creatively, and this photo is a good example of how and why.
The foreground light coming from an unfiltered Coast HP7R LED flashlight. The light is soft and broad and a little warmer than usual because rather than hitting the shack with a direct beam, I bounced the beam off the top of the sand dune to camera-right, and it’s reflecting back to illuminate the front of the shack. That was a creative solution for working in a tight spot where I couldn’t side-light from outside the frame (because of the slope of the dune), and it came with the added benefit of creating that nice, soft effect. — Chris
UPCOMING WORKSHOPS FROM NATIONAL PARKS AT NIGHT

