twilight

The Simmer Dim: Photographing in Twilight that Lasts Till Morning

What if I were to tell you that one of the best experiences a night photographer can have is to travel to a time and a place when the surrounds hardly get dark at all? The idea is not one of fantasy, but rather one of fancy. I much enjoy shooting in twilight, and with time to plan the travel properly, one can shoot in it all night long.

That time? Within a few weeks of summer solstice. That place? The further toward the north or south pole, the better.

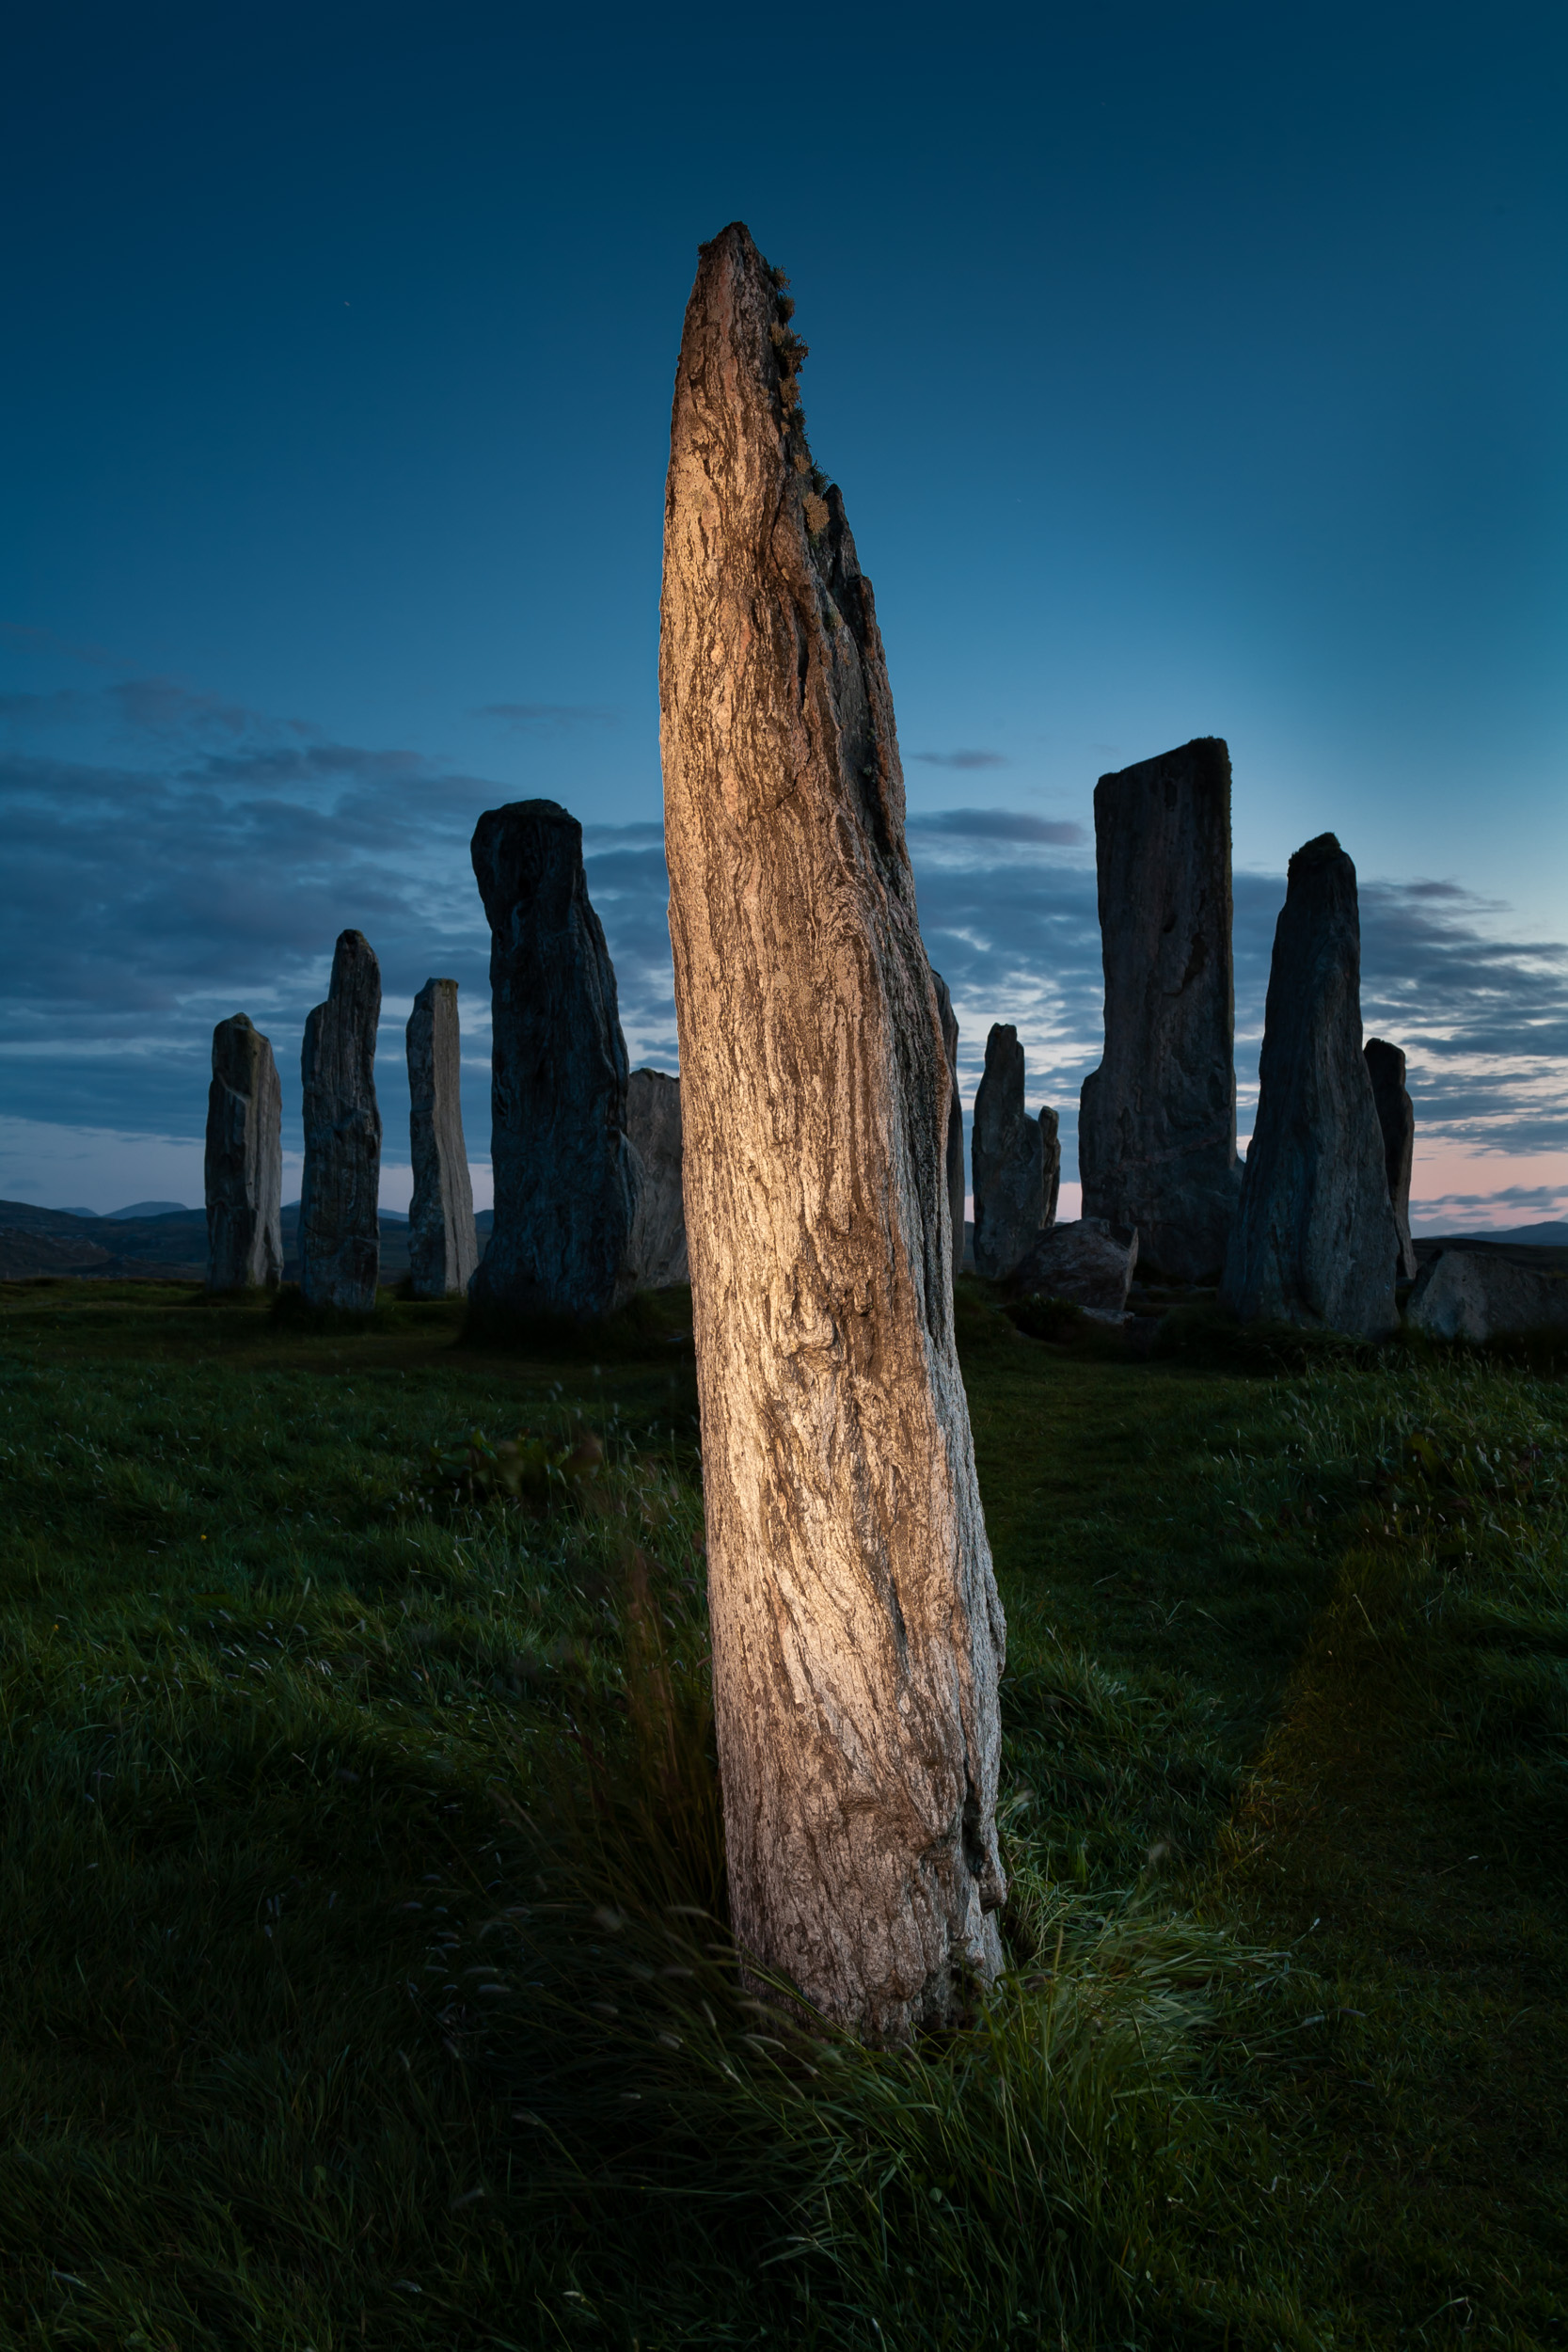
Stones of Stenness, Orkney, Scotland. Canon 5D with a Nikkor 28mm f/3.5 PC lens. 30 seconds, f/8, ISO 800.

Chasing Twilight

Traveling to a far-northern destination in May or June (or to a southern one in November or December) may seem like an odd choice for a night photographer. It doesn’t get fully dark north of 47 north latitude for several weeks a year. To note:

  • Above the Arctic Circle, at about 66 degrees north, the sun never sets at all around the summer solstice.

  • Between 61 north and the Arctic Circle, (which includes Scandinavia, parts of Alaska, and Canada, Iceland and Greenland) the sun sets, but never gets more than 6 degrees below the horizon in high summer, which means the sky never grows darker than civil twilight.

  • Between 53 and 61 north (the United Kingdom, parts of Alaska and Canada), summer nights in June are spent in nautical twilight.

  • Between 47 and 53 north (much of Europe, China, Ukraine and the northern U.S.), it doesn’t get darker than astronomical twilight.

Yet all of these are great locations for night photographers. Just why is that?

Dornee, Kyle of Loch Alsh, Scotland. Canon 5D, Canon EF 50mm f/2.5 macro lens. 4 minutes, f/22, ISO 100.

To many contemporary photographers, night photography is all about the Milky Way, which we need dark skies to photograph. But there’s much more to night photography than that, which I’ve written about previously (see “Beyond the Milky Way” and “The Night Photography Mindset.”)

To that end, this article is about making the most of nautical and astronomical twilight, especially when it lasts through the night—which is exactly what it can do in many of those places mentioned above. (You can read a rundown of the different stages of twilight on EarthSky, or in Tim’s blog post “Out of the Blue: The Importance of Twilight to the Night Photographer.”)

Dusk That Never Quite Ends

One of the places that enjoys this phenomenon is Scotland, and it’s the Scots—especially those from Orkney and Shetland—who call this phenomenon “Simmer Dim.” This is one of my favorite times to photograph, especially when I’m lucky enough to shoot in those northern Scottish isles. (Which is exactly why we’re running a night photography tour in Orkney next May!)

Lerwick, Shetland, Scotland. Canon 5D Mark II, Zuiko Shift 24mm f/3.5 lens. 10 seconds, f/8, ISO 100.

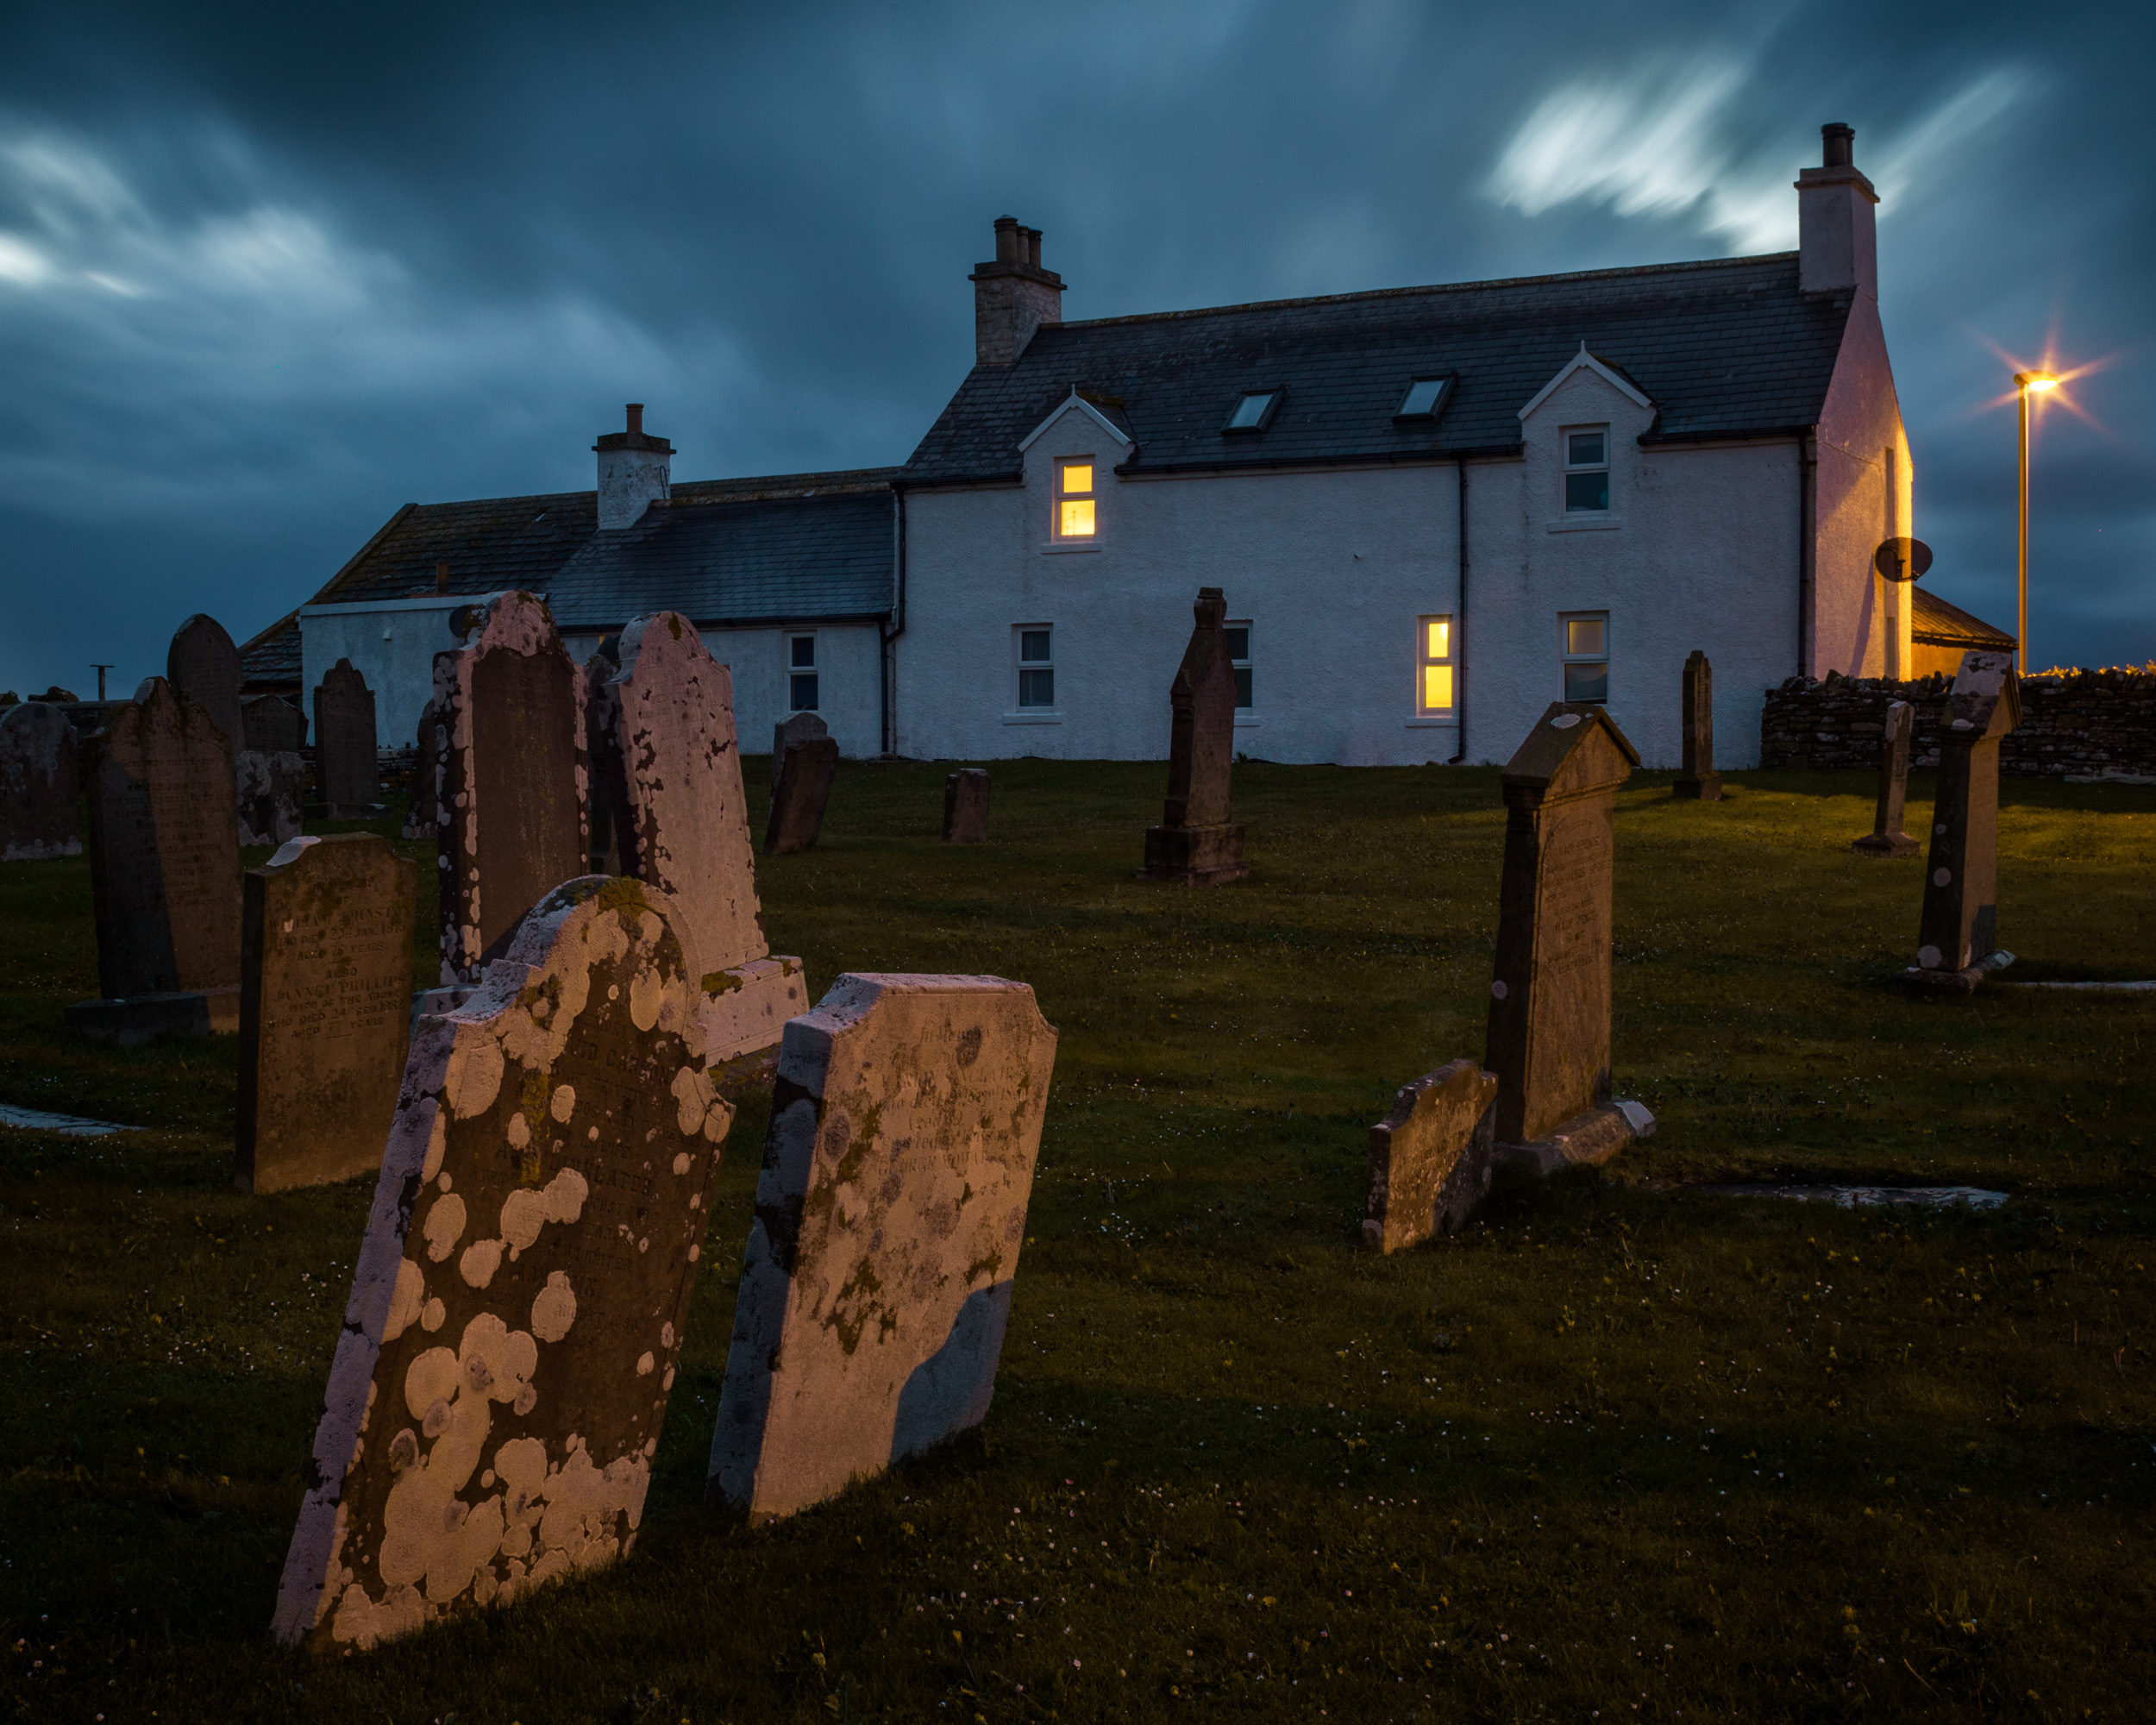
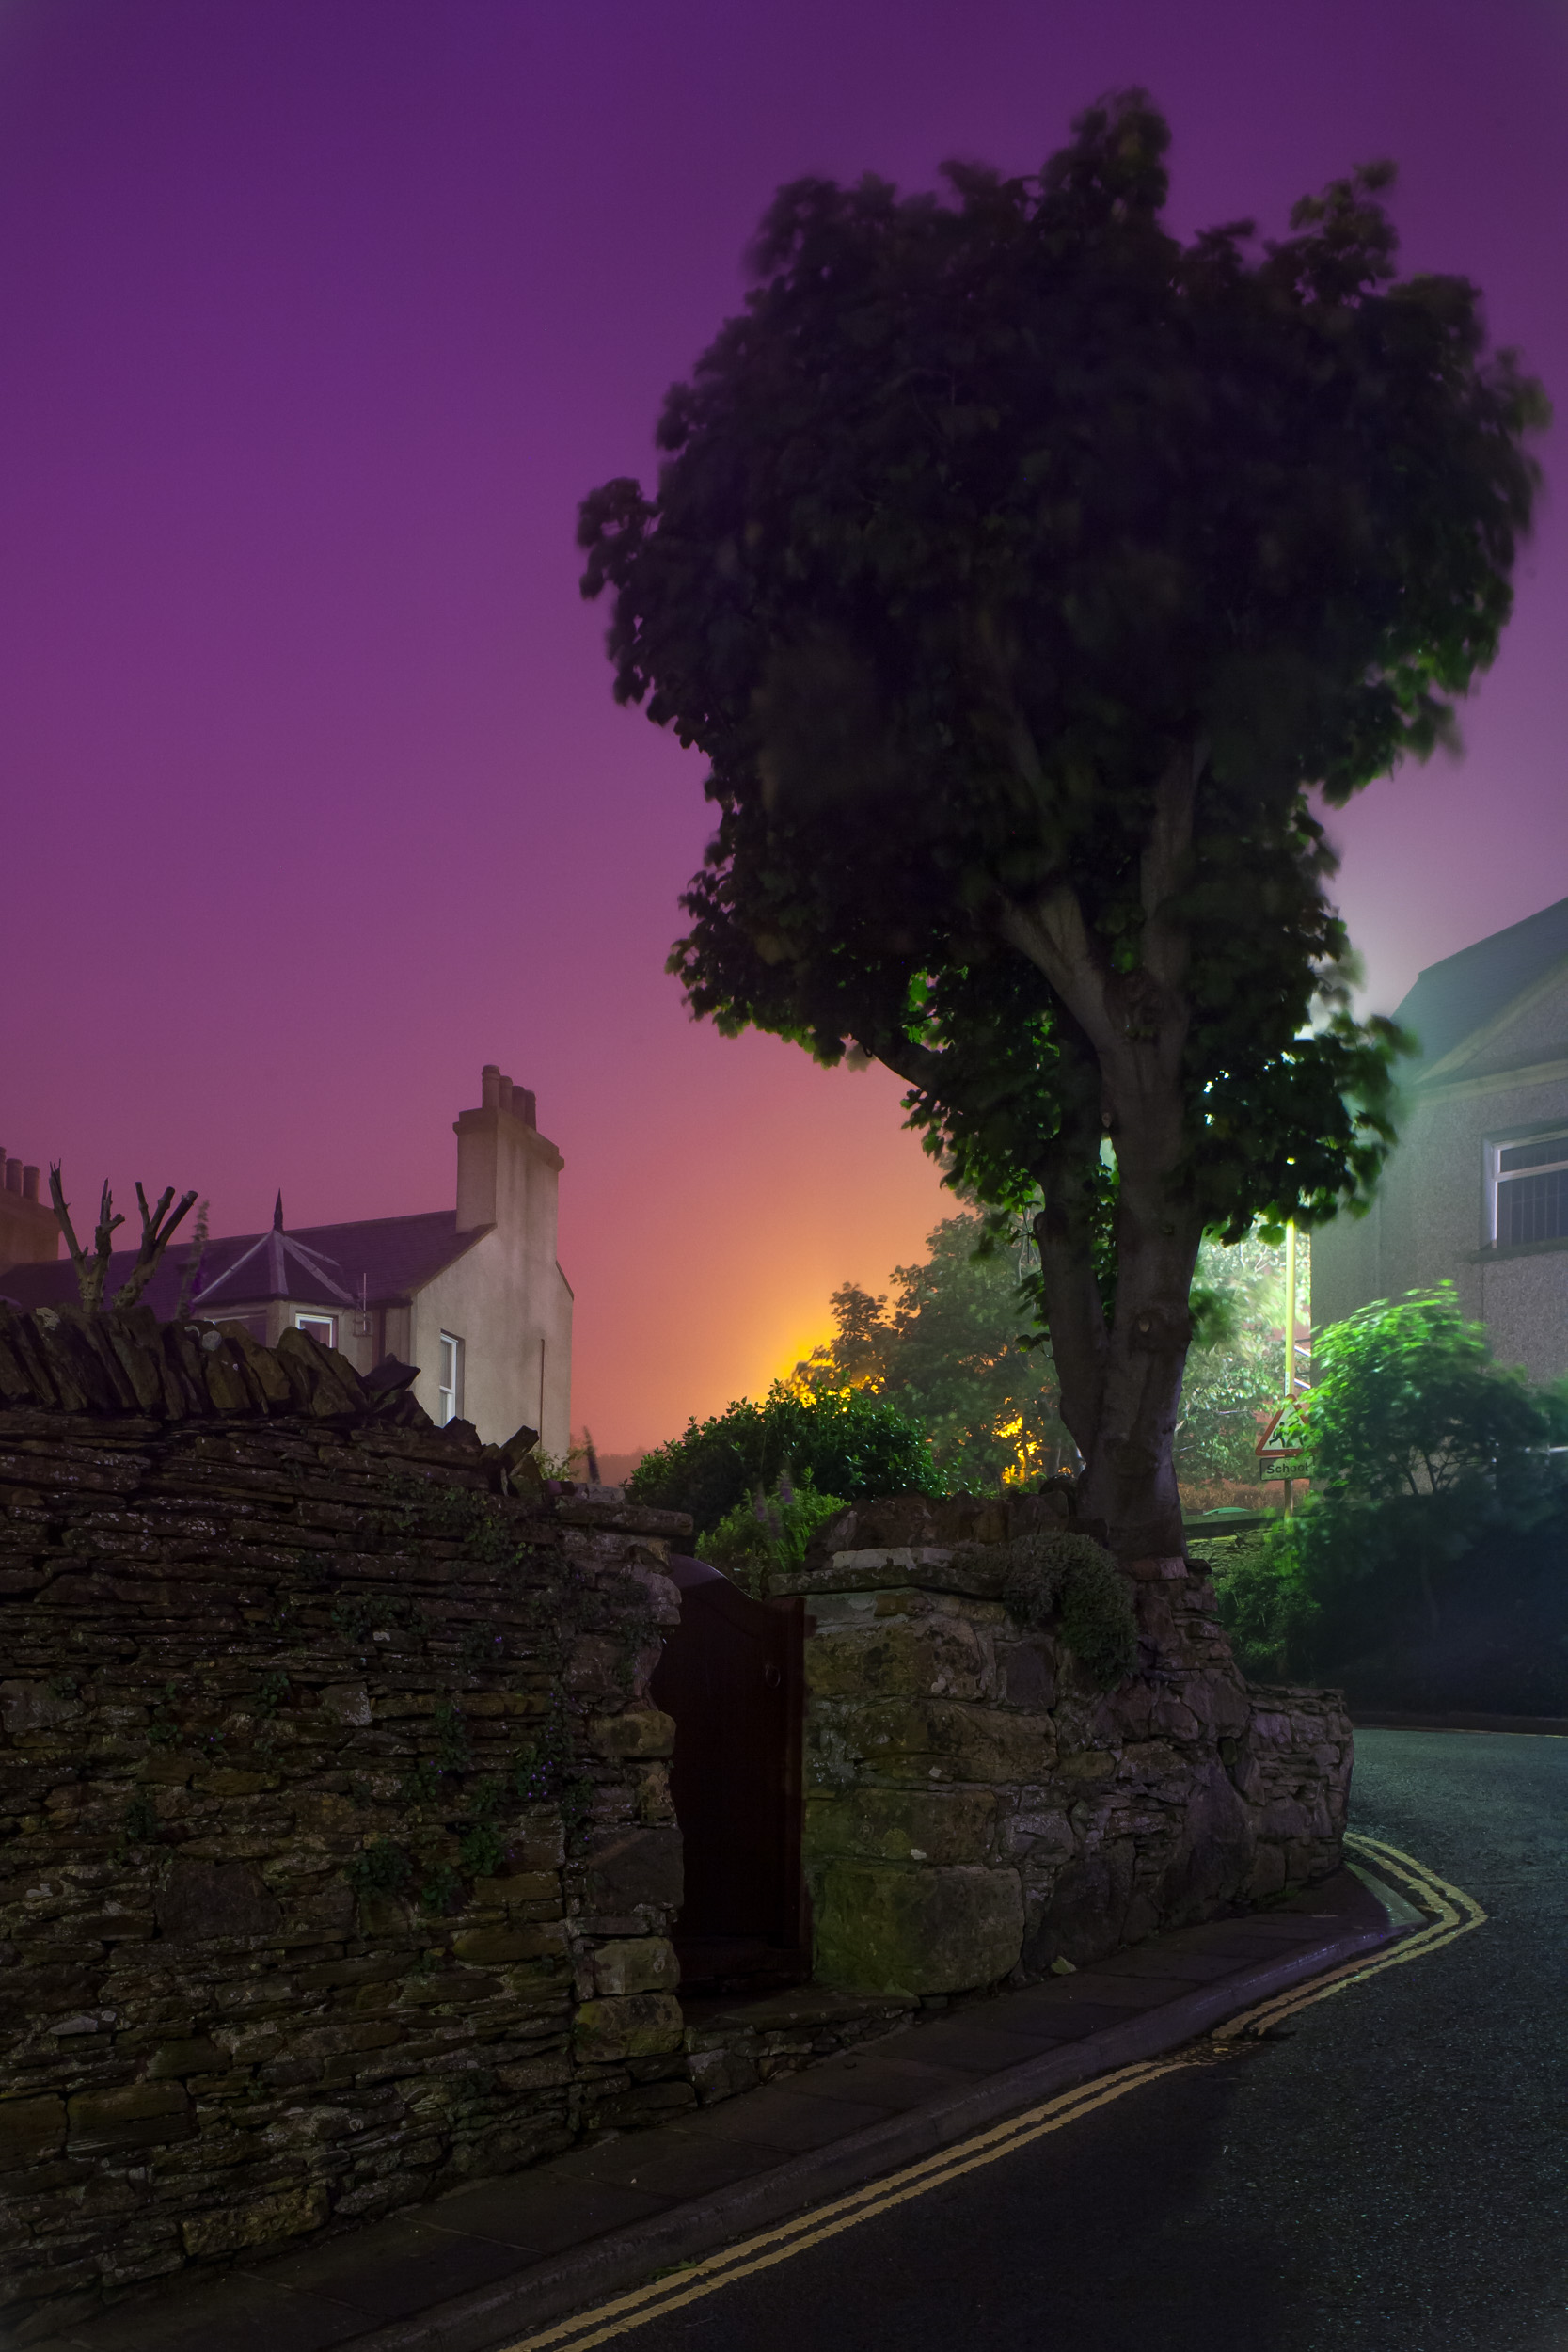
Why do I love Simmer Dim? Imagine spending an entire night in twilight—that enchanting time between daylight and darkness when the earth’s atmosphere scatters the last rays of the sun’s light to create deeply saturated colors in the sky. It’s nothing short of magical. Under normal twilight conditions, there’s only a brief window of opportunity when the light is perfectly balanced for both sky and ground—but during Simmer Dim, that balance may last for hours.

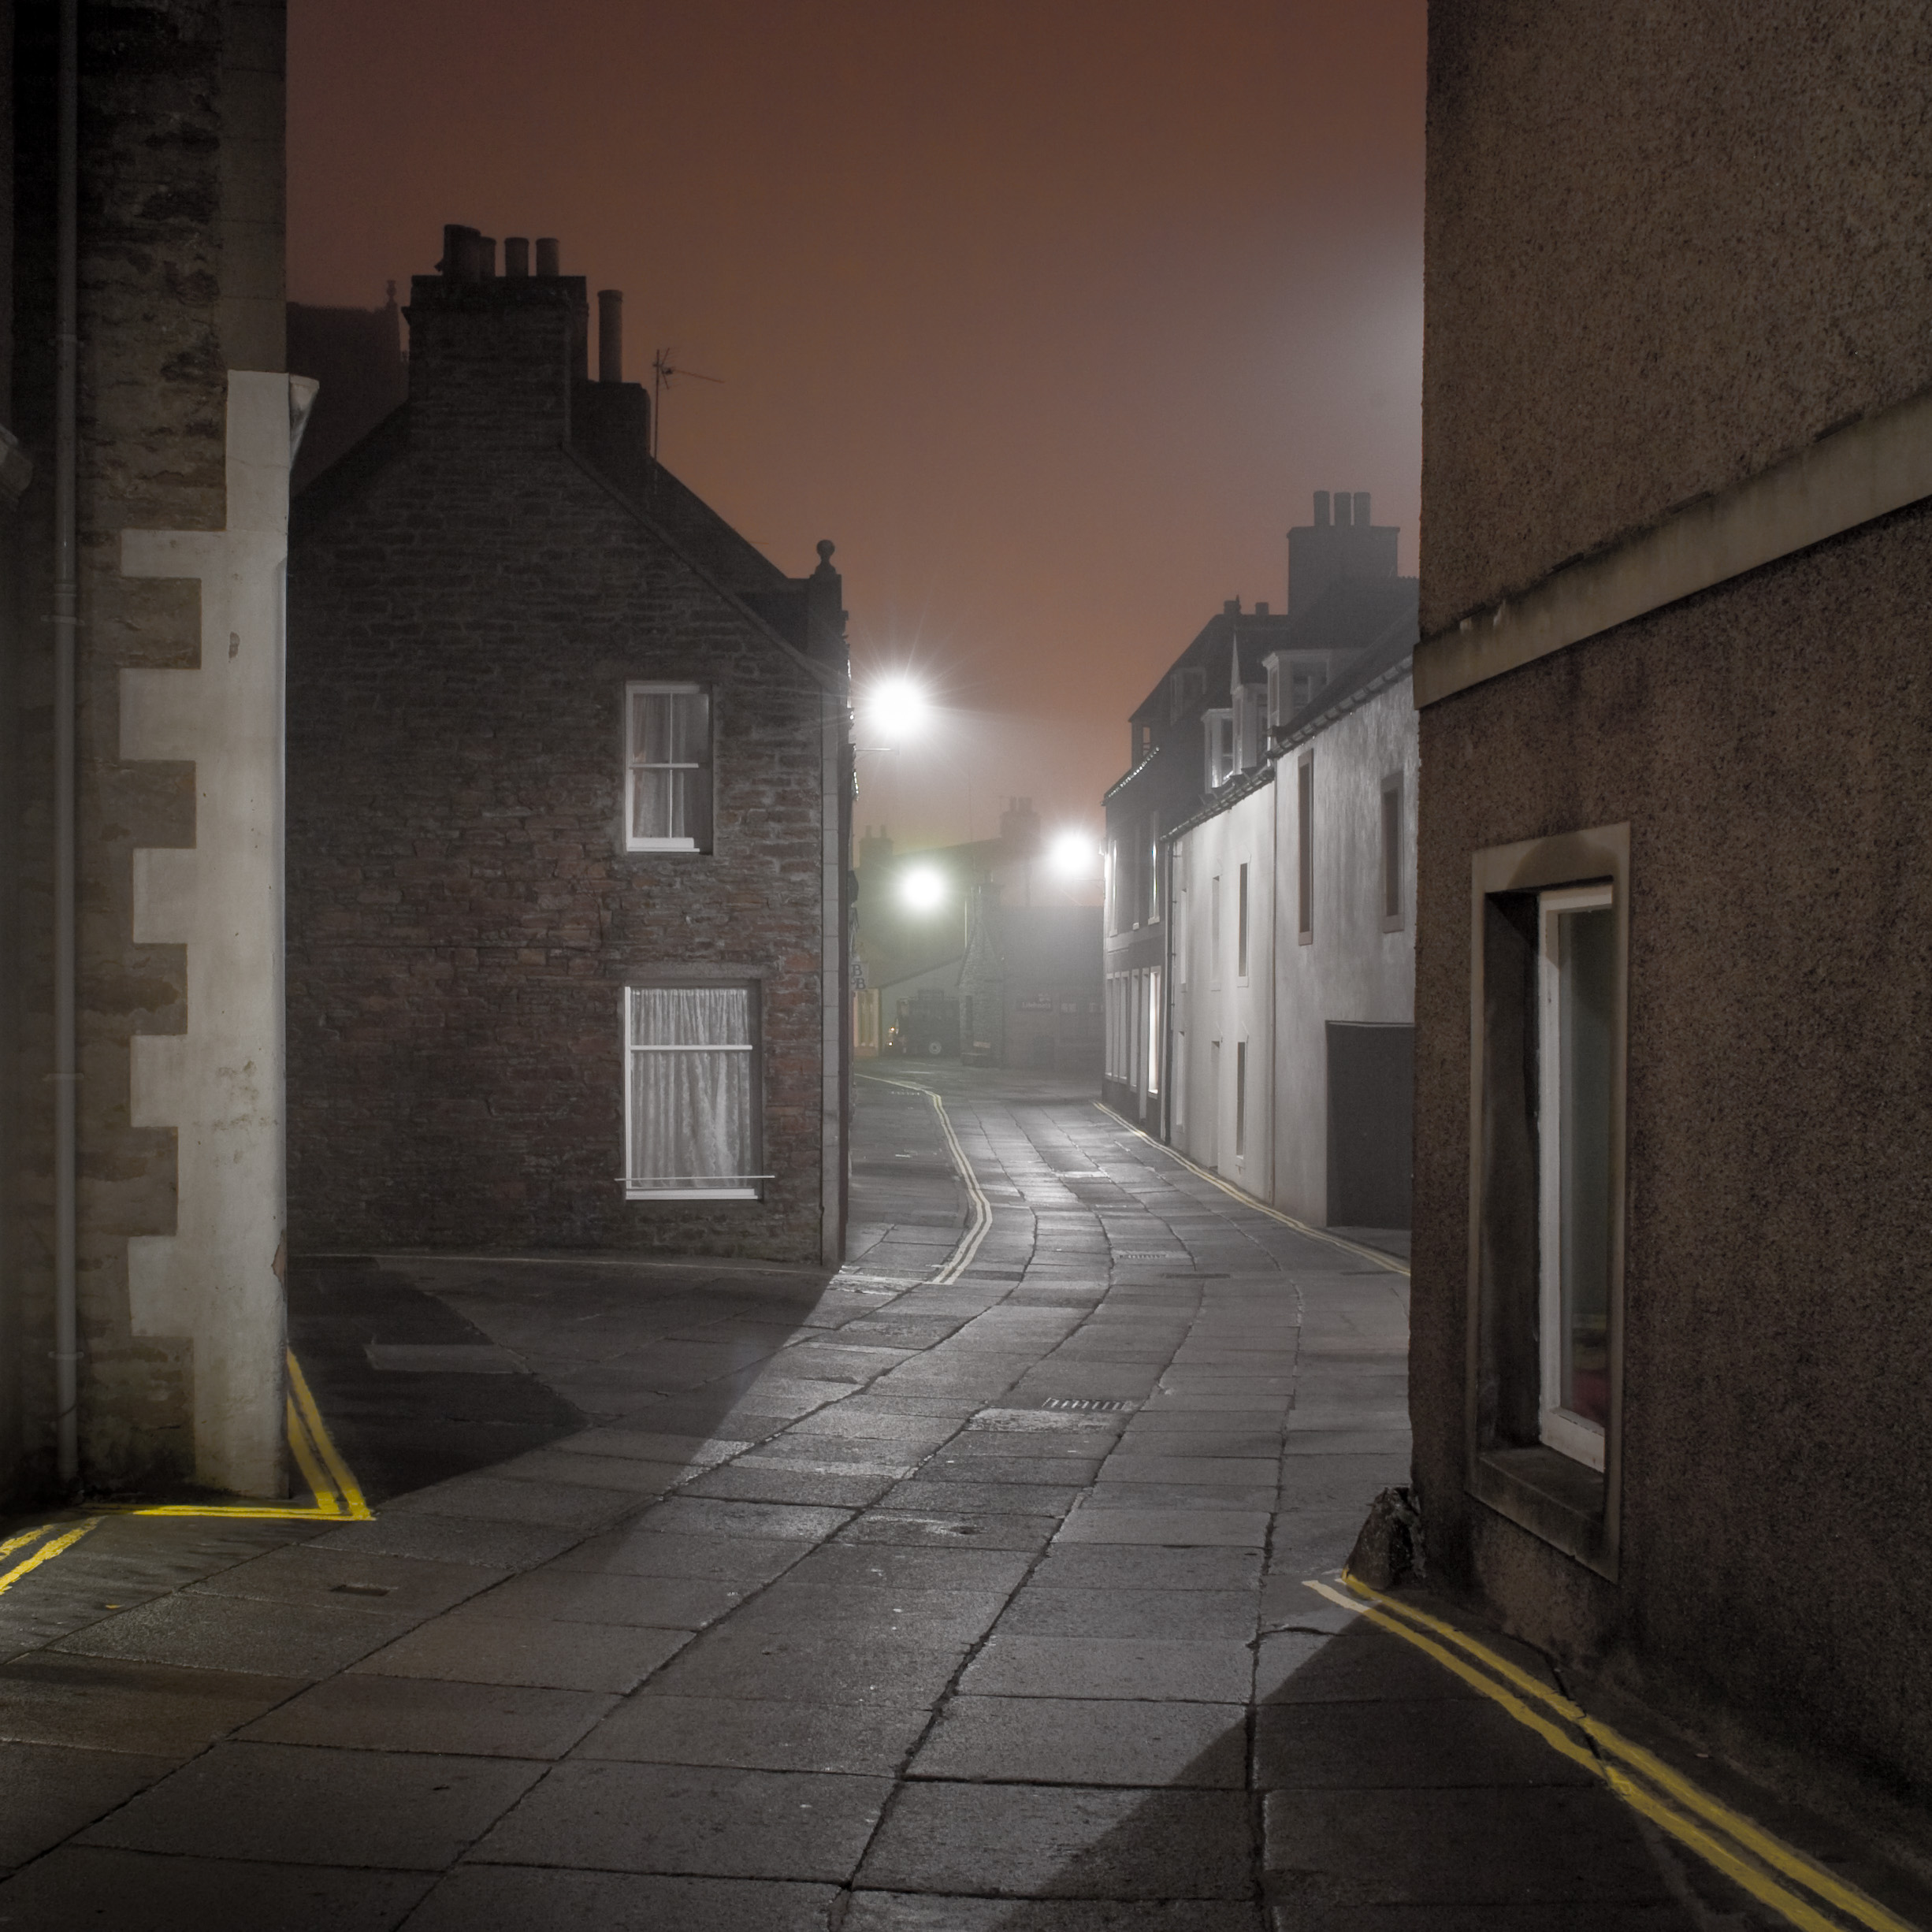
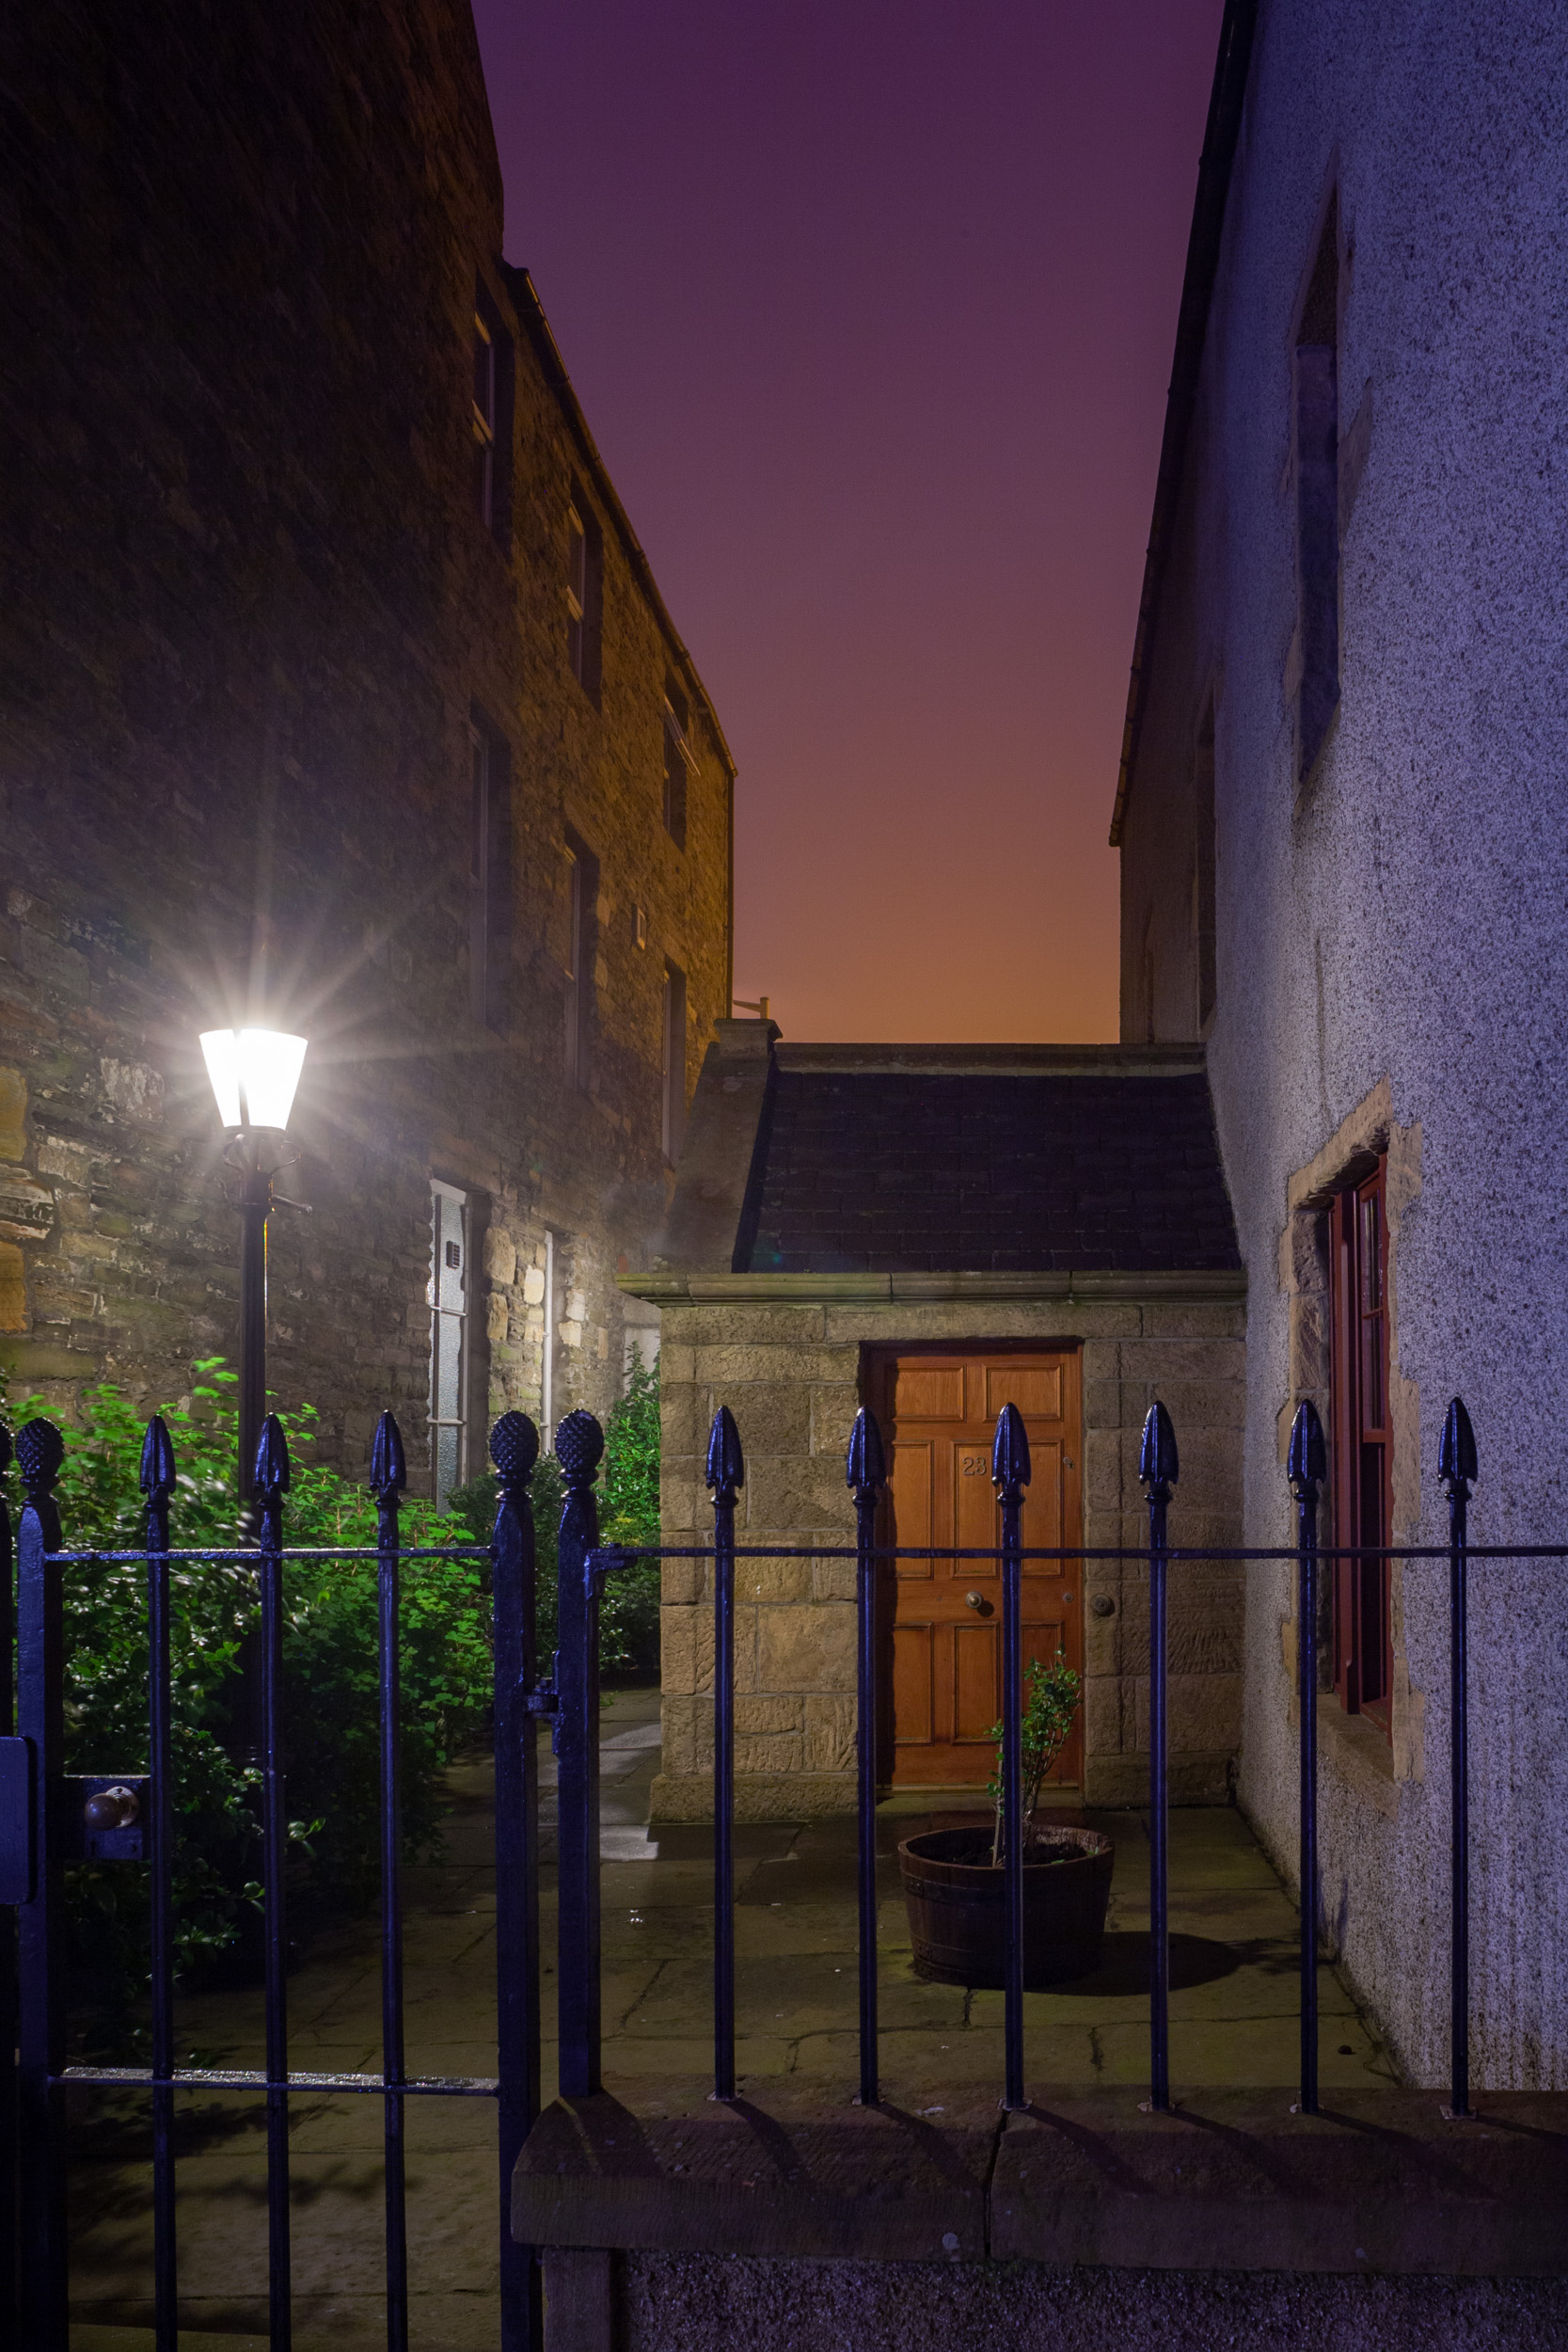
I’ve been fortunate to photograph during Simmer Dim on many occasions, but there was one night in particular in early July 2007 that I’ll never forget. I was leading a photo tour of Orkney, and the weather had been rather gloomy for days with a dense fog that just wouldn’t break. The fog was so thick that it had begun to dampen our spirits, but we decided to go into Stromness—Orkney’s second largest town—to see if we could find a picture for the making. It was amazing!

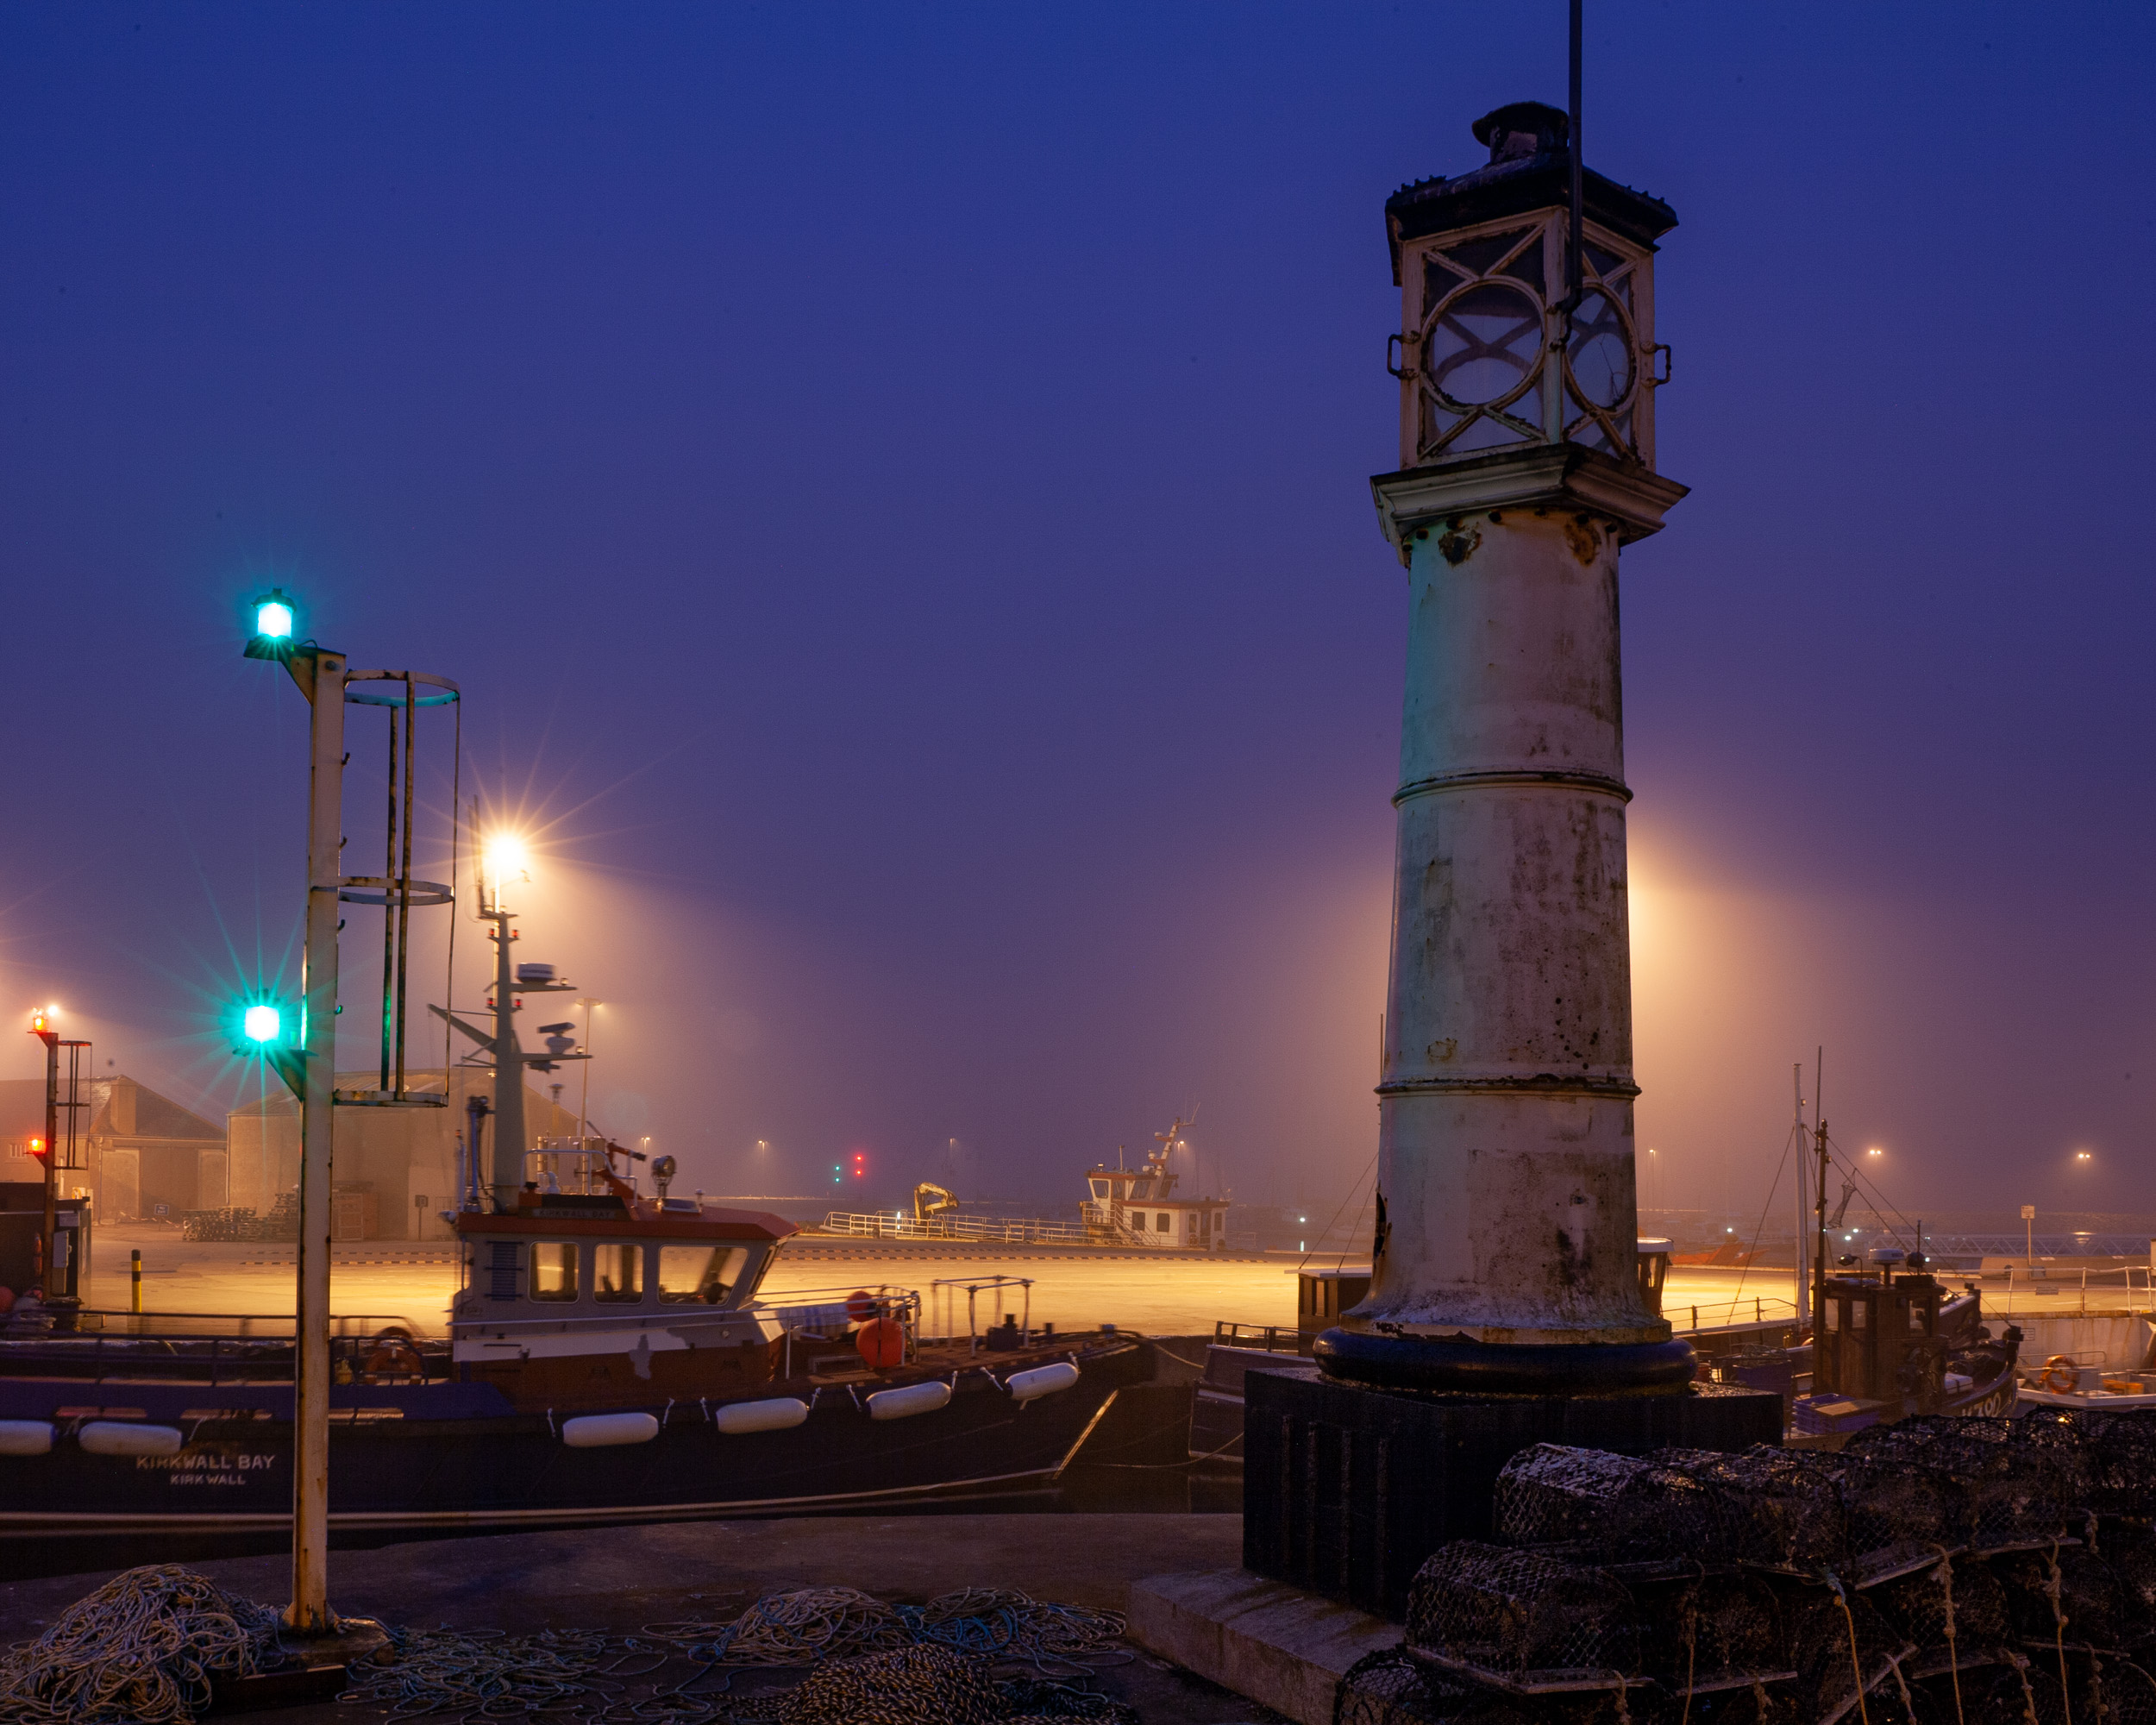
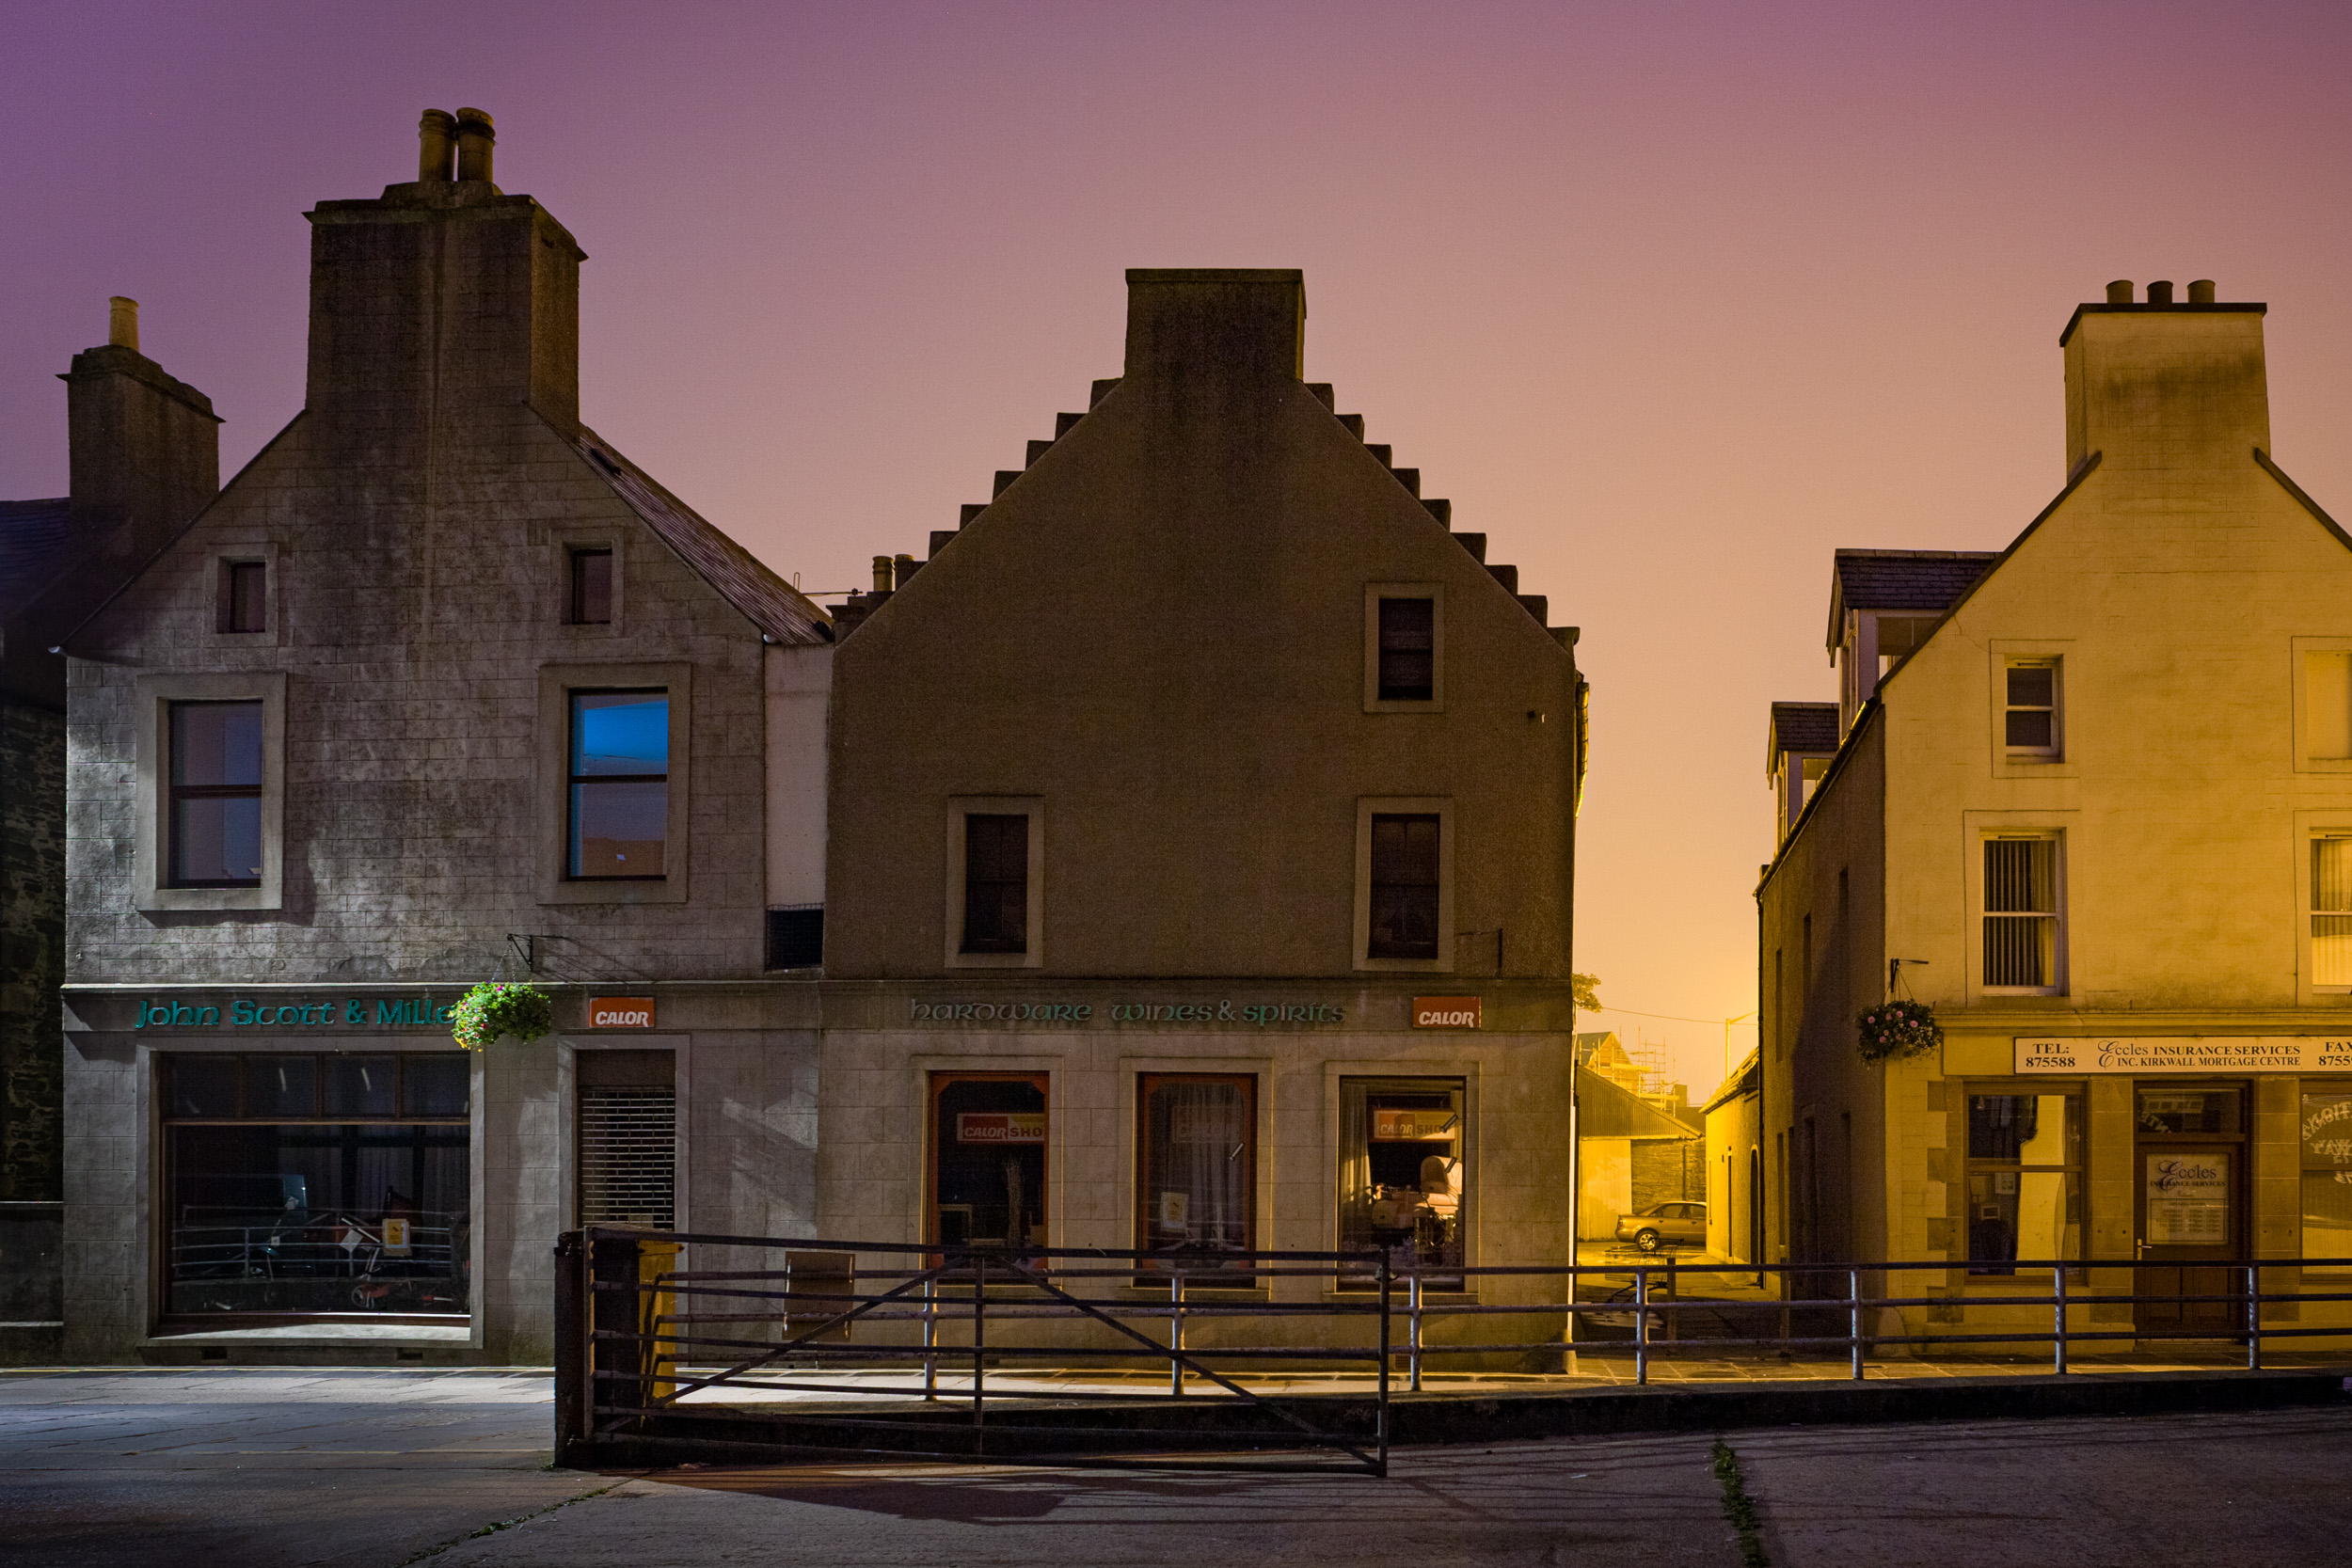
The fog held the glow and the colors of the streetlights low in the sky, and they were perfectly balanced with the natural luminance of the twilight. We photographed all night until the sky began to lighten further around 3 a.m. We suddenly found ourselves hoping that the fog would last or come back the following evening. It did, and we spent the next night in Kirkwall—the largest town on Orkney—photographing through the night and into the morning again.

Tips for Twilight Photography

Photographing in twilight can be a little different depending on whether your environment is natural or settled—or, more precisely, whether it contains artificial lighting. In nature, twilight often calls for the use of light painting or graduated neutral density filters, as the light level at the ground is usually several stops darker than the sky. In urban areas, especially small towns and villages, the streetlights and sky require similar exposures during twilight, which means you can usually keep your filters in the bag.

In nature, such as one of our Beautiful National Parks:

  • Use a 2- or 3-stop graduated neutral density filter to even out the exposure between the foreground and sky.

  • Or, make multiple exposures for foreground and sky and combine them in Photoshop.

  • The color of light changes quickly at dusk, so consider using auto white balance. Or, do what Tim and Matt do, which is to use Daylight white balance to render colors “as they are” even if they’re not “what we expect.” These are both valid approaches to the same problem, albeit with different results.

  • Use an incandescent flashlight or other warm color temperature light source to contrast with the cool blue of twilight.

  • Keep an eye out for vampires.

In an artificially lit environment:

  • Look for a balanced exposure between the ground-level illumination and the sky.

  • Manually set your white balance. Choose a setting that makes your foreground look the way you want it.

  • Utilize the blinking-highlights feature to help maintain important highlight details in your exposure.

  • Make multiple exposures of the same scene at different stages of twilight.

  • Keep an eye out for hipsters.

Finding Simmer Dim

In the Northern Hemisphere, we’re past the Simmer Dim for 2019. Our Southern Hemisphere friends can look forward to it at the end of the year, but aside from Antarctica and the southern tip of South America, there’s not a lot of land that sees the effect.

Either way, it’s never too early to plan a trip for Simmer Dim 2020, and regardless, twilight in general is great for low-light photography year-round. Twilight is often dark enough for light painting, and is a great time to get better color saturation into your images. So get out there early and give it a go!

A Simmer Dim Gallery

Below is a selection of ten images from Simmer Dim shoots I’ve done, including the all-nighters mentioned above. For notes on the gear used and the exposures, download the accompanying PDF.

If you’ve shot in the Simmer Dim, please share your stories and images in the Comments section below or on our Facebook page. (And if you haven’t, come join us in Orkney next May!)

Lance Keimig is a partner and workshop leader with National Parks at Night. He has been photographing at night for 30 years, and is the author of Night Photography and Light Painting: Finding Your Way in the Dark (Focal Press, 2015). Learn more about his images and workshops at www.thenightskye.com.

UPCOMING WORKSHOPS FROM NATIONAL PARKS AT NIGHT

Out of the Blue: The Importance of Twilight to the Night Photographer

Twilight is one of the most beautiful times of day to shoot. It is also the perfect time to finalize compositions and setups for your eventual night photography.

The famous “magic hour” for photography extends for over two hours on either side of the setting and rising of the sun. As the sun moves closer to the horizon, it bathes our subjects in a beautiful warm and soft light considered by many to be the prime time to shoot daytime landscapes. Then, as it dips below the horizon after sunset, the exceptionally warm light illuminates the sky, and the clouds become brilliant and saturated.

As time moves on and the sun sinks even further below the horizon, soft, blue light provides an otherworldly glow. This has come to be known as “blue hour”—and it’s an amazing time to start your night photography.

Shades of Blue

Hawaii in the blue hour. Nikon D4. 15 seconds, f/11, ISO 400.

To better understand twilight and its relevance to the night photographer, let’s a take a look at the different moments that occur around sunset (these moments also occur in the opposite order around sunrise). Following are definitions of terms compiled from the U.S. Naval Observatory website:

  • Horizon—Wherever one is located on or near the earth's surface, the earth is perceived as essentially flat and, therefore, as a plane. The sky resembles one-half of a sphere or dome centered at the observer. If there are no visual obstructions, the apparent intersection of the sky with the earth's (plane) surface is the horizon, which appears as a circle centered at the observer.
  • Sunset (and sunrise)—The times when the upper edge of the disk of the sun is on the horizon. This means the ball of the sun is no longer visible, as it is just below the horizon.
  • Civil twilight—The center of the sun is 6 degrees below the horizon. This is the time of day just after the actual sunset.
  • Nautical twilight—The center of the sun is 12 degrees below the horizon.
  • Astronomical twilight—The center of the Sun is geometrically 18 degrees below the horizon.

As photographers, we are concerned with light. Specifically, usable light. We are also concerned with being in the right place at the right time! During twilight and at times of the setting and rising sun, the light changes very rapidly. We must be prepared, having scouted and found our ideal shoot positions, or a series of ideal positions, subject matter and viewpoints. This is crucial for the night photographer, because once darkness settles in, all of those things are much harder to find.

Civil Twilight

Civil Twilight color at Jekyll Island in Georgia. Canon EOS 10D. 30 seconds, f/19, ISO 100.

From the time the sun sets until approximately a half-hour later is civil twilight. This is when color starts to hit the highest clouds in the sky. We should rename it “Photographer’s Twilight” for the millions of photographs taken at this marvelous time of day. This is usually when we take what we consider “sunset” shots.

Notice the cloud positions. Are they low clouds? These will receive light for only about 15 minutes after sunset. High clouds? They will retain color for longer. While not “night photography,” this is a great time to begin scouting, planning and capturing the beautiful light of the end of the day.

Bonus:

The end of Civil Twilight is the best time to shoot cityscapes. The fading light of the sky matches the emerging city lights perfectly.

Last of civil twilight on a cityscape—Inner Harbor in Baltimore. Nikon D700. 4 second, f/8, ISO 400.

Nautical Twilight

This is the blue hour. Nautical twilight begins when civil twilight ends and lasts for roughly another half-hour to 45 minutes. The light is beginning to fade and we are transitioning into night. This is the time for finalizing locations, compositions and focus. It’s much easier to set your camera up in this dim light as opposed to starting from scratch in the dark.

Bonus:

In addition to readying yourself for the stars, this is a great time to photograph straight-up landscapes. The dim blue light at this hour serves to create haunting and peaceful scenes. Nautical twilight is also a great time to begin light painting; it’s dark enough to allow for light painting but bright enough to safely move around the scene.

Car trails and fog at nautical twilight. Nikon D4. 4 seconds, f/16, ISO 200.

Astronomical Twilight

The moment you have been waiting for! Astronomical twilight begins approximately 1 1/2 to 1 3/4 hours after sunset. It is the beginning of dark, dark. No sky light. You can now begin to get your star-point shots.

Start by testing your exposure and checking your focus. A good starting point is 30 seconds, f/2.8 or f/4, ISO 3200 or 6400. (For more info on star-point exposures, check out Lance’s blog post, “What’s the Longest Usable Shutter Speed for Astro-Landscape?”). Next, how does your white balance look? Does your foreground complement the sky? Check to ensure your long exposure noise reduction is turned off for shorter exposures.

Once astronomical twilight ends, the sky is as dark as it’s going to get. Now you’re firmly entrenched in “nighttime.” You can certainly continue with star-point and Milky Way shots, but now is a great time to get those really long star trails. Depending on the phase of the moon, exposures into the hours can be achieved after astronomical twilight.

Astronomical twilight at McDonald Lake in Glacier National Park. Nikon D4s. 30 seconds, f/2.8, ISO 6400.

Tackle the Twilights

As you can see, knowing the exact times of the different twilights is necessary for planning and executing great photographs.

There are a great many places on the web as well as various smartphone apps that will give precise twilight times for any given day of the year in almost any location worldwide. One of our favorites here at NPAN is PhotoPills. This app will help you plan not only your night shoots, but also full-moon shots, sunset and sunrise excursions, and Milky Way captures.

Take some time to become accustomed to the terms and rhythm of the twilights to greatly expand and enhance your photographic experience!

Tim Cooper is a partner and workshop leader with National Parks at Night. Learn more techniques from his book The Magic of Light Painting, available from Peachpit.

UPCOMING WORKSHOPS FROM NATIONAL PARKS AT NIGHT