Night Photography Blog — National Parks at Night

Chris Nicholson

Are You Ready for the Total Lunar Eclipse of 2025?

If total lunar eclipses seem like a thing of the past, there’s a good reason for that: The world hasn’t seen one since 2022. But have no fear—the disappearing act is back!

This week the moon will cross completely into Earth’s shadow, providing an opportunity for most of the photographers in the Western Hemisphere to get out and shoot this uncommon celestial event.

This eclipse will happen on the overnight of March 13 to 14, 2025—in other words, you want to be out tomorrow night. We’re offering this blog post to help you get prepared.

Info About the Eclipse

To learn more about this eclipse, we recommend checking out these excellent resources:

Where to See the Eclipse

A good portion of the Western Hemisphere will witness the total eclipse, including all of the contiguous United States and the eastern half of Alaska, plus all of Canada, all of Central America and half of South America.

Courtesy of NASA.

How to Shoot the Eclipse

Gear

You don’t need any special equipment beyond what you’d use to photograph any moon at night: camera, lens, tripod. You can add a cable remote, an intervalometer, a star tracker, etc., but you won’t need any special light filters or anything of that nature.

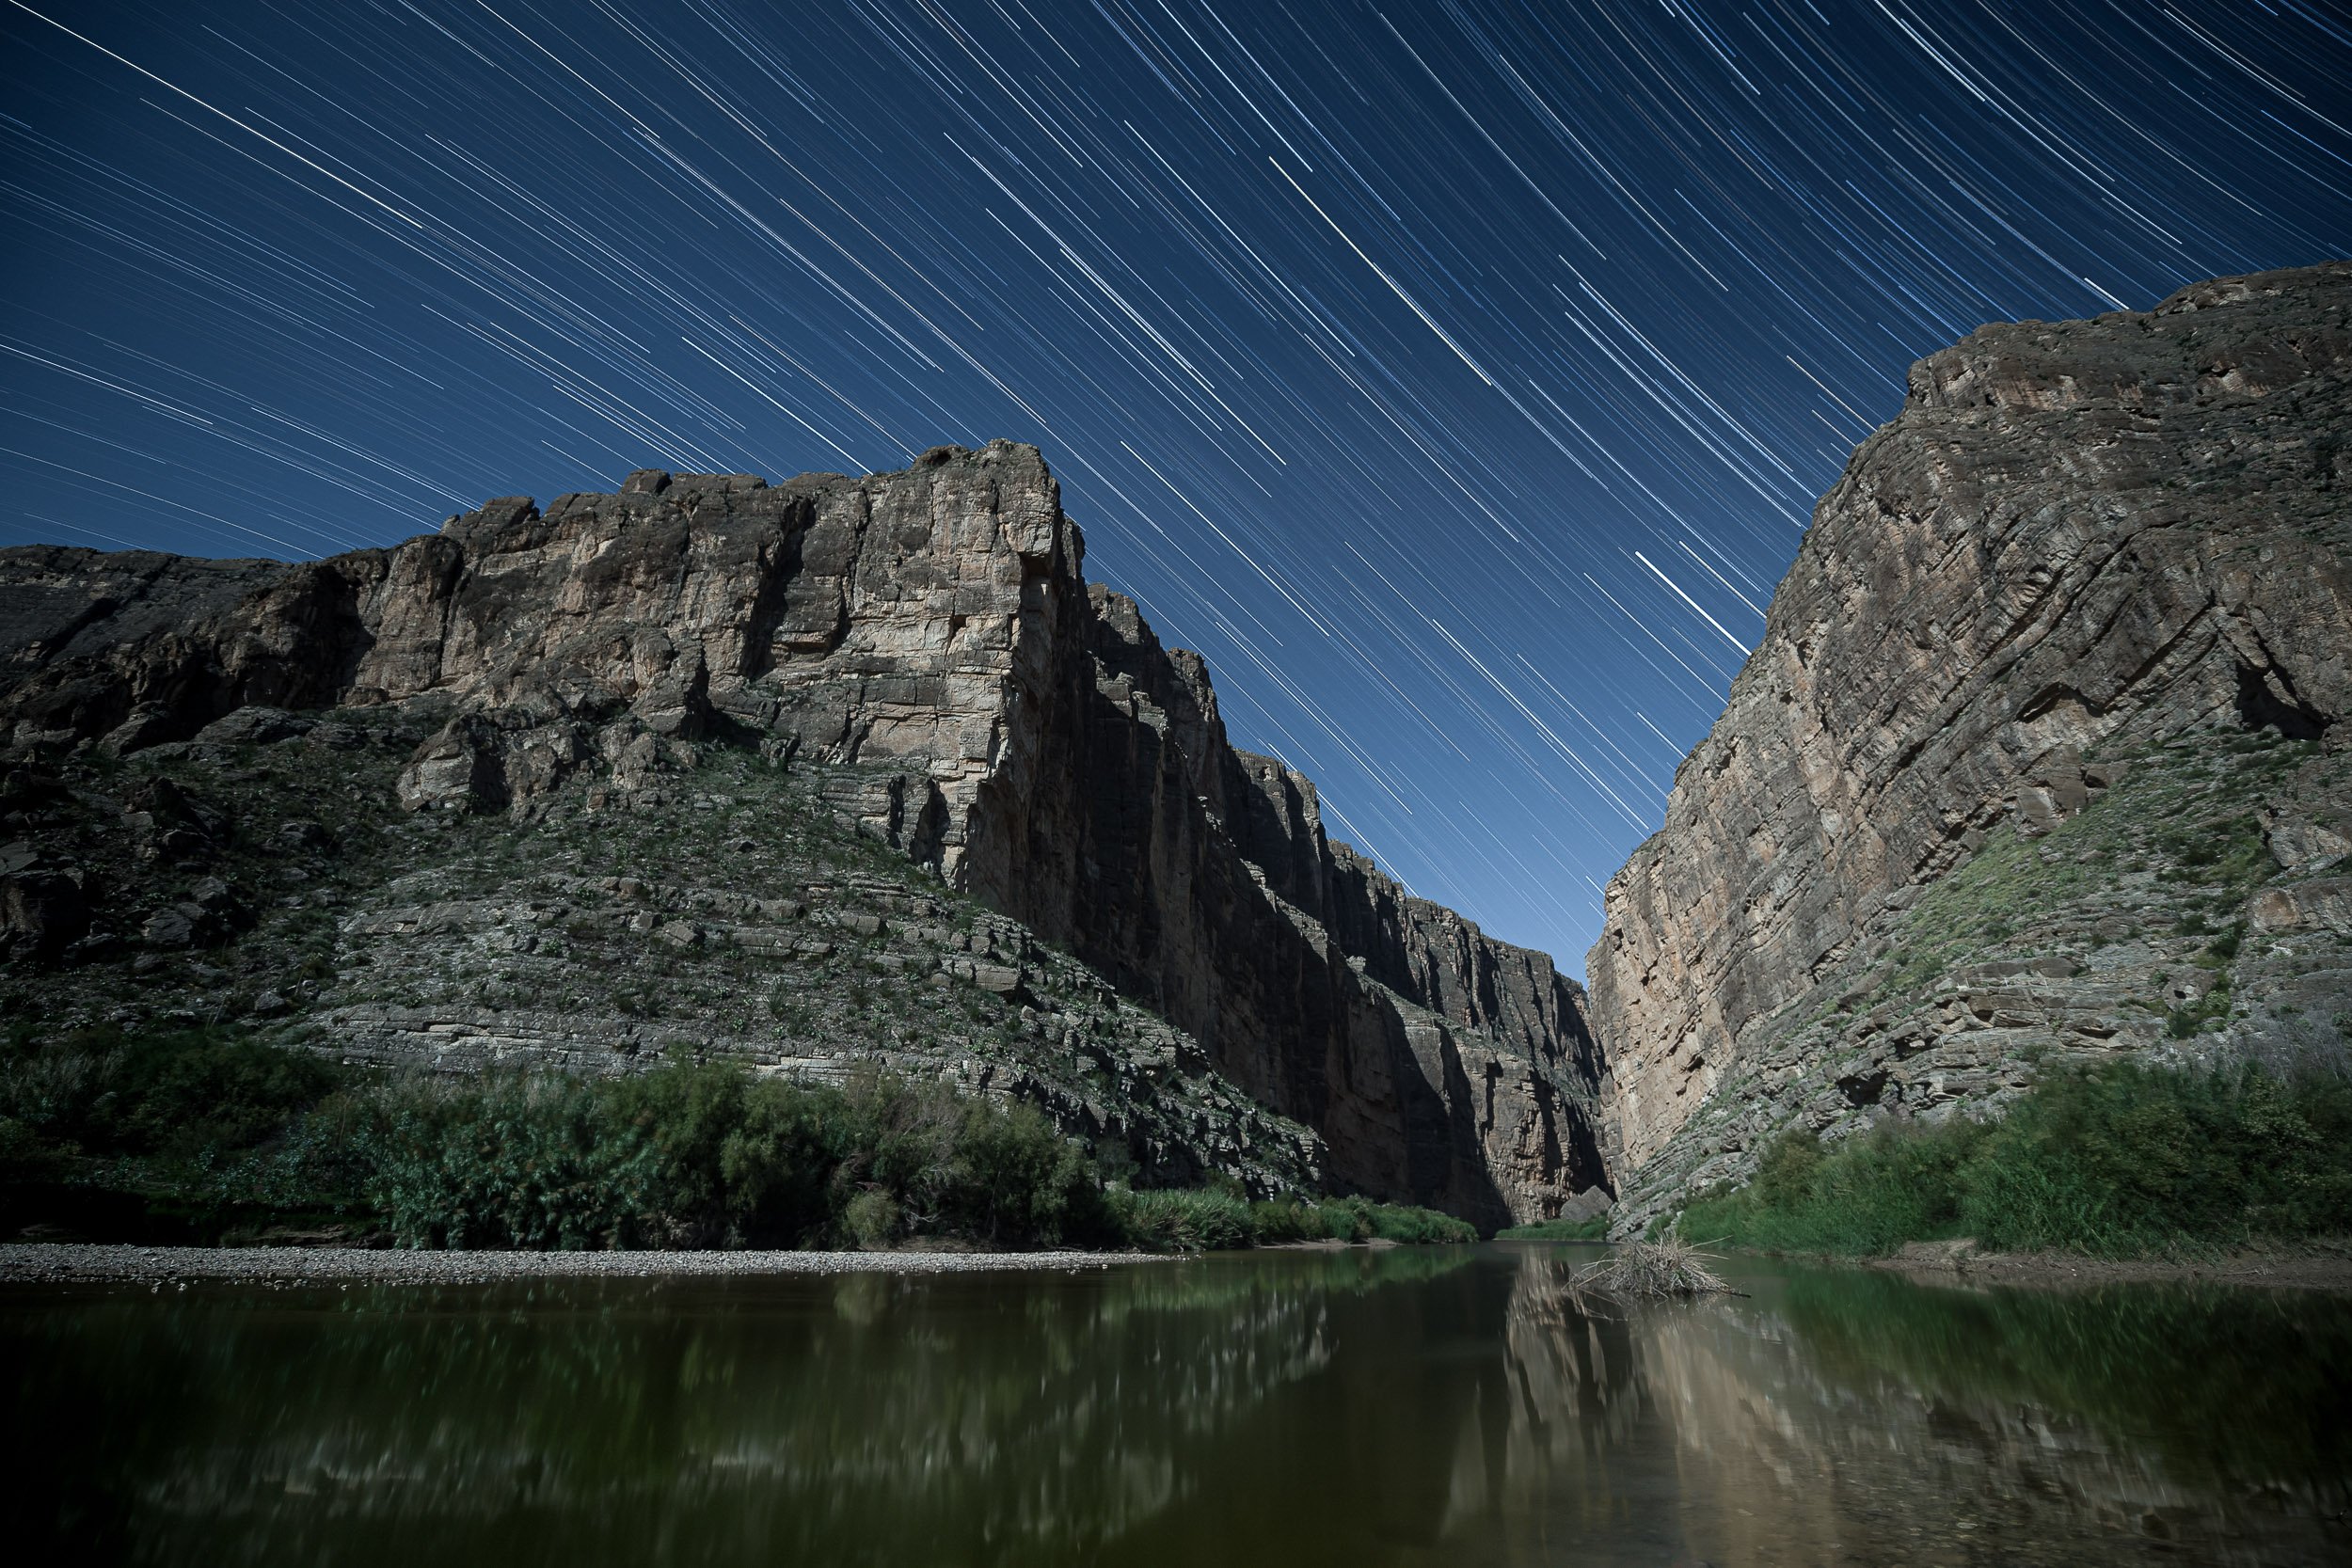
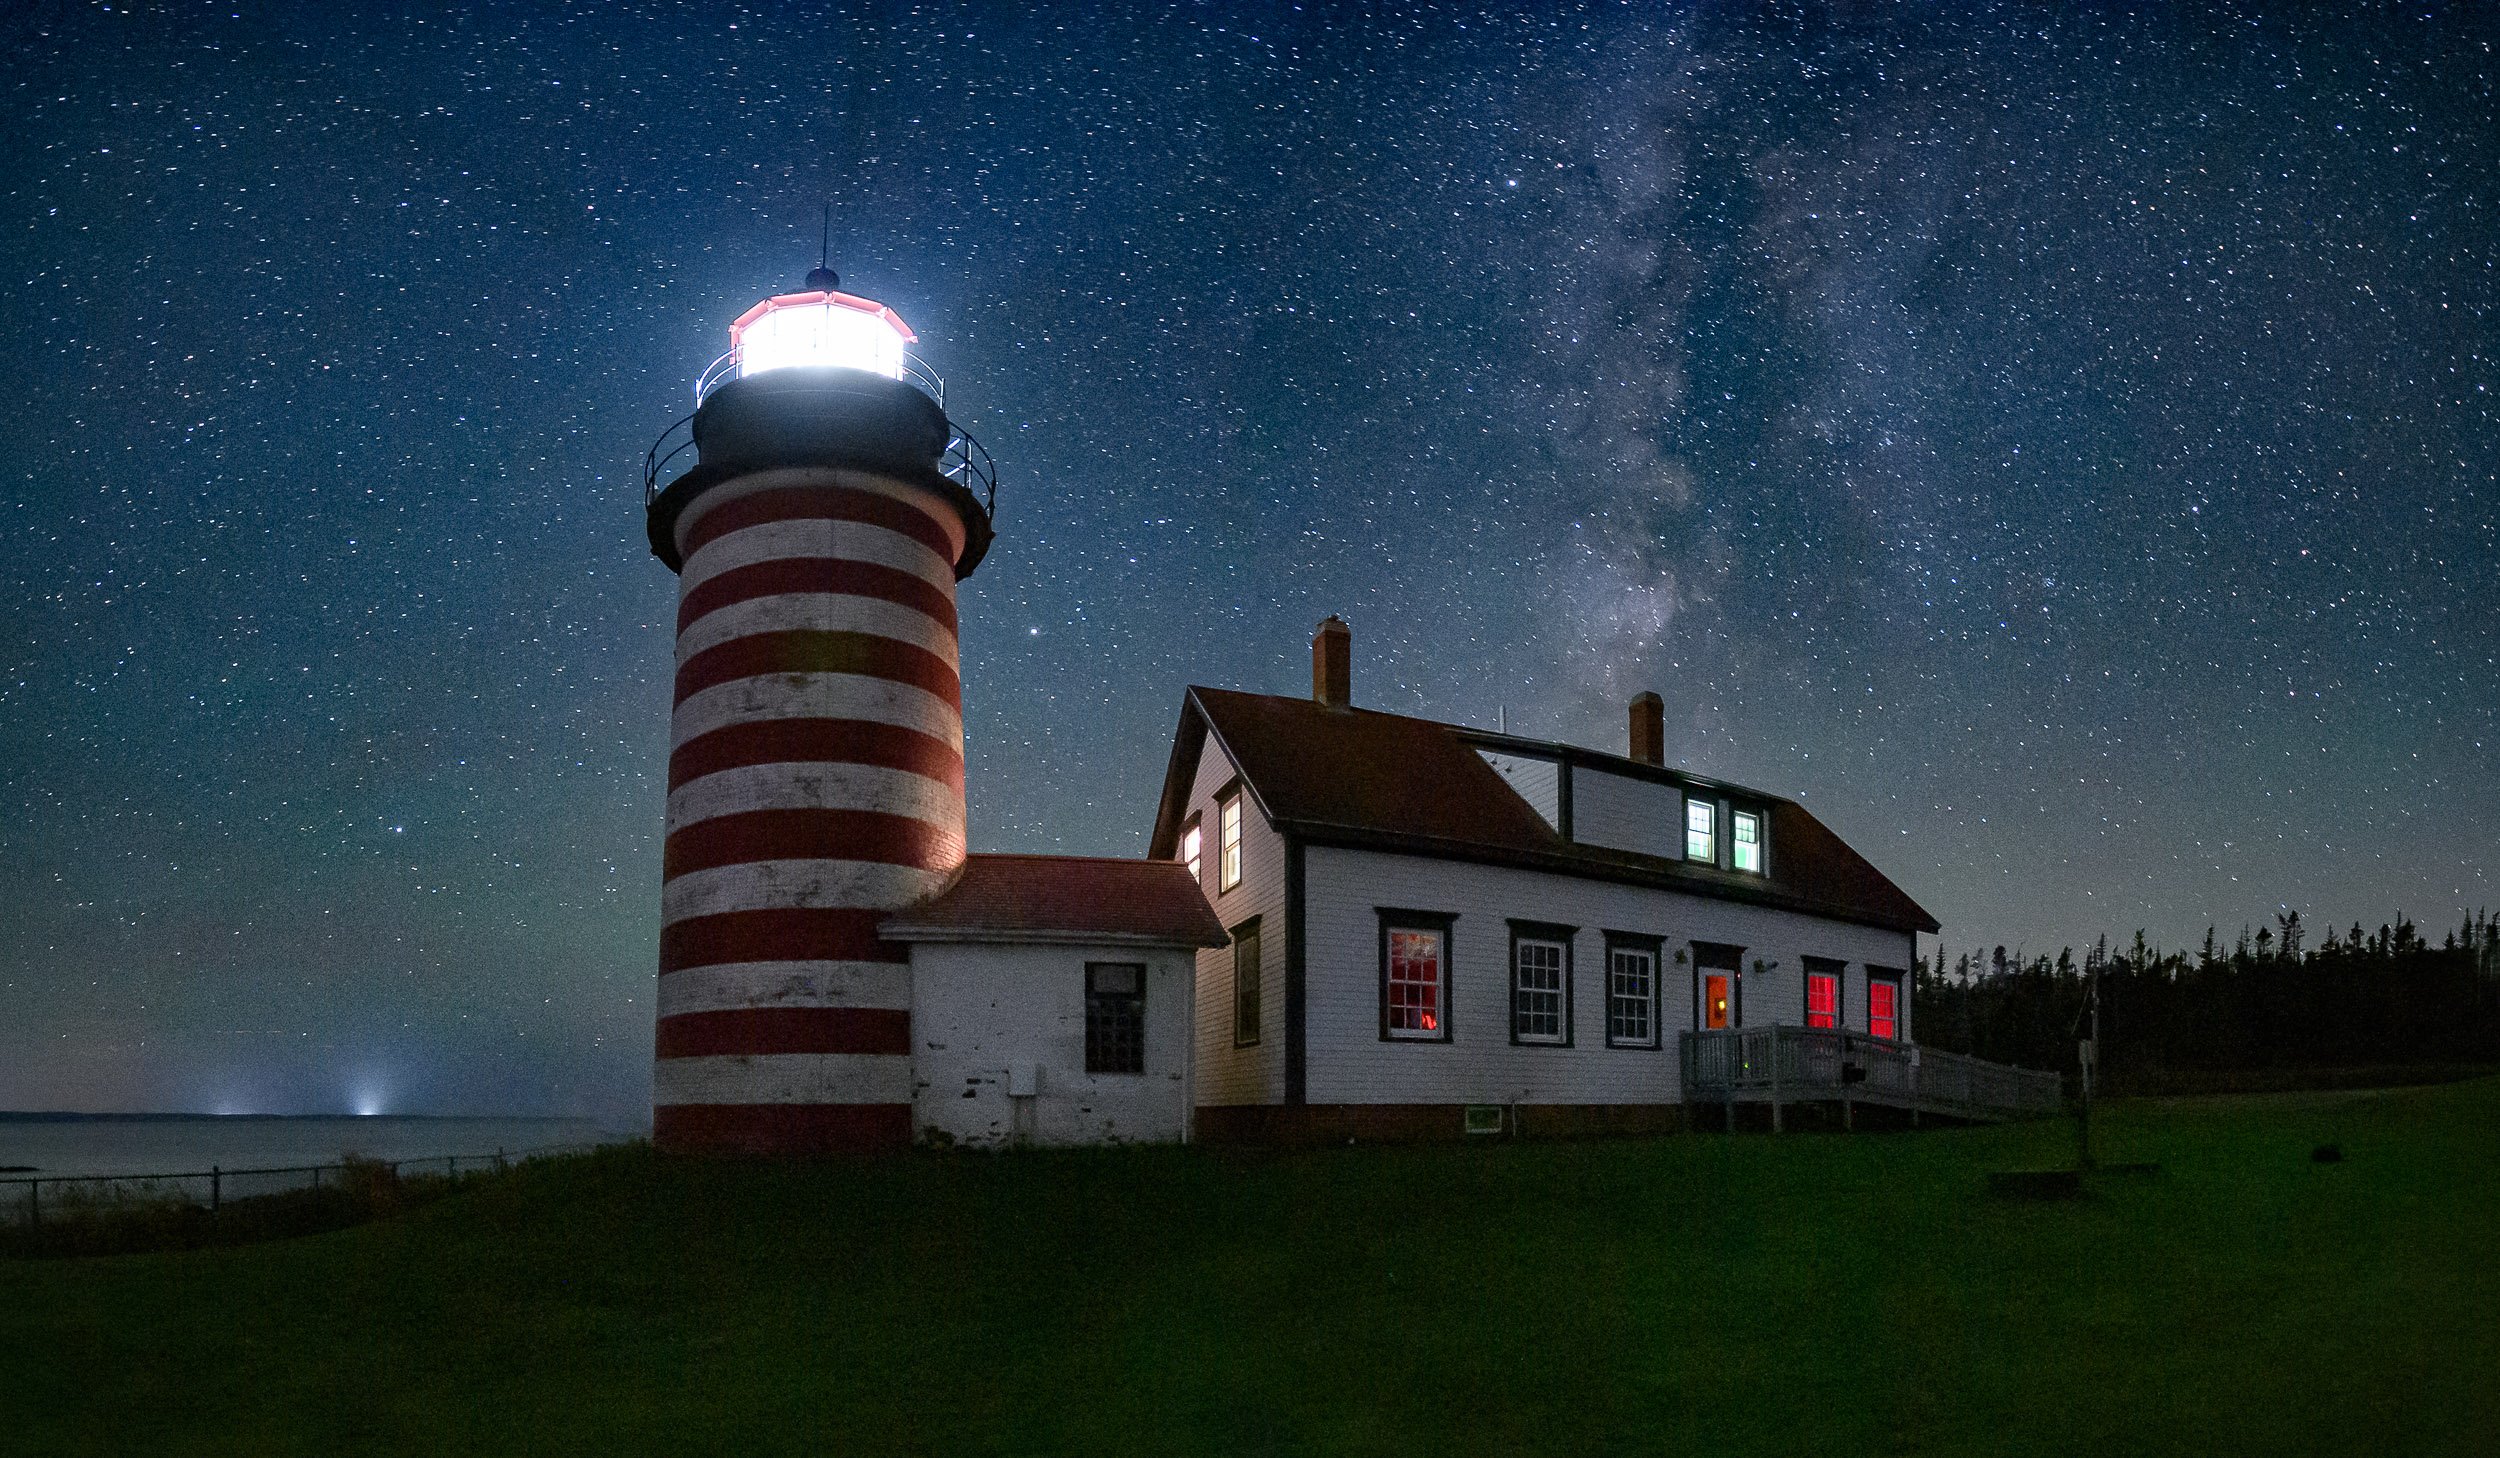
Consider using both long and wide lenses to create different types of compositions. The former will give you great moon portraits, while the latter will allow you to portray the moon as an element of a wider night scene (see below). The visible eclipse will last 3.5 hours from beginning to end, and totality will last about an hour. You can work through a lot of scenarios and ideas in that much time, and you can even wait out clouds that might be blocking the moon for a bit.

Lunar eclipse over Price Lake, Blue Ridge Parkway. Nikon D5 with a Nikon 24-70mm f/2.8 lens. Three blended frames shot at 30 seconds (foreground), 15 seconds (stars) and 1/4 second (moon), f/2.8, ISO 6400.

Scouting

Use PhotoPills to see ahead of time where the moon will be in the sky during the eclipse. You can do this with the Eclipse panel in the Planner, or if you’re already on location just use Night AR in the Moon pill to visualize where the moon will move during the times mentioned above.
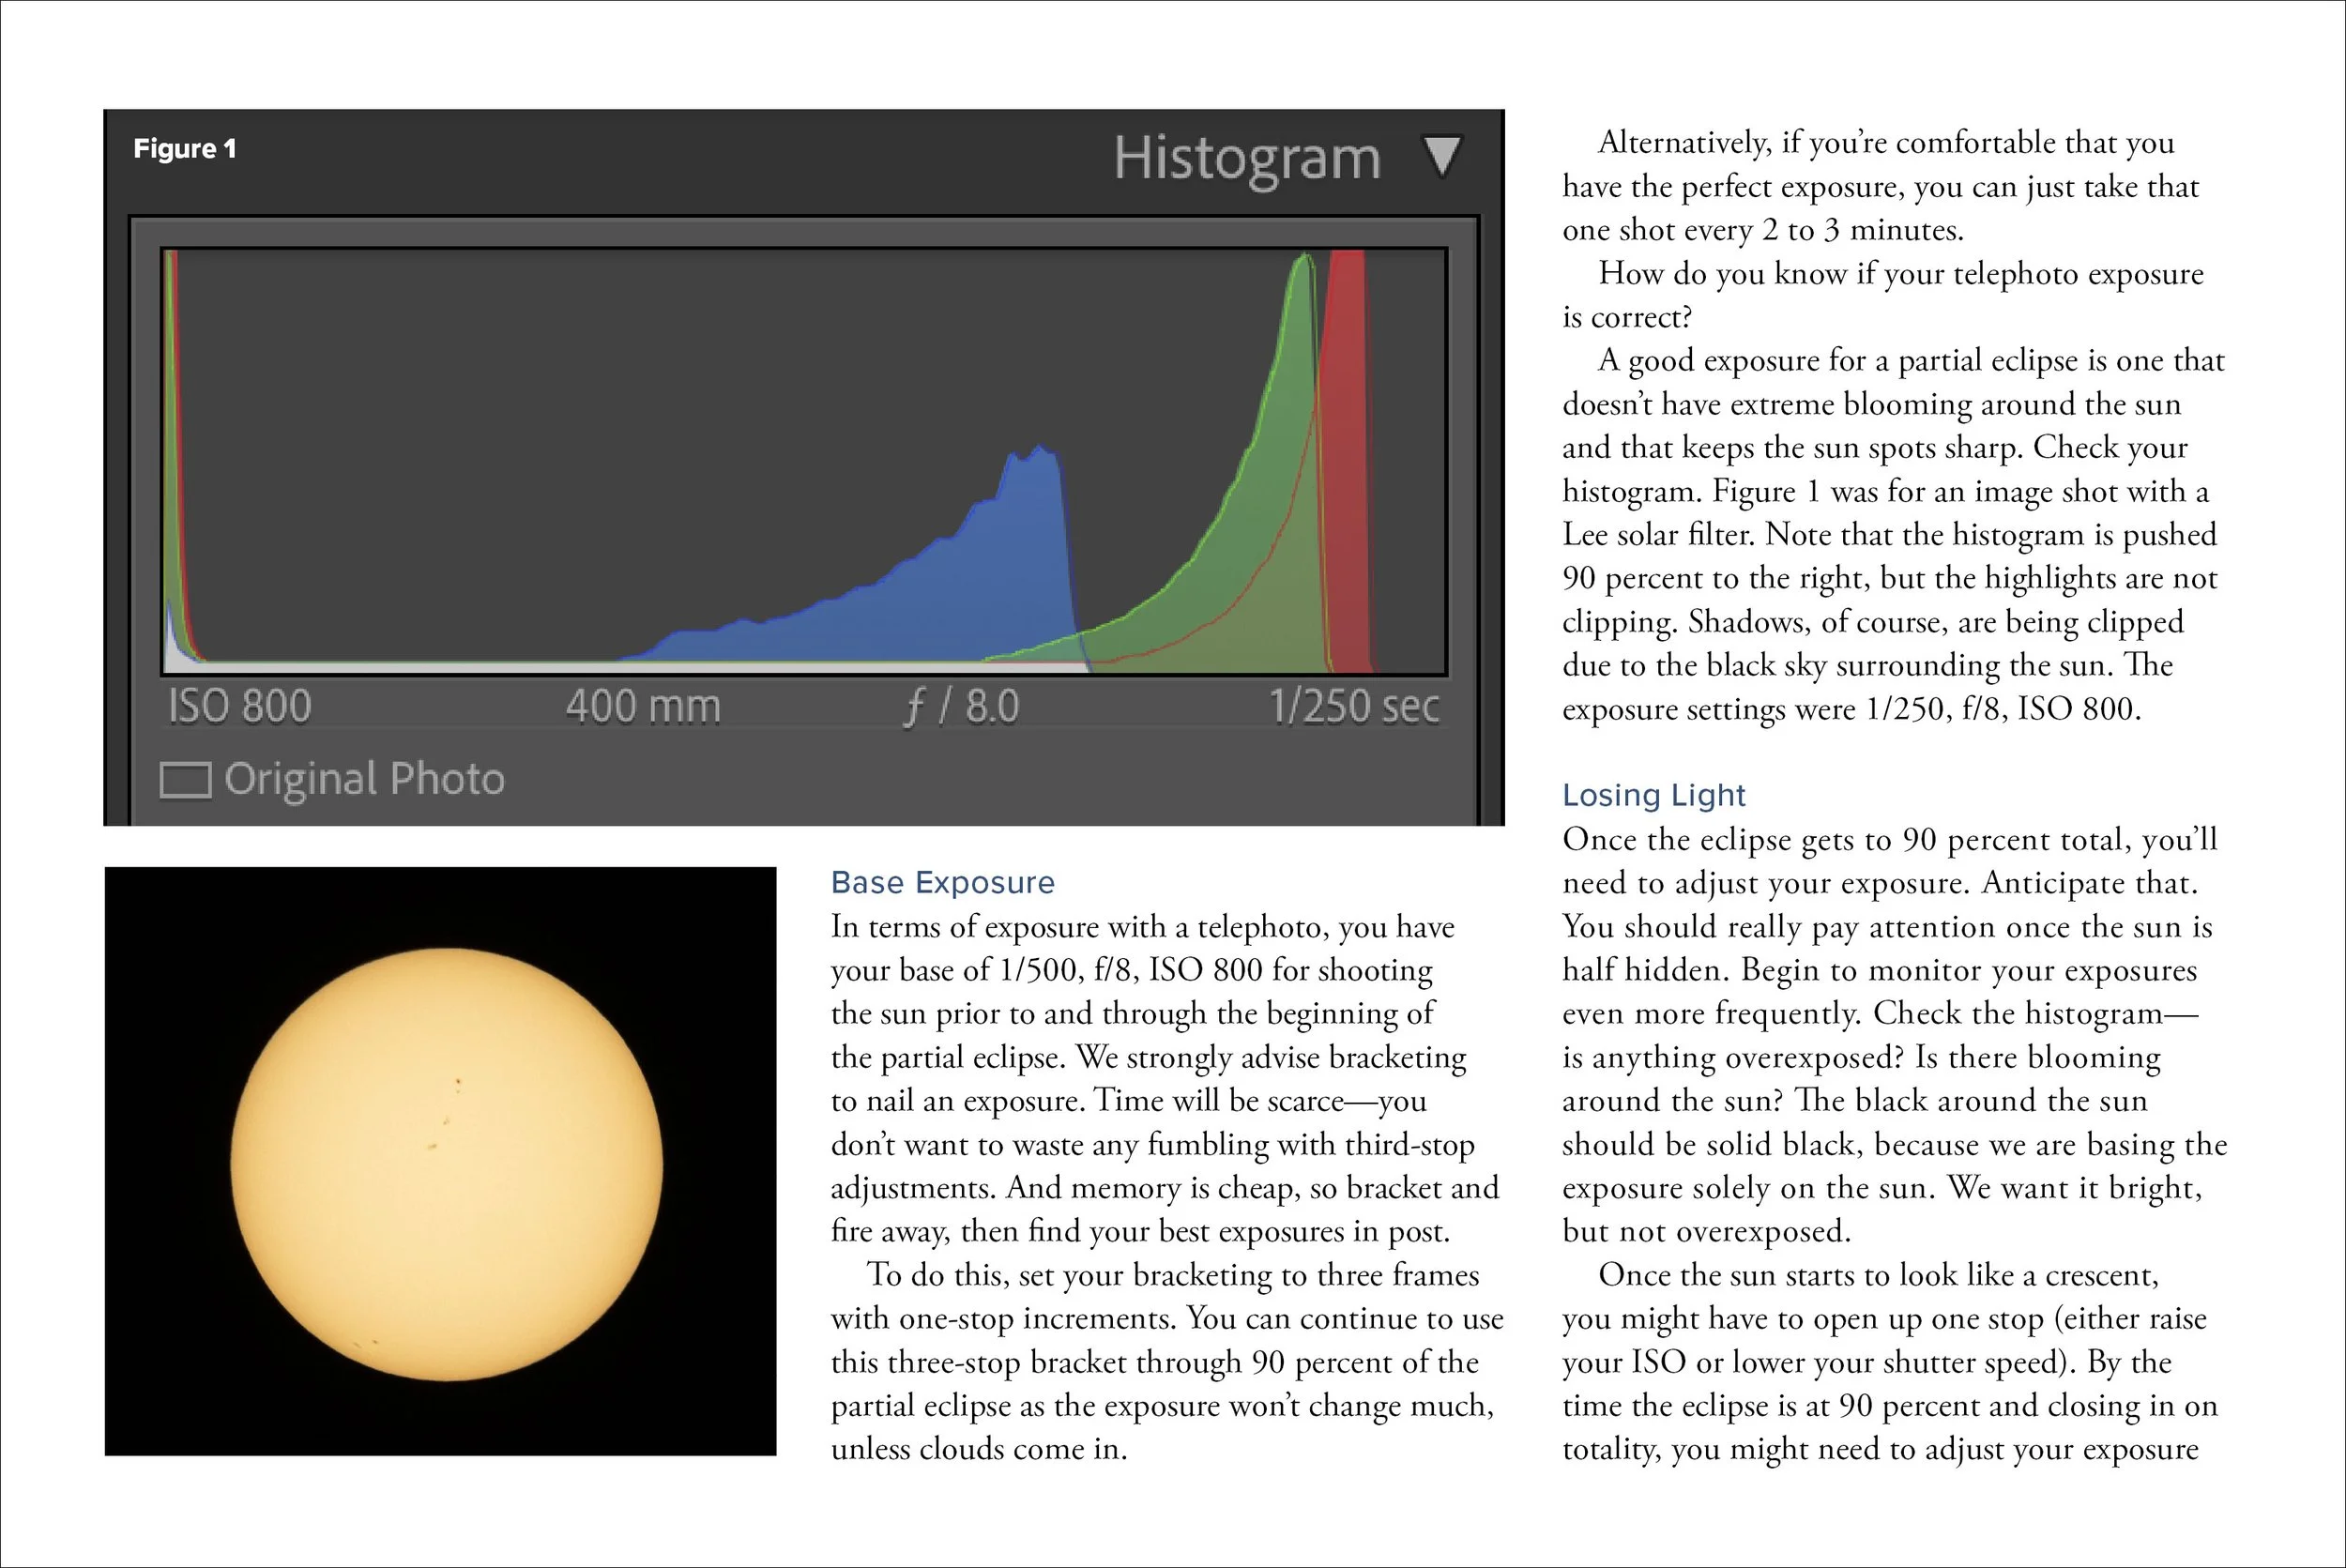
Exposure

Pay attention to shutter speed. The moon moves faster than it appears—a little less than 2,300 miles per hour. The moon moves the length of its diameter every 2 minutes.

This means that if your shutter speed is too long, the moon will blur. The wider your lens, the longer shutter speed you can get away with—even as long as 10 seconds or so. But with longer lenses, you’ll be limited to much shorter speeds.

Be ready to change exposure. The moon will get darker closer to the middle of the eclipse, so an exposure that looks good at 1:30 a.m. EDT will appear dark at 3 a.m., and your good 3 a.m. exposure will blow out the moon at 5:00 a.m. But you have to be careful about compensating for that loss of illumination by changing your shutter speed too much, lest your moon go soft from motion (see above). Therefore, during totality you’ll probably want to increase your ISO instead.

More Info

In the past we’ve written a few blog posts about lunar eclipse photography. Reading through them will offer a little more context about how to work this week.

When to Shoot the Eclipse

All phases of the eclipse will happen simultaneously for viewers across time zones. However, because your watches will be different, the times will be different. To that end, we offer the following guides for when to be out shooting, and for when to expect what. (Click to open, right-click to download.)

Atlantic Daylight Time (GMT -3)

Eastern Daylight Time (GMT -4)

Central Daylight Time (GMT -5)

Mountain Daylight Time (GMT -6)

Pacific Daylight Time (GMT -7)

Alaska Daylight Time (GMT -8)

Wrapping Up

We wish all of you great success in shooting for the moon this week! Please come back and share your photos with us. Share in the comments below, or on our Facebook page, or on Instagram (tag us @nationalparksatnight #nationalparksatnight #seizethenight). Be sure to tell a story too—the technical aspects, the challenge overcome, or a tale of the experience.

Chris Nicholson is a partner and director of content with National Parks at Night, and author of Photographing National Parks (Sidelight Books, 2015) and Photographing Lighthouses (Sidelight Books, 2025). Learn more about national parks as photography destinations, subscribe to Chris' free e-newsletter, and more at www.PhotographingNationalParks.com.

UPCOMING WORKSHOPS FROM NATIONAL PARKS AT NIGHT

Winter Wishes: Our 2024 Holiday Gift Guide

It’s a jolly holiday here at National Parks at Night, as we once again bring you our annual gift guide. Cameras and tripods, bags and swag, coffee and mugs, and other this’s and thats. We spend all year looking for gear that you and your photographer loved ones might delight in finding wrapped with a ribbon and a bow. Delivering the list is our gift to you.

Of course holidays, particularly the end-of-year ones, are about more than gifts. They’re about spending time with others, enjoying precious moments of life together. We wish you many of those.

We hope you enjoy perusing these pages, as you dream about winter wishes for long, quiet nights filled with stars and photography, and with good books and memorable fireside chats.

You can view the gift guide in two ways: you can read it in the blog post below, or you can download the full-experience Gift Guide e-book. We encourage the latter, as the e-book version:

  • is more graphical

  • has lots more pictures

  • contains some deals, discounts and specials


Acratech

Leveling Base

A leveling base that goes between a ball head and its tripod has been the top support-kit accessory for the team at National Parks at Night. We use it to create seamless stitched panoramas as well as to easily level a shot without adjusting a tripod leg. The Acratech Leveling Base is now a permanent fixture on our tripods.

Aeropress

Coffee Maker Premium

Most night photographers are coffee freaks (us included!), and Aeropress is our go-to method for ensuring we get our prescribed caffeine smooth and without bitterness while on the go. The latest model, the AeroPress Coffee Maker Premium, levels up this amazing product from simple and down-to-earth to fancy and elite. Handmade from double-wall borosilicate glass, stainless steel and anodized aluminum, it’s a work of art—a showstopper that turns the kitchen counter into an elegant coffee station. You won’t find another method this compact and reliable to make coffee … anywhere.

Asterisk*

National Park Watches

Five parks are uniquely featured in the National Park Inspired Collection of Asterisk* Watches, and three of them embrace the night. With these timepieces, auroras are in constant motion at Gates of the Arctic, Arches has a cool day/night feature that rotates around Delicate Arch, Hawaiʻi Volcanoes is a beautiful night scene with flowing lava to showcase the passing of time, Channel Islands depicts a sea lion diving among the kelp, and Olympic is a stunning daytime celebration of a gushing waterfall. Keep time and stay tuned in to nature.

B&H Photo

Gift Card

Giving a gift is never stressful when you have a photographer in your life, because a B&H Gift Card is always the perfect present. Always. It’s the gift of choice. Let your photographer (or videographer, musician or gamer) pick any camera, lens, computer or whatever new doodad, thingamabob or doohickey they may need. Of course B&H will have it—they are the world’s biggest and best resource for all photo, video and image-making needs.

Bay Photo Lab

Wall Display Print

A photograph isn’t truly finished until it’s printed, and our favorite place to print is at Bay Photo Lab. A great photo always looks greater when printed large, and Bay shines with those big sizes, from 16x24 to 45x80. Choose a Wall Display archival print, available in various mounts on various surfaces for a custom feel and maximum impact.

BenQ

PhotoVue SW272Q HDR Monitor

BenQ’s outstanding 27" PhotoVue SW272Q monitor is an ideal size for editing photographs. The 2560x1440 native resolution helps keep our digital imaging tools the right size (as opposed to 4K displays that can make them too small). Via a single USB-C cable, this monitor provides 90-watt power to a laptop, plus a fine-coated reduced glare panel and 99 percent of the Adobe RGB color gamut in a sleek bezel design.

Benro

Rhino Tripod with VX30 Head

For a steady, rock-solid tripod kit, look no further. Boasting a 44-pound load capacity, the Rhino Carbon Fiber Three Series Tripod with VX30 Head combo from Benro can hold long lenses and heavy bodies—yet it weighs only 4.5 pounds. The dial panoramic head allows for panning from the base—a simple solution for single-row panos. The stylish carbon fiber legs fold up travel-style and have three positions with an auto-hold trigger. Or combine one of the tripod legs with the center column to form a full-featured monopod.

Bookshelf

Various Authors

In a world where we carry the entire knowledge of humankind in our pockets, in many ways books are still king. We are big fans of national park and photography tomes, and here are a few of our recent favorites:

Calibrite

Photo Kit

Take control of color, from capture to edit. This new Photo Kit from Calibrite includes both the ColorChecker Passport Photo 2 target and the Display Pro HL colorimeter. The former helps a photographer create profiles and custom white balance settings for all their cameras (astro-modified included!), and the latter helps with keeping a monitor’s brightness and color consistent. Both are essential tools for getting to the good part—applying creative vision.

Cameras

Canon, Nikon & Sony

This past year we saw some of our favorite and most popular cameras get some serious upgrades. All of them are a gift well worth giving.

  • The 45-megapixel Canon EOS R5 Mark II upgraded to a back-illuminated sensor that significantly reduces noise at higher ISOs.

  • Nikon made a major revamp with the Z6III by adding a partially stacked sensor to improve their class-leading high ISOs. A new grip and articulating LCD also give the camera a much better ergonomic experience.

  • Sony’s flagship Alpha 1 II powerhouse improved ergonomics with a deeper grip and a four-axis multi-angle high-resolution LCD. Key features for a night photographer are focus bracketing, pre-release capture and three stops of improved image stabilization.

Chimani

Chimani Pro Subscription

One of our favorite scouting apps! Chimani provides access to loads of information about all 63 national parks and more, all written by local experts. With the Pro Subscription, get the lowdown about photo opportunities, maps, trails, services, lodging and more, all without needing a data connection in the field.

Copper Moon Coffee

Dark Sky Blend

Every night photographer needs a morning pickup, and Indiana-based Copper Moon Coffee offers a dark-sky lover’s dark drink of choice. In particular, check out the Dark Sky Blend, with its touch of sweetness without the acidity. It’s a medium-dark, full-bodied coffee containing notes of lightly charred cocoa, blueberry, plum and nuts. Available whole-bean or ground. (Also check out their Stargazer blend.)

DXO

Nik Collection 7

This famed plugin package has long helped photographers solve picture problems and curate creativity. The latest release, Nik Collection 7, features improved local adjustment technology with new elliptical and polygonal tools for more accurate selections, as well as new luminosity range masks that offer higher levels of precision. Add to that a new plugin switcher that lets you seamlessly transition between apps, as well as tons of other additions and tweaks, and this may well be the most robust upgrade Nik has ever gotten.

HangTime Gear

Koala Smartphone Harness

The 1.2-ounce Koala 2.0 Super-Grip Smartphone Harness can save you from disaster when out in the field, or at home. Clip or clamp it to a belt, backpack or any other place to help protect your phone from falling to the ground. Compatible with most phones with or without cases. Eight cool colors available. Comes with both clip and clamp attachments. The 50-pound capacity wildly exceeds any phone’s weight.

Irix

15mm f/2.4 Lens

Irix lenses are well known as a classic choice for astro-landscape photography due to their sharpness and minimal coma, and their 15mm f/2.4 is perfect for photographing big starry skies over nighttime landscapes. Irix lenses are weather-sealed and feature a fully manual focus with a stiff, confidence-assuring focus ring. The Blackstone version features an infinity detent and focus lock. The Dragonfly version has a clicked or smooth adjusting aperture ring. Available in Sony E, Nikon F, Canon EF and Pentax K mounts.

Junlit

Night Light

Traveling for night photography often means sleeping in new, unfamiliar places, and the last thing a night photographer needs during the few hours they can sleep is to bang a knee on a hotel dresser on the way to the bathroom. Junlit Night Lights are perfect for travel. They’re small and lightweight, so this four-pack is easy to stow in luggage. The lights have three brightness settings, which allows you to see while not ruining your night vision, and they have three white balance settings so you can avoid cool light disturbing your alpha waves.

KabukiGlasses

KabukiGlasses 4x13 HD

The hands-free and autofocus KabukiGlasses 4x13 HD are a great new twist on our old binoculars, useful for anything from birding to night skies. These universal and slightly steampunk binocular glasses come in three varieties: normal vision, slight nearsightedness and strong nearsightedness.

Ledlenser

P6R Work

The Ledlenser P6R Work has just the right combination of qualities for light painting. It has six modes, but the unique feature is that it is programmable, allowing the user to select their two favorite modes and then cycle between just those most frequently used settings. It also has a “last used setting” recall, so if you turn it off at low power, it comes back on at low power. With an industry-leading color rendering index (CRI) of 90 and a color temperature of 4000 K, it’s nearly the perfect light painting tool.

LifeStraw

Steel Filter Straw

The further a photographer travels from home, the less sure they might be about the water they drink—especially in the wilderness. The LifeStraw Sip Reusable Steel Filter Straw provides an easy solution for hydrating with confidence from almost any water source. Whether the concern is contaminated water from a foreign city or forest stream, this filtered straw will remove microplastics, bacteria and parasites before the sip hits the lips. The straw is reusable and lasts for up to 1,000 liters of drinking. Slim, lightweight and comes in a sleek case that’s easy to pack in a camera bag.

McIntosh Mugs

Starry Night Mug

One of the ultimate night sky images ever created wasn’t even a photograph (gasp!) but rather a painting. Painted on canvas in 1889, Van Gogh’s masterpiece is now available on this hardy 19.5-ounce fine bone china mug. With the Van Gogh Starry Night Grande Mug, enjoy beautiful art in the morning while drinking coffee and dreaming of the night.

MODL Outdoors

Infinity Tool Straps

The stretchy, colorful Infinity Tool 2.0 Modular Straps are so versatile, there are uses for them everywhere. We’ve added the glow-in-the-dark version to our backpacks and tripods to hold water bottles, intervalometers, light stands and more. Link multiple straps together to form a longer strap, and the grippy, 70-pound weight capacity keeps even heavyish gear from slipping. (Hint: Order extras, because friends and family will steal them.)

National Park Service

Annual Pass

National parks (as well as national monuments, national scenic byways, national preserves, national seashores, et al.) offer some of the best places for night photography. Not all have entrance fees, but many do. The National Park Service’s America the Beautiful Annual Pass gets you into all of them and more. Better yet, buying a pass supports the parks, as 100 percent of the proceeds go directly toward improving and enhancing visitor services.

National Parks at Night

Night Photography Adventure Workshops

Photographers love little more than being out in the world making photographs, and it’s all the better when we can do it with friends, both old and new. That’s where our Night Photography Adventure Workshops come in. Send someone on what may well be the trip of a lifetime, photographing stars in some of the world’s wondrous places. Tickets are currently available for the following adventures.

  • Photograph auroras during the solar maximum under the unparalleled night skies of Iceland’s North Coast (April 11-19, 2025).

  • Come to the Aloha State for 6 nights of shooting dramatic coastline, bamboo forests, volcanic landscapes and more in Haleakala National Park (June 9-15, 2025).

  • Head to Alabama to explore a remnant of the U.S. Industrial Age, with 3 nights of private access to Birmingham’s Sloss Furnaces (September 25-28, 2025).

  • Learn the ins and outs of Lightroom and Photoshop at our Post-Processing Intensive workshop in Chicago (October 26-31, 2025).

Instructor Books

For national park and night photography knowledge, browse the books written by members of the NPAN team.

Night Photo Summit

Virtual Conference Ticket

Over the winter weekend of January 24-26, 2025, over 300 photographers from across the United States and around the world gather virtually for the Night Photo Summit, three days of night photography education and inspiration. Over 30 speakers will engage with a passionate and dedicated audience with presentations that range from fundamentals to mid- and high-level post-processing, specialties such as auroras and light painting, and general topics such as dark sky preservation, astronomy, national parks and more. Attendees banter in chats and converse in networking rooms, and can win any of over $10,000 of giveaways during virtual parties. Tickets go on sale December 14.

Novoflex

KOPF2-Basic Geared Head

Ideal for exacting work, the KOPF2-Basic Modular Geared Head from Novoflex allows for micro-adjustments via a geared mechanism on two axes. The German engineering astounds—it is lightweight, strong and gosh it looks great on a tripod. The base features a locking panoramic motion and the top includes a quick-release clamp. This is certainly one the most drool-worthy tripod heads we have ever used. Also excellent for single-row panoramas and macro photography.

Palmly

Cosmic Orb

Bring home the cosmos with a laser-engraved crystal Cosmic Orb ball that can be used as a nightlight or lamp. Choose from the celestial scenes of Saturn, Galaxy, Solar System, Earth, Moon or Universe. The illumination comes from the base light, which can be run on AA batteries or plugged in via USB (power brick not included). Once turned on, the stars will shine brightly in the comforts of home.

PhotoPills

Danger Clouds! T-Shirt

We’ve all been there: ready for a great night of shooting stars, and we get outside to see the dreaded cloud cover. Show a healthy wariness of bad weather with a PhotoPills Danger Clouds! T-Shirt, comfy to wear indoors while waiting for the perfect night skies to appear—tomorrow!

ProGrade Digital

CFexpress Gold Memory Card

Night photographers who shoot loads of captures for time-lapses and star trails are sure to benefit from the 512 GB CFexpress 4.0 Type B Gold Memory Card from ProGrade Digital. This card provides read speeds of up to 3400 MB/s (which helps to quickly offload celestial sky image files to a computer) and write speeds of up to 3000 MB/s. ProGrade is our go-to memory card for reliability and speed. Their Gold cards have a minimum sustained write speed that is guaranteed not to drop below 850 MB/s.

Robert Decker

National Park Posters

Artist Robert Decker designed a massive and stunning collection of fine art National Park Posters that echo the WPA (Works Progress Administration) era of the 1930s and 40s. He has all the printed posters in Colorado with soy-based inks on “Conservation,” a recycled, domestically produced paper stock. Choose from among the 98 posters that Robert created to celebrate America’s greatest idea.

Shimoda

Carry-On Roller V2

Ideal for fitting into overhead luggage bins on an airplane, the Carry-On Roller V2 from Shimoda is a traveler’s best friend. If you want to get the gear off your back while traversing the airport, pull the internal camera unit out from the backpack and drop it right into this rolling bag. Or, pack that way from the get-go and stow the empty backpack in a suitcase to use once on location. Or just use it like any other rolling bag! The massive wheels are nearly indestructible, sure to get any photographer and their gear from Point A to Point B and beyond.

Spencer’s Camera

Astro Modification

To make images that have the “true” colors of bright reds and magentas in the night sky, consider getting a camera “astro modified.” This Astro Modification process can be confusing, and perhaps daunting, but the staff at Spencer’s Camera takes all the anxiety away and makes the process simple. They also provide advice and guidance, plus accessories for using the newly modified gear.

Tahr Equipment

Cap Strap

This goes under the category of “How did no one think of this before?” The Cap Strap is a strong metal ring that threads onto a Nalgene bottle so you can carry or hang it without stressing (and eventually breaking) the plastic cap tether that came with the bottle. Use your own carabiner or purchase one with the Cap Strap to connect it to a backpack strap, belt, tent and more. Stop stressing, hydrate more.

Uncommon Goods

National Park Explorer’s Fanny Pack

It might be hard to believe, but fanny packs are back! Whether they are worn across the shoulder like a sling or in their intended fanny spot, they make carrying essential hiking gear such as water and snacks super easy. Join the rejuvenation and celebrate your love of public lands with Uncommon Goods’ National Park Explorer’s Fanny Packs. They come in eight bright and bold national park designs for Glacier, Grand Canyon, Grand Tetons, Joshua Tree, Rocky Mountain, Yellowstone, Yosemite and Zion.

Venus Optics

20mm f/4 Shift Lens

When we’re photographing a night sky, we’re always looking up—because, ya know, that’s where the sky is! The downside of looking up is that it creates perspective distortion in an image. Oftentimes that’s irrelevant, but it can be disruptive when photographing buildings, lighthouses, tall trees, giant cactuses, etc. The fix is to shoot with a shift lens, such as the Laowa 20mm f/4, which offers crystal-clear images free of perspective distortion with nearly nonexistent comatic aberration. Level up by shifting up!

Wander Club

National Park Tokens

Admittedly we stamp, sticker and collect lots of ephemera from the places we visit. The Wander Club U.S. National Park Tokens give us another fun way to celebrate and showcase the parks we’ve been to. These beautiful color pieces look wonderful on the company’s new Wanderchain, which can hold 35 tokens. You can also roll into a park with extra tokens and give them away to first-time park visitors. A great gift for kids to start getting excited about visiting more of our national wonders.

Wondery Outdoors

Bucket List Bottle

The Parks of the USA Bucket List Bottle holds 32 ounces and comes in a variety of colors to keep our water cold on all the hikes. But the real fun is stickering. All 63 national parks are etched around the bottle. Once you’ve visited a park, place the color sticker over the etching. It’s a super-fun way to stay hydrated while checking off those parks.

ZWO

Seestar S50 Telescope

One of the coolest things we saw at the 2024 Nightscaper Photo Conference was the Seestar S50 All-in-One Smart Telescope. Tell the app which celestial object you want to capture and it sends the celestial coordinates to the telescope. Easy to set up, effortless to use.


Note: Remember, this gift guide is also available as a free downloadable e-book, with lots more photos and a ton of discount codes. Download yours today by clicking the image below.

Chris Nicholson is a partner and director of content with National Parks at Night, and author of Photographing National Parks (Sidelight Books, 2015) and Photographing Lighthouses (Sidelight Books, 2025). Learn more about national parks as photography destinations, subscribe to Chris' free e-newsletter, and more at www.PhotographingNationalParks.com.

UPCOMING WORKSHOPS FROM NATIONAL PARKS AT NIGHT

Eleven Eclipses: Following Our Friends in the Path of Totality

Here we are. After waiting for it to come for years, the week of the Great North American Eclipse is now over.

Four of the five of us at National Parks at Night enjoyed the few minutes of darkness. I was with my daughter Maggie on an eclipse-chasing road trip to eastern Kentucky. Lance was with his wife Katherine in their backyard in Vermont. Matt and Gabe were leading our workshop in Arkansas’ Hot Springs National Park.

In the days that followed, we looked around social media and saw so many wonderful and creative images made during that 4 minutes of magic, set in so many inspiring places along the path of totality. And we noticed that many of those photographs were made by former attendees of our workshops and conferences. Really—the work we’ve seen has blown us away.

So we decided that instead of celebrating our own eclipse images, we want to celebrate theirs.

Below you’ve find eclipse photographs and eclipse stories from 11 of the amazing night photographers we’ve had the pleasure of working alongside over the past decade. We hope you enjoy their art.

Of course, these aren’t all the photographs created by our alums, nor by the uncountable number of night photographers around the globe. So many images are still showing up on social media, and we applaud them all.

If we missed you in the celebration below, please add your photo and your story to the comments section, or on our social media. We’d love to see what you did!


Charles Barker

cbarkerphoto.comInstagram

Nikon Z 9 with a Nikon Z 100-400mm f/4.5-5.6 lens at 400mm. Composite of exposures from 1/800, f/8, ISO 800 (phases) to 1/60, f/22, ISO 800 (totality).

I went to Cuyahoga National Park in Ohio. I approached this without full awareness of just how special this experience would be. I planned for this event, spent lots of time listening to others describe it, I’d seen pictures and thought I knew what I was about to see. Yet, as the moment of totality arrived, I was still astonished, startled and in awe. Staring at the dark sphere where the sun should be, I realized I’d taken the sun for granted my entire life. The collective gasp and applause of other park-goers nearby reminded me that we were all sharing this amazing moment, and it was one none of us would ever forget.

Ed Finn

Instagram

Fujifilm X-T5 with a Fujifilm XF 8-16mm f/2.8 lens at 15 mm. Composite of 35 frames shot at 1/40, f/5.6, ISO 400.

I shot this in Lake Placid, New York. We drove there Friday through a snowstorm, and it snowed all day Saturday as well, with solid thick clouds. We scouted the area for the best shot on Sunday. The eclipse was high in the sky Monday, which made finding an interesting foreground a challenge. At the back of the hotel we were staying in I could frame the shot through some trees, with mountains behind. The area filled with people from the hotel and the neighborhood to see the eclipse, and we were pleased that the snow stopped and the clouds lightened by showtime for the eclipse tailgate parties.

Holly Looney

ourworldinphotos.com

Canon R3 with a Canon RF 100-500mm f/4.5-7.1 lens at 400 mm. Composite images shot at 1/500, f/8, ISO 1600.

I shot this in Ouachita National Forest in Hot Springs, Arkansas, as part of National Parks at Night’s Hot Springs and the Total Eclipse workshop. I did this composite because I was struck by the number of onlookers who left the area following the end of totality. That was definitely not the end of the eclipse and this is a visual of that fact.

James Embrescia

Sony a1 with a Sony 200-600mm f/5.6-6.3 lens.1/500, f/8, ISO 800, shot at intervals of 1 minute, 20 seconds intervals.

I just took the online black and white workshop with by Tim and Lance, so I wanted to try a black and white picture of the eclipse. I like photos that capture abstract patterns and the motion of natural things, so this was a natural for me. I picked an interval I thought would work based on something I read about speed of motion during an eclipse, and I was lucky.

Jurgen Lobert

Linktree

Sun images: Nikon Z 6II with a Nikon Z 180-600mm f/5.6-6.3 at 600 mm. 1/180, f/8, ISO 100. Foreground: Nikon Z 6II with a Sony 14mm f/1.8 lens at 1/2, f/11, ISO 200.

After planning for Texas because of less chance for clouds, I cancelled my trip on short notice to escape the tornado warnings and rain forecast, and I ended up near Pittsburg, New Hampshire, on a perfectly clear day with a bunch of friends. I decided to stress myself out and operate three cameras, one for closeups, one for landscape and another for a 360-degree view with a circular fisheye to capture that awesome moment with darkness above and sunset all around.

Klaus-Peter Statz

Instagram

Totality: Nikon D780 with Nikon 200-500mm f/5.6 lens at 400mm. 1/160, f/8, ISO 400. Foreground: Sony RX100V at 24mm (built-in lens). 1/30, f/1.8, ISO 500.

After shooting the 2017 eclipse (also during a National Parks at Night workshop, in Idaho) and missing most of the spectacle as I was busy operating two cameras, I vowed that this time I would shoot only the corona and would spend the remaining time watching the eclipse with my own eyes. When totality happened I had my Nikon shoot bracketed close-up exposures, triggered with a remote release. Watching the eclipse I was so impressed by what I saw that I spontaneously snapped a few frames with my trusted Sony point-and-shoot, one of which serves as the foreground for this composite. The sun/moon at totality is one of the frames shot with the Nikon at 400mm. The two together are the perfect representation of what I saw and experienced.

Lawrence Lee

Instagram

Pentax K-1 Mark II with a Pentax 150-450mm f/4.5-5.6 lens at 410mm. 1/2500, f/8, ISO 800.

This was my first total solar eclipse experience and it was truly amazing. Shot in Lake Placid, New York, at the Olympic Ski Jumping Complex. We had spent the weekend scouting locations and chose this spot for its easily identifiable ski jumping towers. I shot the eclipse with two cameras using the 150-450mm telephoto lens and a 15-30mm lens.

Patricia Blake

Instagram

Sun images: Canon 5D Mark IV with a 200mm lens. 1/800, f/6.3, ISO 1600 during totality, plus bracketed exposures with a NiSi Solar Filter Pro Nano UV/IR Cut ND during the other phases. Foreground: Canon 60D with a 14mm fisheye lens. 1/6, f/8, ISO 1600.

The 2024 eclipse happened to go right over my hometown in New Castle, Indiana. I just knew that I wanted to get a shot of the eclipse phases over a historic Indiana barn. This beautiful barn was built in 1860 and happens to be owned by an astrophysicist who was thrilled to have a night sky nerd like me ask if I could sit in his empty cornfield during the eclipse. I made some wonderful new friends and truly enjoyed photographing. Getting muddy in a cornfield was absolutely worth it!

Shari Hunt

sharihuntphotography.comInstagram

Sony a7R III with a Sigma 150-600mm f/5-6.3 lens. 1/250, f/6.3, ISO 100.

I was initially going to chase clear skies, but decided the day before the eclipse to stay in Dallas. With heavy low clouds most of the morning (even just an hour before totality), I thought it would be a total bust. However, I met fellow National Parks at Night alum Beth Kochur at our nearby lake and set up, with fingers crossed. Everything turned out perfect just in time and the eclipse was insane. Now I understand the addiction (kinda like night photography).

Sudhir Mehta

Instagram

Sony a7R III with Sony 100-400mm f/4.5-5.6 lens at 400mm. Composite of totality pictures shot at shutter speeds ranging from 1/200 to 2 seconds, f/11, ISO 200.

I shot the eclipse while on the National Parks at Night workshop to Hot Springs National Park. This was shot in Charlton, near Hot Springs, Arkansas.

Terry Kahler

tkahler.comInstagram

Sony a7 IV with a Sony 200-600mm f/5.6-6.3 lens. 1/160, f/6.3, ISO 800.

I shot in Austin, Texas. I wasn’t too excited about this event as photographing the solar eclipse is not part of my bucket list. As a result, I was not prepared. My camera gear sat on the shelf as it has for months. At about 1:13 p.m. local time, even though we had very cloudy skies and I had only minutes to prepare, I decided that I should get myself in gear and prepare to photograph the event just in case conditions improved. So I got up from my desk and retrieved my camera gear only to note that the batteries were depleted. However, I found one battery with a 47 percent charge. I inserted the battery in the camera, mounted my lens and headed out to photograph this astronomical event. Right place, right time.

Your Turn

Did you shoot the eclipse too? We’d love to see your images! Share in the comments below, or on our Facebook page, or on Instagram (tag us @nationalparksatnight #nationalparksatnight #seizethenight). Be sure to tell a story too—the technical aspects, the challenge overcome, or a tale of the experience.

Chris Nicholson is a partner and director of content with National Parks at Night, and author of Photographing National Parks (Sidelight Books, 2015) and Photographing Lighthouses (Sidelight Books, 2024). Learn more about national parks as photography destinations, subscribe to Chris' free e-newsletter, and more at www.PhotographingNationalParks.com.

UPCOMING WORKSHOPS FROM NATIONAL PARKS AT NIGHT

From Beginning to End, How to Expose a Solar Eclipse

It’s almost here! The Great North American Eclipse happens only two days from now, on April 8, 2024.

Much of America—especially the camera-owning folk—has been waiting for this day since being dazzled in 2017 by the last total eclipse to span the continent. The hype is real, and the reason is good.

To help folks get ready, last week we published a brand new e-book, There Goes the Sun: A Guide to Photographing a Solar Eclipse. Below is an excerpt from that book.

The book covers pretty much everything you’d want to know about photographing an eclipse, from gear to scouting, from shooting to editing, and more. The excerpt below is from the chapter on shooting. We hope it gives you an edge toward getting some great images on Monday.


THE SUN’S MOVEMENT

The sun moves its own diameter every 2 minutes. Setting a shooting interval for every 2 minutes will make sure that you capture many phases of the eclipse without any overlap. Gabe stacked the accompanying eclipse photo with a frame shot every 3 minutes, which gave enough separation between each shot.

Note that without a tracker to keep the sun in the middle of the frame during all the phases of the eclipse, you will need to readjust your frame every 10 minutes with a 300mm lens or every 5 minutes with a 600mm lens.

Eclipse composite. © 2017 Gabriel Biderman. Nikon D750 with a Nikon 14-24mm f/2.8 lens. 13 images stacked in Photoshop.

CAMERA SETTINGS

Settings are very subjective. Just like any day or twilight shot, you can be creative with adjusting your exposure for a desired effect that emphasizes movement, clarity or depth.

Also note that the exposure can vary depending upon your filter strength, clouds in the sky and how high the sun is (eclipses that happen low to the horizon will need to cut through more atmospheric haze, which reduces luminosity).

Your exposure will change as the eclipse progresses, and further on in we’ll detail what you can expect, in chronological order.

We suggest reading through it a few times to get comfortable with how the light, and therefore your settings, will change over the course of a few hours.

A good starting point for exposing for the sun, with a solar filter on the lens, with clear skies, is:

1/500, f/8, ISO 800

Why these settings? These are safe settings that will play to the strength of most cameras and lenses for excellent image quality. Let’s explain why:

Aperture

An aperture of f/8 is the sweet spot for most lenses and will not cause extreme diffraction or flare. If you are using a telephoto lens, stopping down to f/11 would also work and be more in the sweet spot.

Shutter Speed

The general rule for handheld telephoto photography is to use a shutter speed that’s the reciprocal of your focal length. For example, for a 500mm lens the shutter speed would be at least as fast as 1/500. Theoretically this prevents the image from getting soft due to camera movement caused by heavy gear.

That said, we recommend that you use a tripod and turn off VR/IS/OIS for the eclipse. This will make any relatively fast shutter speed effective. We’ve shot totality at as low as 2 seconds as part of exposure brackets to get even more detail in the corona. However, during the partial phases the sun will be brighter and we can play to the safer shutter speeds between 1/125 and 1/1000 to the best sharpness. Even at fast shutter speeds, with long lenses, try to trigger your camera with your built-in or external intervalometer—this will help prevent any camera shake.

ISO

This is probably the most subjective choice. How comfortable are you shooting with your camera at ISO 800, 1600, 3200 or 6400? If there are ISOs you want to stay away from, you can probably pull that off. This will be easy during the partial phases, as the bright sun will easily allow for ISOs of 100 to 800.

However, once the eclipse is 90 percent full, things start to get dark. During totality the brightness will be equivalent to the beginning of nautical twilight. There will be a need to let in more light, and ISO is usually the best setting to push up.

Note that the higher the ISO, the more noise will be prevalent in the image. However, we find that modern cameras (2020 and beyond) can easily handle ISOs up to 6400. Plus, these days there are plenty of ways to reduce noise with post-processing.

TELEPHOTO SHOT

Gabe Biderman set up for a telephoto shot of the 2023 annular eclipse.

A telephoto shot will be taking up most of your attention.

Focal length and tracking are the key components to photographing the eclipse with a telephoto lens.

Another important aspect is to practice, practice, practice prior to the eclipse. Most likely a telephoto rig will be less familiar than what you use on a daily/weekly basis. Get used to tracking the transit as well as pointing the camera and lens high in the sky.

Does your camera have a swivel-out screen? That will make aiming high at the sun a lot easier.

If you don’t use a tracker, you will need to continually recompose, or the sun will move out of your frame in mere minutes. If do use a tracker, keep an eye on it and make sure it doesn’t flip and fall over. Definitely practice this in the months/weeks leading up to the eclipse.

Base Exposure

In terms of exposure with a telephoto, you have your base of 1/500, f/8, ISO 800 for shooting the sun prior to and through the beginning of the partial eclipse. We strongly advise bracketing to nail an exposure. Time will be scarce—you don’t want to waste any fumbling with third-stop adjustments. And memory is cheap, so bracket and fire away, then find your best exposures in post.

To do this, set your bracketing to three frames with one-stop increments. You can continue to use this three-stop bracket through 90 percent of the partial eclipse as the exposure won’t change much, unless clouds come in.

Alternatively, if you’re comfortable that you have the perfect exposure, you can just take that one shot every 2 to 3 minutes.

How do you know if your telephoto exposure is correct?

Figure 1.

A good exposure for a partial eclipse is one that doesn’t have extreme blooming around the sun and that keeps the sun spots sharp. Check your histogram. Figure 1 was for an image shot with a Lee solar filter. Note that the histogram is pushed 90 percent to the right, but the highlights are not clipping. Shadows, of course, are being clipped due to the black sky surrounding the sun. The exposure settings were 1/250, f/8, ISO 800.

Losing Light

Once the eclipse gets to 90 percent total, you’ll need to adjust your exposure. Anticipate that. You should really pay attention once the sun is half hidden. Begin to monitor your exposures even more frequently. Check the histogram—is anything overexposed? Is there blooming around the sun? The black around the sun should be solid black, because we are basing the exposure solely on the sun. We want it bright, but not overexposed.

Once the sun starts to look like a crescent, you might have to open up one stop (either raise your ISO or lower your shutter speed). By the time the eclipse is at 90 percent and closing in on totality, you might need to adjust your exposure by opening up an additional one to two stops. Monitor your histogram and continue to bracket three frames at one-stop increments.

Diamonds in the Sky

Right before totality, the first diamond ring phenomenon appears: a sharp burst of light around the edge of the moon that signals the last gasp of sunlight before totality begins (Figure 2). The first diamond ring is difficult to photograph because it lasts for approximately 10 seconds and you need to juggle a few things. First you need to remove your solar filter (perhaps remove it a few seconds early, anticipating when it will happen), then you need to adjust your exposure to the light without the solar filter on (which will be an additional two to three stops you need to let in).

Don’t sweat it. The diamond ring also happens at the end of totality, so you’ll get another chance. And it’s much easier to nail the second one.

Figure 2. Diamond ring phenomenon. © 2017 Gabriel Biderman. Fujufilm X-T2 with a 300mm lens. 1/15, f/22, ISO 800.

Totality

A good starting point for totality is:

1/60, f/8, ISO 1600

However this is just a launching off point. We advise bracketing seven frames with one-stop increments. If you are in burst mode, you can knock these off pretty quickly.

Bracketing generally is applied to your shutter speed, so set your ISO and aperture to something you are comfortable with and that also allows the bracket to not go deep into long shutter speeds (in the seconds).

That being said, we have seen plenty of creative shots during totality that use either HDR or composite blending to incorporate shutter speeds up to 20 seconds. These overexposed shots will really show off how far the corona extends. If you bracket, you can retain some of the brighter highlights and then blend it all together in post.

Post-Totality

If you had set a timer to the beginning of the eclipse, then you’ll be one step ahead in preparing for the second diamond ring effect. Stop down your aperture to f/16 for the diamond ring, as that will amplify the sunburst coming off the moon. You’ll have about 10 to 15 seconds to bracket and nail the diamond ring before too much of the sun is revealed and starts to just blob out.

That’s when it is time to put the solar filter back on and adjust your exposure to a crescent sun. Set your interval for every 2 minutes and adjust your exposure as the sun gets brighter and brighter. Soon you’ll be around the previously recommended exposures of 1/500, f/8, ISO 800, and you can just continue to bracket three frames for every interval. Continue to do this for the rest of the partial phases.

Figure 3.

If you do this you’ll set yourself up to accomplish:

  • capturing any single phase of the eclipse

  • capturing multiple phases of the eclipse that can be composited together creatively (Figure 3)

  • an HDR of your bracketed images to bring out more detail and dynamic range

  • a time-lapse of the eclipse (if you shot even more intervals—this is recommended more for people with trackers that will keep the sun steady in the middle of the frame)


Are You Ready for the Eclipse?

Eclipse photography is a ton of fun, but you need to be prepared. In addition to the details about planning exposures, our e-book also covers:

  • gear critical for eclipse photography

  • safety guidelines

  • finding where the sun will be

  • how to use the light of the eclipsed sun

  • processing eclipse photos, including blending and compositing

  • how to become an eclipse chaser

  • and more!

To get your copy of There Goes the Sun, click below:

Wrapping Up

When you’re done shooting the eclipse, we’d love to see your images! Share in the comments below, or on our Facebook page, or on Instagram (tag us @nationalparksatnight #nationalparksatnight #seizethenight). Be sure to tell a story too—the technical aspects, the challenge overcome, or a tale of the experience.

Chris Nicholson is a partner and director of content with National Parks at Night, and author of Photographing National Parks (Sidelight Books, 2015) and Photographing Lighthouses (Sidelight Books, 2024). Learn more about national parks as photography destinations, subscribe to Chris' free e-newsletter, and more at www.PhotographingNationalParks.com.

UPCOMING WORKSHOPS FROM NATIONAL PARKS AT NIGHT

Black Hole Sun: Get Ready to Shoot the 2024 Eclipse with Our New E-Book

It certainly seems like we are living in a golden age of eclipses.

When we started National Parks at Night in 2015, we were in the middle of a rare tetrad of blood red lunar eclipses. We experienced the 2017 total solar eclipse in a variety of ways, with Gabe and Matt leading hands-on experiences in Idaho and Oregon, respectively, and me sitting on a blanket with my daughter in South Carolina.

Then in 2023 we seized our first ring of fire eclipse with a group trip to Capitol Reef National Park, and with another group learning PhotoPills at the edge of the eclipse path in Joshua Tree National Park.

Then we prepared for the next big one: the Great North American Eclipse of 2024. It’s happening this coming Monday, April 8.

To help get you prepared, we’re excited to announce our brand new e-book, There Goes the Sun: A Guide to Photographing a Solar Eclipse.

What’s in the Book

The book comprises 66 pages and is chock full of everything you’d want to know about shooting an eclipse. Including:

  • a history of eclipses

  • a list and explanations of the gear required

  • notes on eye and gear safety

  • results on testing different solar filters and their affect on color

  • detailed instructions on scouting, shooting and processing

  • a gear guide for all sorts of products to help in the cause

  • and more!

Sample Pages

Sample Tips

Here are three tidbits on eclipse photography that you can find in the book:

  1. “If you manually follow the eclipse with a long lens, it’s a good plan to allow room for the sun to travel across your frame for some time and then readjust your framing when it nears the edge. This does, however, require attention to your camera throughout all the phases you will be photographing.”

  2. “The sun moves its own diameter every 2 minutes. Setting a shooting interval for every 2 minutes will make sure that you capture many phases of the eclipse without any overlap.”

  3. “For everything except totality images, you can probably edit one to taste and then synchronize that image with the rest. But for your frames close to or during totality, which you shot at different exposures, you’ll need to edit them separately to get them to match.”

Get Your Copy Today

Whether you’re new to photographing eclipses and need to know where to start, or whether you’ve done this before and want to level up, we have you as covered as a black-hole sun!

Get your copy of There Goes the Sun for $9.99 today by clicking below:

Then, when you’re done shooting the eclipse, we’d love to see your images! Share in the comments below, or on our Facebook page, or on Instagram (tag us @nationalparksatnight #nationalparksatnight #seizethenight). Be sure to tell a story too—the technical aspects, the challenge overcome, or a tale of the experience.

Chris Nicholson is a partner and director of content with National Parks at Night, and author of Photographing National Parks (Sidelight Books, 2015) and Photographing Lighthouses (Sidelight Books, 2024). Learn more about national parks as photography destinations, subscribe to Chris' free e-newsletter, and more at www.PhotographingNationalParks.com.

UPCOMING WORKSHOPS FROM NATIONAL PARKS AT NIGHT