Five Questions

Five Questions: Holiday Lights, Metal Prints, a Southern National Park and More

‘Tis the season of giving. You’ve given us questions, and we’re giving you answers. Unwrap below.

This special holiday installment of our “Five Questions” series features inquiries about photographing Christmas lights, choosing a surface for metal prints, Congaree National Park, Irix and Sony lenses, and how Lightroom affects raw data.

If you have any questions you would like to throw our way, please contact us anytime. Questions could be about gear, national parks and other photo locations, post-processing techniques, field etiquette, or anything else related to night photography. #SeizeTheNight!

1. Dashing Through the Holiday Lights

Question:

I’m hoping you can solve a mystery for me and my photography students. When they created a zoom-blur photo of holiday lights, some streaks were solid and some were dotted. None of the lights appeared to be blinking. So does this have to do with the cycling of new LED lights? The exposure times were 1 second or longer, which I would think would be long enough to compensate for flicker. What’s the solution to get solid lines, if we can? — Kathy E.

This is one of the photos Kathy E. is asking about. Click on the image to view the photo larger and see full the effect. © 2022 James Steele. Nikon D7500 with a Nikon 70-300mm f/4.5-6.3 lens. 1 second, f/11, ISO 200.

Answer:

The intensity of LED lights is controlled by increasing or decreasing the frequency of their flicker. What you’re seeing is a result of that.

We almost never see this effect with photo/video lights because the manufacturers know about shutter speeds and they keep the frequency much faster than any shutter speed that photographers would conceivably use. However, with cheap light sources, like Christmas lights, the manufacturers don’t care; the lower refresh rate of the LED pulsing will be captured by the camera.

So, in short, the lights were blinking—faster than the eye could see, but not the camera’s eye. If you see that some lines are dotted and some aren’t, that means that the lights were cycling at different rates—some fast enough for the shutter speed, and others too slow.

To keep the lines from becoming dotted during a zoom-blur, I would try zooming more slowly during a longer exposure. (Stop down everything, and maybe even add a neutral density filter.) That way the light will have more time to burn into the pixels while they’re pulsing during your zoom. — Matt

Note: For more about how to photograph holiday lights, see Gabriel Biderman’s post “Seize the Season.”

2. Metal Mettle

Question:

What finish do you recommend for metal prints of astro photos from Bay Photo Lab? — Alan A.

When hanging a metal print opposite a window, consider avoiding a high-gloss surface, as the window light will cause glare. High-gloss prints are best hung at a 90-degree angle from a window.

Answer:

This is a very subjective question with answers that depend on two main factors:

1.       What is your personal taste?

2.       Where will the print hang?

I feel that most of my night images benefit from being printed on a more luminous surface. For metal, I tend to print on high-gloss surfaces. Lance prefers the mid-gloss option. My wife prefers my work printed with a satin finish because glare really annoys her. So as you can tell, personal taste can vary from person to person!

However, understanding what each finish can bring to your space—and how it’s affected by your space—is also key. If you are going to hang a print directly across from a window, then satin might be your best option as you’ll want to have minimal glare. I tend to hang most of my prints at a 90-degree angle to the windows, where even high gloss shows little to no glare.

Bay Photo recently announced their Performance EXT coated metal surfaces, which have additional coatings to extend print life in direct sunlight or outdoors. This addresses another important factor: Most of my images are in a bright room, and my oldest Bay Photo metal prints are 5 years old and show no signs of fading. I recently replaced some metal prints from another printer—those were around the same age but were starting to fade. I have not used Bay’s EXT coating yet, but I advise considering it if your prints get direct sunlight.

If you are new to the metal game, I suggest getting a sample pack made in a smaller size before committing to a surface you are unfamiliar with. Bay offers sample packs in 4x6, 5x7 and 8x12 inches with either standard coating or EXT.

Finally, if you are new to using Bay Photo, be advised that they offer a 25 percent discount on your first order. — Gabe

3. Photographing Congaree

Question:

Have you ever photographed in Congaree National Park in South Carolina? It is only a few hours’ drive from my house and I’ve been thinking about going there, but I’m not sure if the park offers many good landscape opportunities. — Arnie

Congaree National Park boardwalk loop trail. © 2016 Chris Nicholson. Nikon D3s with a Nikon 24-70mm f/2.8 lens. 1 second, f/11, ISO 800.

Answer:

I’ve been to Congaree several times. It’s a very pretty park, but it’s primarily forest. (Floodplain forest, in particular. More on that in a bit.) As you may already know, forest photography is challenging because it’s very much about making compositional order out of natural chaos. So if you’re into that type of challenge, then Congaree can be amazing. (It’s also good for spider and snake photography.)

There are some other compositional elements to work with, but most take some effort to get to: the Congaree River (which needs to be hiked to), several ponds (which need to be hiked to) and Cedar Creek (which should really be paddled). The one exception is the 2.4-mile boardwalk trail that starts (and ends) behind the visitor center; that trail is an easy way to get around that section of park, and is an attractive subject as well.

My personal feeling is that aside from the annual show of synchronous fireflies, Congaree is better for daytime photography than nighttime, and it’s better still in overcast light or fog.

The park is probably at its aesthetic best when it floods, which happens about 10 times per year—the caveat being that those conditions drastically minimize how much of the park you can access. But even with the restricted access, the reflections of the forest in the floodwater can be ample fodder for photography. — Chris

4. Sony vs. Irix Lenses

Question:

In one of Lance’s presentations he recommended the Irix 15mm T2.6 Cine lens as the best for capturing the Milky Way. I am now using a Sony a7R IV camera body with two different lenses for night shooting: the Sony 16-35mm f/2.8 GM and the Sony 20mm f/1.8 G. What is the possible improvement I might achieve with the Irix lens? — Ed H.

Answer:

I’ve looked at your photos, and you do not seem to have a problem focusing, which could have been one reason to switch.

Of the lenses you mentioned you already own, both have some noticeable coma, but neither to a catastrophic level. Stopping down the 20mm to f/2.5 should clear it up nicely. Coma on the 16-35mm will vary across the focal lengths, and with it being an f/2.8 lens, you’d likely need to stop down to f/4 or more to get rid of it.

If you need something wider, or if further testing of the 16-35mm tells you that you need to stop down to f/4 or smaller at 16mm, then the Irix 15mm will probably be a little bit better. Other advantages of the Irix are that it’s a touch wider, and it’s easier to focus and to keep in focus. I like to stop down the Irix to f/3.2 to get rid of its minimal coma.

If those advantages don’t resonate with you, then stick with your two Sony lenses. What you have seems to be working. — Lance

5. Raw Permanence

Question:

When importing, does Lightroom add edits or adjustments? If so, is there a way to import raw files as shot in camera? I was told by another photographer that Lightroom always applies filters or edits on import, so instead of importing directly into Lightroom, she moves images from a card to an external drive, and then imports to Lightroom from the external drive, thus preserving her original in-camera files. — Christie

Answer:

Your friend is partly right and partly wrong.

Yes, Lightroom applies some standard edits. These are the same types of edits that Canon software would apply when importing Canon raw files or Nikon software would apply when importing Nikon raw files. Most of them are under-the-hood stuff, such as sharpness, noise reduction, etc. These are basically the same types of edits that are applied to a JPG when it’s produced in-camera. They don’t really change the look of the image so much as refine it to compensate for imperfections in how the image data was captured.

If there is a change in how the photo looks after importing, the likely cause is that the profile Lightroom is applying in the Develop module doesn’t match the in-camera profile you used when shooting. Immediately upon import you see the camera-generated JPG preview, and then very quickly Adobe updates this preview with their interpretation of that file based on the Lightroom profile that’s being applied. In some cases, this can drastically change the look of your photo. (You can read more about this, and how to fix it, in our post “How to Make Your Lightroom Rendering Look Like Your Camera Preview.”)

Not to worry, though. These settings are not permanent.

In fact, none of the edits that Lightroom applies are permanent. They are simply a recorded set of instructions that tell Lightroom how to render the raw data when you view it on screen or export it later. Those instructions are stored in the catalog database and/or a sidecar file, not in the image file. The actual raw file never changes—only the instructions on how it should be previewed, copied or printed. And those instructions can be reset, altered, updated and reset again, all while never making any change to the raw file.

You can prove this by making drastic changes to a photo in Lightroom and then opening the raw file in another program. When you open it in, say, Nikon Capture NX-D, you won’t see any of the Lightroom edits—because, again, those edits are not stored in the raw file.

Therefore, having another copy of raw files in their “original state” is completely unnecessary—it’s a waste of hard drive space. Of course, we do highly recommend backing up your photo files, but that’s a whole other blog post. (Stay tuned.) — Tim


Chris Nicholson is a partner and director of content with National Parks at Night, and author of Photographing National Parks (Sidelight Books, 2015) and Photographing Lighthouses (Sidelight Books, 2023). Learn more about national parks as photography destinations, subscribe to Chris' free e-newsletter, and more at www.PhotographingNationalParks.com.

 UPCOMING WORKSHOPS FROM NATIONAL PARKS AT NIGHT

Five Questions: Barns, Filters with Auroras, Star Trail Settings and More

The night photography world is full of questions, and we’re happy to help with answers.

This installment of our “Five Questions” series features inquiries about photographing barns on the Blue Ridge Parkway, coma with Nikon Z lenses, moving a Lightroom catalog on a Mac, using filters when shooting auroras and settings for star trails.

If you have any questions you would like to throw our way, please contact us anytime. Questions could be about gear, national parks and other photo locations, post-processing techniques, field etiquette, or anything else related to night photography. #SeizeTheNight!


1. Clapboard on the Blue Ridge Parkway

Question:

I am thinking about traveling to the Blue Ridge Parkway to do some star photography and would love to do some light painting of old barns or structures. I am wondering if you have any locations you can recommend. — Michael S.

Mabry Mill, Blue Ridge Parkway. © 2021 Chris Nicholson. Nikon D5 with a Nikon 24-70mm f/2.8 lens, lit with four Luxli Fiddle LED panels. 30 seconds, f/2.8, ISO 6400.

Answer:

The Blue Ridge Parkway is a great place to find barns! But many are on privately owned or leased farms along the parkway; you could still shoot those, but would want to ask permission of course, especially if photographing them at night, and absolutely if you’re going to light paint them.

Sticking to barns that are not privately owned, here are some tips:

Stay north of Asheville. The section of the parkway south of Asheville (and even for a bit north) is mostly mountainous. The northern two-thirds of the parkway—perhaps safely stated as “north of the Linn Cove Viaduct”—is more rural and agricultural.

If you’re open to just historic clapboard structures that aren’t barns, you can’t drive more than a few miles without seeing some. These come to mind immediately: Mabry Mill, Puckett Cabin, Brinegar Cabin. Lots of others scattered about.

For barns in particular, off the top of my head: the Johnson Farm at Peaks of Otter (you’ll need to hike to it), Explore Park (though you’ll want to ask about access after 8 p.m., as it’s managed by the city of Roanoke) and the farm at Humpback Rocks Visitor Center. — Chris

2. Non-Coma Z Lenses

Question:

I just switched to the Nikon Z 6II and am looking for a recommendation for a lens without coma distortion. I have tried and returned two Rokinon 14mm f/2.4 lenses with severe coma. My preference would be a lens in the 14-24mm range. — Edmund

Answer:

You are going to love the Z 6II! The FTZ adapter works well, so it gives you lots of options, but both the Nikon Z 14-24mm f/2.8 and Nikon Z 24-70mm f/2.8 are among the very best lenses Nikon has ever produced. Pricey, but worth it. Another option (assuming you have the FTZ adapter) is the Nikon’s F-mount 14-24mm. There is nothing better than those three lenses at this time. — Lance

3. Moving Lightroom on a Mac

Question:

Is there a simple way to migrate Lightroom files on a Mac? I will soon have to bring in a new and larger external hard drive. — Julie P.

Answer:

Yes, and the process is actually pretty simple.

  1. With Lightroom closed, plug in the old drive and the new drive.

  2. Copy all of the information from the old drive to the new drive.

  3. Unplug your old drive and launch Lightroom. You will see question marks next to your folders, because Lightroom can no longer find your old hard drive.

  4. You need to locate the parent folder for your images. In Lightroom, navigate to the topmost folder in your Folders hierarchy. That may well be the parent folder, but it’s possible that the true parent folder is hiding above it. By right-clicking on that topmost folder, you will see an option to Show Parent Folder. This command will show the folder containing that topmost folder, if there is one.

  5. Right-click on your parent folder and choose Find Missing Folder. Lightroom will open your system’s Finder.

  6. Navigate to the new drive, then choose the matching parent folder and click Choose.

The parent folder and all of its subfolders (all on the new hard drive) will now be linked back with Lightroom. — Tim

4. Light Pollution Filters and Auroras

Question:

I just read your article on light pollution filters. Will these filters also be usable when shooting Northern Lights? — Claron K.

Answer:

Yes, I believe they would be useful for shooting Northern (or Southern) Lights when near inhabited areas. As auroras tend to be green, pink, purple and sometimes blue, the orange/yellow blocking ability would have a complementary effect. However, you could be lose up to 1 stop of light, so keep that in mind. — Matt

5. Star Trail Settings

Question:

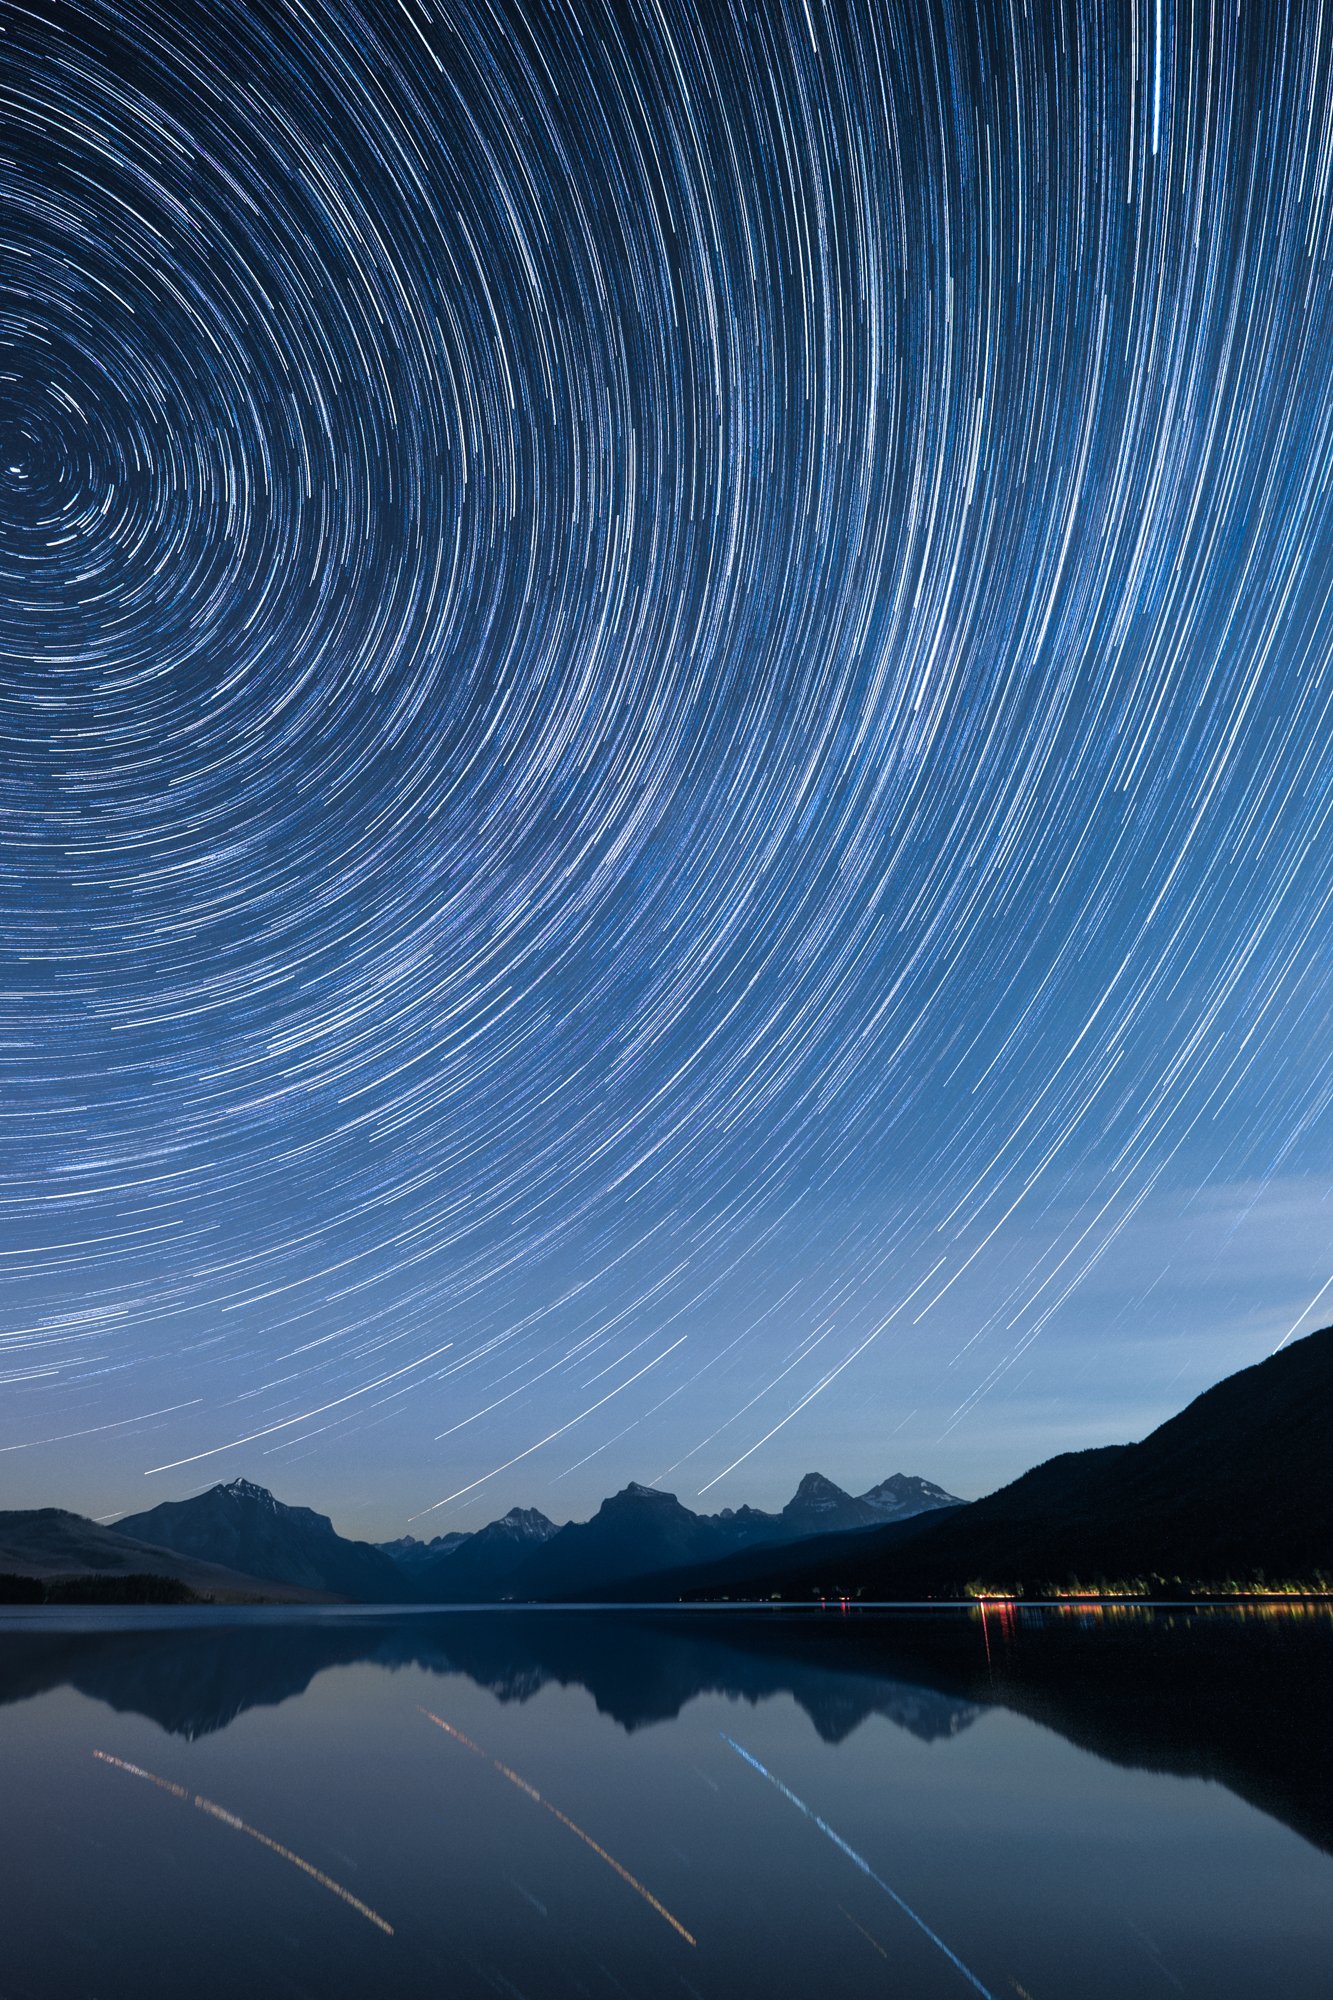
I just reviewed your “How I Got the Shot: Lake McDonald” blog post about star trails. Phenomenal image! I have done a ton of research on how to do this kind of photo, but was hoping for a simple recommendation for settings and timing. I’ll be shooting with either a Nikon D850 or a Nikon Z 6 with a 14-24mm lens. — Darlene

Star Circles Over Lake McDonald. © 2015 Gabriel Biderman. Fujifilm X-T1 with a Fujifilm 10-24mm f/4 lens. 41 stacked frames, each shot at 2 minutes, f/4, ISO 3200.

Answer:

There is no simple formula for star trails. You need to find the balance between a proper base exposure, how long you want to go, and image quality.

You can capture trails with either one long exposure or with multiple shorter exposures that you later stack in Photoshop. Single exposures are often best for up to 15-minute shots, but when you want longer trails you’ll most likely want to shoot multiple frames to stack.

Do a high ISO test shot to figure out the proper exposure. Then you want to get to a more optimal image quality setting. Lower your ISO to something you’re comfortable with in terms of noise (for example, maybe ISO 800), and then adjust your shutter speed accordingly to compensate.

Also consider apertures, in this regard: The wider the aperture, the higher number of stars will appear. While that might sound like a good thing, too many star trails could look too chaotic and distract from the rest of the scene. For example, on a dark night f/2.8 will show an overwhelming number of trails, while f/8 would create a more subtle effect. Under a full moon this isn’t so critical, as not as many stars are visible anyway. Either way, just be careful that you don’t stop down so much that you have to crank up your ISO and sacrifice image quality.

Another consideration is how long your camera’s shutter can be open without generating long-exposure noise (speckled red, blue and green confetti-like specks in your image). This noise is produced when a camera processor overheats during long exposures, but higher outdoor temperatures and lower humidity also play a factor. You have to learn what your camera can tolerate by running some tests in different conditions. For example, if the ambient temperature is 60 to 65 F or less then you can usually get away with 4- to 6-minute exposures, but if the temperatures are 80 F or higher then you might be limited to 30 seconds or 1 minute.

To counteract that effect, you might wonder about using long-exposure noise reduction (LENR). You can use that quite effectively if you’re shooting one long exposure for star trails, but it would be countereffective for stacking. The reason is that for most cameras, LENR disables the shutter after each exposure (for the same amount of time as the shutter speed), which would create breaks in your star trails.

The final decision is how long you want your star trails to be. When facing north for circumpolar trails, you want to shoot for at least 1 hour, and the longer the better. If you are facing east, west or south, you can get away with shorter total exposures—8 to 30 minutes might be sufficient. — Gabe

Chris Nicholson is a partner and workshop leader with National Parks at Night, and author of Photographing National Parks (Sidelight Books, 2015). Learn more about national parks as photography destinations, subscribe to Chris' free e-newsletter, and more at www.PhotographingNationalParks.com.

UPCOMING WORKSHOPS FROM NATIONAL PARKS AT NIGHT

Five Questions: Aurora Noise, Portable Stools, Moving Lightroom and More

Welcome to the 20th installment of our “Five Questions” series. Know what that means? We’re about to answer our 100th question for you!

This installment features inquiries about noise reduction with auroras, internal intervalometers, portable stools, Luxli lights and moving a Lightroom catalog to a new drive.

If you have any questions you would like to throw our way, please contact us anytime. Questions could be about gear, national parks and other photo locations, post-processing techniques, field etiquette, or anything related to night photography. #SeizeTheNight!


1. No Noise in Auroras

Question:

Do you use long exposure noise reduction when shooting auroras? I was trying to shoot some in Minnesota and the person I was with had it enabled in her Canon. — Claron G.

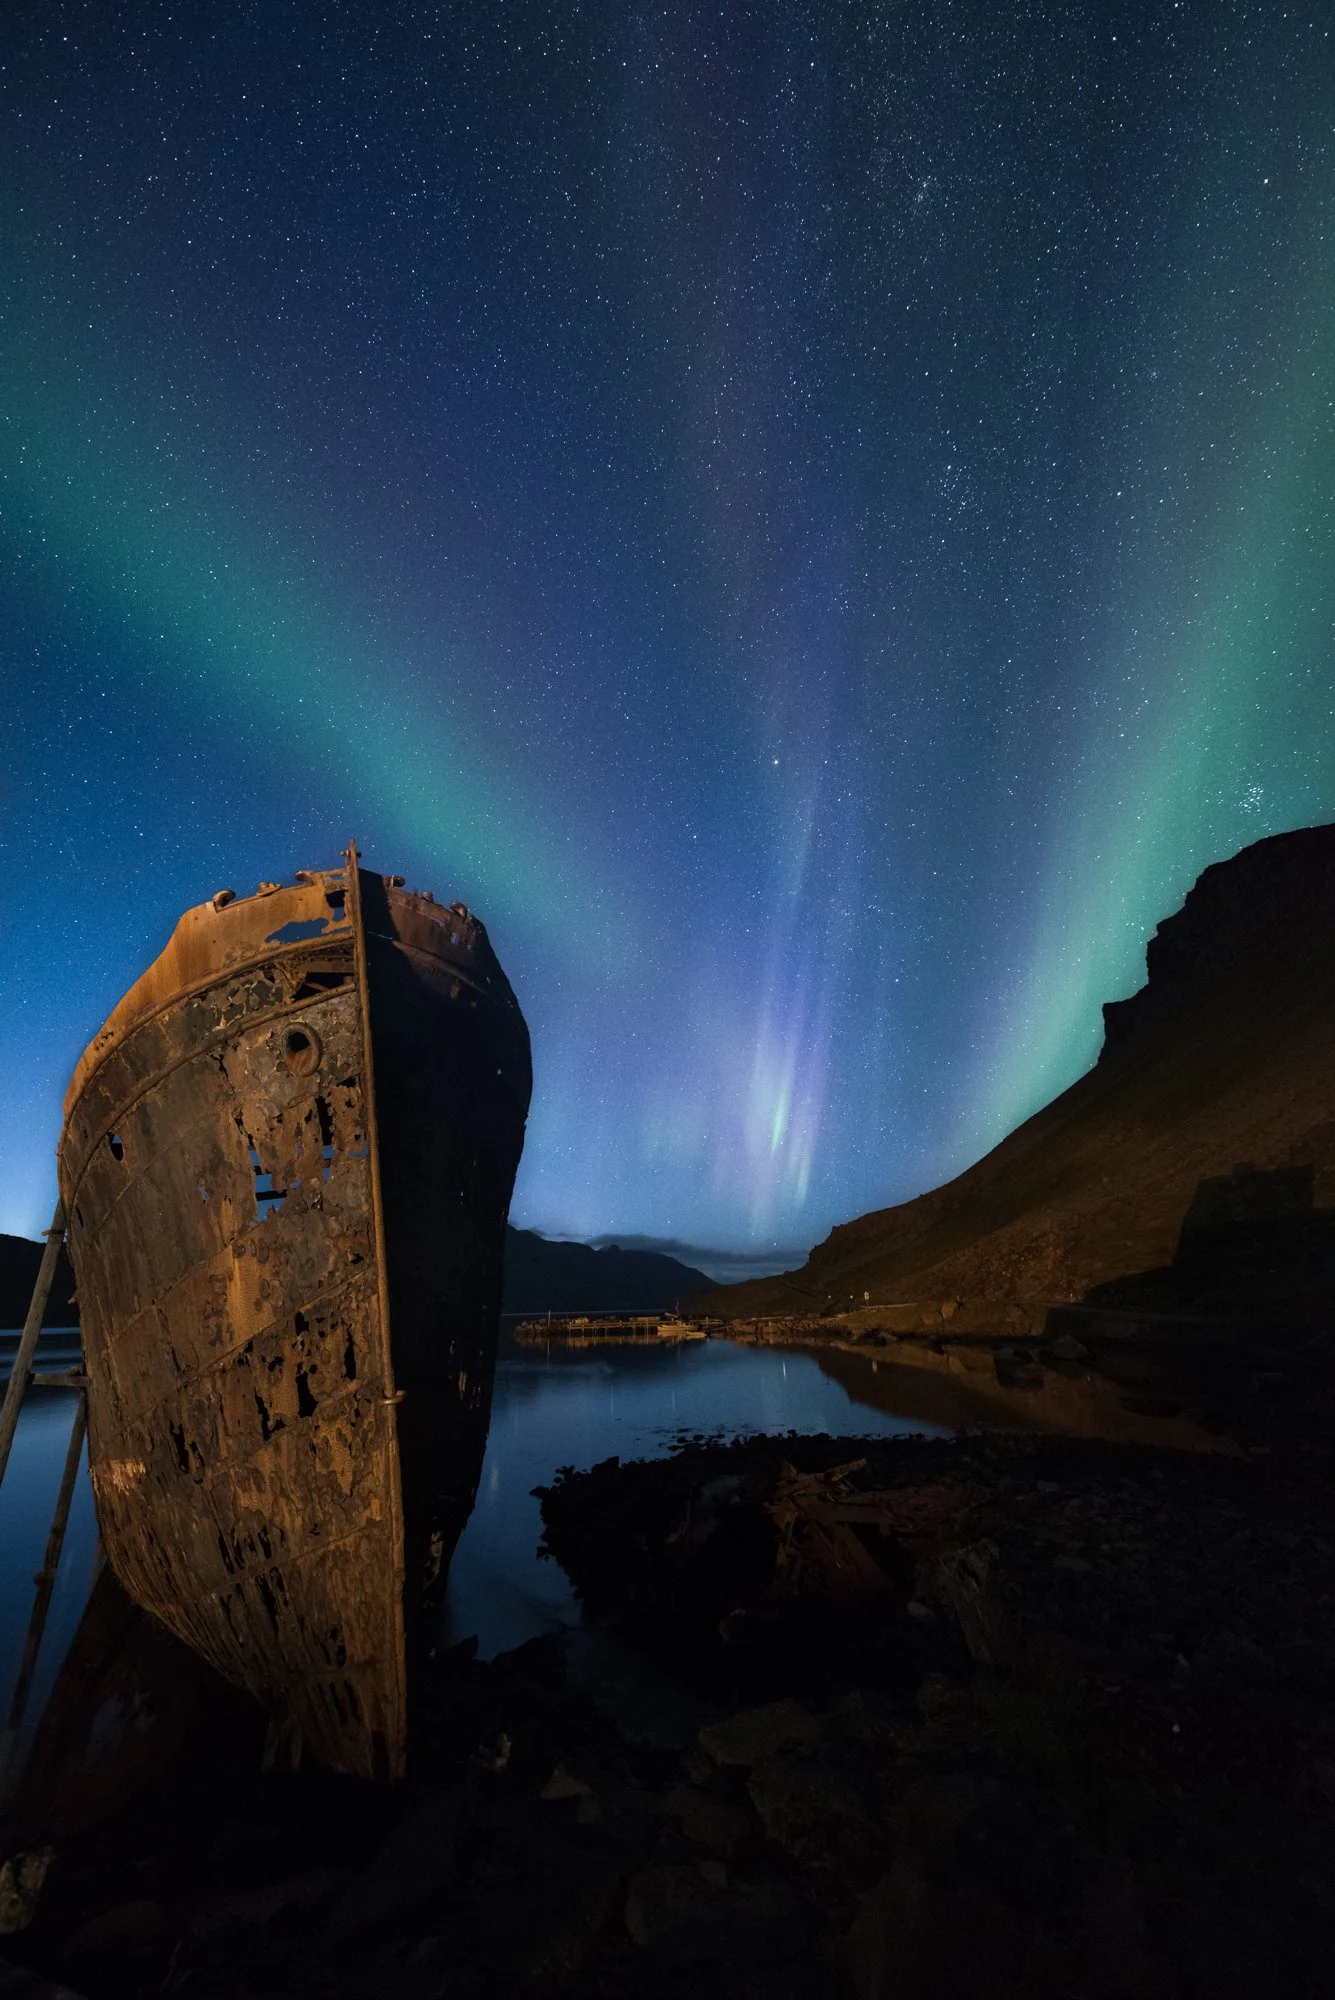
Auroras over Westfjords, Iceland. Nikon D750 with a 14mm lens. 10 seconds, f/2.8, ISO 6400. © Gabriel Biderman.

Answer:

You shouldn’t need long exposure noise reduction (LENR) for shooting auroras in cold temperatures. Your Canon friend was probably taking advantage of Auto LENR, which is a feature available only in Canon cameras.

Most high-in-the-sky aurora shots should be exposed for 2 to 8 seconds, otherwise the waves of light can blur together and you lose their interesting shapes. At such short shutter speeds, I wouldn’t be concerned about long exposure noise with any digital camera made in the last 10 years—especially in the cold temperatures we’re usually shooting auroras in. In most cameras, LENR would even slow you down, because you wouldn’t be able to shoot when the noise reduction is processing between exposures. — Gabe

2. Ignoring Internal Intervalometers

Question:

Considering that the prosumer Nikon Z cameras have fairly good built-in intervalometers, why are you still using external intervalometers? Do they add capability or is it just a convenience thing? — Mark K.

Answer:

There are two issues we have with built-in intervalometers. The first is that most—no matter which camera brand—are terribly confusing. Even after using mine regularly I still make mistakes while setting it up.

The second is that even with a built-in intervalometer, you’re limited to the maximum shutter speed of the camera, and many cameras do not provide for timed exposures longer than 30 seconds. This means you can’t shoot a series of 1-, 2- or 4-minute exposures with the built-in intervalometer, but rather need to shoot a huge stack of 30-second exposures. (The Nikon Z 6II does have the ability to shoot at 15 minutes, so that’s a help if you use that particular camera.)

Using an external intervalometer can be inconvenient, but does have some benefits. For example, being able to look at the intervalometer and see where you are in the exposure count, being able to set odd exposure times (e.g., 45 seconds or 2.5 minutes), and being able to set the number of shots at infinity. — Tim

3. Oft-Folding Stool

Question:

In your e-book about meteor showers you mention the Walkstool Comfort chair. I have a similar (but cheaper) stool that I use when doing macro and insect photography. I find it very comfortable, but very annoying to move. If I pick it up with one hand, holding the camera with the other hand, I can’t move the stool without it collapsing, and then it’s just about impossible to reopen and reposition one-handed. Does the Walkstool have the same issue? — Judy L.

Answer:

Yes, the Walkstool (which I use and own) does collapse when you pick it up. That’s a nice feature for many situations, but I agree that it’s not ideal for the needs you describe. — Matt

4. a Luxli Buffet

Question:

I just went to B&H Photo’s website and looked at lights. There are lots more options than I could have imagined. I remember you mentioning a Viola at one point, but I didn’t catch the other you mentioned. Which lights would you recommend? — Mark K.

Answer:

At the moment Luxli has four lights worth considering, and two that we recommend for night work.

In the former category: The Cello and Timpani models are great for what they’re great at, but we don’t suggest them for what we do—both are too bright for most dark-sky night photography.

Which brings us to our favorites: The Viola is the tool we have loved since the very first time we tested one, in early 2017. It gives you accurate control over color temperature and the ability to illuminate a scene at very low power. The relatively new Fiddle has the ability to go dimmer still (to 0.1 percent power, when using the Conductor app), something we take advantage of quite a bit. — Lance

5. Migrating Lightroom Files

Question:

I bought a new 8 TB solid state drive to use for my images and Lightroom catalog, to replace my old 1 TB drive. What’s the best way to transfer all the files and catalog to the new drive without messing up Lightroom? Do I use the Move function within Lightroom or move them in Windows Explorer? I suspect this means I will need to update my preferences in Lightroom so it knows the new location of the catalog and files. — Roy B.

Answer:

As a PC user, you’re in luck, because you can trick Lightroom into seeing your new drive as its normal location.

  1. Close Lighroom (important first step, otherwise you’ll also be copying a lock file, which will give you trouble later).

  2. Copy everything from your old hard drive to your new one.

  3. In Windows, change the drive letter of your new drive to whatever your old one was. (So if your old drive is G, change your new one to G.) You might need to unplug your old drive and reboot the computer in order to have access to the old drive letter.

  4. Open Lightroom again and the catalog should load seamlessly.

The Lightroom program should never even know the difference. It will see everything exactly as it was before, not even knowing that it’s looking at a different physical location for the data. — Chris

Chris Nicholson is a partner and workshop leader with National Parks at Night, and author of Photographing National Parks (Sidelight Books, 2015). Learn more about national parks as photography destinations, subscribe to Chris' free e-newsletter, and more at www.PhotographingNationalParks.com.

UPCOMING WORKSHOPS FROM NATIONAL PARKS AT NIGHT

Five Questions: Tripod Cleaning, Condensation, Auto ISO and more

We get a lot of questions, we give a lot of answers, and we’re happy to share them all with you.

This installment of our “Five Questions” series features inquiries about keeping your tripod clean, predicting lens condensation, auto ISO, Super Resolution and computer displays.

If you have any questions you would like to throw our way, please contact us anytime. Questions could be about gear, national parks and other photo locations, post-processing techniques, field etiquette, or anything else related to night photography. #SeizeTheNight!


1. Sand & Salt & Tripods

Question:

I’m wondering if I haven’t cleaned or cared for my tripod enough. The lower leg sections have been a bit rough in movement, and although I’ve tried to wipe down or rinse, I do wonder if Moroccan sand, Death Valley dunes, Argentinian salt flats and just plain ol’ dirt is sneaking in. What’s the best way to care for a tripod? — Therese

If you’re shooting in a place like the sand dunes of Morocco, keeping your tripod clean will mean you’ll be keeping your tripod longer.

Answer:

Whenever you bring your tripod to very sandy destinations or submerge the legs in salty water, you should not collapse the legs until you can rinse them with tap water at home or the hotel. Then towel them off and let them air dry completely overnight.

If you needed to collapse your tripod while still in the field, then grit or corrosives may have gotten inside. In that case, try to do a more thorough job rinsing, and perhaps even disassemble the tripod legs and thoroughly rinse them individually.

If you’re in that type of environment for a few days or more, then also give the tripod a full rinse when you come home from your trip. That’s not common practice for most photographers, but it should head off any long-term complications you might otherwise encounter with dust, dirt and salt getting into the locks and inside the legs. — Gabe

2. Condensation Mitigation

Question:

Is there a good method of determining the likelihood of experiencing lens condensation during a night photography session? When (and when not) should I use a lens heater? — Jim B.

The photographic effects of unmitigated condensation.

Answer:

Checking a meteorological site for dew point and expected low temperature is the best way to anticipate a problem with lens condensation. If the expected low temperature is dropping toward the dew point, you will be likely to get moisture on your lens during an evening shoot.

To understand dew point, here is an explanation from the National Weather Service:

“The dew point is the temperature the air needs to be cooled to (at constant pressure) in order to achieve a relative humidity of 100 percent. At this point the air cannot hold more water in the gas form. If the air were to be cooled even more, water vapor would have to come out of the atmosphere in the liquid form, usually as fog or precipitation.”

In short, if the relative humidity is high and the temperature drops, these are the conditions where you are likely to experience condensation.

The best way to prevent condensation on your lenses is to apply your lens heater before condensation starts to form. If you anticipate it to be an issue, put your lens heater on the lens as soon as you take your gear out of the bag, which will ideally prevent the lens from dropping below the dew point. Waiting until after you already see dew on the front element is a recipe for spending most of the evening wiping the lens than shooting with it.

You already have a more high-tech dew solution, but night photographers should know there are also lower-tech alternatives. Simply attaching the lens hood will hold off dew for a while. And we highly recommend our good friend and Night Photo Summit speaker Kevin Adams’ LensMuff (below). It’s an adjustable and effective solution that does not require batteries, but instead relies on economical hand warmers. — Lance

3. Auto ISO a No-Go

Question:

How do I set auto ISO for dusk into night since the exposure changes so much? This also applies to the moonlit skies when the moon when rises or sets during a shoot, changing the ambient light. — Wendy K.

Answer:

I do not use auto ISO for still photography. I’d rather my exposure time (shutter speed) change and not the overall quality of my image (ISO).

However, if we’re talking about making time lapses, that’s another ball of yarn. In that case I might choose auto ISO so that I get more images as it gets darker instead of the fewer that would result from the shutter staying open longer.

If you are serious about day-to-night time lapses (or vice versa), you should consider getting something that does bulb ramping (aka “bramping”), such as the View intervalometer, ElysiaVisuals RamperPro3 Kit or MIOPS Smart+. These take a lot of the guesswork out of the process in lighting conditions that change radically. — Matt

4. When to Sharpen a Supersized Image

Question:

Thank you for the post on Super Resolution. Do you have any suggestions on when to apply sharpening to the original image? Should that be done before upsizing or after? — Kathy E.

Supersizing a Bryce Canyon photograph quadruples its size.

Answer:

When it comes to sharpening, I would always do that last, just like we have always advocated with any post-production process. Lots of things in post-production can change the apparent sharpness of an image, so you want to do those things before sharpening, so that you know how much sharpening you really need.

Likewise, sharpening changes the contrast of pixels at a micro level, and applying changes to those sharpened pixels later can introduce artifacts such as fringing and haloing where there wouldn’t have been any if your order of processing decisions had been different.

Always sharpen last. — Tim

5. Monitors of Mention

Question:

When Chris and Tim did the photo feedback session following their presentation at the Out of Chicago In-Depth conference, they mentioned a monitor brand that they are both happy with. If you would be so kind, please let me know that brand. I may be getting due for a monitor replacement. — Donald

Answer:

Tim and I both use BenQ monitors, in particular the SW2700PT (recently replaced in their lineup with the SW270C), which is designed specifically for photography. It’s a 27-inch display, which is plenty big for photo editing. Also, it covers 99 percent of the Adobe RGB color space, which is excellent for producing accurate color.

Another great feature is this: If you want to dig really deep on color accuracy, you can take advantage of BenQ monitors’ ability to store calibration settings right inside the display. This means you can set the monitor to make the color adjustments that result from your calibration profile, rather than having your computer’s operating system make those adjustments. This is referred to as “hardware calibration,” as opposed to the more commonly used “software calibration.” For more detail, you can read about this on BenQ’s website, but the takeaway is that this approach gives you better color depth, and theoretically means you won’t need to calibrate as often. — Chris

Chris Nicholson is a partner and workshop leader with National Parks at Night, and author of Photographing National Parks (Sidelight Books, 2015). Learn more about national parks as photography destinations, subscribe to Chris' free e-newsletter, and more at www.PhotographingNationalParks.com.

UPCOMING WORKSHOPS FROM NATIONAL PARKS AT NIGHT

Five Questions: Dark Skies, Light Stands, PCs and More

If you send questions, we’ll send answers. Want proof? See Exhibits 1 through 5 below.

This installment of our “Five Questions” series features inquiries about websites for finding dark skies, light stands, PC computers for photo editing, filter vignetting and a lighting effect.

If you have any questions you would like to throw our way, please contact us anytime. Questions could be about gear, national parks and other photo locations, post-processing techniques, field etiquette, or anything else related to night photography. #SeizeTheNight!


1. Tools for Seeking Dark Skies

Question:

A few of the presenters at the Night Photo Summit referenced the website ClearDarkSky for help in planning night sky photography. Assuming that I will probably have to drive at least two hours one way to reach a certified dark sky preserve from my home, just to photograph only stars and the Milky Way, is it sufficient to just look at the darkness and cloud cover on that website? I see that Dark Sky has similar information, but its forecast components appear to be more related to telescope viewing. — Ray B.

darksitefinder.jpg

Answer:

You can always make a photograph in any condition. Obviously, the darker the sky, the more stars you will see, and the more of the Milky Way you will see in your images. Are you primarily interested in photographing the sky, or the landscape, or both? There are many dark-sky websites you can check (I like DarkSiteFinder), but don’t get too hung up on Bortle numbers—just go out and make some images.

If you’re just doing astro-landscape photography, then find a spot with an interesting landscape/foreground that doesn’t have any artificial light in the immediate area, and see what you get. I think it’s more important to make interesting pictures than to have the darkest sky possible.

On the other hand, if you are mainly interested in photographing the sky and celestial objects (i.e., astrophotography), then use any one of those websites to find the darkest spot within a comfortable driving distance, and go for it.

This screenshot above from DarkSiteFinder has a pin where I live. Even though I’m on the outskirts of an urban area, I can easily see the Milky Way with the naked eye, and it shows up even better in-camera because the light pollution is to the north and Milky Way to the south. — Lance

2. Night Light Stands

Question:

I have been playing with my Luxli Fiddle light but could use a stand to position it better. What type of stand do you use? — M. West

Answer:

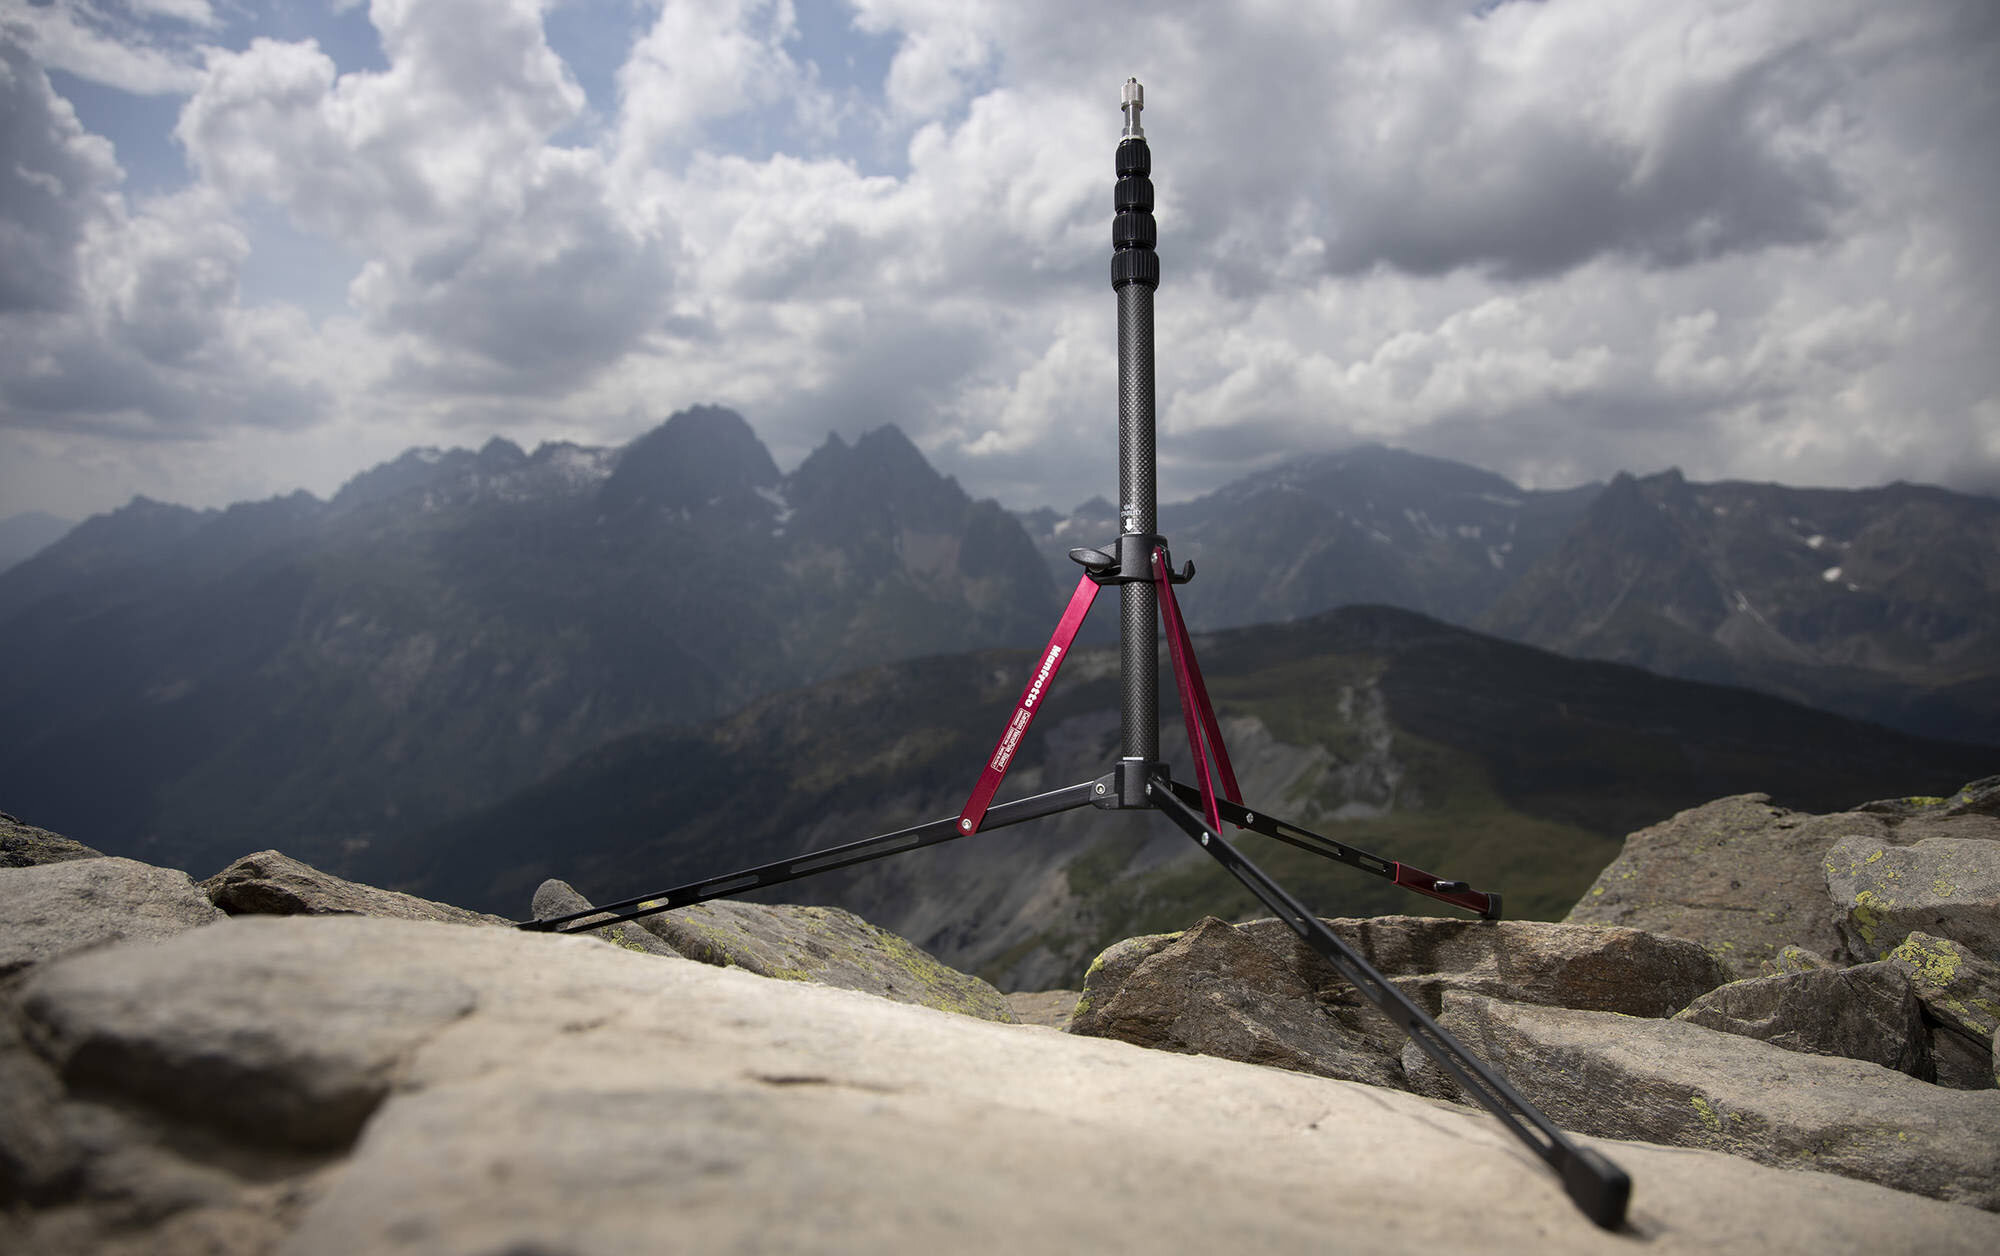
A compact and travel light stand is a perfect complement for your Luxli Fiddle. You’ll be able to set it up, finesse the position and then leave it there for repeatability. It has been a game-changing way for many of us at National Parks at Night to level up our Low-level Light Painting. (Though if you’re shooting in national parks, note that many of them require a Special Use Permit for light stands.)

Below is a breakdown of our favorite compact light stands that are easy to pack for your night adventures (you can all their specs compared at this link):

The Impact Reverse is the least expensive and the most basic.

The Manfrotto options offer an adjustable leg, which is helpful on uneven terrain. The Nano Plus will also hold bigger lights if you have any strobes. The Nanopole will let you easily pull out the center column and to use as a boom arm. The Carbon Fiber is the lightest but also most expensive of those mentioned.

While your Luxli Fiddle will screw directly into the light stands with the included 1/4-inch adapter, you will want to add a mini-ball head adapter so you can adjust your light easily. — Gabe

3. PC Preferences

Question:

I’m wondering about your recommendation for a laptop of the non-Apple variety. Do you recommend using a desktop or laptop with external monitor? Space and money are at a premium. — I.B.

Answer:

My personal approach is that I have both a desktop and a laptop.

The desktop is my workhorse—that’s where all my power is (i.e., RAM, higher-grade processor, terabytes of storage space, etc.). My laptop has enough power to run Lightroom and Photoshop effectively when I’m traveling, but doesn’t have all the bells and whistles of my desktop. The reason is that an all-powerful desktop PC is notably less expensive than its performance equivalent in a laptop, and the aforementioned strategy gives me a combined system with “enough” power when I’m on the road and full power when I’m home.

However, that’s not necessarily the best “space and money” option overall. Instead of two computers, you could get just a somewhat-better-than-adequate laptop that you can connect to your larger display when home, as you suggested. For photo editing, I personally recommend a laptop that meets or exceeds these specifications:

  • a calibratable 15-inch display (larger is better for photo editing, but is also heavier for travel)

  • HD (1920 x 1080) resolution or greater (but not 4K, unless you’re also doing video work)

  • 2 GHz processor with 64-bit support

  • 16 GB RAM

  • 2 GB video memory

  • 1 TB internal SSD hard drive

I suggest checking B&H Photo to see what kind of system you can put together for your budget. Go to their Laptops page and enter your desired specs in the left margin, then browse your options, looking for what might fit your budget. Alternatively, just call B&H and speak with someone from the computer team. They’re excellent at guiding you toward a solution based on your needs, and they can even custom-build a desktop or laptop computer. In my experience with B&H for over 25 years, they will not guide you toward something more expensive that you don’t need.

For what it’s worth, since last fall I’ve been using an MSI Creator 15, and I recently obtained an MSI Creator Z16 (pictured above) that I’m eager to take out for a spin. — Chris

4. Perseid Vignettes

Question:

I’m hoping to shoot the Perseids in August and wondered about the Breakthrough Photography filter for light pollution. Do you know it and whether it vignettes? — Wendy K.

vignette meteor.jpg

Answer:

I have not used that particular filter, but I can confidently say that it should not cause vignetting. Light pollution filters inhibit particular color wavelengths that are commonly associated with light pollution. The only way they would vignette is if they have a deep profile that can be seen through a too-wide-angle lens, which good design should prevent.

This is a great year for photographing the Perseids, as they’ll peak on nights when the moon isn’t visible. For more information on how to shoot a meteor shower, be sure to check out our Great Balls of Fire e-book. — Matt

5. Cape Cod Lighting Effect

Question:

I recently saw a presentation you did, and I have a question about the image Chris showed of the dune shack at Cape Cod National Seashore. Was a special “effect” in editing applied to that picture, or was it just your lighting? — K. O’Donnell

Dune shack, Cape Cod National Seashore. © 2017 Chris Nicholson. Nikon D5 with a Nikon 14-24mm f/2.8 lens, light painted with a Coast HP7R flashlight. 20 seconds, f/4, ISO 1600.

Dune shack, Cape Cod National Seashore. © 2017 Chris Nicholson. Nikon D5 with a Nikon 14-24mm f/2.8 lens, light painted with a Coast HP7R flashlight. 20 seconds, f/4, ISO 1600.

Answer:

No special effects or trick editing—I only lit and shot it. There was some post-processing, of course, but just to tweak exposure and contrast.

That said, I’m not sure if you’re referring to the color of the background or the illumination of the shack, so I’ll address both:

  • The warm tones of the background are caused by the lights of nearby Provincetown bouncing off the clouds. Some night photographers avoid light pollution at all costs; I try to embrace it creatively, and this photo is a good example of how and why.

  • The foreground light coming from an unfiltered Coast HP7R LED flashlight. The light is soft and broad and a little warmer than usual because rather than hitting the shack with a direct beam, I bounced the beam off the top of the sand dune to camera-right, and it’s reflecting back to illuminate the front of the shack. That was a creative solution for working in a tight spot where I couldn’t side-light from outside the frame (because of the slope of the dune), and it came with the added benefit of creating that nice, soft effect. — Chris

Chris Nicholson is a partner and workshop leader with National Parks at Night, and author of Photographing National Parks (Sidelight Books, 2015). Learn more about national parks as photography destinations, subscribe to Chris' free e-newsletter, and more at www.PhotographingNationalParks.com.

UPCOMING WORKSHOPS FROM NATIONAL PARKS AT NIGHT