0
items
$0
On the Road Again: Announcing Our 2021-22 Workshops
For many reasons, it’s amazing that we are announcing our sixth season. But no matter the reason, it’s a delight to offer you so many opportunities to hone your skills as a night photographer.
Continuing our growth plans for you, we have expanded our options to include something new. You asked for it, and now we are offering two workshops focused solely on learning PhotoPills in the field. And that’s not all! … But I don’t want to ruin the surprise. So let’s get to browsing the dizzying array of destinations for Season 6. Just like the Red Headed Stranger said, we “just can’t wait to get back on the road again..”
Please join us for at a workshop. We look forward to seeing you there.
Use the Waitlist!
As usual, our community has committed very strongly to many of the workshops. Also, eight of these workshops were postponed from 2020 and were already sold out or nearly so. If you see something you really want to attend and there are no tickets now, we urge you to sign up for the waitlist today. On every workshop someone drops out and we ask waitlisters to step up.
The Workshops
Below you can read a little bit about each of the workshops we’ll be running in our sixth season. Click on the photos or the links to read even more.
If you’d like to see a lineup of all the workshops we have scheduled for 2021-22, including updates on how many tickets are available in each, see our Season 6 Workshops page:
OK, onward … Here’s where, like a band of gypsies goin’ down the highway, we’re heading in Season 6. …
Passport Series
These are our signature event workshops, which we hold in national parks. These workshops cater to all levels of night photography. We teach every day, either in the classroom or on field trips, and we shoot every night in beautiful and inspiring places.
We generally run only five Passport Series workshops per year, at least four of them to parks we’ve never run workshops in previously. But this year, that changes. We had three Passport locations we needed to postpone from 2020, and we were disappointed that would supplant some of the new parks we’d been excited to go to. So we said the heck with it, we’ll just go to all the parks we want.
Ready to come with?

Badlands National Park
Nestled in the Northern Great Plains, Badlands National Park comprises 244,000 acres of otherworldly landscapes, grassy prairie and wildlife such as bison, black-footed ferrets, mountain goats and bighorn sheep. We’ll be visiting during the 2021 Perseid meteor shower, and will be focusing on capturing the incredible eroded landscapes with Milky Way, meteors and some moonlight.
Badlands National Park Night Photography Workshop — August 11-16, 2021

Everglades National Park
The Everglades is primal, yet inviting. The landscape is raw, yet beautiful. The mosaic of habitats invites photographers to explore and be inspired by wetlands and pinelands, coastal lowlands and freshwater ponds, hardwood hammocks and cypress stands, and vast sawgrass-prairie "rivers of grass." And, of course, the wildlife, from migrating birds to the park's most famous resident, the American alligator. Over them all at night hover a crisp, starry sky and a Milky Way arching from horizon to horizon.
Everglades National Park Night Photography Workshop — April 12-17, 2021

Joshua Tree
Joshua Tree National Park encompasses sections of two different deserts—the Mojave and the Colorado—both full of opportunities for remarkable images. We will extensively explore this IDA Dark Sky Park. People come for the trees and bouldering during the day, but at night these features take on a heightened surreality and make for great foreground subjects while the Milky Way stretches across the sky. We will also have special access to Keys Ranch, a photogenic “ghost ranch” that has several buildings, old cars and lots of machinery to light paint. The workshop will feature dark starry skies and Milky Way explorations, as well as a gentle waning moon that we can mix with our light painting to create wonderful night images.
Joshua Tree National Park Night Photography Workshop — May 2-7, 2021

North Cascades National Park
In the northern regions of Washington state, some of the least-visited and most beautiful mountains in the U.S. rise dramatically from the landscape under untainted dark skies. An alpine wilderness rife with dramatic peaks, lush forests, placid lakes, roaring waterfalls, curious wildlife and more. We will explore by day and night, visiting and photographing different regions of this peaceful, special place.
North Cascades National Park Night Photography Workshop — August 8-13, 2021

Sequoia National Park
The coast redwood may be the tallest tree in the world, but the giant sequoia is the most massive. You’ll be awed by these incredible trees as we spend a week among them in the Sierra Nevada of California. The park’s dark sky festival will be held August 27-29, so come early and join the festivities!
Sequoia National Park Night Photography Workshop — August 29-September 3, 2021

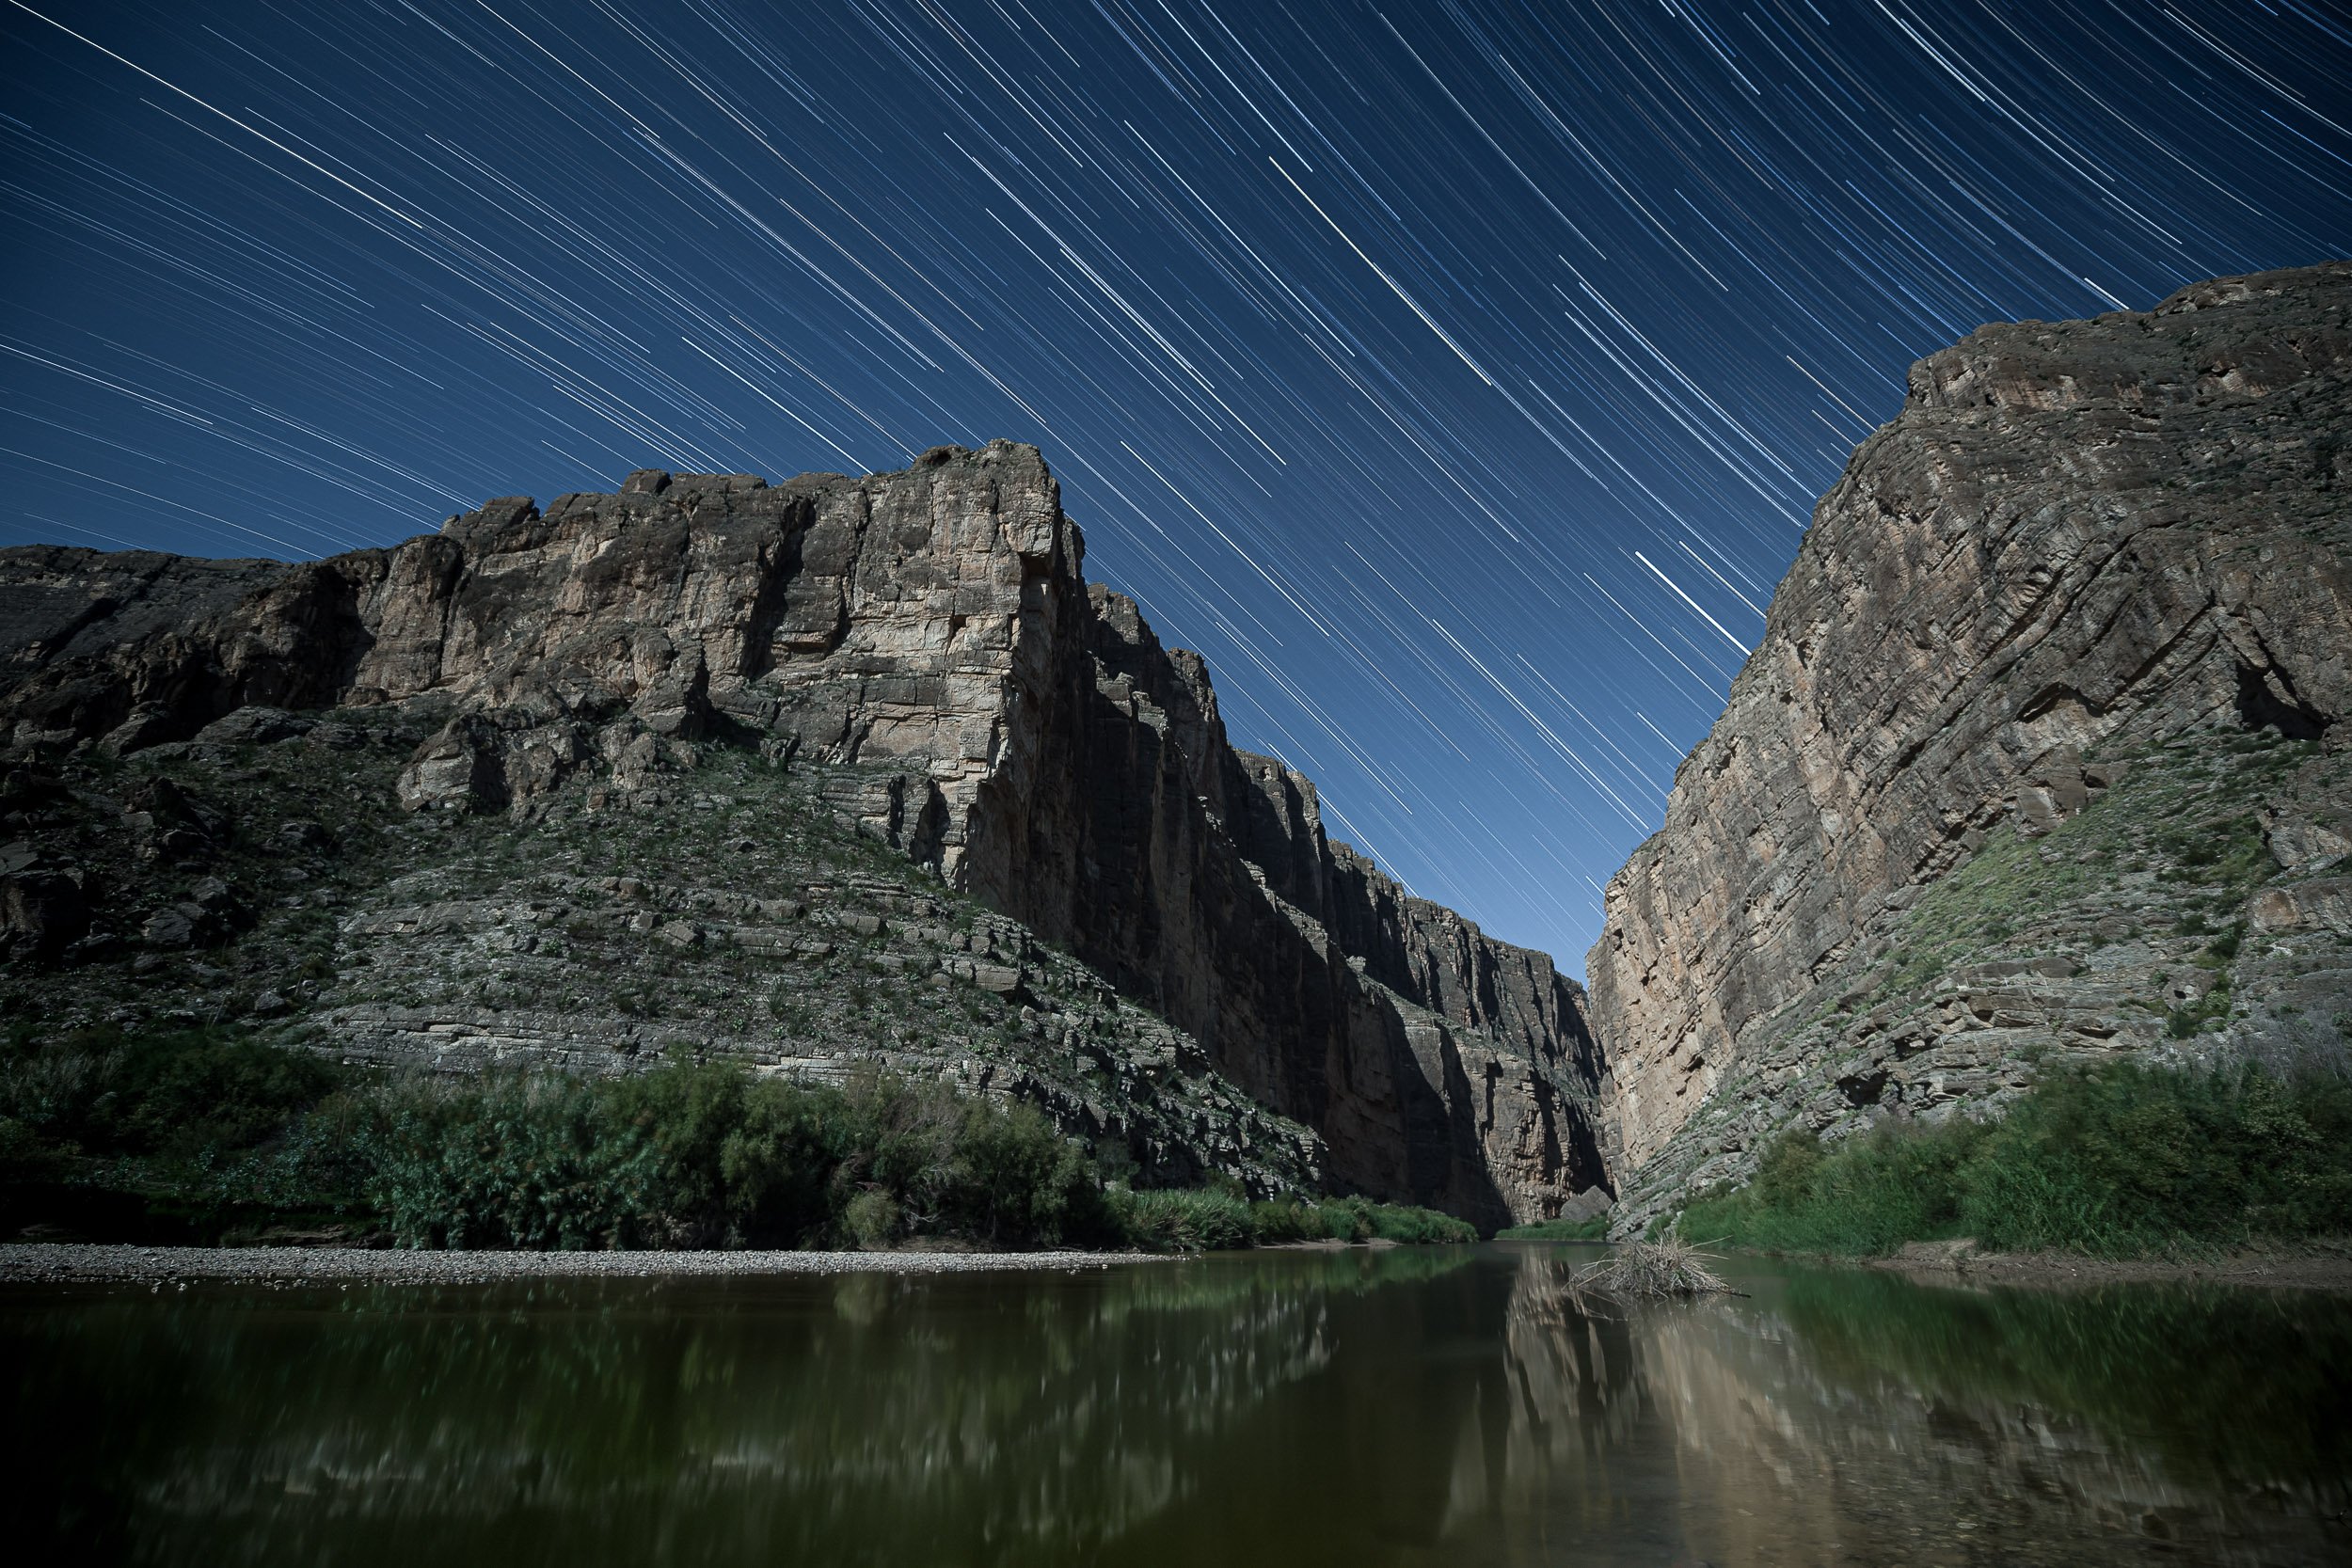
Shenandoah National Park
Road-trip through time as we fully immerse ourselves in the scenic Shenandoah area. We’ll visit historic towns like Harpers Ferry and venture deep into the surreal underworld of the Luray Caverns. Then of course there is the 105-mile Skyline Drive, which features 75 beautiful overlooks of the rolling Blue Ridge Mountains. We’ll do some daytime hikes to photograph waterfalls, and nighttime shoots to capture the Milky Way rising above the Appalachians.
Shenandoah National Park Night Photography Workshop — June 26-July 2, 2021

Yosemite National Park
While Yosemite doesn’t get the honor of being our first national park, it is this area of vertical granite cliffs, placid meadows and rushing waterfalls that inspired our country’s long history of protecting public lands and irreplaceable scenery. We will explore the valley that inspired America’s greatest idea, particularly at night, when the stars hover over one of the most magnificent landscapes in the world.
Yosemite Valley Night Photography Workshop — October 24-29, 2021

Zion National Park
Boasting some of Utah’s most awe-inspiring red-rock peaks, cascading waterfalls and the beautiful Virgin River, Zion National Park and its amazing landforms are a perfect complement to the night sky. We'll explore this epic, iconic landscape under the stars, as well as venture into a nearby ghost town and its 18th century graveyard under the light of a bright gibbous moon.
Zion National Park Night Photography Workshop — March 21-26, 2021
Adventure Series
We started running Adventure Series workshops in 2017. There are amazing places in the U.S. to shoot at night outside of national parks, and we want to visit those too. National monuments, national forests, scenic byways, urban ruins and more.
This year the Adventures will include one of the best ghost towns in the country, two urban locations, a national parkland that’s 469 miles long and only about a mile wide, a legendary cemetery and more.

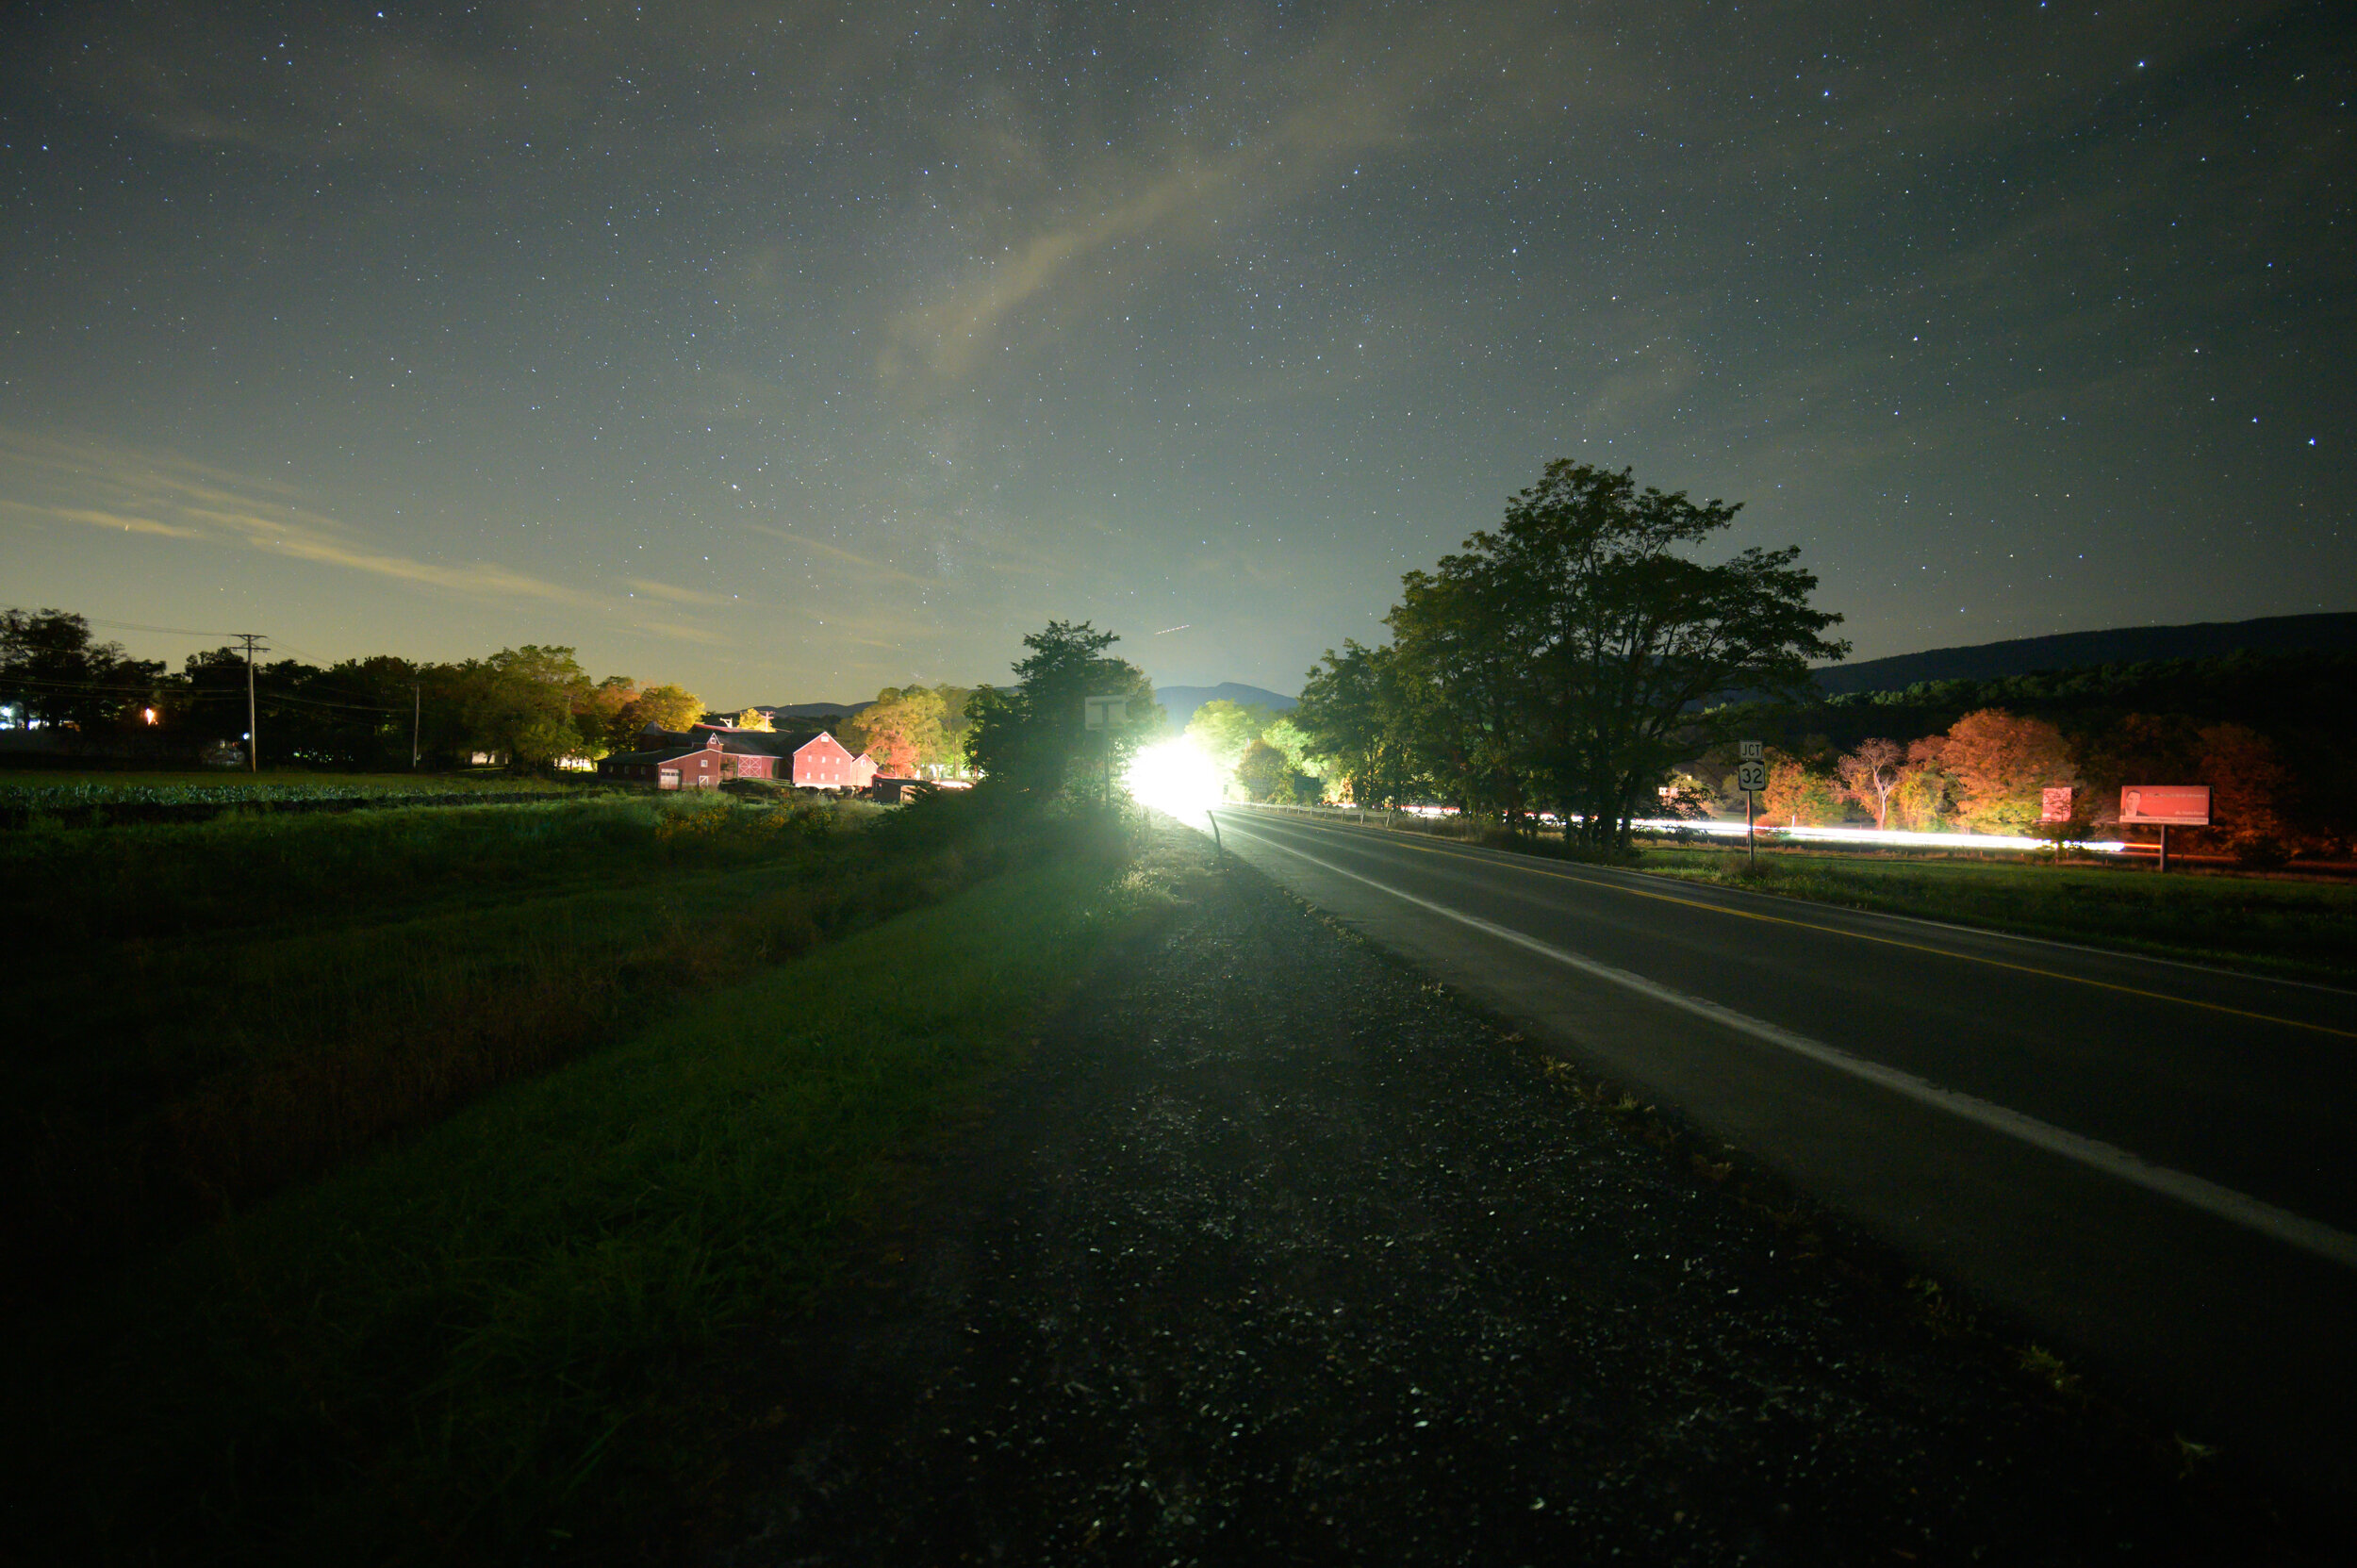
Blue Ridge Parkway
The night is falling, and the road is calling. And we will be there, driving and photographing America’s greatest scenic byway. When the sun fades, we’ll bring our cameras along the 469-mile ribbon of national parkland that stretches atop mountain ridges, through farming communities, past historic cabins and mills, alongside meadows and more, while the stars and moon gently shine on the great blacktop river called Blue Ridge Parkway.
Blue Ridge Parkway Night Photography Road Trip — July 4-10, 2021
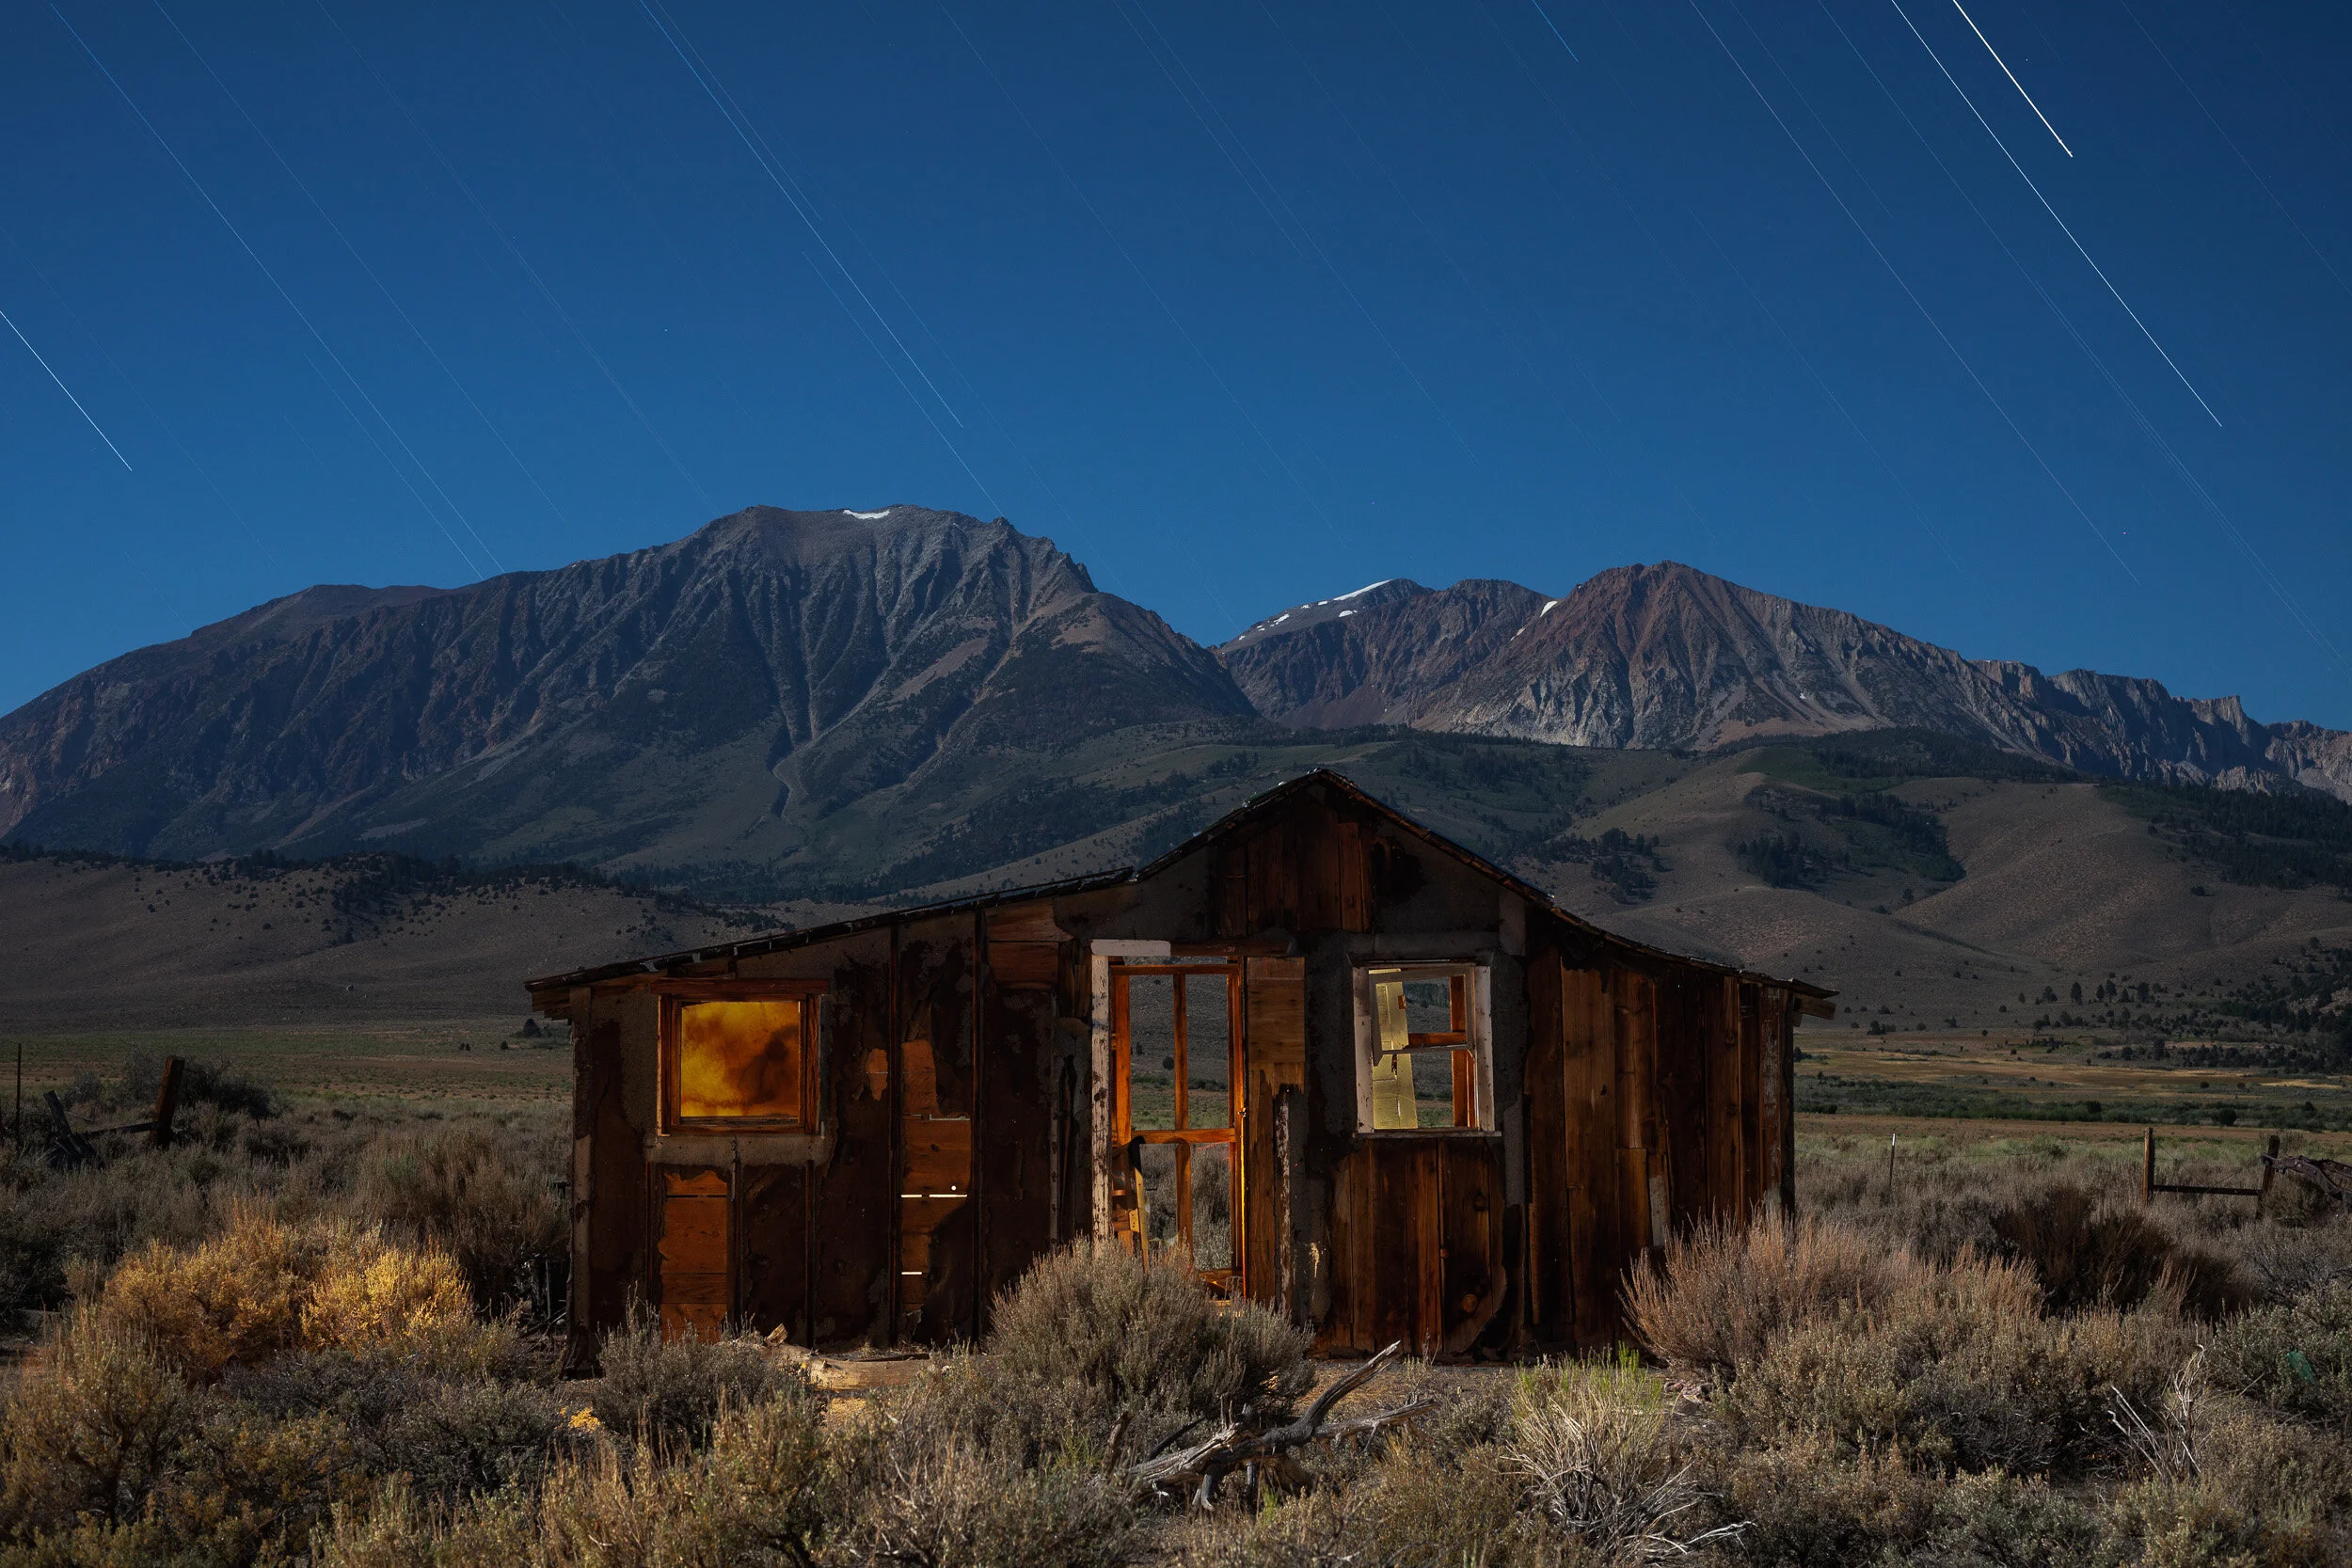
Mono Lake & Bodie
Explore the northern part of the Eastern Sierra with two nights at the incomparable Bodie ghost town, two nights at Mono Lake, and a one-night foray into the High Sierra of Yosemite National Park. These three vastly different California environs will keep your creative juices flowing in night conditions ranging from dark sky and Milky Way to the gentle light of a first quarter moon.
Mono Lake & Bodie Night Photography Workshop — June 13-18, 2021

New York City
New York City means so many things to so many people: illuminating, exhilarating, intense, intoxicating, frantic, alive. Our mission will be to capture the moving energy of the city—the people, the cars, the bridges and the rivers that surround this 8 million-person island. Within the hustle and bustle we’ll explore the inspirational architecture and quieter green spaces that can be found throughout the five boroughs. We will also focus our lenses and attention on many of the National Park Service units that will educate us on the 400 years of American history that laid the foundation of commerce, immigration and equality in our country.
New York City Night Photography Workshop— September 19-24, 2021

Sedona
Sedona is a vibrant arts community nestled among some of Arizona’s most beautiful red rock buttes. Sitting at an elevation of 4,350 feet, this desert town is world-famous for its natural beauty and new age vibe. It’s also a perfect destination for night sky enthusiasts as one of America’s IDA International Dark Sky Communities.
Sedona Night Photography Workshop — September 5-10, 2021

Sleepy Hollow
Spend three nights photographing in one of the most iconic cemeteries in the world, barely an hour outside of Manhattan in the village of Sleepy Hollow, New York. Expect to be spooked by an abbreviated equestrian with a penchant for drama and overgrown squash. If that sounds like fun, this is the workshop for you.
Sleepy Hollow Night Photography Workshop — November 12-14, 2021

Washington, D.C.
Washington, D.C., is truly one of our must-visit destinations. It’s an awe-inspiring city by day or by night. Combining our nation’s history with a myriad of architectural styles, and the many and varied monuments and memorials, makes D.C. a playground for the intellectually curious and visually motivated.
Washington, D.C., Night Photography Tour — April 22-27, 2021
Voyager Series
As much as we love traveling and photographing in our home country, we also endeavor to trek the globe finding beautiful landscapes and fascinating cultures to immerse ourselves in, especially in the dark. Over the next two years (we plan these ones a little further out), we’ll be heading to overseas destinations that range from one of the most enigmatic islands in the oceans to one of the urban art capitals of the world.

Barcelona
Barcelona, Spain’s premier city of culture and art, is rich in delicious dichotomies. From the 13th century gothic Barcelona Cathedral to the 19th century art nouveau masterpiece of the La Sagrada Familia, from the respectful and beautiful graffiti to the citywide art installations—here world-class food, art and architecture are woven together to create one of the most beautiful and photogenic cities in Europe.
Barcelona Day & Night Photography Tour — September 4-9, 2022

East Greenland Schooner
Experience the extraordinary scenery and Inuit culture of Greenland’s captivating coastline. This trip along the striking and sparsely populated east coast of Greenland will begin and end in the village of Kulusuk, but everything in between will truly be an exploration. Glacier hikes, stand-up paddleboarding, sea kayaking, and of course photography––you’ll have the opportunity to do all of these and more on one of our grandest adventures yet.
East Greenland Schooner Day & Night Photography Tour — September 16-26, 2021

Easter Island
Few places on Earth are as mysterious or compelling as Easter Island. The giant stone figures known as Moai oversee this remote island 2,200 miles off the coast of Chile. Most of Rapa Nui, as it’s known to the locals, is a national park. Not only is it hard to get to Easter Island, it is notoriously difficult to access the park after the sun goes down. But we will be taking a lucky group of fellow night photographers on this rare opportunity of spending an unforgettable week with the Moai.
Easter Island Day & Night Photography Tour — January 25-February 1, 2021

Lofoten Islands 2022
This will be a winter workshop focused on photographing the rugged snow-covered mountain islands, dramatic beaches, northern lights, pristine fisherman’s huts and untouched beauty of this remote and breathtaking region of the world. March is a perfect time to visit Lofoten—the milder winter temperatures make the overall experience ideal for catching the auroras over a snow-globe winterscape.
Lofoten Islands Day & Night Photography Tour — March 18-26, 2022

Scotland: Orkney Islands
During our tour we’ll explore the remarkable ways that past and present collide at the crossroads of the Celtic and Viking worlds. A cluster of 5,000-year-old archeological sites on the archipelago are collectively designated as a World Heritage Site called The Heart of Neolithic Orkney. The main sites consist of two major circles of standing stones, a massive chambered cairn, and the remains of an ancient village that was exposed on a clifftop during a storm in the 19th century. Orcadians live with these monuments in their backyards—these relics are part of the cultural, as well as physical, landscape that influences the way the locals interact with the world.
Scotland: Orkney Islands Day & Night Photography Tour —May 23-30, 2021
Skills Series
All of the above workshops and tours focus a lot on exploration. Our Skills Series events focus on learning something specific—still in an inspiring place, but we focus on a specific skill set. This year we have a couple of workshops based in amazing cities and focused on post-processing, as well as a couple in national parks to learn how to use the best scouting app in the business, PhotoPills.

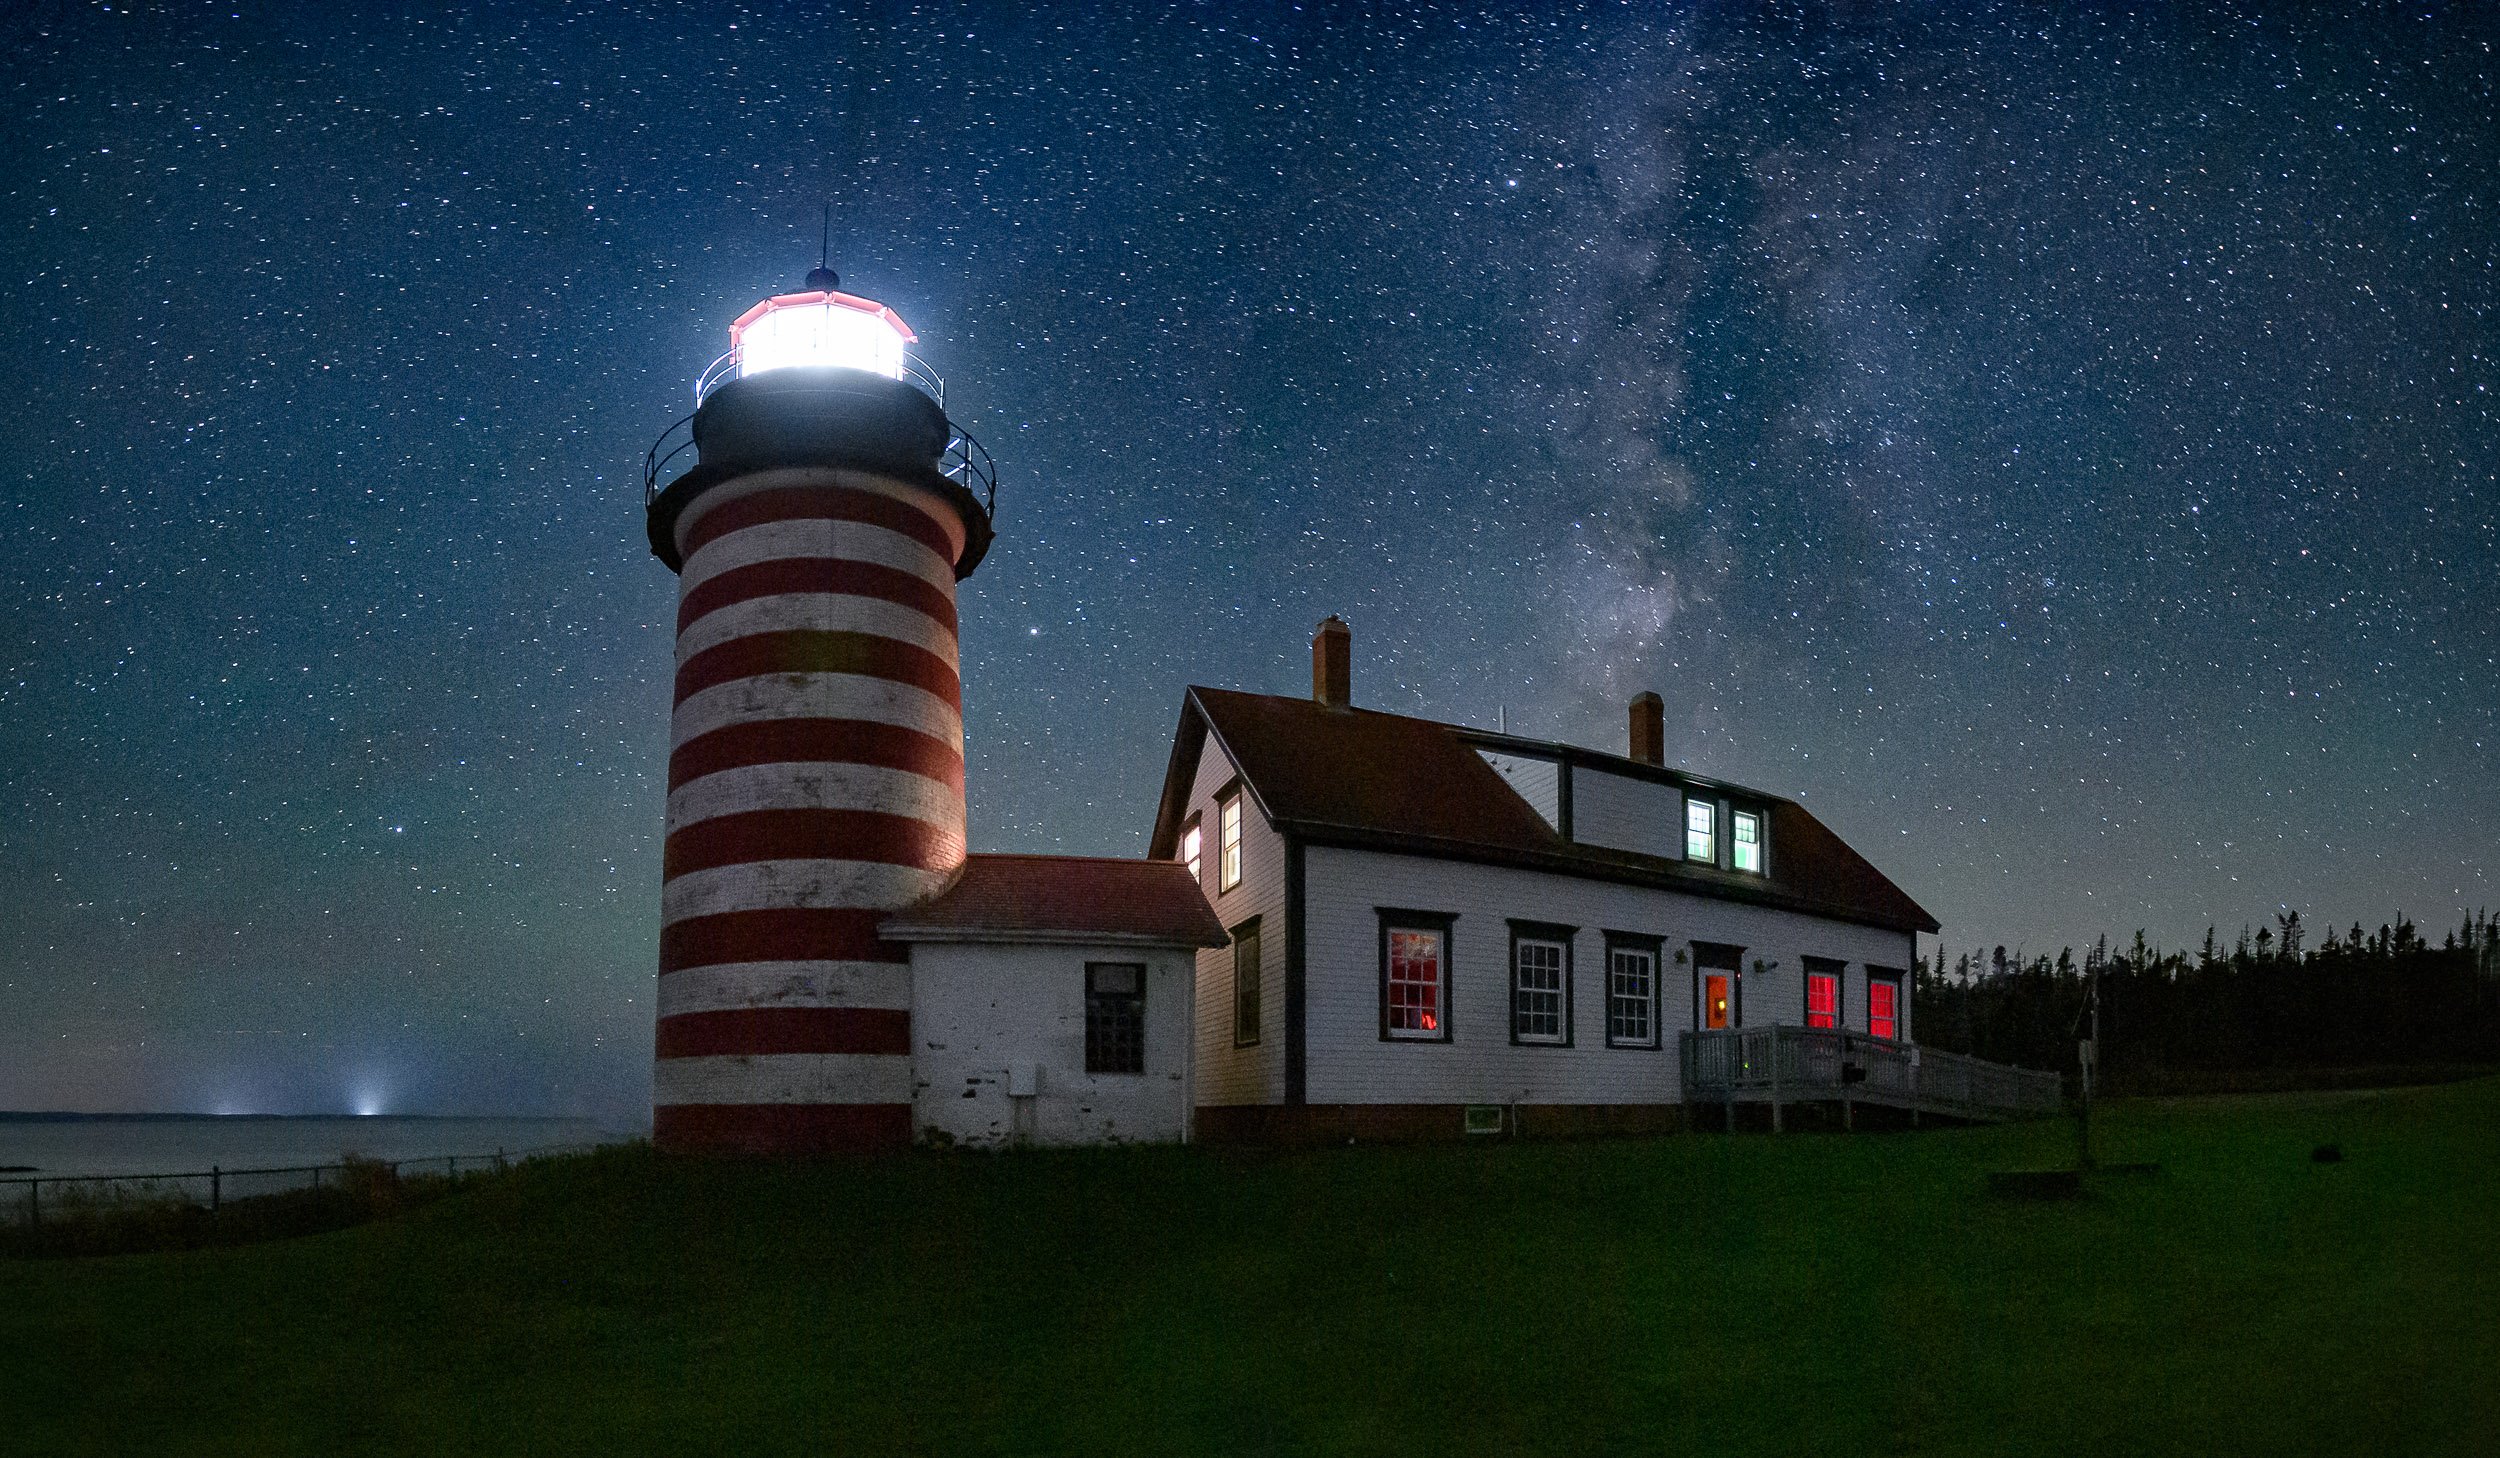
PhotoPills: Acadia

PhotoPills: Joshua Tree
Long before the photograph comes the idea. And with PhotoPills, the ideas have no bounds. During five days and nights of learning, scouting in two amazing national parks—Acadia and Joshua Tree—we’ll explore the ins and outs of one of the most powerful tools a photographer can keep in their pocket. Learn to plan and capture the Milky Way, sunsets, moonrises, star points, star trails and more.
PhotoPills Bootcamp: Acadia — October 2-7, 2021
PhotoPills Bootcamp: Joshua Tree — May 9-14, 2021

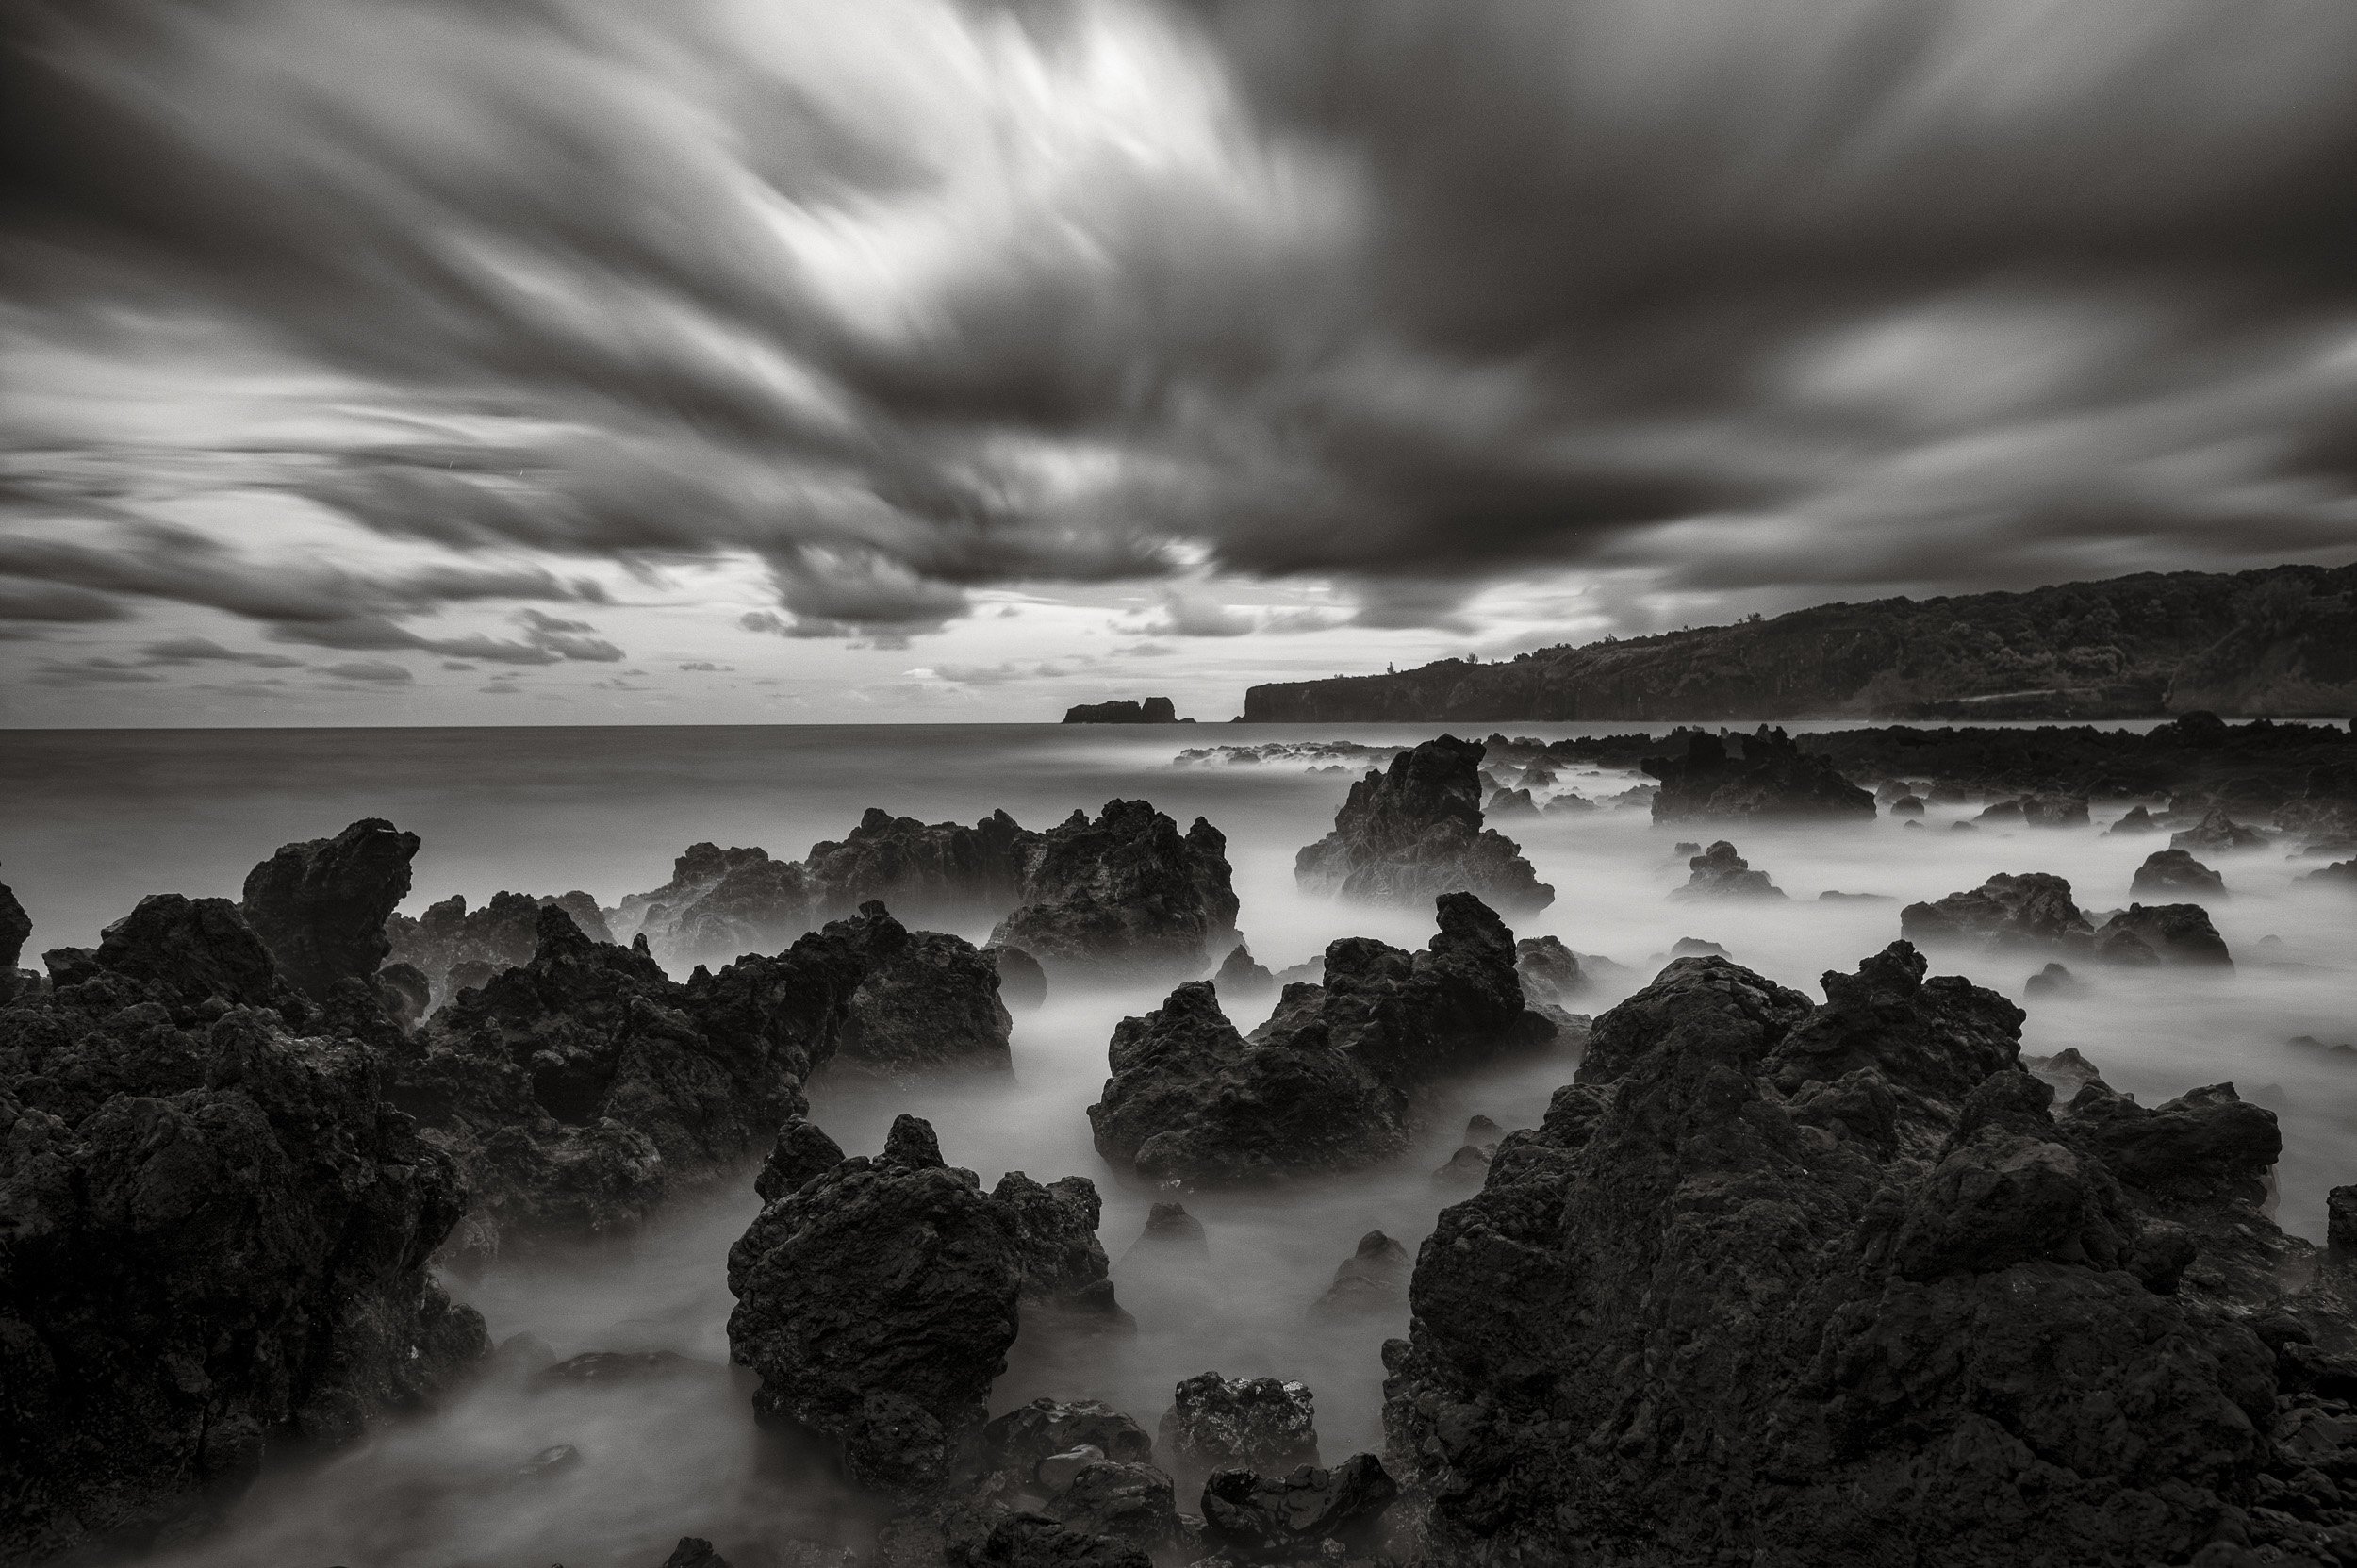
Post-Processing: San Francisco
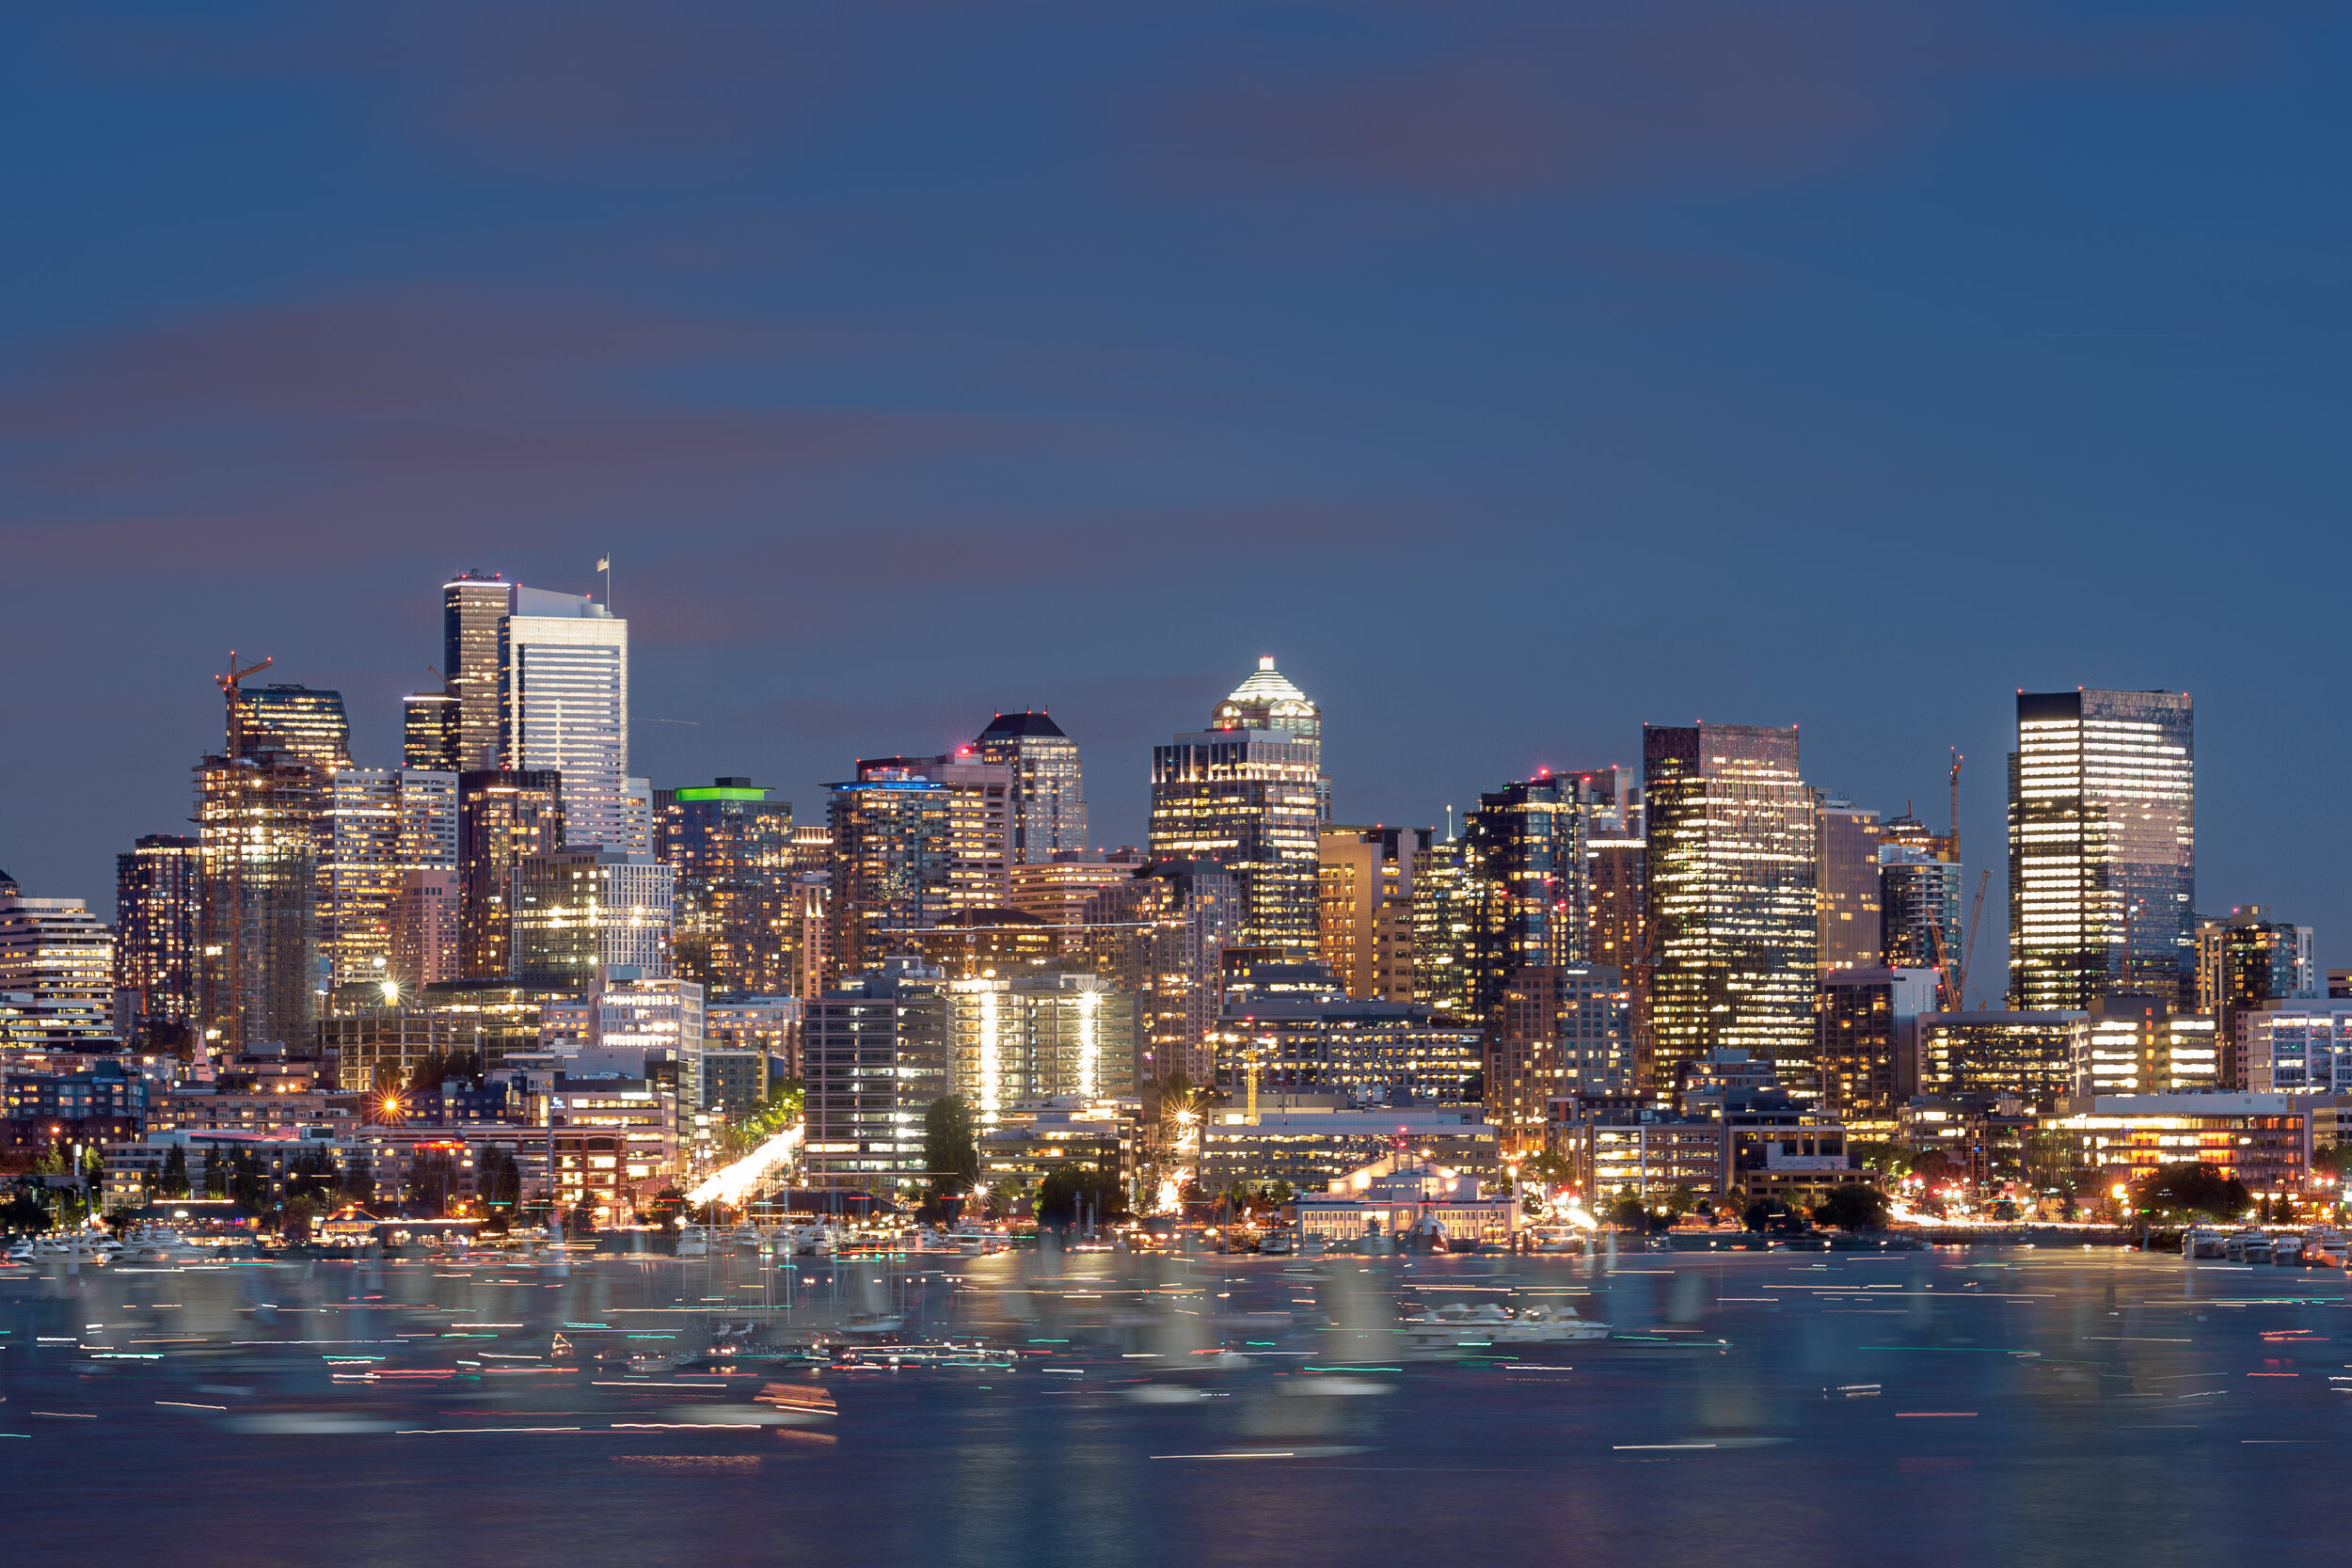
Post-Processing: Seattle
You’ve spent a lot of time building your camera skills and honing your photographic vision. Now it’s time to take it to the next level. Post-processing has become an integral part of nearly every discipline of photography. Just as the black and white photographers of the 20th century were able to creatively interpret their work in the darkroom, we can now use modern technology to enhance our photos, and even to create images that were impossible only a few short years ago. Join us in either of two amazing cities—San Francisco or Seattle—to learn how to master the tools of post-production.
Post-Processing Intensive: San Francisco — February 21-26, 2021
Post-Processing Intensive: Seattle — July 26-31, 2021
Where Will You Seize the Night With Us?
Thank you all for being part of our community of eager explorers and lifelong learners, and for continuing to use us as a whetstone for your creative skills. We appreciate you so very much.
Here’s to seeing you on the road again, very soon!
Matt Hill is a partner and workshop leader with National Parks at Night. See more about his photography, art, workshops and writing at MattHillArt.com. Follow Matt on Twitter Instagram Facebook.