Night Photography Blog — National Parks at Night

Gabriel Biderman

Happy Birthdays: 4 Parks and More Celebrating Milestone Anniversaries in 2018

National Parks at Night is excited that we’ll soon be commencing our third year of photography adventure workshops in some of the prettiest places in the U.S. (and Iceland and Scotland too!). But three years is nothing compared to how long many of our national parks have been around. Four national parks and an entire category of preserved lands will be celebrating landmark anniversaries in 2018. (And we’ll be offering workshops, as well as running print exhibits, at two of them!)

Next year three parks will be celebrating their 50th year in the system: Biscayne in Florida, Redwood in California and North Cascades in Washington. And one park will be celebrating its 100th: Katmai in Alaska.

We are leading night workshops in both Biscayne and Redwood, and the culminating photography that comes out of those workshops from both the participants and the instructors will be featured in two concurrent group exhibits at both parks! The show is tentatively titled “From the Redwood Forest to the Gulf Stream Waters.” How cool is that?

Whether you join us for a workshop, attend one of the exhibits or want to just venture out on your own, we highly recommend witnessing and helping to celebrate the historic milestones of these great national parks. For more about each place, what they’re planning for their anniversaries, and how we’re planning to participate, see the information below.

Biscayne National Park

by Gabriel Biderman

Biscayne is a unique and rare place that has survived many battles and storms, and was welcomed into the National Park System as national monument in 1968. It was expanded in 1974 and again in 1980 when it was re-designated as a national park. (Visit the park website to learn more about the birth and evolution of Biscayne.)

One of the things that makes Biscayne so unique is that 95 percent of its 172,924 acres are under water. It is truly a wonderful water world.

Stiltsville—orange house along the forever horizon in Biscayne National Park. © 2017 Tim Cooper.

The rangers and the community around Biscayne have been so welcoming and incredible to partner with. They kicked off their golden anniversary in October and will be hosting many events over the next 14 months. National Parks at Night is honored and thrilled to be part of the celebrations with a group show of our Biscayne students’ work in October 2018.

We specifically planned our workshop during the first major celestial event in 2018: a blue supermoon! With spectacular horizon lines surrounding all aspects of Biscayne, we are all but guaranteed to capture the supermoon as it rises and reflects over the horizon.

Boca Chita Lighthouse will be just one of our many explorations at Biscayne … at night!. © 2017 Gabriel Biderman.

Out of all the National Parks, Biscayne might be one of the least documented at night, because there are very few places to set down your tripod on terra firma! However, we are getting special access to one of the surreal floating houses of Stiltsville, access to the ornamental lighthouse on Boca Chita, as well as access to several of the keys that never have nocturnal visitors! So come and be one of the first groups to lead a night photography venture in Biscayne!

Redwood National and State Parks

by Lance Keimig

The far north of the California coast makes for one of the more unique settings of any of the national parks. In addition to the truly amazing redwood forests, the park includes upland prairies which overlook the fog-shrouded tall trees below, and miles of spectacular Pacific Ocean coastline dotted with jagged sea stacks.

Fog-shrouded coastal redwoods in the Lady Bird Johnson grove. © 2017 Lance Keimig.

Redwood National and State Parks is a unique conglomeration of three California state parks and the national park, which was approved by Congress and signed into law by President Johnson in 1968. Conservation of the California coastal redwoods dates back even further—in fact, much further. The Save the Redwoods League was formed in an effort to protect remaining redwood forests from logging, and was instrumental in the founding of the three state parks. Today, the California Department of Parks and Recreation and the National Park Service work collaboratively to maximize protection of the parks’ natural resources.

2018 marks the 50th anniversary of the national park, and National Parks at Night is working with the NPS to help celebrate the occasion with our Passport Series workshop, followed a few months later by the print exhibit of student and instructor work to be displayed at the park headquarters.

One cannot help but be awed and overwhelmed by the enormity and majesty of these incredible trees. © 2017 Lance Keimig.

During our workshop in June, we’ll experience a healthy sampling of all three environments the park offers—the forests, the prairies and the coast. Our base camp will be in the heart of the Yurok tribal lands, overlooking the mouth of the Klamath River in the tiny fishing village of Requa. Unlike most of our workshops, this one is inclusive of meals and lodging, which along with our classroom sessions will be at the historic Requa Inn. The inn is a special place, and we will have it, along with their talented chef, all to ourselves during the workshop. Meals will be specially prepared for us using local seafood and organic ingredients from a nearby farm.

North Cascades and Katmai national parks

by Chris Nicholson

Though we won’t be running workshops at these parks in 2018, North Cascades and Katmai will also be celebrating notable anniversaries, so we wanted to include them in this dedication as well.

North Cascades is one of the gems of our mountain parks, protecting a half-million acres of alpine wilderness in northern Washington. Though it doesn’t get as much fanfare as the state’s other two national parks (Olympic and Mount Rainier), it ranks just as high in terms of beauty and photographic opportunity. It’s a wonderful spot for both road warriors and backpackers, as it features about 55 miles of scenic byway and 400 miles of backcountry trails. This mountainous wonderland includes inspiring peaks, forested valleys, over 300 glaciers, and countless lakes, ponds and waterfalls.

Mount Shuksan in North Cascades National Park sits reflected under a starry summer sky. © 2016 Chris Nicholson.

North Cascades is organizing a slew of events to commemorate its golden anniversary, which they will begin announcing over the next couple of months. Be sure to check their website and Facebook page for more information as it’s available.

Katmai National Park & Preserve in Alaska will be celebrating the biggest anniversary of the whole bunch: its centennial! Formed in 1918, the park protects some of the grandest landscapes in North America. Its features include scenery shaped by the devastating volcanic eruptions of 1912 (including the awesomely named Valley of Ten Thousand Smokes), the wilderness of 6,716-foot Mount Katmai, snow-covered peaks, pristine alpine landscapes and tundra, spruce and willow forests, hundreds of miles of coastline, hundreds of miles of rivers and streams, and hundreds of thousands of acres of lakes.

Brown bears are the most famous attraction of Katmai. NPS photo by R. Taylor.

Despite the 4.1 million acres of visual grandeur, that’s not even what Katmai is most famous for. The park’s major attraction is its most popular residents: the ubiquitous brown bears. If you’ve ever seen a photo of a brown bear fetching a salmon mid-air from the top of a waterfall, that image was probably created in Katmai, in particular at Brooks Falls. The bears are so frequent, numerous and predictable that people (especially photographers) flock to Katmai every July and September to see the beasts feast on the unfortunate sockeye salmon of the Brooks River.

For the park’s centennial, Katmai is planning a series of events that will begin in April with a geology research symposium in Anchorage, followed by a summer full of webinars, culminating with an on-site event in September. More details will be announced on the park website over the winter.

National Rivers and Trails

by Gabriel Biderman

Additionally, the National Park Service recently created a website that celebrates the 50th anniversary of the National Trails System and the National Wild & Scenic Rivers System. For the next two years you can #FindYourWay to events and stories that will be exploring the 12,734 protected miles of rivers such as Allagash, Salmon, Snake, Missouri and Concord, to name a few.

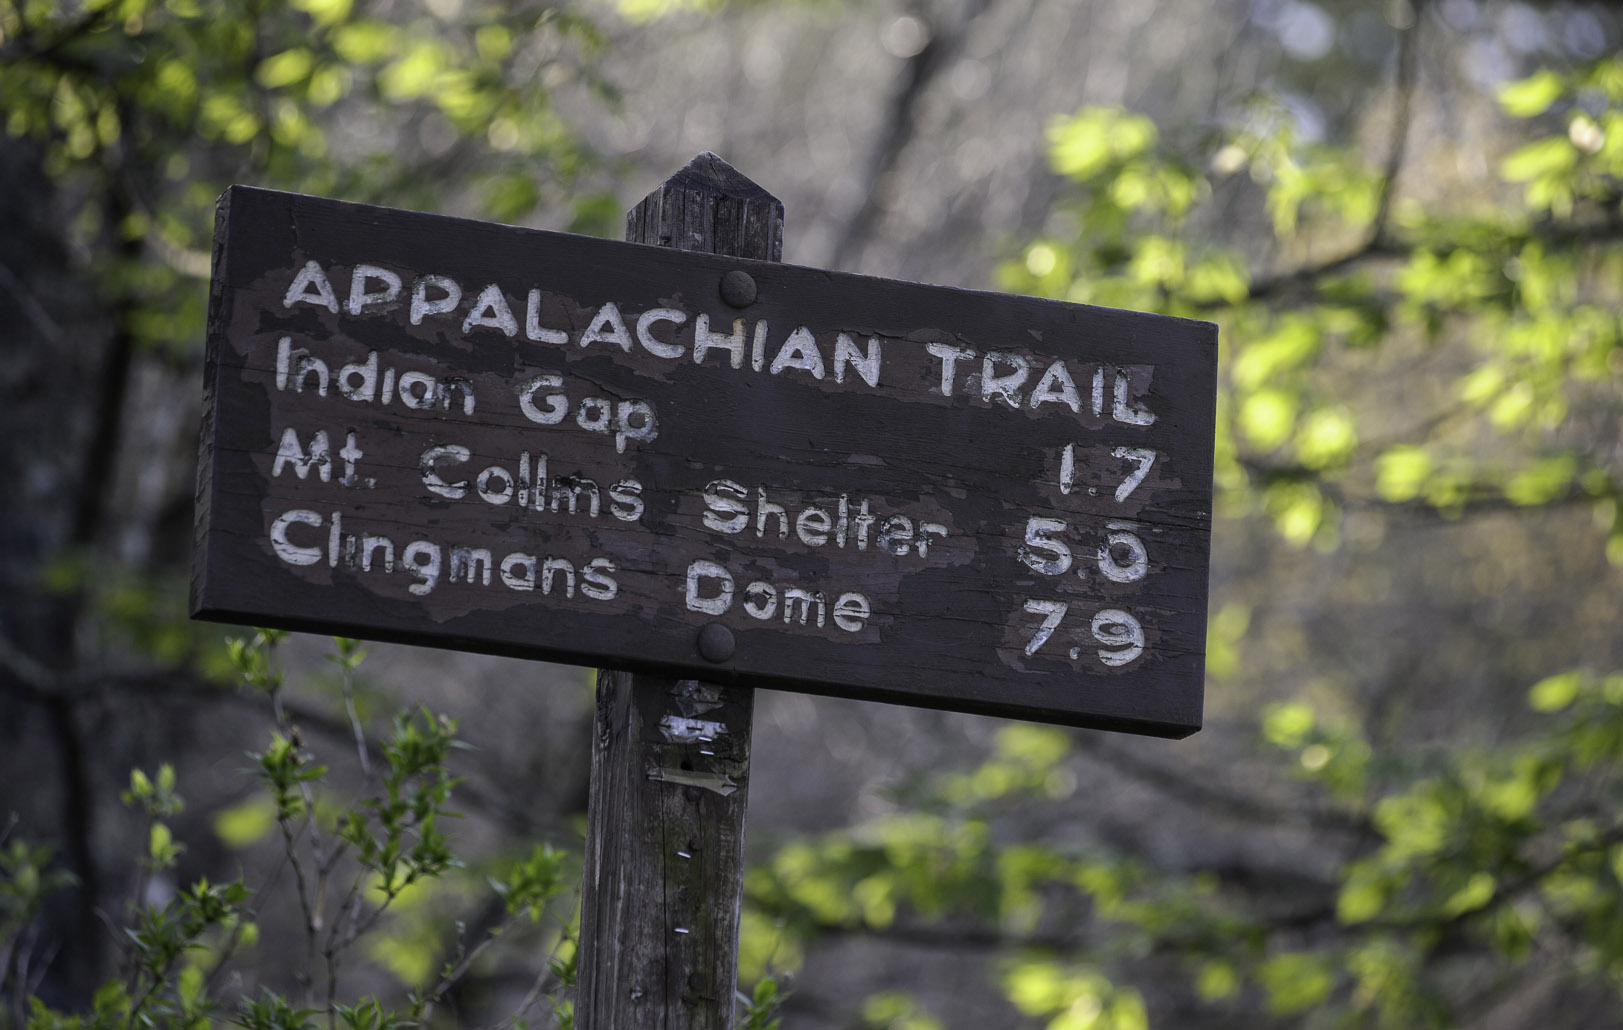
The Appalachian Trail, part of the National Trails System, wanders through some of the most spectacular scenery in the eastern U.S., including through Great Smoky Mountains National Park. © 2013 Chris Nicholson.

The Appalachian Trail, part of the National Trails System, wanders through some of the most spectacular scenery in the eastern U.S., including through Great Smoky Mountains National Park. © 2013 Chris Nicholson.

Not a fan of water? Then get lost on one of the many scenic, historic or recreational trails that unite our country. Scenic trails include the big three—Appalachian, Continental Divide and Pacific Crest Trail—as well as eight others that extend well past 100 miles! There are 19 Historic Trails that bring you a richer sense of the history in their regions. A few examples are the ancient settlements of Hawaii, the gold rushers in California, the dog mushers of the Iditarod, and the adventures of the Lewis and Clark journeys, as well as the more somber Selma to Montgomery and Cherokee Trail of Tears.

Still can’t find a path to follow? Over 1,000 trails in all 50 states are organized under the National Recreation Trail database.

So no matter where you go, make 2018 the year that you go outside and explore more!

National Parks at Night Involvement

If you want to be a part of our part of history, join one (or both) of our workshops at Biscayne and Redwood that will culminate in the “From the Redwood Forest to the Gulf Stream Waters” group show that will be exhibited at both parks. (We will pass along more info about the latter as the event nears.)

Our Biscayne workshop runs from January 29 to February 3, our Redwood workshop from June 25 to 30, and the photo exhibit in both parks will be held in October 2018. We hope to see you there, seizing the night and celebrating the parks!

Gabriel Biderman is a partner and workshop leader with National Parks at Night. He is a Brooklyn-based fine art and travel photographer, and author of Night Photography: From Snapshots to Great Shots (Peachpit, 2014). During the daytime hours you'll often find Gabe at one of many photo events around the world working for B&H Photo’s road marketing team. See his portfolio and workshop lineup at www.ruinism.com.

UPCOMING WORKSHOPS FROM NATIONAL PARKS AT NIGHT

'Tis Once Again the Season: Our 2nd Annual Holiday Gift Guide

It’s that time of year again, and the fellas at National Parks at Night are here to help you find the best ideas for that special person in your life. Welcome to National Parks at Night’s second annual Holiday Gift Guide!

We’ve compiled some of our favorite things that help us explore and enjoy our parks more, and that help us capture and create more dynamic images! We kept our eyes open all year, tested the tools, and collated the absolute best and unique gifts that will warm the heart and hearth of any fan of national parks and night skies.

We’re providing all of our findings as a free downloadable PDF ebook, so you can read it and reference it on any device, anytime, anywhere. Inside you’ll find products from major brands such as B&H, Peak Design and Nikon, along with great little finds from smaller companies and startups. You can download it below, or keep on scrolling.

Help us spread the cheer by posting our guide on your favorite social media channels and share it with other like-minded photographers, friends and nature buffs!

If you prefer to read the guide in our blog, that's okay too; we're also publishing it right here, below. (Though, we will say the e-book version looks cooler. It contains a lot more pictures, photo tips from all five National Parks at Night instructors, and a discount code that doesn't appear anywhere else online, including this website.)

We hope that perusing the items in the guide will inspire you to give some great gifts to the night photographers in your life. (And if you’d like to give us one or two of these things, we won't argue!)

Wishing you all the very best, and hoping that you are taking advantage of seizing the longer winter nights!

—Gabe, Lance, Matt, Chris and Tim

Note: If you decide to purchase any of the items in this gift guide, please consider using the links included, as many help earn a small commission that help us improve the National Parks at Night workshop program.


Atlas Obscura

Atlas Obscura: An Explorer’s Guide to the World’s Hidden Wonders

To wander without being lost, we all need some sort of guide—whether that be spiritual or bound paper. For the latter, wander no further down the book aisle than Atlas Obscura: An Explorer’s Guide to the World’s Hidden Wonders, a how-to and why-to for finding the world’s best off-the-beaten-path and out-of-the-box travel locations. A regular travel guide would bring you to New Zealand, while Atlas Obscura brings you to the glowworm caves of North Island; a regular guide would show you how to safari in South Africa, while Atlas Obscura tells you about the pub inside a giant baobob tree. Don’t be just a traveler—be a discoverer, with Atlas Obscura.

Atmosphere Aerosol

Atmosphere Aerosol

Sometimes, charisma is not enough. To make the right mood happen, you need a little help. Grab a can of Atmosphere Aerosol to create additional mood, or to reveal the path of your light sources. Truly exceptional results with light painting to add drama to any scene.

B&H Photo Audio Pro Video

Gift Card

Have a photographer friend and don’t know what to get them? Let photographers choose their own gift at the world’s biggest and best resource for all your photo, video and image-making needs! We’ve never met anyone who complained about receiving a B&H Gift Card any time of the year!

National Parks at Night

‘ISO 6400 and Be There’ T-shirt

Photographers who have been around the block a few times will no doubt remember the phrase “f/8 and be there,” the street and event photographer’s motto and standard answer when asked, “How did you get that shot?” We revised the terminology for 21st century night photographers, and it’s become a rallying cry for us at National Parks at Night ever since. Show off your stars and take it as a point of honor to get out from behind your computer and set up your camera under the starry night sky. This super-soft, navy blue, Next Level poly/cotton crew shirt is available in sizes from small to 3XL, and is printed with glow-in-the-dark ink so you can read it when it really counts!

Bay Photo

Metal Print

In this digital age, we often forget to take our amazing images off the computer and make prints that we can share—prints that will last a lifetime. We absolutely love the image quality and longevity of Bay Photo’s metal prints. Sizes range from 2x3.6 inches to 4x8 feet, and five distinctive metal surfaces help you bring out the best of your work. For our night photography we prefer their mid-gloss and satin surfaces. Bay Photo also makes books and calendars, and our favorite standard floating prints are their thin wraps. So give the gift of a print or help a photographer celebrate their work on the wall.

Special offer: New customers to Bay Photo get 25 percent off their first purchase. Exclusive to the National Parks at Night community and If you are already a Bay Photo customer: Use the promo code “NPANM10” for 10 percent off metal prints , excluding Clusters and Splits; good through December 29, 2017.

BenQ

SW2700PT 27" Widescreen LED Backlit QHD Monitor

We spend so much of our time looking at images on small screens––phones, tablets, laptops. While the quality and resolution of these screens has improved dramatically in recent years, they are no substitute for a quality display with accurate color that any serious photographer needs to produce quality work. BenQ makes some of the best there are. The National Parks at Night crew uses the SW2700PT 27" Widescreen LED Backlit QHD Monitor, which features 99 percent coverage of the Adobe RGB color space for more accurate color representation and features 2560x1440 QHD resolution with 109 pixels per inch for increased clarity. In short, display your photos with the best possible light!

Chimani

Chimani Perks

If you want an app to help you navigate the national parks and all they offer, you’ll find no need to look further than Chimani. Not only do their apps give you the what and where of the parks, but they provide the photographer with critical information, including sunrise, sunset, moonrise, moonset, golden hour, blue hour times and more, including photos of popular and out-of-the-way shoot locations. The apps are free (yay!) but the gift idea here is a membership to the Chimani Perks program, which provides discounts and special offers throughout the national parks and the communities that serve them.

Coast Portland

FL75R Headlamp

Along with a good flashlight for light painting, the headlamp is one of the most useful tools in the night photographer’s tool bag. In keeping with their tradition of high-quality, durable flashlights (preferred by National Parks at Night instructors), Coast offers an extensive line of LED headlamps. Our favorite is the FL75R, which features focusable wide-angle beams, low and high output, and dual-color beams with red to preserve your night vision.

Special offer: Use the code “parksatnight” for a 30 percent discount available only through National Parks at Night.

Cooph

Leather Card Holder Wallet

The perfect gift for the shutterbug in your life: a luxurious leather wallet with slots for four SD cards, credit cards, an ID and more. We discovered this at the PhotoPlus Expo in New York City this year and ordered one on the spot. Bye, old wallet! Hello, new friend.

CreativeLive

Night Photography Week Online Course

Can’t make it to a workshop this year? No problem, we’ve got you covered. Our team got together and spent a week recording our favorite night photography topics, with CreativeLive, the best in the business at bringing high-quality instructional videos via livestream and download. Our CreativeLive Night Photography Week videos cover everything from night photography fundamentals to scouting to astro-landscape to light painting to night portraiture. Great for the photographer new to night photography as well the seasoned enthusiast.

Epson

SureColor P400 Inkjet Printer

Quiz: How many dots does 5760x1440 dpi yield in an 8x10-inch print? 663,552,000. That’s what you can expect from this new Epson P400 printer that packs advanced tech with simplified use. Print borderless at 13x19-inches or stunning Milky Way panoramas up to 13x129 inches with roll paper. Prints for the win!

Special offer: $100 rebate until November 20, 2017. See details when clicking the link above.

Grey Learning

Mastering Lightroom Bundle

We understand. Everyone’s Lightroom catalog can get out of control. But don’t worry, our friend Tim Grey can help. Check out Tim’s “Cleaning up Your Mess in Lightroom” video. Tim’s a great instructor and his video will show you how to bring order to chaos in your Lightroom world. Or, even better … this video is part of Tim’s overall-excellent “Mastering Lightroom” bundle of downloadable tutorial videos, which will help you organize and optimize your photos to the level that only Grey learners achieve!

Special offer: Use coupon code “night” during checkout for 20 percent off any course or bundle.

Irix

11mm f/4 Blackstone lens

If you like shooting wide, you’ll love the Irix 11mm lens. A true rectilinear lens, this is no fisheye. Did we mention it’s wide? You’d better stay behind the camera when you use it, otherwise you might just end up in your own shot. Irix lenses are available in two versions: The all-metal Blackstone, and the lighter-weight Firefly. Both versions feature a solid and sure manual focus ring with an infinity detent and a unique focus-locking ring. Once you achieve infinity or hyperfocal focus, lock it down, and don’t worry about focus again.

Light Painting Brushes

9in Black Fiber Optic Brush

Perhaps no other light painting tool comes closer to actually being able to paint with light than these fiber optic brushes. They are especially useful for portrait work and they are most effective when used to actually brush the subject during a long exposure. The black version of brush shows light only at the ends of the fibers, for precise placement of the illumination. The white version creates broader, softer strokes, and lights a larger surface area. Paint the Light Fantastic!

Special offer: Use the code “LKW_20” for a 20 percent discount available only through National Parks at Night.

Luxli

Viola 5" On-Camera RGB LED Light

Night photography’s new darling tool! Ideal for light painting and Low-level Landscape Lighting effects. The Luxli Viola’s native color temperature adjusts from 3000 K to 10,000 K, and you can also dial in all the colors in the world. Bonus: Bluetooth control for remote intensity and color adjustments of up to nine Violas at a time. Wow.

Manfrotto

Befree Advanced Travel Aluminum Tripod with Ball Head

Manfrotto’s new update to the Befree tripod series boasts some cool features: the lightweight yet strong 494 ball head, M-lock mechanisms for fast setup or QPL Travel Levers for those who prefer flip locks, and a newly redesigned body that’s stronger and smaller.

National Parks at Night

2018 Calendar

Here’s a great gift for yourself or that night photography friend of yours. Our National Parks at Night 2018 Calendar, featuring photos from parks around the United States—plus Iceland and Scotland—is an inspiring way to stay up to date. Useful information such as important astronomical events, lunar dates and national park birthdays are included to help you plan your shoots.

Memento

35" Smart Frame

You haven’t seen a digital frame until you’ve had the pleasure of seeing a Memento. Situated in a wood composite frame and a beveled mat, the ultra-HD 4K display contains 7 million pixels that will make your photographs look even better than you can imagine. Controlled completely by Wi-Fi via a free app on your computer, tablet or phone (even remotely!), the frame can store up to 3,000 images. Group your photos in playlists to display at different times of day, and custom-set the interval from 5 seconds to one week to never. Moreover, the frame’s smart technology will dim the display in low light, and turn off when the room lights turn out. Offered in 25- and 35-inch models in five stain colors.

National Geographic

‘Night Vision’ book

A brilliant coffee table book released this fall, National Geographic Night Vision: Magical Photographs of Life After Dark After Dark offers a collection of 230 photographs from some of the best image-makers in the business. 400 pages of night photography from both natural and urban spaces all over the world, including national parks.

National Park Service

Annual Pass

We can only assume that you must be a fan of our primary source of inspiration, the United States’ 59 amazing national parks! You probably know that the America the Beautiful pass gains access to all of those parks for a full year, but did you know that the annual or lifetime senior pass also gets you access to over 2,000 federal recreation sites including national monuments, wildlife refuges, national forests and grasslands, and to sites managed by the Bureau of Land Management, Bureau of Reclamation and U.S. Army Corps of Engineers? The passes cover entrance, fees for a driver and all passengers in a personal vehicle. The cost of the annual pass is $80, or $20 for seniors over the age of 62. Seniors can also buy a lifetime pass for $80. Passes are free for American veterans, Americans with permanent disabilities, and fourth-graders!

Nikon

D850

2017 is the centennial of the Nikon Corporation, and the D850 is a truly worthy camera to be released on such a momentous occasion. If you haven’t heard about the D850 by now, you must still be shooting film. Designed as a replacement for the venerable D810, this camera is a night photographer’s dream. Super high resolution, extremely wide dynamic range and outstanding high ISO performance, all in a weatherized housing that is only slightly heavier than a D750. National Parks at Night just had our first experiences with this great new camera at our last workshop of 2017. Now it’s on all of our holiday wish lists!

NiSi

Natural-Night Filter

Even in some of the darkest locations in the world, the night sky is still tainted by light pollution, much of which is due to ubiquitous high pressure sodium vapor lights. The NiSi Natural Night Filter minimizes scattered light from sodium vapor and mercury vapor street lights. Natural-Night is available in 100x100mm and 150x150mm square filters, and 77mm and 82mm threaded filters. The result is more pleasing, natural-looking skies in your astro and astro-landscape photos.

Outdoor Photographer

Magazine subscription

The photography world is full of fine publications, and one that speaks directly to us and our like is Outdoor Photographer—dedicated to helping photographers capture their very best images of the natural world. From how-to articles to location advice to travel stories to gear reviews and more, Outdoor Photographer will keep readers focused on the latest and greatest news in our niche. Available in print and digital subscriptions.

National Parks at Night

Night Photography Adventure Workshops

We simply love being outdoors, teaching and helping people get great pictures. Many of our 2018 Passport Series workshops are full, but we do have a few slots open on our Biscayne, Redwood and Rocky Mountain national park events. Last year we added the Adventure Series workshops to our lineup too, so that we could visit the varied and limitless beauty that lies outside of our national parks and teach special topics or advanced techniques. Experience the unfettered creativity of night portraiture, explore the depths of a metal machinery in Sloss Furnaces, or light paint the ancient Pueblo ruins of Chaco Canyon. Our road trips include the Blue Ridge Parkway and the south coast of Iceland. Come seize the night with us in 2018!

Palette

Aluminum Expert Control Surface Kit

There’s a communication barrier between photographers and their computer. We need to tell them what to do, but we’re limited by the languages of key presses, mouse movements, trackpad gestures, tablet scribblings, et al. Palette eases that communication by providing a suite of custom-configurable modules that you can use to tell Lightroom and Photoshop (and more!) exactly what to do with intuitive motions and tools. Slide a slider for exposure, turn a dial for color temperature, push a button for picks or rejects, and so on. Choose your options to fit your workflow, and finally you and your computer will be speaking the same language. Multiple kits available—the Expert Kit is a great place to start.

Peak Design

Everyday Sling 10L

Big bags are great for transporting your gear from point A to B, C and beyond. But we always bring a smaller bag with us that is better for a smaller, simpler, scouting kit. The Peak Design Everyday Sling 10L has been a favorite of ours this last year. We can fit a DSLR or mirrorless camera plus two to three lenses and a flash. There’s lots of room for extra batteries and cards, and you can even strap a travel tripod to the bottom. We were so impressed with the Everyday Sling 10L that we made a video in the Galapagos showcasing how much you could pack in it! Looking for something even smaller? Peak Design just announced the even more compact Everyday Sling 5L. It’s perfect for a DSLR and up to a 24-70mm/24-105mm lens or a mirrorless camera plus two lenses, and also works excellently for transporting the DJI Mavic Pro and Spark Drones.

Special offer: Receive a free gift with a purchase over $65 by using the link above.

PhotoPills

Photo-Scouting App

For the shooter who wants to get the most out of their night photography, there isn’t a more full-featured tool than the app PhotoPills. Our favorite feature is Night AR (Augmented Reality), where you can observe the location of the Milky Way, moon and more—all overlaid on the scene in front of you, with sky positions now and in the future. That makes being in the right place at the right time easy! Available for iOS and Android.

Ranger Doug’s Enterprises

WPA Posters

The original national park poster program was launched in 1938 and lasted until 1941. They used WPA artists to give their now nostalgic interpretation of our national parks. Due to the posters’ fragile nature, only 2,000 original copies have survived. However, Ranger Doug Enterprises (founded by an actual former national park ranger) has faithfully reproduced these serigraph images as posters and cards. They make the perfect memorabilia to hang on your wall. Or, send a postcard to a friend with detailed plans on your next national park adventure!

Room Essentials

LED Tea Lights

Tea lights, really? Yes! A super inexpensive and lightweight addition to the light painter’s tool kit. They are easy to place in hard-to-paint areas and are great for long exposure night photography. These low-output LED light sources mimic the natural light of a candle, and last for over 100 hours.

National Parks at Night Instructors

Photography Books

NPAN books strip.jpg

The National Parks at Night instructors have written five books that are definitive guides to popular photography subjects, all of which make excellent gifts. Moreover, the complete set can keep the photographer in your life well informed and educated about topics ranging from national park locations to how to shoot in the dark.

Ruggard

RTC-10 Timer-Remote Case for Tripods

Like a Snuggie for your intervalometer. Avoid stressing the jack on the side of your camera by storing your intervalometer or remote shutter release on your tripod leg in this handy case by Ruggard. Simple to attach with hook and loop fastener, and always there when you need it.

Salomon

XA Pro 3D and XA Pro 3D GTX

We’ll never stop saying it: The first priority when working in the dark is safety. And one of the starting points of safety is where your feet meet the earth. Walking around in the dark in the wilderness requires footing you can rely on, and Salomon is one of our favorite solutions. Their XA Pro 3D trail-runners have a wide heel base that helps prevent rolling an ankle, an aggressive tread that keeps you from slipping while toeing from spot to spot, and light weight that makes moving around a breeze—particularly with expensive camera gear on your back or your shoulder. Available in breathable mesh and Gore Tex waterproof models (we own and use both!).

SkyGlow

Book & Time-Lapse Video

Harun Mehmedinovic and Gavin Heffernan have been making incredible time-lapse movies promoting dark sky awareness for several years.  A year ago they Kickstarted the SkyGlow astrophotography book and time-lapse video series. Educate yourself on dark sky locations and light-polluted cities in North America in their beautiful coffee table book.

Special offer: Use the code “SKYGLOW15” for 15 percent off everything in their store until December 26th. In addition, the first 500 orders priced $25 and above will also receive a signed 10x7-inch archival quality print!


Tether Tools

Jerkstopper ProTab Cable Ties

Keep your cables and cords nice and tidy with Tether Tools ProTab Cable Ties. Great for keeping all those wires that we have in our life organized, and for keeping them from being tangled together when packing and transporting. We find the medium size works best for our computer, charging, headphone and intervalometer cables. But they have larger sizes perfect for extension cords, surge protectors and the like.

USAopoly

Trivial Pursuit National Parks Travel Edition

Which national park is home to Exit Glacier? In which state are 17 of the 20 highest peaks in the U.S. found? Which chatty, problem-solving avian found in Arches National Park is a prominent figure in both European and Native American folklore? Do you know those answers? Then you win! With Trivial Pursuit National Parks edition, one up on the essential and obscure facts about America’s beloved National Parks anywhere. Heck, you can even play the game with other people! We discovered this in the gift shop at Olympic National Park and bought it on the spot. Included is a plastic hard case that feels like a weather-beaten sign, carabiner and die for play. Fits neatly in a camera bag!

Vallerret

Ipsoot Photography Glove

Finding the right glove for night photography has been an ongoing project for us at National Parks at Night. There are lots of options to choose from, but until now the right glove for truly cold weather proved elusive. The challenge was to design a glove that offers both protection from extreme cold and the dexterity to operate a camera in those same conditions. The Ipsoot photography glove from Vallerret is a heavier duty glove that provides extra protection against the elements for when it really gets cold. If a little cold won’t slow you down, and you still want to get out there and shoot in the dead of winter, the new Ipsoot Glove is the answer.

Special offer: Use code “NPANworkshop” for a free pair of merino wool liners with the purchase of gloves at the link above. (Add the liners to the shopping cart for the code to work.)

Vello

Three-Axis Hot-Shoe Bubble Level

It’s hard to see in the dark, and even though lots of cameras have a built-in level to help us keep our horizon line straight, we find that the external Vello Three-Axis Hot-Shoe Bubble Level does a far superior job. This bubble level really shines when we shoot off axis—such as when we shoot upward to include more sky. The level is simple, small and slides right into your hot shoe to keep you on the level!

X-Rite

i1Studio Spectrophotometer

Don’t assume you’re seeing the right colors or brightness. Know it. Calibrate your monitors, mobile devices, projectors and printers with the all-encompassing solution: X-Rite’s i1Studio. Included is a mini ColorChecker for making camera profiles and color-balancing your RAW files. If you don’t use color management, then when you post or print, your final product might not match the way you want it to! Be calibrated; be sure.


Happy Holidays!

Remember, just like holidays, and just like gifts, gift guides are meant to be shared! Please feel free to forward this to anyone and everyone you think might be interested. Particularly if it’s someone who buys a gift for you!

And remember, this gift guide is also available as a PDF e-book that includes lots more photos, an exclusive discount code on one of the products mentioned above, and photo tips from Chris, Matt, Tim, Lance and myself. You can download the PDF by clicking right here.

From all of us at National Parks at Night, we wish you and your loved ones a wonderful holiday season.

Gabriel Biderman is a partner and workshop leader with National Parks at Night. He is a Brooklyn-based fine art and travel photographer, and author of Night Photography: From Snapshots to Great Shots (Peachpit, 2014). During the daytime hours you'll often find Gabe at one of many photo events around the world working for B&H Photo’s road marketing team. See his portfolio and workshop lineup at www.ruinism.com.

UPCOMING WORKSHOPS FROM NATIONAL PARKS AT NIGHT

Eclipse Lessons: What We Learned from Our Day in the Sun

Wow. That … was epic. Whether you experienced the solar eclipse of 2017 in the mountains or the cities, with a small group of friends or with the masses, or even just online, that was the most universally experienced eclipse ever!

As we slowly come down from the high of the event, we want to share our story with you.

All five of us here at NPAN witnessed the eclipse in different ways. Chris, Matt and I saw totality, and Lance and Tim took time out in their location to stare at the waning sun.

I planned a small, hands-on Adventure Series workshop around the event. We lived on a ranch at Exit 0 in Montana and then drove two hours to the remote wilderness to capture totality.

Matt collaborated with B&H and Atlas Obscura at a Total Eclipse festival in eastern Oregon and made the most of his two minutes by creating eclipse portraits during totality. And Chris probably did the smartest thing and simply shared the whole experience with his 4-year-old daughter, laying together on a blanket in the grass outside a zoo in Greenville, South Carolina.

Tim was leading a workshop in smoky Glacier National Park and guided the students not to shoot the blocked sun but instead to capture the unique rays of light from a minimal sun. And Lance, who had just recently moved to Vermont, took time out of his day to take it all in with his fiancée.

In this post, Matt and I share how we prepared for our shoots, and the ideas we had for capturing and creating during the whole of the eclipse.

Gabe’s Prep

I’m always looking ahead to unique celestial events that we at NPAN can share. When I first learned that the Great American Eclipse was going to be passing through an area I frequent, Montana, I knew I had to start planning!

As it turns out, I was invited to the rural big night skies of J Bar L Ranch in Centennial Valley. Located about one hour from the path of totality, I had initially planned to avoid the crowds and just shoot and share the eclipse at the ranch. When we posted the details of the workshop, we even downplayed the eclipse aspect because you never know with weather. However, we received several emails from “eclipsers” who told us that they would rather see the total eclipse in front of a pile of rubbish than a partial eclipse in the most beautiful place in the world.

So we changed the game plan and I started researching nearby locations in Idaho that would be in the path of totality, which I was able to scout a year ahead of time. My first thought was to go to Sun Valley and get close to Stanley, a small town smack dab in totality, But when I heard that this small town of 50 people was expecting 50,000 visitors, I starting looking for locations even more rural.

Figure 1. Idaho’s Sawtooth Mountains. © Gabriel Biderman.

In the end I was guided by stormy weather and magical light. I was visiting the small towns of Arco and Mud Lake when an impressive storm drew me toward the Sawtooth Mountains (Figure 1).

I pulled off and drove down a dirt road to gain a better vantage point to shoot the rays of light dancing around the mountains. I knew I was in the path of totality and pulled out the PhotoPills app to confirm that the sun would be seen over the Beaverhead Mountain Range at the time of the eclipse.

Figure 2. PhotoPills’ VR overlay of the path of the sun over the Beaverhead Mountain Range.

Figure 2. PhotoPills’ VR overlay of the path of the sun over the Beaverhead Mountain Range.

It was important for me to have an interesting foreground, as I wanted to have our students have a wide-shot option when photographing the eclipse.

Matt’s Prep

(Hi, Matt here!) I was a polar opposite to Gabe. Imagine that.

I wasn’t really interested in photographing the eclipse stages before and after totality. Why? I am happiest shooting at night, and totality was what I was looking for. The heat was on to make a plan for those two minutes.

I love making night portraits. So I challenged myself to stage and shoot as many portraits as I could pull off during totality. I knew the exposure would be akin to end-of-dusk light levels. So I grabbed my Sigma 35mm f/1.4 Art lens to make both the subject and the sun/moon combo a size that felt appropriate to me.

Figure 3. Night at Atlas Obscura’s eclipse festival.

We were set up in a field on a private farm in Durkee, Oregon, for Atlas Obscura’s eclipse event. I was hanging out with the B&H Photo crew, enjoying all the solar-equipped telescopes they brought to observe first bite and the looming totality.

The crowd was abuzz with anticipation (for the eclipse—not for what I was doing.). I grabbed a speedlight and a Luxli Viola, and prepared to test.

Gabe’s Practice and Process

As we discussed in our “NPAN 2017 Solar Eclipse Guide,” the most important thing you can do to prepare for the eclipse is practice shooting the sun.

Zoom lenses need constant monitoring to track the path of the sun in the sky. Solar filters take some getting used to looking through, as they darken everything but the sun. We practiced tracking for several days right before the eclipse. If you can practice during the same time of day, you’ll get a feel for how high you need to track.

I found that the autofocus of the zoom lens did a good job, but because we were pointing directly above us at noon, my lens had issues with creeping. I had to gaff-tape down my zoom ring so that it would stay all the way zoomed out. Investing in a lens that locks its zoom at multiple focal lengths would be very wise.

Matt’s Practice and Process

All of my practice is from years of night photography and flash portraiture. I’ve been shooting in dim light combining those two practices for a while, so I felt confident I could make it happen when the time came.

But it didn’t stop me from thinking though the possibilities over and over while waiting. I did fret a little. But the Light Painting Party the previous evening had me feeling all sorts of good.

Gabe’s Gear and Settings

My wide setup was the Nikon D750 with the Nikkor 14-24mm f/2.8 lens and the cardboard DayStar Solar Filter. My settings during the eclipse (not totality) were 1/125, f/8, ISO 800. I manually set focus at hyperfocal distance so that everything was sharp from 10 feet to infinity.

My telephoto setup was the Fuji XT2 and 100-400mm f/4.5-5.6 lens, with the best filter holder system I have ever used, the Wine Country. Even with the dubious Amazon scare, I stood by my Lee Solar Eclipse Filter, as I had used it for many hours without any issues. My base settings were 1/250, f/8, ISO 800.

I wanted to simplify my shooting during totality as much as possible and set up both cameras to bracket. To capture the “diamond ring,” I closed down to f/22 to heighten the flare, increased the shutter speed to 1/60, and bracketed as best I could. The light bursts were bright and quick and the bracketing worked out really well. The 1/2-second exposure gave me the best corona (see Figure 4) and 1/250 captured the Bailey’s beads (Figure 5). But the most dramatic image was the flare from the diamond ring effect, which worked out best at 1/15, f/22, ISO 800 (Figure 6).

Figure 4. Corona. 1/2, f/22, ISO 800.

Figure 5. Bailey’s beads. 1/250, f/22, ISO 800.

Figure 6. Bailey’s beads, or the diamond ring effect. 1/15, f/22, ISO 800.

During totality I lowered my shutter speed to 1/15 and bracketed again. I should have also opened my aperture, but I was trying to keep things simple while running between two rigs.

The best exposures ended up being 1/15 and 1/30, as exposures at or over 1/8 tended to be too blurry with the rather rapid movement of the sun and moon. In hindsight, I should have opened my aperture to f/8 and kept my shutter speeds in the range of 1/125 to 1/250.

It was very important to put my camera in the highest burst mode, to shoot in RAW (of course) and to still bracket. Keep the trigger firing and take some time to take it all in.

Matt’s Gear and Settings

I popped the CTO-gelled speedlight on a tripod and tested the output. Why CTO? Well, I wanted to shoot with Tungsten white balance and the flash should be neutral.

This is night photography, if but for a moment.
— Matt

I then grabbed the Luxli Viola and set it to 5000 K. I placed it lower than the speedlight, but on axis. I’ve been studying how cinematographers are making the shadows and highlights different color balances. So I wanted a cool shadow undertone from the LED light and neutral/warm from the flash. And the sky would look cool because of the Tungsten setting.

I revved up my Nikon D750 and Sigma 35mm with no filter. Why? It’s totality—this is night photography, if but for a moment.

I worked through a couple of test shots to get the sun/moon exposure while my first subject, John Faison, was making a few images for himself. I asked John to stand in front for a few darker frames at 1/125, f/6.3, ISO 200. Then I wanted some more corona and landscape for context, so I dropped my shutter speed down to 1/25 and then 1/3. (See Figures 7 through 9.)

Figure 7. 1/125, f/6.3, ISO 200

Figure 8. 1/25, f/6.3, ISO 200.

Figure 9. 1/3, f/6.3, ISO 200.

Figure 10.

We swapped places and by the time John shot two frames of me (Figure 10), our two minutes of totality were over. Wow. Talk about pressure!

I asked the next volunteers to step in and it was all over. :-(

Gabe’s Experience/Emotion

Well, that was the quickest two minutes in my life! It was magical to have the sunlight change so drastically and to have hard “night” shadows engulf us. Typically moonlight is very soft, so this was very surreal. I saw only the brightest stars and planets—it was a very silvery civil twilight.

The drastic drop in temperature brought an eerie chill and the only creatures close to us were flies that appeared out of nowhere when the lights came back on.

I did watch too much of totality from the back of the screen and really wish I had spent more than 15 seconds staring at the sky.

Matt’s Experience/Emotion

I was laser-focused on one mission. OK, two. I forgot to mention I was running a time-lapse with a fisheye from ground level on Aperture Priority (see below).

Anyway, my one mission (I told myself) was to do something no one else was likely to be doing. I like to zig when others zag. I’m known for it. It’s curiosity. I love that feeling of, “Oh, this might not work.” In fact, I told John and those who didn’t get a chance to get their portrait done that very same thing.

I was listening intently to everyone around me. I heard the hush of wildlife. I heard the birds all speak up at once, then crickets. I felt the temperature drop and one of the scientists nearby exclaim in glee, “It’s 62 degrees Fahrenheit—a full drop of ten degrees!” I felt the mosquitoes rise up and eat me alive. I heard all the oohs and aahs of everyone marveling about all the stars in the sky behind us. But I saw none of it. I was on task.

Do I regret not enjoying the eclipse with my own eyeballs? Not at all. Because now I would be regretting not trying for something that was a pressure-based stretch goal. I tried, and I believe I succeeded. In fact, I got a diamond ring in my portrait. Pretty rad.

Gabe’s Final Takeaways and Notes for 2024

I was able to share this experience with my dad as well as nine Centennial students, which was incredibly special. We were all alone among the mountains, and it would have been weird to experience it all by myself. Viewing it in a city would have been more of a universal gasp of astonishment, but I really appreciated the people I was with and the earth that surrounded us. We all promised to meet back up in 2024!

It was difficult to remain cool, calm and collected during totality. I totally forgot to turn on my 360-degree video camera, which would have been a unique way to capture the changing light and our reactions. Maybe next time we can work together and have each person be responsible for one way to interpret the eclipse—that way we would be more focused and could share the many results.

Figure 11. Composite of 25 frames showing the full sequence of the solar eclipse. Nikon D750 with 14-24mm f/2.8 lens and DayStar Solar Filter. Each frame (except totality) shot at 1/125, f/8, ISO 800.

In the end, the close-up shots give you a closer look at all the incredible things that happen moments before, during and after totality, but after the rush of it all, I’m really enjoying the wider-view composite shot of all the sun phases over the scene (Figure 11).

I feel like I accomplished the standard takes on the eclipse and look forward to challenging myself for a new perspective in 2024—or before!

Matt’s Final Takeaways and Notes for 2024

I was very fortunate to be where I was, when I was. I wasn’t originally scheduled to go to the festival, but a series of other things put me in a position to represent NPAN at Atlas Obscura’s exclusive event.

I’ve always admired the cut of their jib. Their focus on adventure, satisfying curiosity and generously sharing is right up my alley. And I met a host of like-minded people there. It was kismet and I would do it all over again exactly the same way.

Next time, however, I will bring about five cameras. That may be in Argentina in 2019 or 2020, or much of North America in 2024. I am hooked. That was a truly singular experience.

Did you photograph the solar eclipse? We would love to see your images in the Comments section below!

Gabriel Biderman is a partner and workshop leader with National Parks at Night. He is a Brooklyn-based fine art and travel photographer, and author of Night Photography: From Snapshots to Great Shots (Peachpit, 2014). During the daytime hours you'll often find Gabe at one of many photo events around the world working for B&H Photo’s road marketing team. See his portfolio and workshop lineup at www.ruinism.com.

UPCOMING WORKSHOPS FROM NATIONAL PARKS AT NIGHT

Night in Day: How are you Preparing for and Shooting the Eclipse?

Note: This article is also featured in our brand new free e-book Here Comes the Sun: 2017 Solar Eclipse Guide. The e-book also includes the articles “Parks in the Dark,” a travel guide to all the National Park Service units that the total eclipse will pass over, and “The Right Stuff,” a detailed buyer’s guide for all things related to eclipse photography. Download your copy today!

If you haven’t heard the buzz yet, the continental United States will be experiencing a solar eclipse on August 21. If the weather is good, we will all be able to see … most of it. But lots of lucky folks will be driving to a spot along the path of totality to experience something very rare and surreal: the total eclipse, when day turns into night. For approximately 1 to 2 minutes you’ll be able to see the stars during the day and the wild corona light dance from behind the moon.

The last total solar eclipse to touch the lower 48 was on February 26, 1979. The last time we experienced a total solar eclipse crossing our entire nation from the Pacific to the Atlantic was on June 8, 1918. That was a long time ago; it’s pretty rare.

The good news is that, at least this time around, it won’t be rare for long. The next total solar eclipse in the U.S. after 2017 will be in 2024, when the path of totality will cross from Mexico into Texas and will leave via northern New York and New England on its way to New Brunswick and Newfoundland. So any specialized gear you get now, you can put to good use in seven years!

The last trans-U.S. total solar eclipse happened … well, awhile ago.

Gear you Need to See and Capture

As you have probably guessed in life, it is not a good idea to stare at the sun. The most important thing you can purchase to prepare for the eclipse is a pair of solar glasses for your eyes and solar filters for your camera lenses. Technology continues to get better in this field and the newest international standard rating is ISO 12312-2. If you do not see this certification on the product, you shouldn’t purchase it. Solar filters absorb the ultraviolet, visible and infrared energy of the sun, making our star safe to view and photograph.

Protect your eyes with solar glasses. (Helmet is optional.)

B&H Photo, home of my day job, has been a great resource for embracing the best products and knowledge. To that end, I have been recently practicing shooting the sun and want to share this knowledge with you.

As far as glasses go, any simple paper pair will do, as long as it has the aforementioned ISO rating. A cool thing that B&H is doing is packaging free solar glasses with most of their solar filters! So you can kill two birds with one stone, all while not killing your eyes or camera sensor.

Let’s focus on the filters from a photographic point of view. There are three types of solar filters you can choose from:

  • screw-in filter
  • glass drop-in filter for a filter holder system
  • inexpensive and universal paper or adjustable aluminum alloy filters that are easy to take on/off

The screw-in filter is the one I would least recommend. Even though it seems to be the most popular, think of this: The common strategy for shooting the eclipse is to have a filter over your lens so that you can capture a properly exposed and non-flaring sun. Once we enter the small window of totality, when the moon will eclipse the sun, it will be safe to take the filter off and adjust your exposure accordingly for that beautiful shot of dark sky and the white ring around the moon. You must wait until after the “diamond ring effect”—when the sun flares one last time from behind the moon—before taking off the filter. You don’t want to waste precious time (5 to 10 seconds) unscrewing a screw-in filter when you could instead take 1 to 2 seconds to remove a drop-in filter or universal filter cap. The average time of totality will be from 1 to 2 minutes and you want to photograph it but also experience it. Don’t waste precious time fumbling around with your gear!

If you want to look into the available filters and other eclipse equipment, an easy way is to search all the gear and articles that B&H has been working on for the last year. Type “Solar Eclipse” into the search engine at www.bhphotovideo.com and you’ll be taken to this very resourceful page:

Start Practicing Now

The first time you shoot the sun shouldn’t be on August 21. Get some solar filters and start practicing shooting the sun now! I’ve been doing this over the summer, which has given me a chance to test exposures and specific gear before the big day.

I recently purchased the Solar Eclipse Filter by Lee for my Wine Country Filter Holder system, as well as the Daystar universal solar lens filter. My MrStarGuy Adjustable Objective filter is on back order, but should be shipping soon.

Lee is one of the top-end filter companies. Their filter mentioned above is equivalent to a 20-stop neutral density, but also is ISO certified and should be used only for solar work—not for long-exposure landscape photography.

Wine Country Filter Holder system and 100-400mm lens.

The Lee filter is made of glass, and I find the image quality is excellent. The suggested settings from Lee with this filter are 1/800, f/8, ISO 800. Think crazy eights! This was pretty spot-on while the sun was high in the sky around 2 p.m.

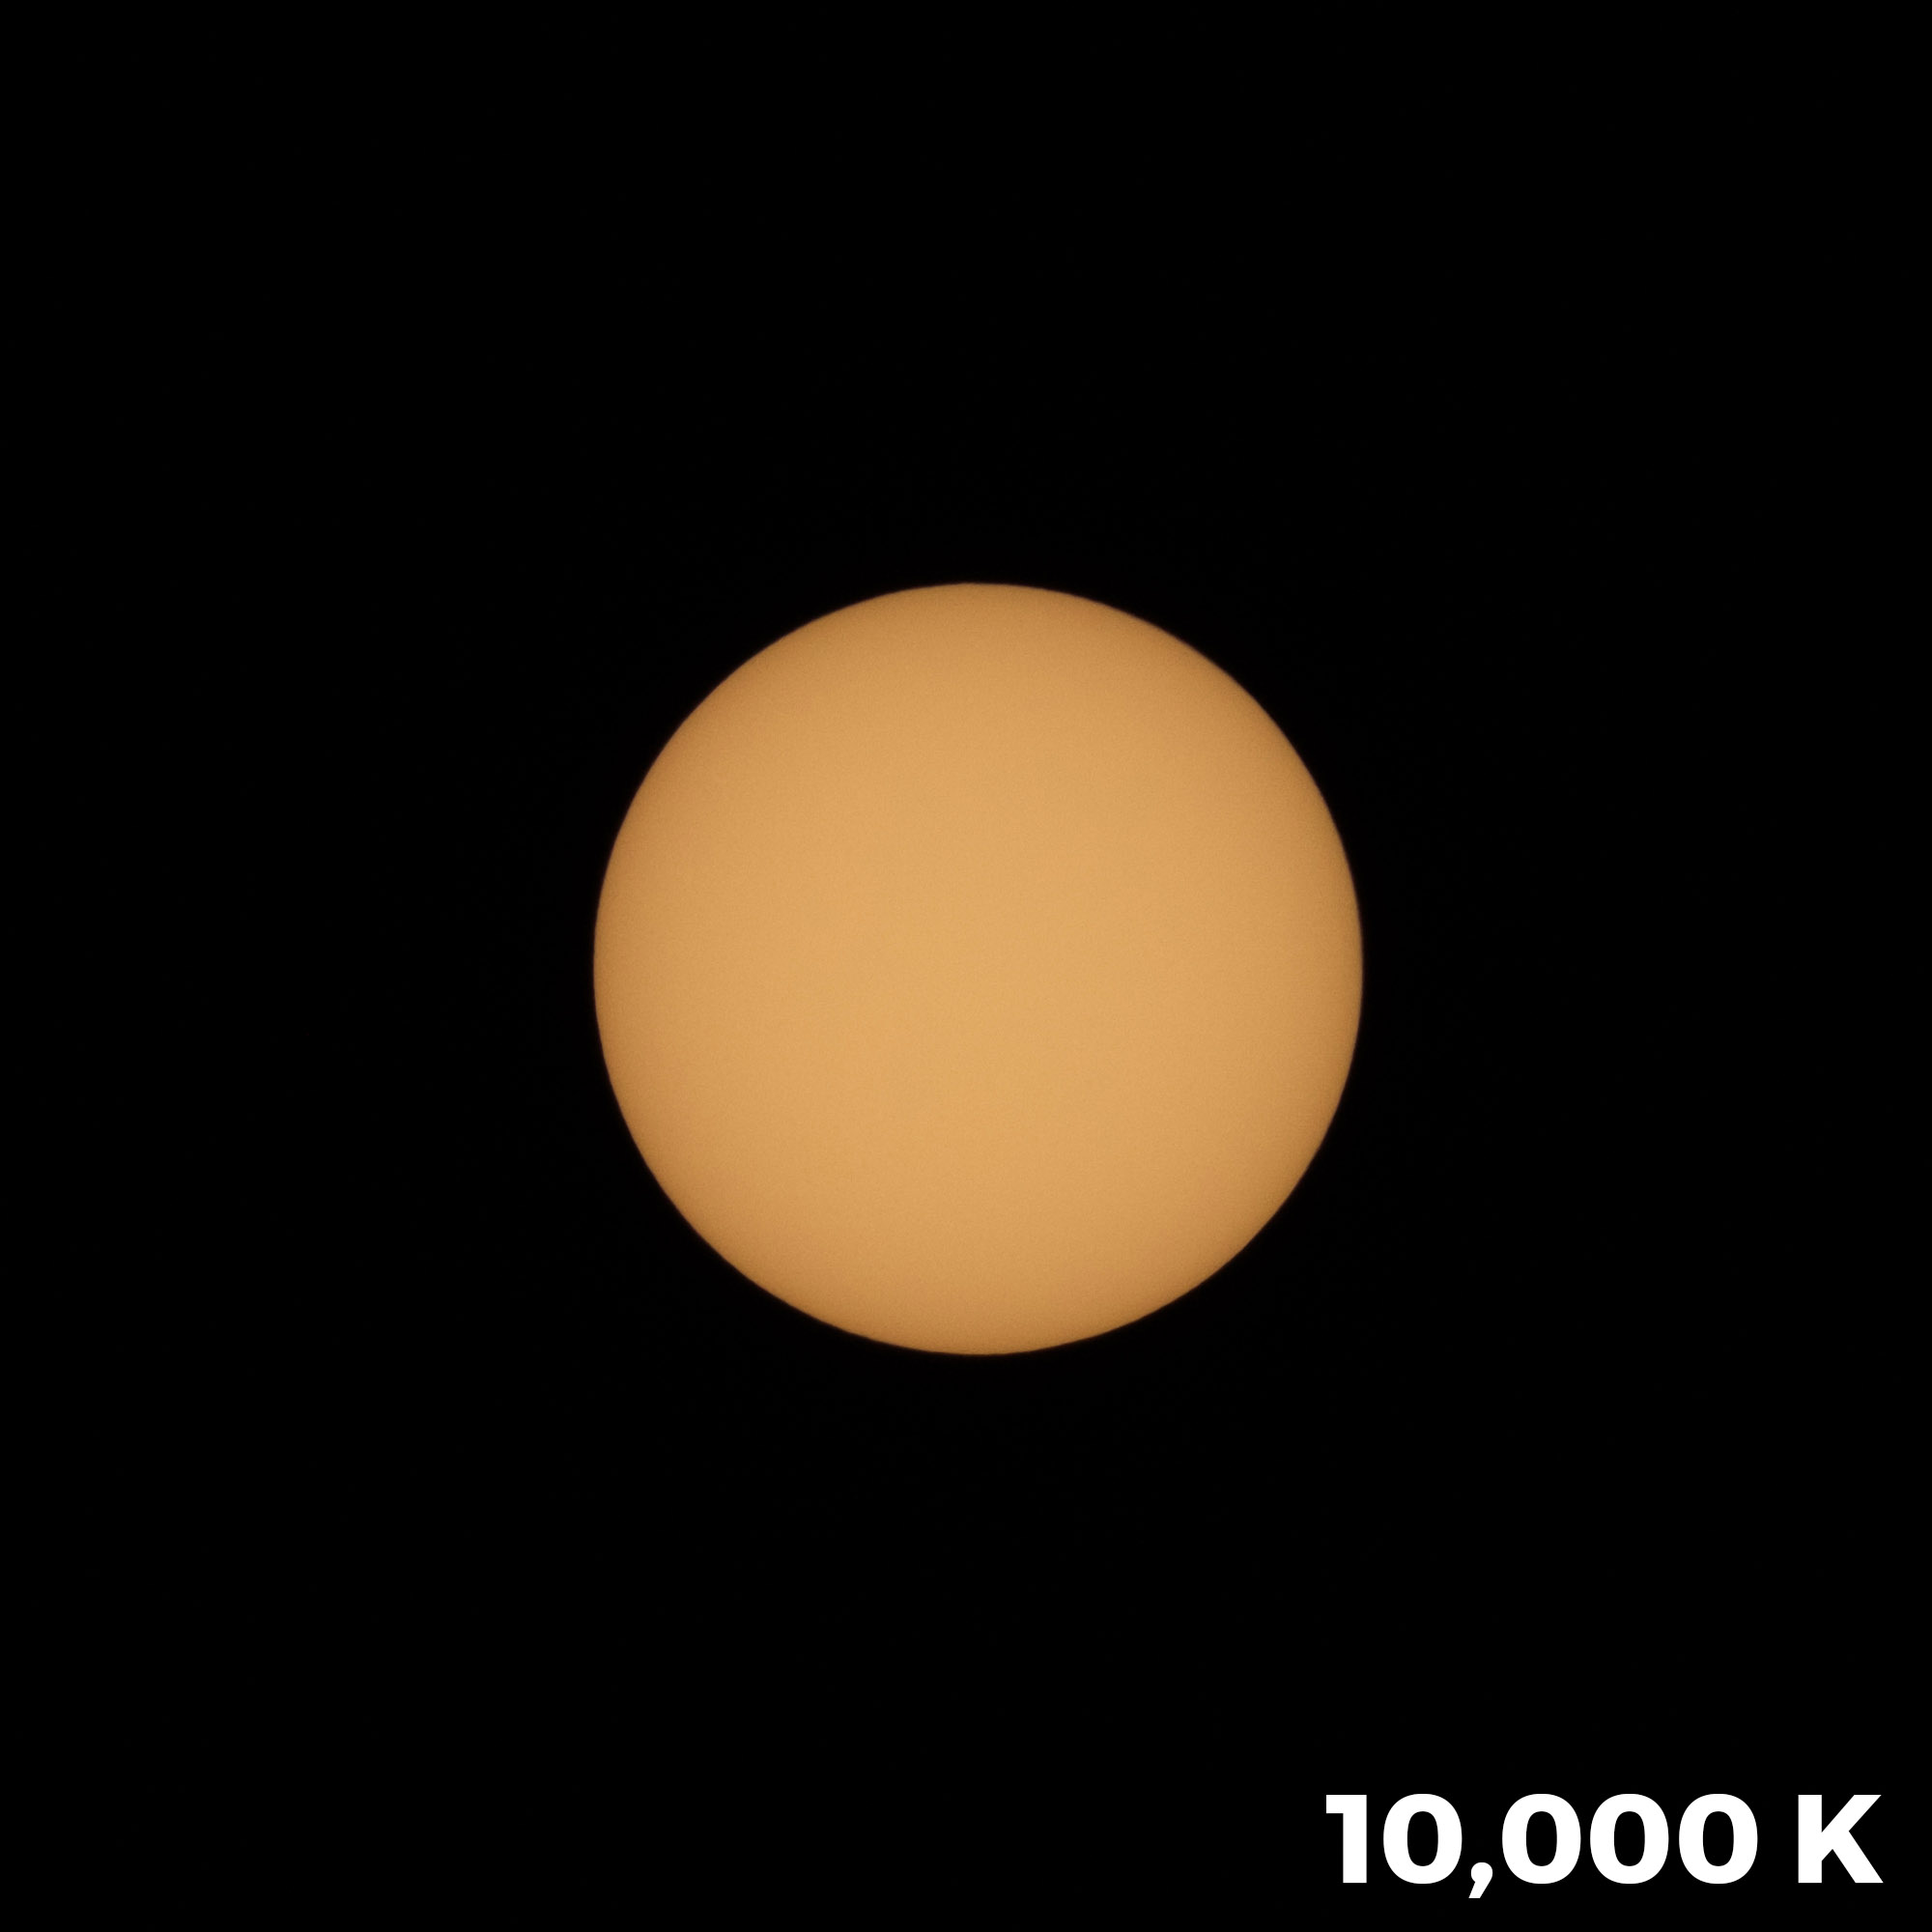
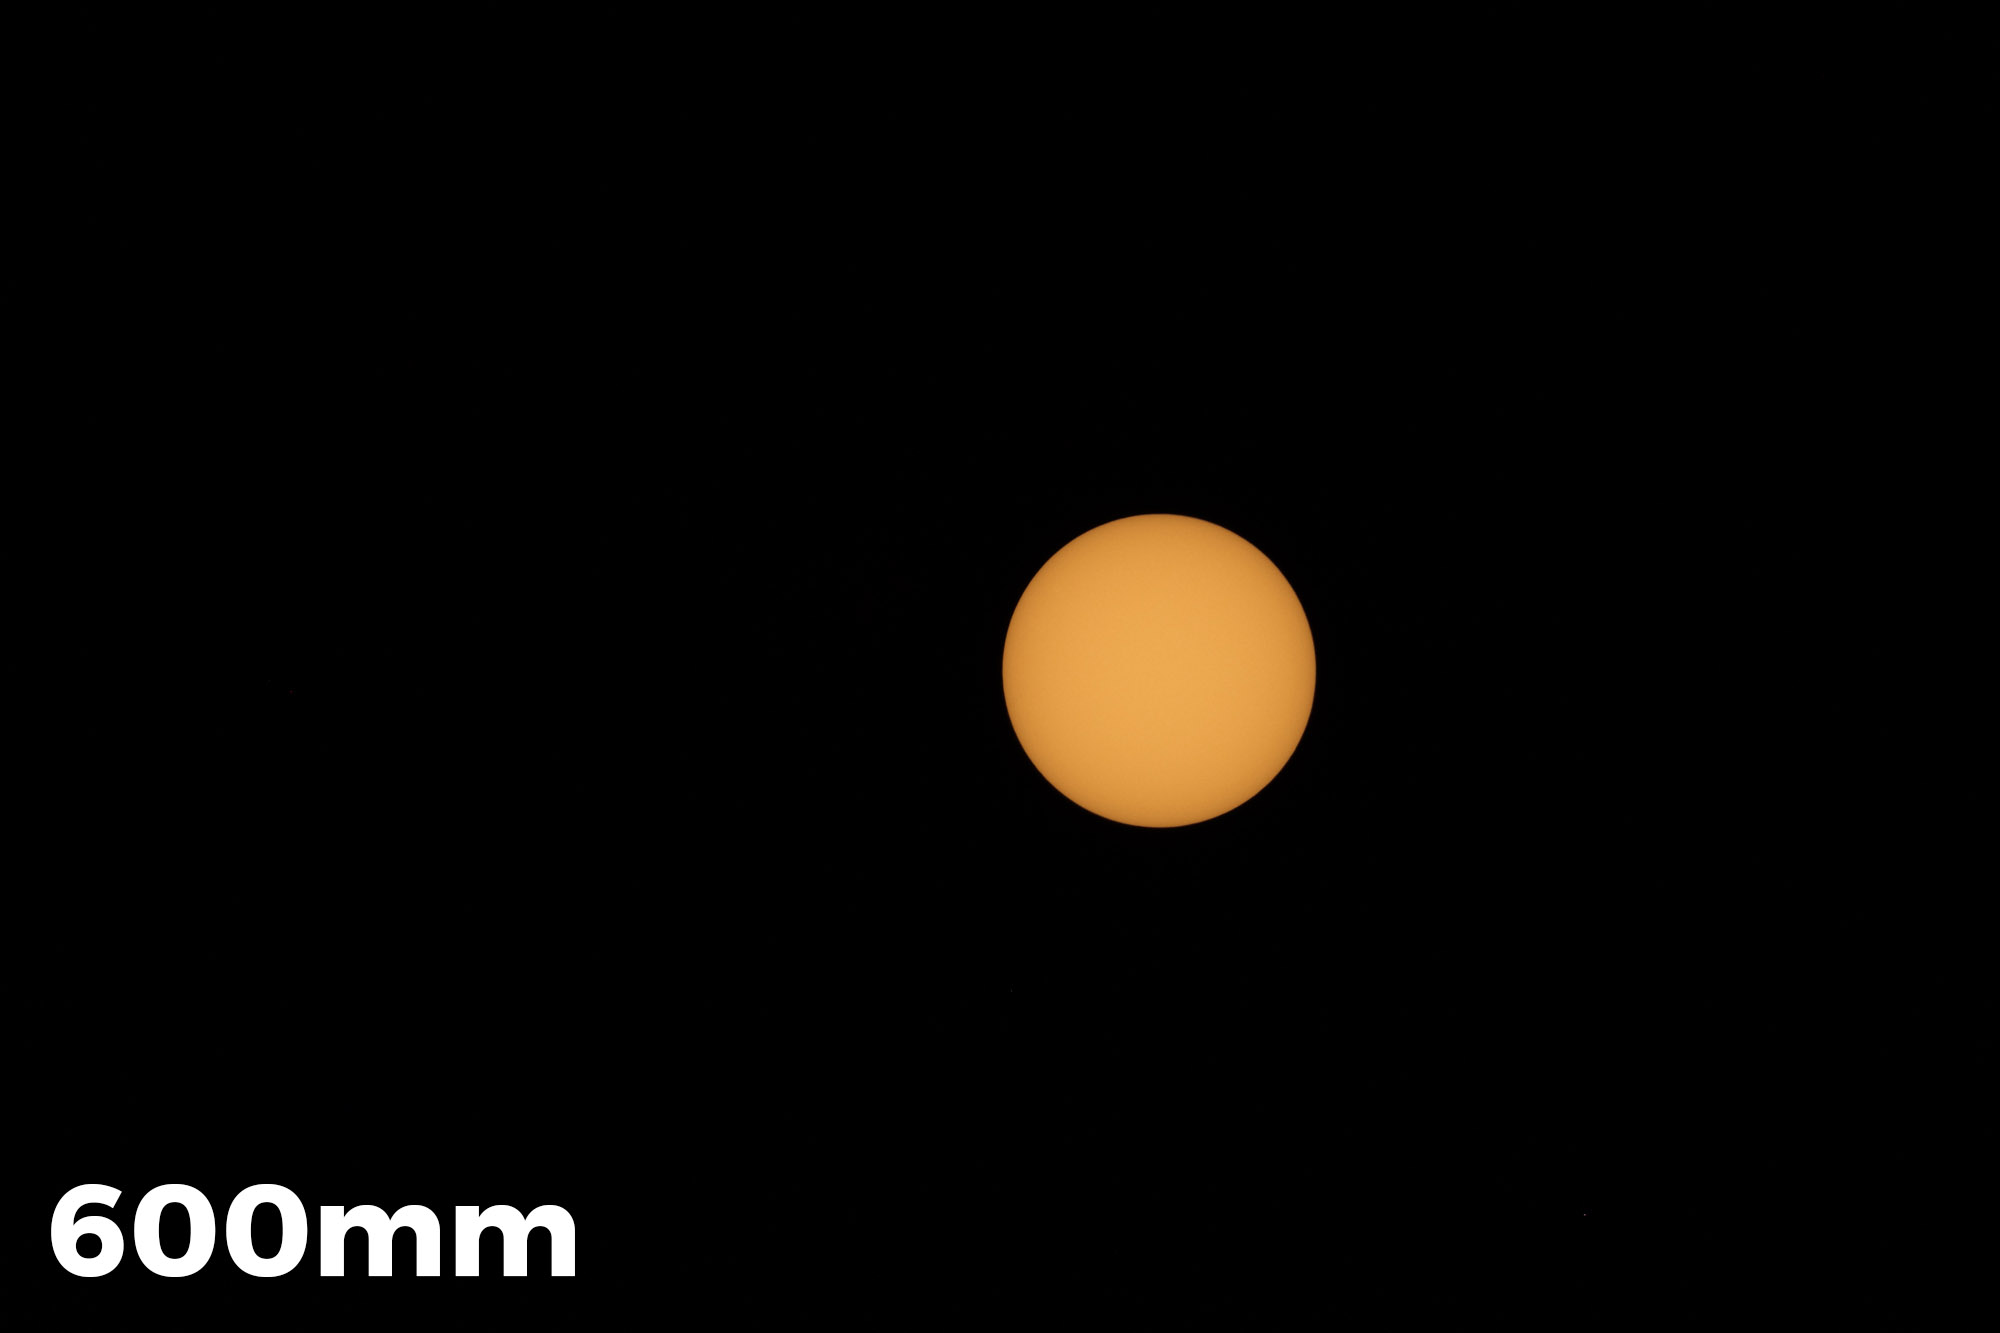
With Auto white balance, I found the Lee filter produced a clean white sun. I experimented with the white balance and preferred cranking it to 10,000 K for a nice yellow/orange sun that is more visually familiar. You can see the two compared below:

I also tested the Daystar slip-on filter and found that to be of very good quality as well. It was a bit deeper orange/yellow than the Lee with the white balance set to 10,000 K. I also found the Daystar to be 1 1/2 stops faster than the Lee, as my final exposure setting was 1/500, f/5.6, ISO 800.

Sun shot with Daystar filter at 10,000 K white balance. 1/500, f/5.6, ISO 800.

Sun shot with Daystar filter at 10,000 K white balance. 1/500, f/5.6, ISO 800.

Lens(es) and Game Plan

There are multiple ways to capture and create some unique images of the eclipse. Search Google Images to see what resonates with you.

I definitely recommend using a telephoto lens and getting a somewhat tight shot of the different phases of the eclipse. The careful thing to consider is not getting in too tight. When the total eclipse starts you’ll see the breathtaking corona light start to spill out from behind the moon. This can spread pretty far and create some beautiful patterns. If you are in too tight, you’ll frame it out.

When testing, I was using a 100-400mm lens on an APS-C crop sensor, and the far end of that focal range seemed like the sweet spot for a good telephoto capture. That’s 600mm to 800mm with a full-frame sensor, which you can achieve with really big glass or with a 1.4X or 2X teleconverter. But if you have a crop-sensor camera, that would be the one I’d lean on for this project.

The trick to the telephoto shots will be tracking the sun as it quickly moves through your frame. Depending on how tightly composed your shot is, this setup could require constant attention and adjustments. Having a sturdy tripod is a must, especially if you add a tracking device to a long lens and camera. Make sure your tripod head and legs are rated to hold the combined weight over a long period of time.

Many people will be using digiscoping (attaching a camera to their telescope) to get even closer images of the sun and eclipse. We really haven’t experimented with digiscoping at NPAN, but our good friend Todd Vorenkamp at B&H Explora discuses those considerations in his very informative article, “How to Photograph a Solar Eclipse.”

I’d also bring another, separate camera setup for capturing a wider view that includes the landscape. The telephoto phases of the eclipse are cool to capture, but they are generally featured against a dark black sky. If you use a medium telephoto or wide-angle, you can include some subject matter that gives your composition depth and scale. You’ll still need to have that solar filter on to capture more phases of the sun, but you’ll also want to get a properly exposed foreground—ideally once the uneclipsed sun is well out of the frame—to layer together in Photoshop.

Two tips to consider when using that technique:

  1. Underexpose the foreground shot so all the solar disks will stand out against that hopefully deep blue sky.
  2. Once the eclipse starts to happen, keep an eye on your settings and make adjustments to open up your exposure as the sun gets thinner and fainter.

Be Flexible and Keep an Eye on the Weather

This is going to be the most viewed and recorded solar eclipse ever. You’ll be able to watch it in and around populous cities such as Kansas City, St. Louis, Nashville and Charleston, as well as in national parks such as Great Smoky Mountains and Grand Teton, and in many rural national and state forests.

Do you want to experience this event in a city or town with tons of people and lots of rooftops and amenities, or do you want to go someplace more remote and get a darker sky?

Staying flexible with weather is key. There are plenty of apps (we like Weather Underground) that can share predicted cloud cover. It’s a good idea to have a Plan B and C that are within a 1- to 3-hour drive from your Plan A. You obviously want to avoid overcast and thick cloud cover, but sometimes stray clouds and wisps are unavoidable. Do your best to adapt or adjust—we are wishing you the clearest of skies, of course!

Most hotels are sold out within the path of totality, but campgrounds and private property are “renting” space to eclipse chasers. I will be leading a sold-out workshop with NPAN at a private ranch in the Centennial Valley in Montana, but we will dip down into Idaho to get into the path of totality. We will also be participating with Atlas Obscura and B&H Photo on a Total Eclipse festival in eastern Oregon that just sold out. (There is a wait list that they might open up—click here for more info.)

To find more events in areas that you will be close to, check out these listings:

Don’t forget to enjoy and EXPERIENCE it!

Sure, most of the United States will be watching the eclipse on TV, and that is … two-dimensional. But to actually experience the eclipse is something very special. Animals and humans both react to this astronomical phenomenon in extraordinary ways, and nothing can really prepare you for when the darkness takes over the land and sky. There is a reason people become eclipse chasers and travel the world to keep searching out this experience. Each eclipse and location is unique and different. We look forward to sharing photos of ours with you and vice versa.

A couple of other fun things to prep you for the eclipse:

  • Read Tyler Nordgren’s book Sun, Moon, Earth—A History of Solar Eclipses from Omens of Doom to Einstein and Exoplanets. We are also a big fan of Tyler’s other book, Stars Above, Earth Below—A Guide to Astronomy in National Parks. He makes the science of astronomy very engaging, easy to understand and to get excited about.
  • Send an eclipse to someone you love! The United States Postal Service has released a unique Total Eclipse of the Sun forever stamp. The stamps show the total eclipse, but when you touch them with your finger the eclipse reveals the moon. They used thermochromic ink that reacts to the heat of your finger! So stock up on these stamps and send a letter or post card from wherever you are experiencing the eclipse!

Download our Eclipse E-book

Finally, if you want to learn some more about how and where to photograph the eclipse, download our free Here Comes the Sun: 2017 Solar Eclipse Guide e-book today! It includes this article, along with a travel feature about all the units of the National Park Service in the path of totality, as well as recommendations about photography gear and services, and eclipse information and swag.

Carpe eclipse!

Gabriel Biderman is a partner and workshop leader with National Parks at Night. He is a Brooklyn-based fine art and travel photographer, and author of Night Photography: From Snapshots to Great Shots (Peachpit, 2014). During the daytime hours you'll often find Gabe at one of many photo events around the world working for B&H Photo’s road marketing team. See his portfolio and workshop lineup at www.ruinism.com.

UPCOMING WORKSHOPS FROM NATIONAL PARKS AT NIGHT

Collaborate & Create: Making Better Night Photographs by Working Together

What is the best way to master a skill? Typically the first steps are to study the subject and then gain comfort applying that knowledge to real-world experience. However, there is a missing X-factor that can lead us down so many different paths of knowledge. That is collaboration.

We at National Parks at Night have been preaching the importance of collaboration since Day 1. Our whole business model is dependent upon it, as is the experience we offer. We almost always provide two instructors to lead a workshop and try to mix up different combinations that will each yield a unique vibe to the overall experience. We encourage our students to work together and each take turns directing or light painting. A new aspect that we have been experimenting with, and that came together quite spontaneously, is working on a larger-scale collaboration. See our recent post about how our first Joshua Tree workshop did panoramic light painting as a group.

When I taught my first workshop many years ago, part of my proposal was that I co-teach the workshop with Tim Cooper. Tim is not only a good friend, but someone whose photography knowledge and general demeanor I respect very much. We each had different strengths that complemented one another, and not only did the students gain a wealth of knowledge from the workshop, but Tim and I also inspired each other.

You gain knowledge from each experience—good or bad. If you study and learn from that, better photographs aren’t far away.

Night photography can very much be a solo effort, whether that means you are shooting alone or going with a group to the same location and just splitting up to hone those night visions. I think this is a very common and old-school approach. With astro-landscape we are looking for strong foregrounds or landscapes, and then framing them creatively against the backdrop of the night sky. We are also seeing more and more people add the human element to their night photography, and that of course is a collaboration.

Personal Collaborations

I remember the first portrait I took of my then-hopeful girlfriend, now wife, Nancy. She knew I was a budding B&W photographer and asked if I could take some portraits of her prior to attending a big fashion event in San Francisco.

At the time, I was doing a lot of portrait work but obviously had little “fashion photography sense.” An early and continual inspiration was Duane Michaels, who created wonderful storyboard fantasies about human interactions. I had recently purchased the Lubitel twin lens camera, a fantastically plastic version of the Rolliflex. You could easily do multiple exposures by just cocking the shutter without forwarding the film. So I asked Nancy to strike three different poses within the boundaries I set. Let’s just say that everything clicked and we have been collaborating ever since.

Another great collaboration, also from the SF film days, was with good friends Peter and Jen. We used to plan shoots every month—Jen would bring a variety of props, costumes and ideas, and Peter and I would set up the shoot.

My favorite experience that came out of our many shoots was the “Angel in the Subway.” We scouted that location and were aware of when it was safe to walk on the tracks. We knew we had to work quickly because the authorities could kick us out at any time. The whole shoot lasted around 10 to 15 minutes and the resulting image became our holiday card for years to come!

When I moved to New York City, I helped start a couple of photo meetup groups that would either schedule early morning shoots or impromptu one-night gallery shows. It was a ton of fun, but it was mainly a bunch of us sharing our individual visions. When I was introduced to Matt Hill and we discovered our passion for night photography was mutual, sharing and collaborating started moving furiously forward!

Matt and I immediately started shooting and experimenting with bending time! We asked “What if” a lot and re-approached our styles of night photography with childlike eyes. Several wonderful projects were born out of our continual collaborations—my favorites are our yearly workshops on Bannerman Island, Matt’s time-bending night paper portraits, and of course National Parks at Night, which was concocted one evening when we were both sitting under the stars as our cameras were ripping long exposures.

Coaching Collaboration

How do you teach collaboration? Because it either works or it doesn’t. You can really sync with some people and might have to just walk away from others. But I strongly feel that you gain knowledge from each experience—good or bad. If you study and learn from that, better photographs aren’t far away.

Bouncing ideas off of each other prior to getting out in the field is a great first step to see if you gel. Like-minded people aren’t always the best collaborators—ideally we want to complement each other and bring a unique idea, question or solution to the table.

We like to arrive to our locations during the day—either a couple of hours before sunset or during midday. We use that time to scout the locations and really walk around the scene to figure out the shot. We are often drawn to the obvious, but more dramatic possibilities might be just around the bend.

For example, at the last night at our second Joshua Tree workshop, we invited anyone who wanted to collaborate on a group shot to meet Lance and I at 10:30 p.m. Most of the class joined and we divided the group into two. We chose locations and set a 20-minute time limit for each group to shoot at one location and then switch to shoot the other.

Below, Lance and I share both teams’ behind-the-scenes process and the images that came out of this.

Two Cars

Gabe: Our first subject was two cars hidden behind some rocks. Without setting up our tripods we walked around the scene. The point of view seemed pretty obvious and could have been captured with a superwide-angle lens. However, I wanted to tell the story of how these cars were nestled under the rock hill and under the night sky. I suggested a four- to five-shot panorama that would encapsulate the location with minimal distortion from a wide-angle lens.

I zoomed my Nikon 14-24mm lens to 24mm, leveled my tripod and head with a panoramic level base, and took some quick test shots to see if it would work. We tried compositions that included the moon, but decided to exclude it as it detracted from the real story.

Collaborating in Joshua Tree National Park. Photos by Susan Wales.

Sandra and Beth experimented with some subtle light painting to open up shadow separation. We decided to go for a more natural-light approach rather than adding light for surreal effect. Susan, who was taking some amazing night portraits, captured some great behind-the-scenes photos of the shoot, and Robin set up next to me so we could have two points of view for the panoramic scene.

We did three to four takes where I was calling out when we were open so our light painters could time their lighting accordingly. We did two takes and kept things simple. I was pretty pleased with our results.

Another Two Cars

Lance: Somehow when the group split up to do the collaborative shots, everyone fell along gender lines, and Gabe, ladies’ man that he is, ended up working with the women. The men’s group consisted of Klaus, Rick, Terry, Steve and Hadley.

The guys decided right away that they wanted to do something different from the previous week’s workshop attendees, who had created the panorama of the ranch. Everyone was drawn to the cars, and we walked around checking out the various wrecks looking for our shot. We agreed upon the Plymouth and the Dodge, both of which were mid-1940s cars facing in opposite directions.

Klaus was elected to direct this image, and he framed it fairly tight, as a straight-forward composition facing west. The moon was high in the sky and casting shadows on the foreground. We decided to let the moon do most of the work. Terry took on the task of lighting the interiors, with a short string of warm-white LED Christmas lights on the front seat of each car.

Klaus used his previous experience photographing in junkyards to expertly light the headlights of the Dodge, and Steve raked a light against the back end of the Plymouth and then softly filled in the shadows on the back ends of both vehicles with reflected incandescent light. The warm color balance of the added light contrasted nicely with the naturally cool moonlight, and set the mood perfectly.

Three Cars

Gabe: Our next collaborative challenge was a cluster of three rusted-out cars. As we walked around the scene the moon was shining from one side, and as obvious a shot it was, we quickly assessed that the light was just to direct and flat. However, when we walked 180 degrees to the other side, the moon created a nice backlight and gave us lots of shadows on the front to be creative with while light painting.

Sandra loves abandoned old cars and started talking about how she saw the shot. It is always good to have a director who oversees the collaboration, so we gave Sandra the reins.

Photos by Susan Wales.

Photos by Susan Wales.

After setting up at a low angle and firing off a couple of test shots, with Beth confirming focus and composition, we were ready to practice painting. We knew we had to paint from both the right and the left of the cars. We used the same flashlight and Sandra directed how the light was falling so we could adjust our angles and timing. We also saw a need for a little backlight between the cars to separate them a bit more, so I jumped in and lit from a low angle so the flashlight wouldn’t be seen by the camera.

Because the light painting was a bit complex with three people working from three different angles, Sandra was only exposing for the light painting, reviewing the image and then giving us feedback. The overall exposure was 2 minutes but we were generally done with the painting in half that time. This let us repeat our motions and save time so that the final exposure was pretty much spot-on!

Two Cars and A Boulder

Lance: We chose two other cars that were spaced a little further apart, and we used a similar plan of attack. For this, Hadley was the director, and he set up his camera in what we determined to be the best spot to show these cars in the context of their final resting places. Vince also joined us for this second image.

This second shot minimized the moon shadows, but emphasized the location and the way that the cars were situated in the landscape. Everyone took turns lighting the various parts of the scene, and we ended up with a photograph that had a similar mood and feel to the first. The two work nicely together side by side.

The collaborative process was fun, and everyone got something out of the experience. I always encourage collaboration, but such collaborations tend to be smaller groups—pairs or trios. In this case, the seven of us managed to work together and all find a way to contribute. These shots were relatively simple and contained within a small area, but the seven of us managed to work together and all find a way to contribute. At the end, we even made a group portrait to commemorate the occasion!

Joshua Tree light painting Group No. 2.

Final Thoughts

Collaboration is definitely at the forefront of my mind right now. We at National Parks at Night have been excited with our early experiments during the workshops and we can’t wait to see how that continues to grow. On a personal level, I want to engage and work with more artists and opposites to see what new creative paths can be explored!

Gabriel Biderman is a partner and workshop leader with National Parks at Night, a Brooklyn-based fine art and travel photographer, and author of Night Photography: From Snapshots to Great Shots (Peachpit, 2014). During the daytime hours you'll often find Gabe at one of many photo events around the world working for B&H Photo’s road marketing team. See his portfolio and workshop lineup at www.ruinism.com.

UPCOMING WORKSHOPS FROM NATIONAL PARKS AT NIGHT