technique

Moon Shots: What We Learned from Photographing the 2019 Lunar Eclipse

While lunar eclipses aren’t as jaw-droopingly exciting as total solar eclipses, they are still an amazing thing to witness, as well as to capture as photographs. And a lunar eclipse comes with a big benefit: totality lasts much longer than during a solar eclipse, so you have more time to get creative as well as not stress out!

I had last shot a lunar eclipse in 2014, which was a very special time. That blood moon was the second of a tetrad, a series of four consecutive total eclipses that occurred in approximately six-month intervals. The next time that will happen will be in 2032-33. I wonder how we will capture it then! Technology made a major leap from 2014 to 2019, so who knows how it will leap in another 13 years. Maybe we will be able to witness those lunar eclipses from the moon!

The next lunar eclipse will occur in two years, on May 26, 2021. In the meantime, we wanted to share a few tips that we learned this year to help you better prepare not only for the next eclipse but for shooting the moon in general.

And by “we,” I mean a few more people than usual. First I’ll talk about my experience shooting the eclipse this week, and then Matt will add some thoughts from his experience. Finally, we have invited six of our National Parks at Night workshop alums to share their images and lessons learned.

Onward … to the moon and beyond …

11 Tips and Tricks from the 2019 Lunar Eclipse

1. Do your research.

Understand the location you will be in to capture the moon. Will you be in an urban or rural environment? How can this location help tell your story? I saw lots of wonderful lunar eclipse phases placed over breathtaking landscapes, buildings, etc. You could do the same in an urban location.

For this year’s lunar eclipse, I was in Atlanta, a city I wasn’t that familiar with and had little time to scout. I was inspired by the skyline I saw while driving into the city, and I noted that there were plenty of overpasses that could provide a good vantage point.

2. Ascertain the elevation of the eclipse.

The 2019 super blood wolf moon (aka the lunar eclipse) over Atlanta. Foreground: 35mm lens, 25 seconds, f/16, ISO 200; background (moon): 600mm lens, 1/2 second, f/5.6, ISO 3200.

You want to foresee what foreground you can include in a single shot. I was really taken aback by how high in the sky this lunar eclipse was. It was very difficult to introduce foreground into the scene unless you were really far away or made a composite.

In hindsight, I could have gotten under the Skyview Atlanta Ferris Wheel downtown and probably made a pretty cool shot—but my last photo of a lunar eclipse (in 2014) included a Ferris wheel and I didn’t want to be known as that guy! This did make me realize that figuring out the problem—i.e., the height of the moon in the sky—can lead to unusual solutions like actually getting under your foreground to get the shot!

3. Go with two rigs.

The lunar eclipse lasts approximately 4 to 5 hours. Give yourself more options to create! It could be wide and telephoto rigs, or short-exposure and long-exposure setups.

4. Be ready for that close-up!

That big ol’ blood moon, 2019.

This is advice for shooting the moon any time of the year: Use a telephoto lens. The more you can fill your frame, the better. Higher-resolution cameras will also allow us to crop into the image more with minimal loss in detail.

This year I used a 100-400mm lens, which when zoomed in all the way was the equivalent of a 600mm with my APS-C sensor. I still cropped into the moon in post and would have preferred an effective focal length of 800mm to 1000mm in the field. While those lenses might seem expensive and out of reach, consider using crop-sensor cameras with 200-500mm or 150-600mm lenses. Also, you could adapt a telescope to fit your camera and can easily get to 1000mm.

When using a super-telephoto lens and aiming it high in the sky, watch out for lens creep, which is when your lens zooms slightly during the exposure. I once found this to be the culprit of a soft image, when my Fujifilm 100-400mm lens wouldn’t lock down at one focal length. Eventually it stayed put, but the problem was a bit frustrating and ruined several of my shots. Always zoom in and review your images.

 5. Don’t forget your wide lens.

Telephoto lenses get most of the love during the eclipses, but wide-angle lenses can offer better storytelling. They can tell something else about where the image was shot—just think about what other elements of the scene you want to combine with the moon. Two rigs gives you that option.

6. Allow plenty of time to play.

We mentioned that the lunar eclipse lasts a while. The totality, or umbra period, can last 1 to 2 hours. That’s a lot of blood moon! While the umbra phase can be the most exciting, start clicking as soon as the penumbra starts, when the moon remains white but starts to show all its phases as Earth casts its shadow.

7. Try a moon trail!

High Roller & Lunar Moon Trail, 2014. 55mm focal length, 15 minutes f/8, ISO 400.

With so much time, why not set up one rig dedicated to shooting the entire eclipse and then stack it together for a very unique moon trail? The beam will be wide and bright during the penumbra period but get skinnier and a little dimmer during the umbra period. I’ve seen only a few images using this technique, and I definitely want to give it a go next time!

Given the length of this long exposure, you’ll definitely want to make sure you have plenty of power in your camera. I’d at least want to add a second battery and attach a power grip—but for even more power and reliability I’d hook up the camera to a Tether Tools Case Relay or ONsite power solution.

8. Do a time lapse or capture some video.

I’m a still photographer, but moving images can help tell a story in more detail. This could be especially helpful if you are battling clouds or weather. Dedicate that second rig to video and keep that powered up with the Tether Tools solutions listed above.

9. Zoom while exposing.

I slapped my hand against my head when I saw these images pop up on social media. I love this technique for neon signs and buildings but it didn’t cross my mind with the moon! Especially during the dimmer umbra phase, you can get exposures of 3 to 8 seconds. Use a telephoto lens zoomed all the way in, then midway into the exposure zoom to the widest end and leave it there. Two moons for the price of one!

10. Include the moon with other night elements.

Match up that moon with car trails or other bright things that move. We often default to the telephoto close-up of the moon, but how else can we tell the night story? Emphasize movement in your image! In my image from Atlanta, I really wanted car trails and the lunar eclipse—I wanted those leading lines taking us to the moon! Perhaps you could shoot the moon next to moving water, or add star trails surrounding the moon.

11. Composite away!

Full moon and eclipse photography are techniques that totally lend themselves to creative and fantastic composites. Show us all the phases of the eclipse in an interesting pattern. Place the moon anywhere in the world! Compositing images—taking elements from multiple shots and combining them—can totally unleash a new fantasy location.

My advice on compositing is to have a clear vision and stay true to it. Larger-than-life moons make a viewer realize the moon “doesn’t belong” in the scene, however if the rest of the image is pure fantasy then it is totally acceptable. In my image from this week, the moon is bigger than it normally would have been but still has a somewhat realistic feel.


Photographer vs. Freezing Temps

by Matt Hill

The night of the lunar eclipse, it was frigid in Catskill, New York. I mean cold. 3 degrees F cold. (Interpret the “F” how you want.)

Also, I was feeling really under the weather. But I really wanted to grab some frames of the eclipse, despite all these roadblocks.

So I popped open PhotoPills and saw that the super blood wolf moon would be arcing right between the houses by my studio. I decided to shoot it from the tiny deck outside the studio door.

The Weather Underground app (left) and PhotoPills’ eclipse and Night AR features provided all the info needed about where and when to shoot the eclipse in Catskill, New York.

For about 2.5 hours, I popped in and out, trying to avoid frostbite, and I worked through an image sequence that got me fully into totality.

And then, for kicks, I ran through optimizing exposure length versus ISO during totality. I mean, it was an hour long, right? The worst thing I could get was frostbite.

I settled on shooting at 1/2 second and ISO 100. I liked it better than any of the images I shot at higher ISOs. I made this sequence of images from the set:

Nikon Z 6, Nikon 300mm f/2.8 lens. 1/125, f/14, ISO 100 (full moon); 1/2 second, f/4.5, ISO 100 (totality).

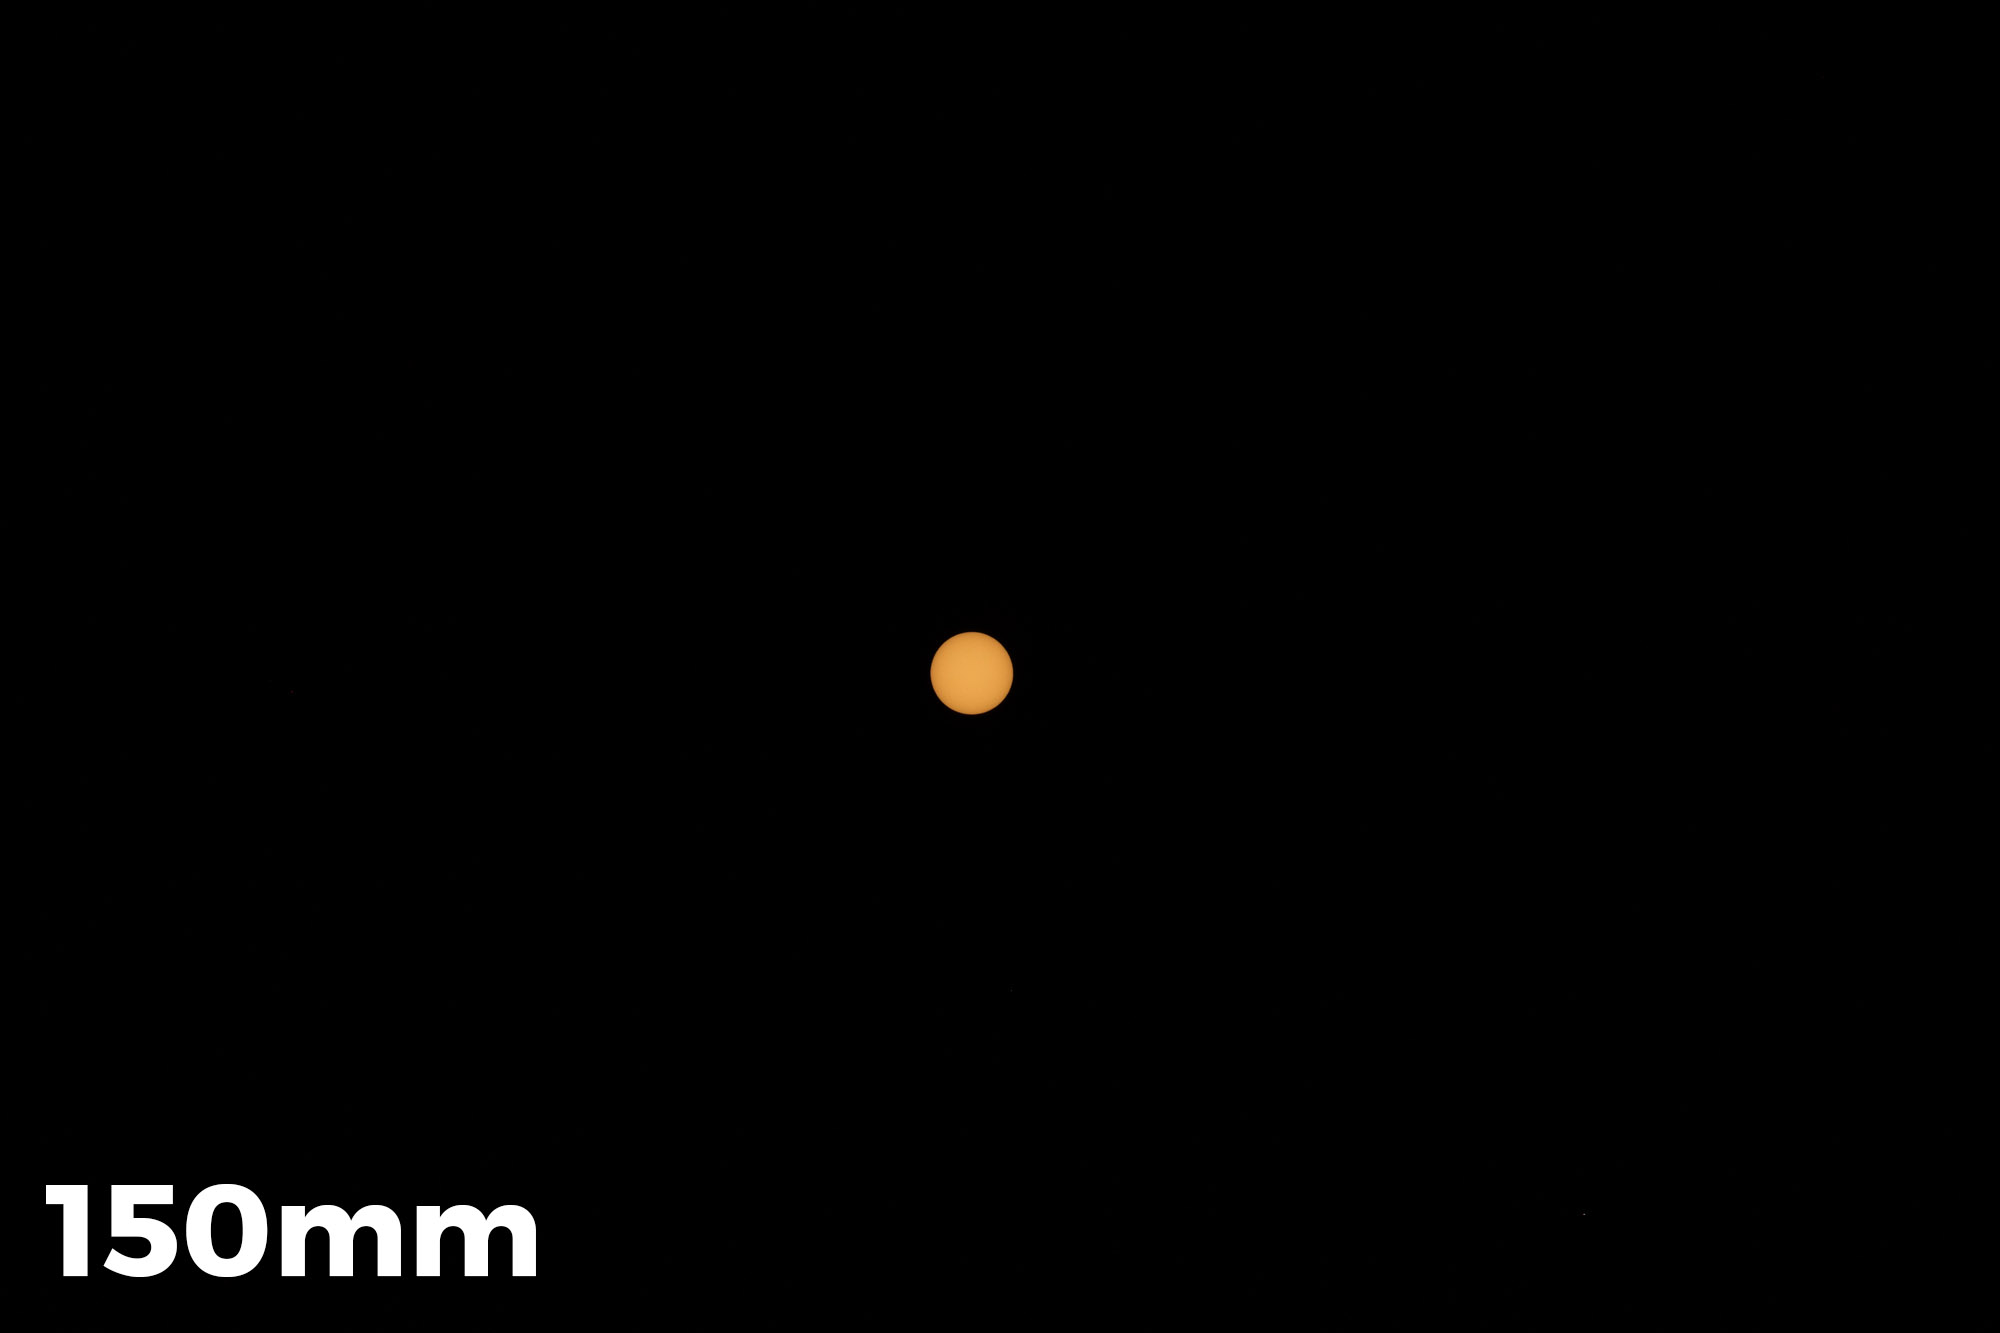
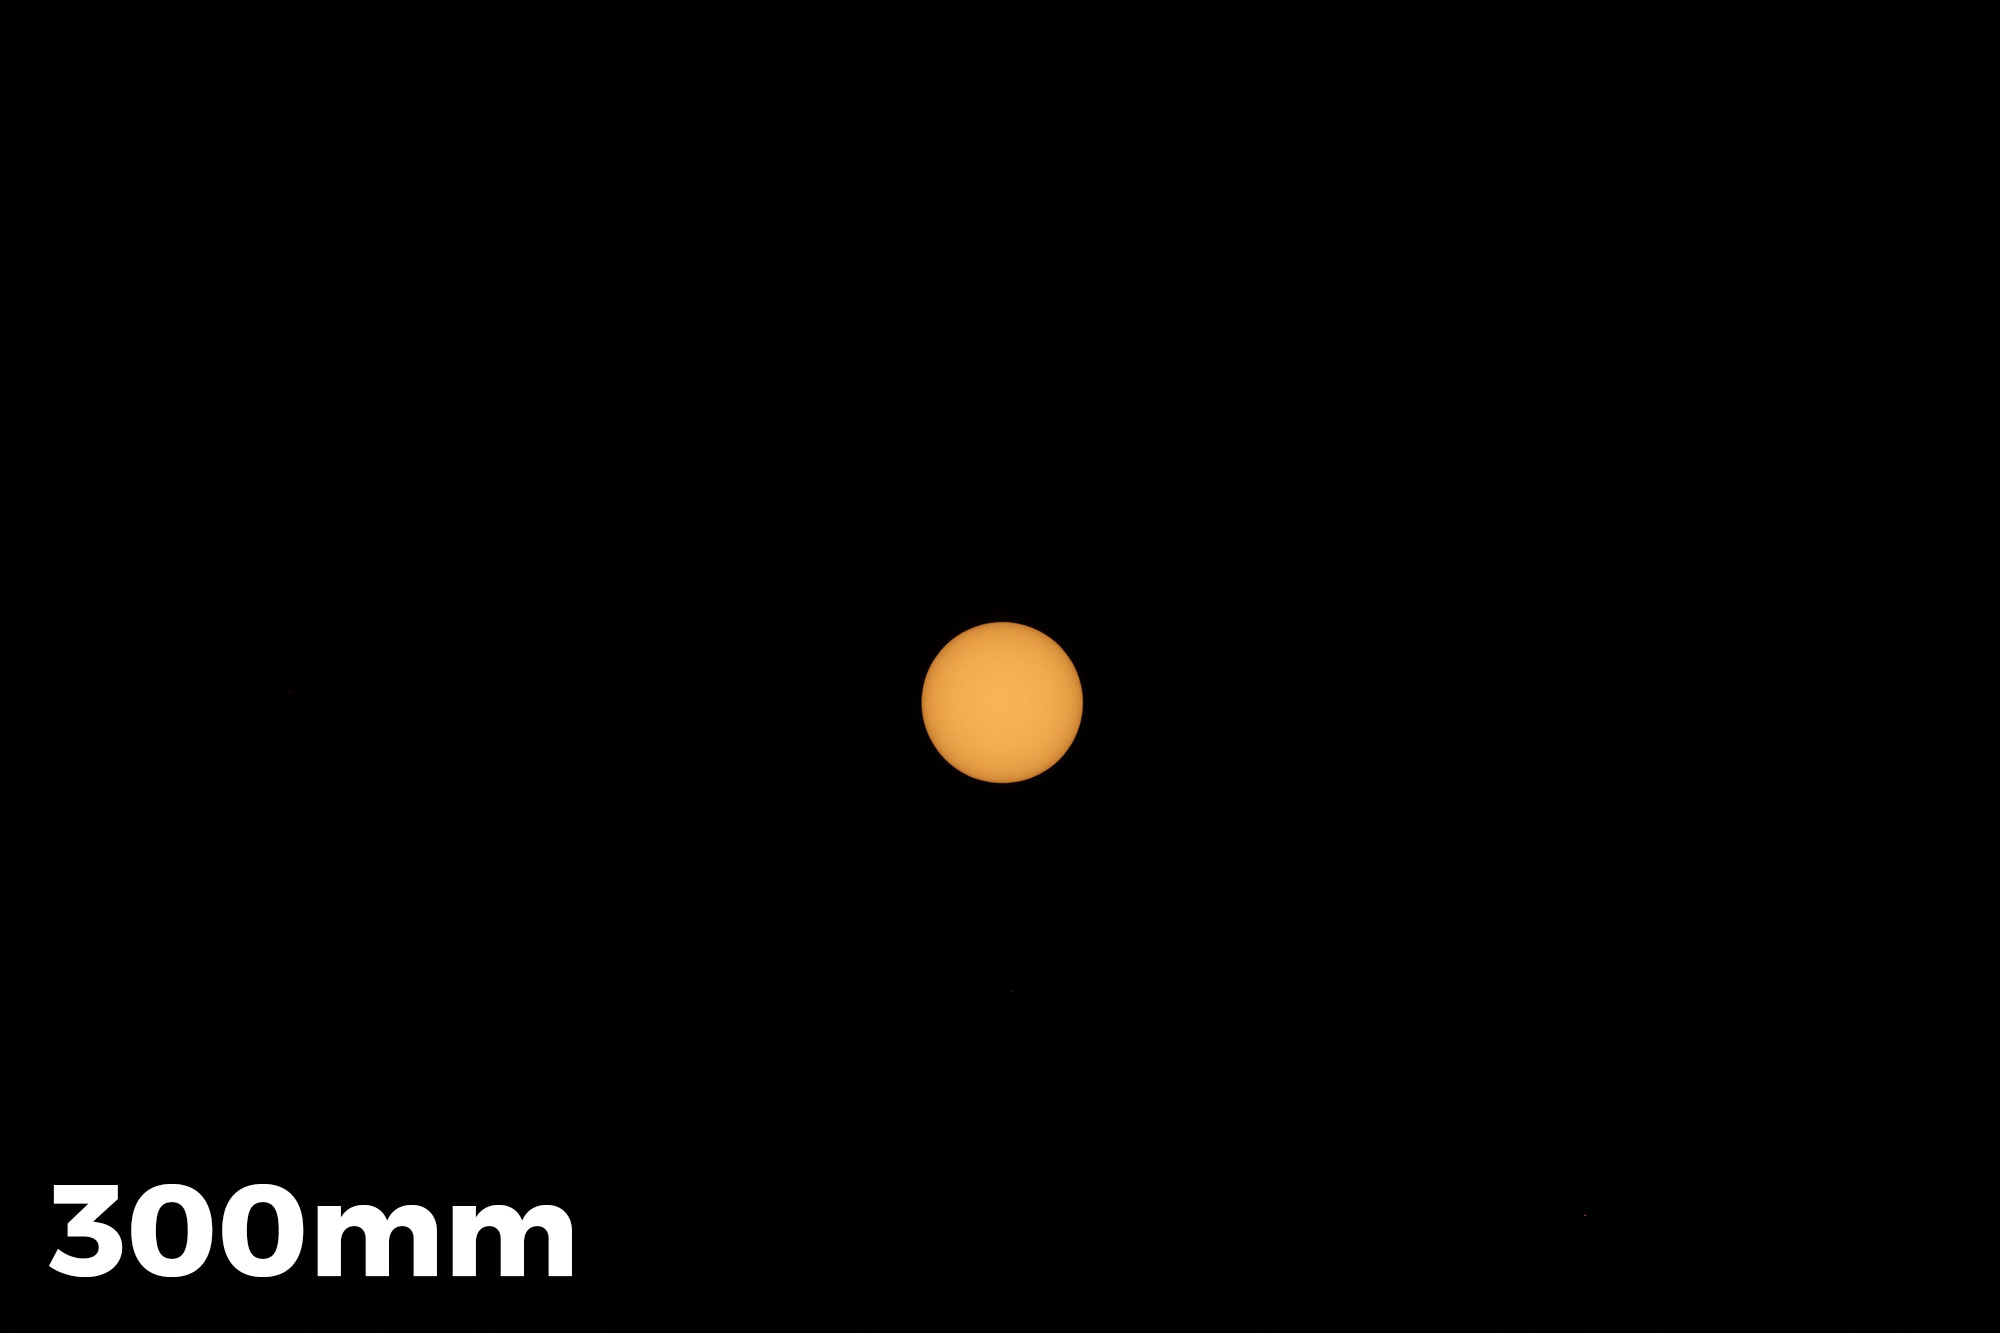
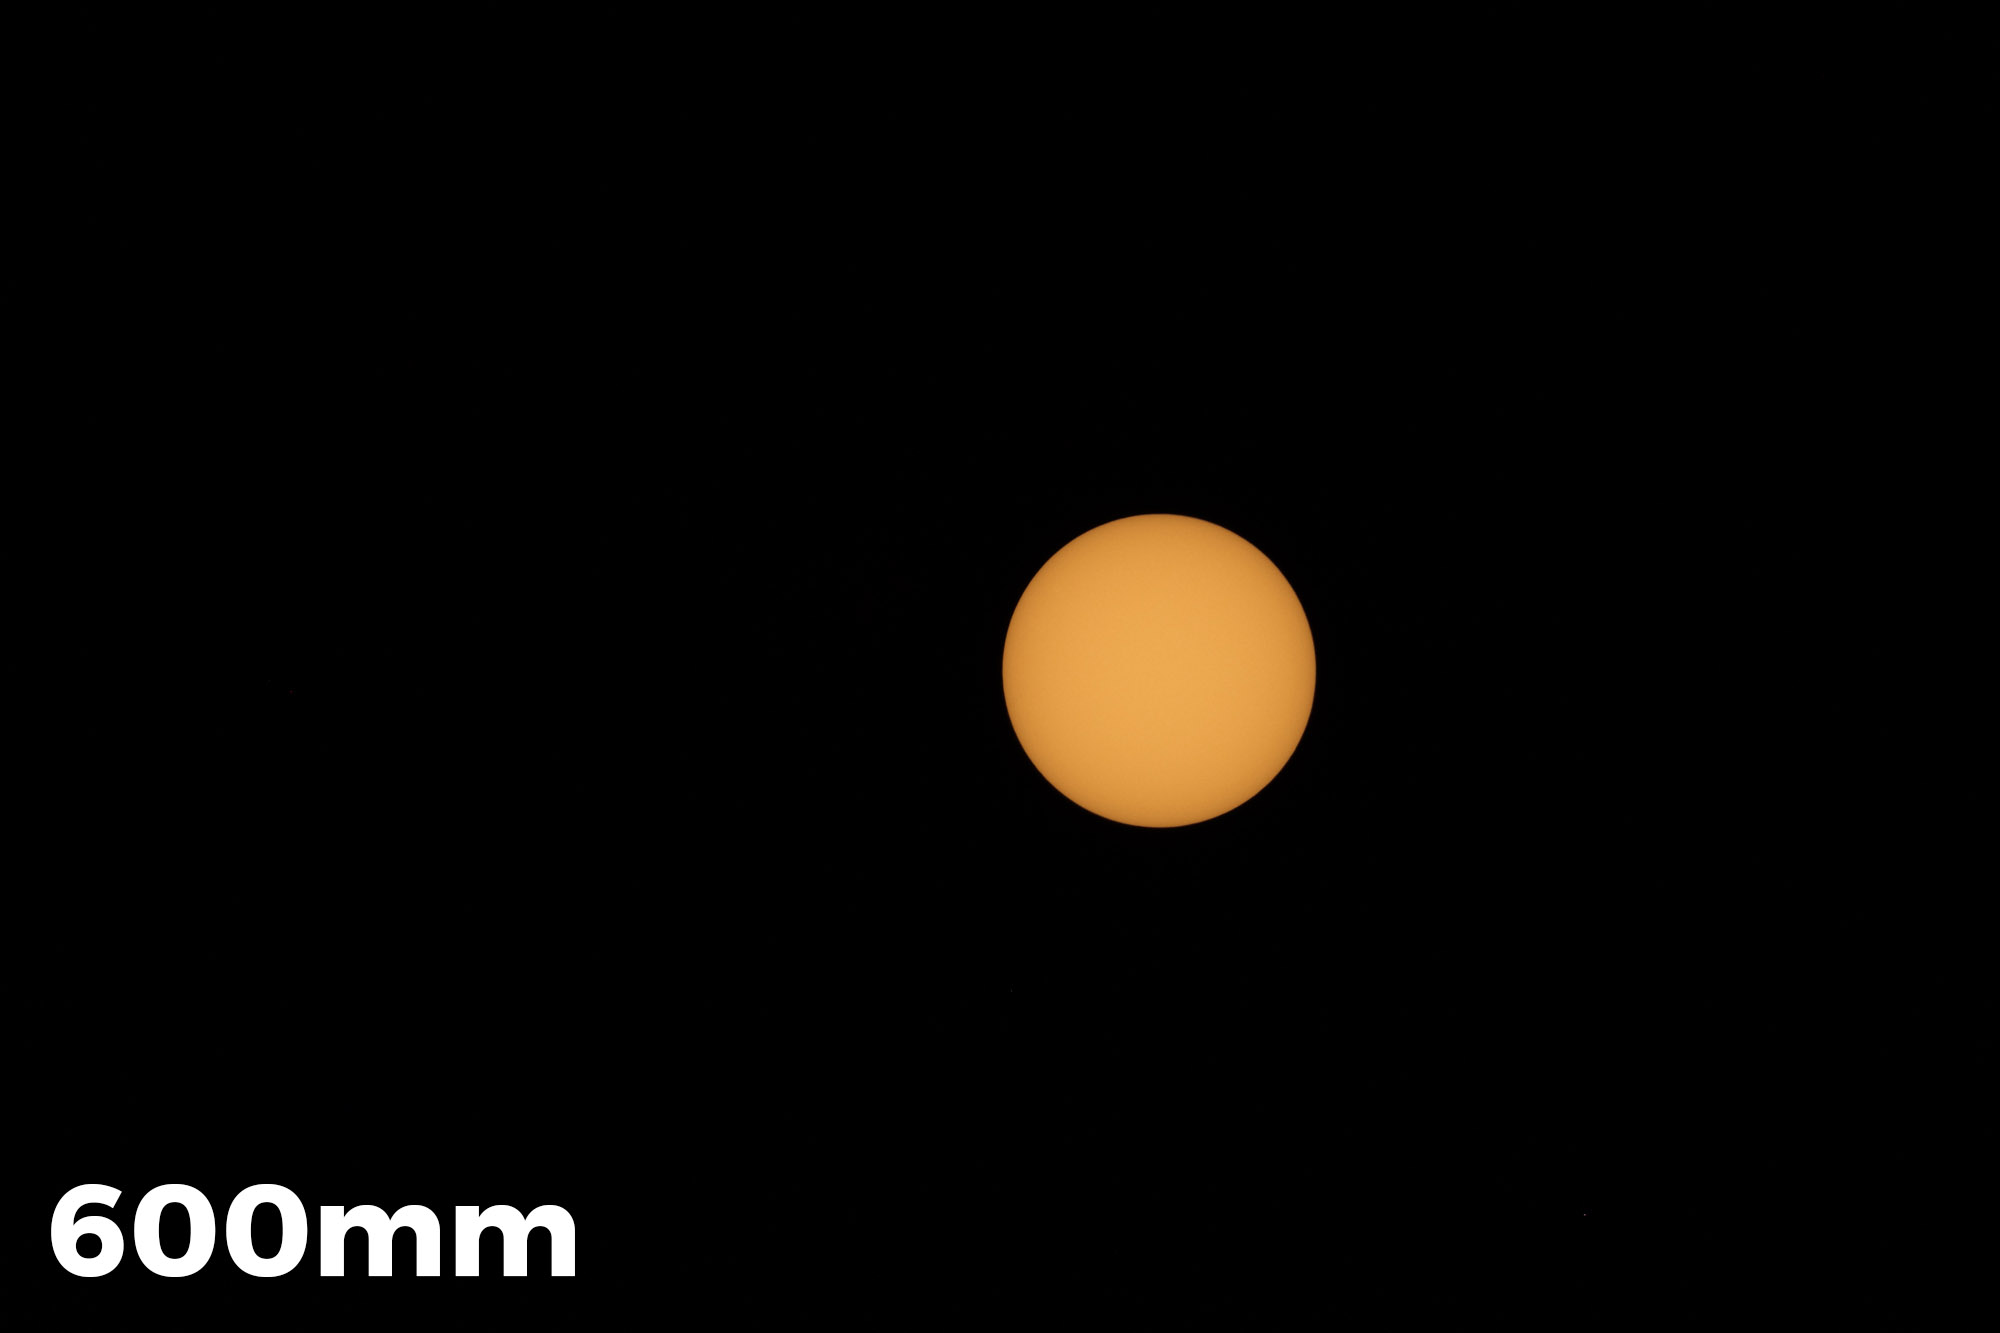
Then I thought it would be great to run one more experiment to see at what shutter speed a 300mm lens would make the moon too blurry to be seen clearly. It’s easy to do with a full moon—but I wanted to have this to show people what it looks like during an eclipse:

Honestly, I thought the 1/2 second exposure was the sharpest that was acceptable to me. Either way, note that the chart above is for a 300mm lens. Results will be even more restrictive with a longer lens, such as a 600mm. It’s important to bracket and test in the field.

Exhausted and tired, I put my gear inside and rolled into bed around 1 a.m.—after downloading and inspecting my images, naturally. ;-)


Eclipse Stories from NPAN Alums

For several days this week we saw some of our workshop alumni post incredible images on social media. We asked a few if they’d share their stories and lessons learned, and we were thrilled that they are happy to do so.


by Gary Domrow

© 2019 Gary Domrow, instagram.com/gsdpic. Canon 5D Mark IV, Canon 100-400mm f/4.5-5.6 lens with teleconverters. 1/2 second, f/8, ISO 1600.

I set up the tripod up in my driveway here in Austin, Texas. I had hoped to do a sequence but the first part of the eclipse was obscured by clouds, so I took pictures for just about 15 minutes on either side of the beginning of totality. I shot them using the Canon 100-400mm, some with the Sigma 2X teleconverter and some with the Canon 1.4X, set up on a Really Right Stuff tripod and ball head. I used the “live view and zoom in” method to focus, and actually remembered to try a few different settings for ISO, shutter speed and aperture.

Despite using that lens and teleconverter combination, I must not have been zoomed in quite all the way because the focal length is 525mm according to the EXIF data. So I cropped the final image. What you see is maybe 30 or 40 percent of the original frame. Finally, I did some minor tweaking in post with Lightroom—Exposure, Contrast, Noise, Clarity.

I guess I can’t say I learned anything new. I just practiced and reinforced the techniques that I have, which is also a good thing.

Well, I did learn later that some people are really lucky—did you see this article about the meteor hitting the moon during the eclipse? I guess as long as you are out shooting the night sky, there’s always a chance you’ll catch something unique or interesting or unexpected.


by Heather Cunningham Wendelboe

© 2019 Heather Cunningham Wendelboe, bolo-photo.com. Nikon D750, 20mm f/1.8 lens.

I’ll pretty much always have a story, because every time I go out on one of my “automotive astroscape shoots,” I set myself up for a major mistake—since I always want to try something I don’t know how to do! So here’s the whole story of my disaster.

I had planned for one my usual automotive astroscape shoots. My intention for my final image is always to share a vision as if you had looked out a window and watched the whole experience through the night—to inspire someone to go on a late-night road trip out there in the middle of nowhere. A secondary intention is to showcase my passion for driving these cars the way they were meant to be driven and not just hoarding them in a garage.

This was my first attempt at a lunar eclipse. I wasn’t thinking about what would be different than other night photos I’ve done, so I composed like I normally would. The focus and exposures actually turned out pretty good, considering the haze in the sky and the lens fogging up, not to mention the microscopic size of the moon with a 20mm lens! The main problem was that at the time I started shooting the moon, it was in the middle of my frame, and there was not enough room at the top of the frame to fit the entire sequence of exposures as planned. So, right about the time of maximum totality, the moon just dropped off the edge of the composition!

I wish I had set up the camera to shoot the entire sequence of the eclipse, and then I could have done a second setup for the composition and foreground exposure, since the final image would have to be a composite anyway.

When it came to editing, I cropped out about two-thirds of my frame to make it a vertical, which helped get rid of a lot of the vertical line distortion and placed the moons in a better position from side to side. But with the vertical orientation, looking from top to bottom, I ended up with literally the middle third of my frame being blank sky. I posted that version to the National Parks at Night Alumni Facebook group. After talking with several people in the comments about all our lunar eclipse photos, I decided to try a re-edit: I moved the moon sequence lower to fill the blank sky, then I cropped it back to horizontal.

Moving the moons to an inaccurate position in the sky bothers me, because no one who could have been there watching that scene would have seen it this way. But the resulting composition is acceptable.

Lesson learned: You can’t recover what you didn’t shoot. And if you mess up what you did shoot, you owe it to yourself to salvage it, because your failed attempt required the same effort that a successful one would have. It wasn’t your work, only your decisions, that made the difference.


by Randy Christ

© 2019 Randy Christ, MovingImagesPhotography.com. Canon 5D Mark IV, Canon 100-400mm f/4.5-5.6 with 1.4X teleconverter, on an iOptron SkyGuider Pro EQ Camera Mount. 20 seconds, f/8, ISO 100.

The photograph is a single image—no HDR, no compositing, no Photoshop. All the editing, cropping, etc. was done with Lightroom.

Image stabilization was turned off, and focus was set to manual. The camera was mounted on an iOptron SkyGuider Pro EQ mount, which was configured to track the moon precisely. The 20-second exposure time was chosen to hold in check the star trails that would occur due to the moon and stars moving at different rates in different directions. Also, this shutter speed allowed for the settings of ISO 100 and f/8, which are the sweet spots of this camera and lens.

This was my first attempt at shooting with an EQ mount, and the comedy of errors I made kept rolling all evening. Talk about lessons learned—as well as just some bad luck. But I also had some good luck, and came away with some shots I am pretty happy with.

I decided to process this particular image in the series because it caught the fleeting moment when the moon was just about to leave the umbra shadow of Earth, ending totality. During totality, the light that reaches the moon travels through the inner layers of Earth’s atmosphere, which passes along the longer-wavelength orange and red light. This is why the moon turns orange during totality. In the moments just prior to reaching the end of totality, some light reaches the moon after having passed through Earth’s ozone layer, which passes along blue, shorter-wavelength light. This results in a small strip of purple trim on the leading edge of the moon. It is a unique and splendid moment that occurs for only a brief moment in time.

Note: If you’d like to read more about how Randy created this image, see his blog post “Total Lunacy—Photographing the Total Lunar Eclipse.”


by Martha Hale

© 2019 Martha Hale, instagram.com/marthahale. Canon 5D Mark IV, Canon 70-200mm f/2.8 lens.

I was fortunate enough to shoot the solar eclipse of 2017 with National Parks at Night, so I knew I wanted to give this lunar shot a foreground element. Using PhotoPills, I scouted numerous skyline and landscape possibilities around town, only to realize this event was going to be happening straight up in the sky far away from the horizon. Change of plans. I scouted taller locations such as the statue of Vulcan in Birmingham, but newly installed multicolor LED lighting was going to be a challenge. I pondered Sloss Furnaces National Historic Landmark, but without NPAN, would they let me in that late again and turn off all the lights? Slim chance.

At the entrance to my neighborhood is a rather large replica of the Statue of Liberty. I couldn’t resist. I ended up liking a composition from directly beneath the statue with my lens aimed straight up, shooting with a Canon 5D Mark IV and a 70-200mm lens. I bounced all night between that and a Fuji X-T3 setup with a 100-400mm f/4.5-5.6 lens plus 2X extender. I was struggling with the loss of stops at f/9 with the Fuji, and with chasing the moon to keep it in the frame (should have used my star tracker from the previous eclipse), and with having to bump up the ISO so much once we were in totality.

I was getting frustrated, so when my husband came to check on me, I was ready to pack it up. But first I handed him a flashlight and asked him to point it at the face of the statue. I went back to my Canon and decided to do one final composition with my focal point on the statue, and just to be sure, took the time to do one more shot focusing specifically on the moon. I’m so glad I took that extra step, because when I got back to the full screen of my computer, the moon was slightly out of focus in all the earlier shots! I stacked the two shots in Photoshop for the win!


by Susan Wales

© 2019 Susan Wales, susanwales.ca. Nikon D810, Sigma 150-600mm f/5-6.3 lens.

I did not do a time lapse, but rather only took individual frames and put them together in Photoshop later. It would have been hard to do a time lapse because the settings changed a lot from the beginning to the end of the eclipse.

I did not realize that the color of the moon would change so dramatically from white at the start until the blood moon color developed with the full eclipse. That was fascinating to watch.

I pre-focused to infinity, locked my focus down and then shot in manual mode. I started to photograph at 8:50 p.m. (in British Columbia) and finished at 10:09 p.m. when the clouds moved in. I started with an exposure of 1/6 second, f/5.6, ISO 64 and finished at the height of the eclipse at 1.3 seconds, f/5.6, ISO 2000. I adjusted my camera settings manually as the light changed on the moon. 


by Steve Winker

© 2019 Steve Winker, whereswinker.com. Canon 6D, Tamron 150-600mm f/5-6.3 lens.

I shot the eclipse from the RV Park I’m staying at in Tucson, Arizona. Unfortunately, my site is right next to a 40-foot wall separating the RV park from Interstate 10. So there wasn’t any decent foreground. Plus, there’s a very tall bank of lights right there.

The main thing I learned was that I shouldn’t have set up so close to a very strong light source high in the air. At totality, it was almost impossible to see the moon thru the haze created by the light. The strong haze also caused my photos of the moon at totality to be a little hazy.

I really didn’t learn too much else this time. But I had shot a lunar eclipse in 2014 and I applied what I had learned from that shoot to this one. Based on that shoot and the fact that I didn’t have a foreground to use, I made the decision to zoom in and make a composite using several stages of the eclipse.

I did no cropping. I just took the five frames into Photoshop as layers, masked out the sky in each layer, and then moved the five layers so that the moons lined up.


Wrapping Up

Thank you to those six fantastic alums for sharing their images and their stories! We’re continually inspired by the photography we see coming from the fine folks we get to work with throughout the year.

So, who’s next? How about you? We’d love to see your photos of this week’s lunar eclipse, and to hear the stories behind them and the lessons you may have learned. Please feel free to share them in the comments section below or on our Facebook page.

Gabriel Biderman is a partner and workshop leader with National Parks at Night. He is a Brooklyn-based fine art and travel photographer, and author of Night Photography: From Snapshots to Great Shots (Peachpit, 2014). During the daytime hours you'll often find Gabe at one of many photo events around the world working for B&H Photo’s road marketing team. See his portfolio and workshop lineup at www.ruinism.com.

UPCOMING WORKSHOPS FROM NATIONAL PARKS AT NIGHT


Advanced Light Painting: Balancing Ambient and Added Light to Achieve Your Objective

Light painting can be fun, creative and rewarding, but also one of the most challenging aspects of night photography. Carefully crafted light painting can make the difference between a boring and a spectacular image. The range of tools and techniques we have at our disposal make for unlimited possibilities. Effects can range from subtle (from simply filling in shadows to manage contrast and exposure) to dramatic and bold (highlighting a subject in a way that only light can do).

The full moon is rising behind the vertical car. The bus has a Luxli Constructor light on medium power inside at ground level and facing toward the back of the bus. The car in the foreground does not have any added light. The backlighting from the moon created strong shadows and a glow in the sky around the car. All three variations 20 seconds, f/6.3, ISO 3200 with a Nikon D750 and Irix 15mm f/2.4 lens.

Even a quick pass of a Surefire P6 from camera-left was too much light because of the high ISO.

In the final version, I bounced the light from a Surefire P6 off my hand held over my head while standing about 6 feet to the left of the camera. It was enough to subtly light the car in the foreground while preserving the shadows and overall feel of the image.

The first step to light painting is to figure out what you want to light, and what you are trying to achieve by lighting it.

Once you have that down, the next step is to determine the amount, color and quality of light required. There are lots of decisions to be made, and the answers are different for every image and every situation:

  • Are you lighting multiple objects or multiple surfaces?
  • Do you need to illuminate from multiple positions?
  • Do you want soft, diffuse light or contrasty directional light?
  • Should you use light that matches or contrasts the color of the existing light?

The remainder of this article assumes that you have gotten to this point, and are ready to take it to the next step.

The last-quarter moon was just rising behind camera to the right. Lit with a Surefire P9 incandescent flashlight from the left and right sides at oblique angles. It was a challenge to light both sides of this large building in 30 seconds, but it was freezing cold so I ran from side to side to do the lighting to keep warm. You can see that I overlit the right side and the underside of the top of the building. The background was too dark. 30 seconds, f/8, ISO 800. Canon 6D and Nikkor 28mm f/3.5 PC lens.

After several attempts, I conceded that I would need to use a longer shutter speed, both to add more exposure to the background and to do a better job at the lighting. The light painting is more evenly distributed, and I added light to the foreground. Additionally, the longer exposure opened up the inside of the store, which is lit by vintage, very orange Edison bulbs that have been burning continuously for decades. 75 seconds, f/8, ISO 800. Canon 6D and Nikkor 28mm f/3.5 PC lens.

Controlling the Look

Learning to control lighting ratios between the existing light and whatever light you bring to the party is one of the most powerful ways that you can influence the overall look of your images.

If you are not sure what I mean, think of it in terms of a rudimentary on-camera flash. If you use flash on a point-and-shoot camera, or even a DSLR in “P” mode indoors at night, you’ll end up with a foreground that is properly exposed, and a background that is likely to be dark and underexposed. You can adjust the flash compensation to reduce the amount of flash relative to the existing light for a better balanced overall exposure. Another way to achieve the same end would be to increase the exposure time to increase the background exposure.

The more light you add to your subject relative to the ambient light, the more your illuminated subject will stand out from the background.

We can do that same thing in the field with light painting. But it takes a bit of work, and a clear idea of what we want to say with our images.

It’s all about the context. If your added light is two or three stops darker than the existing light, it will be barely noticeable. If it is two or three stops brighter, the more pronounced and dramatic it will be.

In the simplest terms, the more light you add to your subject relative to the ambient light, the more your illuminated subject will stand out from the background. Within the parameters of a workable exposure, exactly how much light to add compared with the ambient light is a matter of taste, and is one of the ways a night photographer can style their images.


Case Study: Mono Lake Series

The exposure for all five images is 20 seconds, f/4, ISO 12800, and they were shot with a Canon 6D and Nikkor 28mm f/3.5 PC lens. Starlight conditions with practically no light pollution.

Starlight only.

Very low power, broad-beam LED flashlight from camera-right for 2 seconds.

Bright LED flashlight from camera-left for shortest possible time. The brightness of the light meant that I had to use it like a flash by waving it in and out of the scene as quickly as possible. It was impossible to control the light with any consistency.

Very low power, broad-beam LED flashlight from camera-left and right for 3 seconds from each side. I liked the look, but wanted to try a warm light that would contrast the cool, blue sky.

Very low-power, incandescent flashlight from camera-left and right for 1 second from each side. This light was brighter, and therefore harder to control at ISO 12800. It was also less diffuse, which made it difficult to light the formation with just a single 1-second pass of the light from each side, but it was my preferred result.


Arriving at a Ratio

How, though, do you decide how much light to add in comparison with your ambient exposure?

There are two main ways to vary the lighting ratio:

  1. Just as in the flash example above, you could increase or decrease the amount of added light. This can be achieved with a brighter or dimmer light source, or by using a continuous light for a longer or shorter period of time, or by popping a flash once or multiple times.
  2. Extend or shorten the exposure time. Assuming that you used the same amount of light painting, the length of the shutter speed would affect only the ambient exposure. (Whereas changing either the ISO or the aperture would affect both the existing and added light. Our goal is to separate the ambient and added light, not to adjust them proportionally.)

To summarize, you change the lighting ratio by increasing or decreasing the amount of added light, or lengthening or shortening the overall exposure time without changing the added light. Use whichever method works better for each particular shot.

Controlling the Light

You can control how much light you add in different ways depending on the painting tool you’re using:

  • If you are using flash, or a variable brightness continuous light source such as our beloved Luxli Viola, you can increase or decrease the intensity.
  • With a flash, you could also use multiple pops of light, and each additional fire doubles the amount of light on your subject.
  • If you are using a flashlight, then you can increase or decrease the amount of time you employ it to light your subject, provided that time fits within your exposure length. (Increasing the exposure time without altering the added light painting will reduce the ratio—and therefore the impact—of the light painting. Reducing the exposure time without altering the light painting will make the light painting stand out more.)
  • In some situations, of course, you may need to adjust both the added light and the exposure time to find the right combination.
  • One other way to modify your light painting is to increase or decrease the distance between your light source and your subject, keeping the Inverse Square Law in mind. The Inverse Square Law essentially states that doubling the light-source-to-subject distance results in one-quarter of the light reaching the subject.

Case Study: Trona Series

From my “Loos With Views” series. A nearly full moon, with light pollution from Trona and Ridgecrest in the background.

The first attempt. 30 seconds, f/4, ISO 800. Canon 5D Mark II with an Olympus Zuiko Shift 35mm f/2.8 lens. Incandescent flashlight from the right, and inside the loo. I considered this to be overlit.

The second attempt. 30 seconds, f/4, ISO 800. Canon 5D Mark II with an Olympus Zuiko Shift 35mm f/2.8 lens. Incandescent flashlight reflected off my hand from camera-left, and LED bounced off the back wall of the structure. The LED was too harsh, and I didn’t want to see the signage on the front.

The third attempt. 30 seconds, f/4, ISO 800. Canon 5D Mark II with an Olympus Zuiko Shift 35mm f/2.8 lens. Better-controlled LED bounced off the back wall of the structure, and no light on the front.

The final attempt. 10 minutes, f/4, ISO 100. Canon 5D Mark II with an Olympus Zuiko Shift 35mm f/2.8 lens. A few seconds from camera-far-left with a Surefire P6 incandescent flashlight to show texture in the structure. I used the same light for a few seconds inside the loo, bounced off the front wall. The light on the rock and the vent pipe was ambient that accumulated during the long exposure. The color of the sky is so different due to the combination of the long exposure and the moonlight’s effect on the white balance.


Complications

Other constraints (such as shooting at high ISOs to avoid star trails) may come into play, and these can complicate things further.

A common scenario when light painting at high ISOs to preserve star points is that a light source may be so bright that a fraction of a second is all that is required to light a scene, making it next to impossible to control the light well. Reducing the camera exposure would have a negative impact on the stars, and would also even further reduce the amount of time available to get into position and execute the lighting.

In that case, using a dimmer light source is the best option. If the location is treacherous and getting into position takes some time, two good strategies are setting a delay on the exposure or triggering the shutter remotely once you get into position.

Conversely, when working under the light of a full moon, a longer duration of light painting is a good way to increase the added-to-existing light ratio. In urban environments with a lot of ambient light and relatively short exposure times, utilizing a brighter light source might be the best approach.

But It’s Really Not Complicated

In any case, some thoughtful examination of the situation and available options will go a long way toward achieving the desired look.

If after reading this you are thinking about going back to daytime photography, please know that these decisions and tactics are really not that complicated. I don’t know anyone who does mathematical calculations in the field to figure out their light painting—at least no one who has done it more than once!

Like everything related to night photography, it’s a mélange of art and science that can be mastered only by trial and error, accumulating knowledge and experience along the way.

Lance Keimig is a partner and workshop leader with National Parks at Night. He has been photographing at night for 30 years, and is the author of Night Photography and Light Painting: Finding Your Way in the Dark (Focal Press, 2015). Learn more about his images and workshops at www.thenightskye.com.

UPCOMING WORKSHOPS FROM NATIONAL PARKS AT NIGHT

Eclipse Lessons: What We Learned from Our Day in the Sun

Wow. That … was epic. Whether you experienced the solar eclipse of 2017 in the mountains or the cities, with a small group of friends or with the masses, or even just online, that was the most universally experienced eclipse ever!

As we slowly come down from the high of the event, we want to share our story with you.

All five of us here at NPAN witnessed the eclipse in different ways. Chris, Matt and I saw totality, and Lance and Tim took time out in their location to stare at the waning sun.

I planned a small, hands-on Adventure Series workshop around the event. We lived on a ranch at Exit 0 in Montana and then drove two hours to the remote wilderness to capture totality.

Matt collaborated with B&H and Atlas Obscura at a Total Eclipse festival in eastern Oregon and made the most of his two minutes by creating eclipse portraits during totality. And Chris probably did the smartest thing and simply shared the whole experience with his 4-year-old daughter, laying together on a blanket in the grass outside a zoo in Greenville, South Carolina.

Tim was leading a workshop in smoky Glacier National Park and guided the students not to shoot the blocked sun but instead to capture the unique rays of light from a minimal sun. And Lance, who had just recently moved to Vermont, took time out of his day to take it all in with his fiancée.

In this post, Matt and I share how we prepared for our shoots, and the ideas we had for capturing and creating during the whole of the eclipse.

Gabe’s Prep

I’m always looking ahead to unique celestial events that we at NPAN can share. When I first learned that the Great American Eclipse was going to be passing through an area I frequent, Montana, I knew I had to start planning!

As it turns out, I was invited to the rural big night skies of J Bar L Ranch in Centennial Valley. Located about one hour from the path of totality, I had initially planned to avoid the crowds and just shoot and share the eclipse at the ranch. When we posted the details of the workshop, we even downplayed the eclipse aspect because you never know with weather. However, we received several emails from “eclipsers” who told us that they would rather see the total eclipse in front of a pile of rubbish than a partial eclipse in the most beautiful place in the world.

So we changed the game plan and I started researching nearby locations in Idaho that would be in the path of totality, which I was able to scout a year ahead of time. My first thought was to go to Sun Valley and get close to Stanley, a small town smack dab in totality, But when I heard that this small town of 50 people was expecting 50,000 visitors, I starting looking for locations even more rural.

Figure 1. Idaho’s Sawtooth Mountains. © Gabriel Biderman.

In the end I was guided by stormy weather and magical light. I was visiting the small towns of Arco and Mud Lake when an impressive storm drew me toward the Sawtooth Mountains (Figure 1).

I pulled off and drove down a dirt road to gain a better vantage point to shoot the rays of light dancing around the mountains. I knew I was in the path of totality and pulled out the PhotoPills app to confirm that the sun would be seen over the Beaverhead Mountain Range at the time of the eclipse.

Figure 2. PhotoPills’ VR overlay of the path of the sun over the Beaverhead Mountain Range.

Figure 2. PhotoPills’ VR overlay of the path of the sun over the Beaverhead Mountain Range.

It was important for me to have an interesting foreground, as I wanted to have our students have a wide-shot option when photographing the eclipse.

Matt’s Prep

(Hi, Matt here!) I was a polar opposite to Gabe. Imagine that.

I wasn’t really interested in photographing the eclipse stages before and after totality. Why? I am happiest shooting at night, and totality was what I was looking for. The heat was on to make a plan for those two minutes.

I love making night portraits. So I challenged myself to stage and shoot as many portraits as I could pull off during totality. I knew the exposure would be akin to end-of-dusk light levels. So I grabbed my Sigma 35mm f/1.4 Art lens to make both the subject and the sun/moon combo a size that felt appropriate to me.

Figure 3. Night at Atlas Obscura’s eclipse festival.

We were set up in a field on a private farm in Durkee, Oregon, for Atlas Obscura’s eclipse event. I was hanging out with the B&H Photo crew, enjoying all the solar-equipped telescopes they brought to observe first bite and the looming totality.

The crowd was abuzz with anticipation (for the eclipse—not for what I was doing.). I grabbed a speedlight and a Luxli Viola, and prepared to test.

Gabe’s Practice and Process

As we discussed in our “NPAN 2017 Solar Eclipse Guide,” the most important thing you can do to prepare for the eclipse is practice shooting the sun.

Zoom lenses need constant monitoring to track the path of the sun in the sky. Solar filters take some getting used to looking through, as they darken everything but the sun. We practiced tracking for several days right before the eclipse. If you can practice during the same time of day, you’ll get a feel for how high you need to track.

I found that the autofocus of the zoom lens did a good job, but because we were pointing directly above us at noon, my lens had issues with creeping. I had to gaff-tape down my zoom ring so that it would stay all the way zoomed out. Investing in a lens that locks its zoom at multiple focal lengths would be very wise.

Matt’s Practice and Process

All of my practice is from years of night photography and flash portraiture. I’ve been shooting in dim light combining those two practices for a while, so I felt confident I could make it happen when the time came.

But it didn’t stop me from thinking though the possibilities over and over while waiting. I did fret a little. But the Light Painting Party the previous evening had me feeling all sorts of good.

Gabe’s Gear and Settings

My wide setup was the Nikon D750 with the Nikkor 14-24mm f/2.8 lens and the cardboard DayStar Solar Filter. My settings during the eclipse (not totality) were 1/125, f/8, ISO 800. I manually set focus at hyperfocal distance so that everything was sharp from 10 feet to infinity.

My telephoto setup was the Fuji XT2 and 100-400mm f/4.5-5.6 lens, with the best filter holder system I have ever used, the Wine Country. Even with the dubious Amazon scare, I stood by my Lee Solar Eclipse Filter, as I had used it for many hours without any issues. My base settings were 1/250, f/8, ISO 800.

I wanted to simplify my shooting during totality as much as possible and set up both cameras to bracket. To capture the “diamond ring,” I closed down to f/22 to heighten the flare, increased the shutter speed to 1/60, and bracketed as best I could. The light bursts were bright and quick and the bracketing worked out really well. The 1/2-second exposure gave me the best corona (see Figure 4) and 1/250 captured the Bailey’s beads (Figure 5). But the most dramatic image was the flare from the diamond ring effect, which worked out best at 1/15, f/22, ISO 800 (Figure 6).

Figure 4. Corona. 1/2, f/22, ISO 800.

Figure 5. Bailey’s beads. 1/250, f/22, ISO 800.

Figure 6. Bailey’s beads, or the diamond ring effect. 1/15, f/22, ISO 800.

During totality I lowered my shutter speed to 1/15 and bracketed again. I should have also opened my aperture, but I was trying to keep things simple while running between two rigs.

The best exposures ended up being 1/15 and 1/30, as exposures at or over 1/8 tended to be too blurry with the rather rapid movement of the sun and moon. In hindsight, I should have opened my aperture to f/8 and kept my shutter speeds in the range of 1/125 to 1/250.

It was very important to put my camera in the highest burst mode, to shoot in RAW (of course) and to still bracket. Keep the trigger firing and take some time to take it all in.

Matt’s Gear and Settings

I popped the CTO-gelled speedlight on a tripod and tested the output. Why CTO? Well, I wanted to shoot with Tungsten white balance and the flash should be neutral.

This is night photography, if but for a moment.
— Matt

I then grabbed the Luxli Viola and set it to 5000 K. I placed it lower than the speedlight, but on axis. I’ve been studying how cinematographers are making the shadows and highlights different color balances. So I wanted a cool shadow undertone from the LED light and neutral/warm from the flash. And the sky would look cool because of the Tungsten setting.

I revved up my Nikon D750 and Sigma 35mm with no filter. Why? It’s totality—this is night photography, if but for a moment.

I worked through a couple of test shots to get the sun/moon exposure while my first subject, John Faison, was making a few images for himself. I asked John to stand in front for a few darker frames at 1/125, f/6.3, ISO 200. Then I wanted some more corona and landscape for context, so I dropped my shutter speed down to 1/25 and then 1/3. (See Figures 7 through 9.)

Figure 7. 1/125, f/6.3, ISO 200

Figure 8. 1/25, f/6.3, ISO 200.

Figure 9. 1/3, f/6.3, ISO 200.

Figure 10.

We swapped places and by the time John shot two frames of me (Figure 10), our two minutes of totality were over. Wow. Talk about pressure!

I asked the next volunteers to step in and it was all over. :-(

Gabe’s Experience/Emotion

Well, that was the quickest two minutes in my life! It was magical to have the sunlight change so drastically and to have hard “night” shadows engulf us. Typically moonlight is very soft, so this was very surreal. I saw only the brightest stars and planets—it was a very silvery civil twilight.

The drastic drop in temperature brought an eerie chill and the only creatures close to us were flies that appeared out of nowhere when the lights came back on.

I did watch too much of totality from the back of the screen and really wish I had spent more than 15 seconds staring at the sky.

Matt’s Experience/Emotion

I was laser-focused on one mission. OK, two. I forgot to mention I was running a time-lapse with a fisheye from ground level on Aperture Priority (see below).

Anyway, my one mission (I told myself) was to do something no one else was likely to be doing. I like to zig when others zag. I’m known for it. It’s curiosity. I love that feeling of, “Oh, this might not work.” In fact, I told John and those who didn’t get a chance to get their portrait done that very same thing.

I was listening intently to everyone around me. I heard the hush of wildlife. I heard the birds all speak up at once, then crickets. I felt the temperature drop and one of the scientists nearby exclaim in glee, “It’s 62 degrees Fahrenheit—a full drop of ten degrees!” I felt the mosquitoes rise up and eat me alive. I heard all the oohs and aahs of everyone marveling about all the stars in the sky behind us. But I saw none of it. I was on task.

Do I regret not enjoying the eclipse with my own eyeballs? Not at all. Because now I would be regretting not trying for something that was a pressure-based stretch goal. I tried, and I believe I succeeded. In fact, I got a diamond ring in my portrait. Pretty rad.

Gabe’s Final Takeaways and Notes for 2024

I was able to share this experience with my dad as well as nine Centennial students, which was incredibly special. We were all alone among the mountains, and it would have been weird to experience it all by myself. Viewing it in a city would have been more of a universal gasp of astonishment, but I really appreciated the people I was with and the earth that surrounded us. We all promised to meet back up in 2024!

It was difficult to remain cool, calm and collected during totality. I totally forgot to turn on my 360-degree video camera, which would have been a unique way to capture the changing light and our reactions. Maybe next time we can work together and have each person be responsible for one way to interpret the eclipse—that way we would be more focused and could share the many results.

Figure 11. Composite of 25 frames showing the full sequence of the solar eclipse. Nikon D750 with 14-24mm f/2.8 lens and DayStar Solar Filter. Each frame (except totality) shot at 1/125, f/8, ISO 800.

In the end, the close-up shots give you a closer look at all the incredible things that happen moments before, during and after totality, but after the rush of it all, I’m really enjoying the wider-view composite shot of all the sun phases over the scene (Figure 11).

I feel like I accomplished the standard takes on the eclipse and look forward to challenging myself for a new perspective in 2024—or before!

Matt’s Final Takeaways and Notes for 2024

I was very fortunate to be where I was, when I was. I wasn’t originally scheduled to go to the festival, but a series of other things put me in a position to represent NPAN at Atlas Obscura’s exclusive event.

I’ve always admired the cut of their jib. Their focus on adventure, satisfying curiosity and generously sharing is right up my alley. And I met a host of like-minded people there. It was kismet and I would do it all over again exactly the same way.

Next time, however, I will bring about five cameras. That may be in Argentina in 2019 or 2020, or much of North America in 2024. I am hooked. That was a truly singular experience.

Did you photograph the solar eclipse? We would love to see your images in the Comments section below!

Gabriel Biderman is a partner and workshop leader with National Parks at Night. He is a Brooklyn-based fine art and travel photographer, and author of Night Photography: From Snapshots to Great Shots (Peachpit, 2014). During the daytime hours you'll often find Gabe at one of many photo events around the world working for B&H Photo’s road marketing team. See his portfolio and workshop lineup at www.ruinism.com.

UPCOMING WORKSHOPS FROM NATIONAL PARKS AT NIGHT

Night in Day: How are you Preparing for and Shooting the Eclipse?

Note: This article is also featured in our brand new free e-book Here Comes the Sun: 2017 Solar Eclipse Guide. The e-book also includes the articles “Parks in the Dark,” a travel guide to all the National Park Service units that the total eclipse will pass over, and “The Right Stuff,” a detailed buyer’s guide for all things related to eclipse photography. Download your copy today!

If you haven’t heard the buzz yet, the continental United States will be experiencing a solar eclipse on August 21. If the weather is good, we will all be able to see … most of it. But lots of lucky folks will be driving to a spot along the path of totality to experience something very rare and surreal: the total eclipse, when day turns into night. For approximately 1 to 2 minutes you’ll be able to see the stars during the day and the wild corona light dance from behind the moon.

The last total solar eclipse to touch the lower 48 was on February 26, 1979. The last time we experienced a total solar eclipse crossing our entire nation from the Pacific to the Atlantic was on June 8, 1918. That was a long time ago; it’s pretty rare.

The good news is that, at least this time around, it won’t be rare for long. The next total solar eclipse in the U.S. after 2017 will be in 2024, when the path of totality will cross from Mexico into Texas and will leave via northern New York and New England on its way to New Brunswick and Newfoundland. So any specialized gear you get now, you can put to good use in seven years!

The last trans-U.S. total solar eclipse happened … well, awhile ago.

Gear you Need to See and Capture

As you have probably guessed in life, it is not a good idea to stare at the sun. The most important thing you can purchase to prepare for the eclipse is a pair of solar glasses for your eyes and solar filters for your camera lenses. Technology continues to get better in this field and the newest international standard rating is ISO 12312-2. If you do not see this certification on the product, you shouldn’t purchase it. Solar filters absorb the ultraviolet, visible and infrared energy of the sun, making our star safe to view and photograph.

Protect your eyes with solar glasses. (Helmet is optional.)

B&H Photo, home of my day job, has been a great resource for embracing the best products and knowledge. To that end, I have been recently practicing shooting the sun and want to share this knowledge with you.

As far as glasses go, any simple paper pair will do, as long as it has the aforementioned ISO rating. A cool thing that B&H is doing is packaging free solar glasses with most of their solar filters! So you can kill two birds with one stone, all while not killing your eyes or camera sensor.

Let’s focus on the filters from a photographic point of view. There are three types of solar filters you can choose from:

  • screw-in filter
  • glass drop-in filter for a filter holder system
  • inexpensive and universal paper or adjustable aluminum alloy filters that are easy to take on/off

The screw-in filter is the one I would least recommend. Even though it seems to be the most popular, think of this: The common strategy for shooting the eclipse is to have a filter over your lens so that you can capture a properly exposed and non-flaring sun. Once we enter the small window of totality, when the moon will eclipse the sun, it will be safe to take the filter off and adjust your exposure accordingly for that beautiful shot of dark sky and the white ring around the moon. You must wait until after the “diamond ring effect”—when the sun flares one last time from behind the moon—before taking off the filter. You don’t want to waste precious time (5 to 10 seconds) unscrewing a screw-in filter when you could instead take 1 to 2 seconds to remove a drop-in filter or universal filter cap. The average time of totality will be from 1 to 2 minutes and you want to photograph it but also experience it. Don’t waste precious time fumbling around with your gear!

If you want to look into the available filters and other eclipse equipment, an easy way is to search all the gear and articles that B&H has been working on for the last year. Type “Solar Eclipse” into the search engine at www.bhphotovideo.com and you’ll be taken to this very resourceful page:

Start Practicing Now

The first time you shoot the sun shouldn’t be on August 21. Get some solar filters and start practicing shooting the sun now! I’ve been doing this over the summer, which has given me a chance to test exposures and specific gear before the big day.

I recently purchased the Solar Eclipse Filter by Lee for my Wine Country Filter Holder system, as well as the Daystar universal solar lens filter. My MrStarGuy Adjustable Objective filter is on back order, but should be shipping soon.

Lee is one of the top-end filter companies. Their filter mentioned above is equivalent to a 20-stop neutral density, but also is ISO certified and should be used only for solar work—not for long-exposure landscape photography.

Wine Country Filter Holder system and 100-400mm lens.

The Lee filter is made of glass, and I find the image quality is excellent. The suggested settings from Lee with this filter are 1/800, f/8, ISO 800. Think crazy eights! This was pretty spot-on while the sun was high in the sky around 2 p.m.

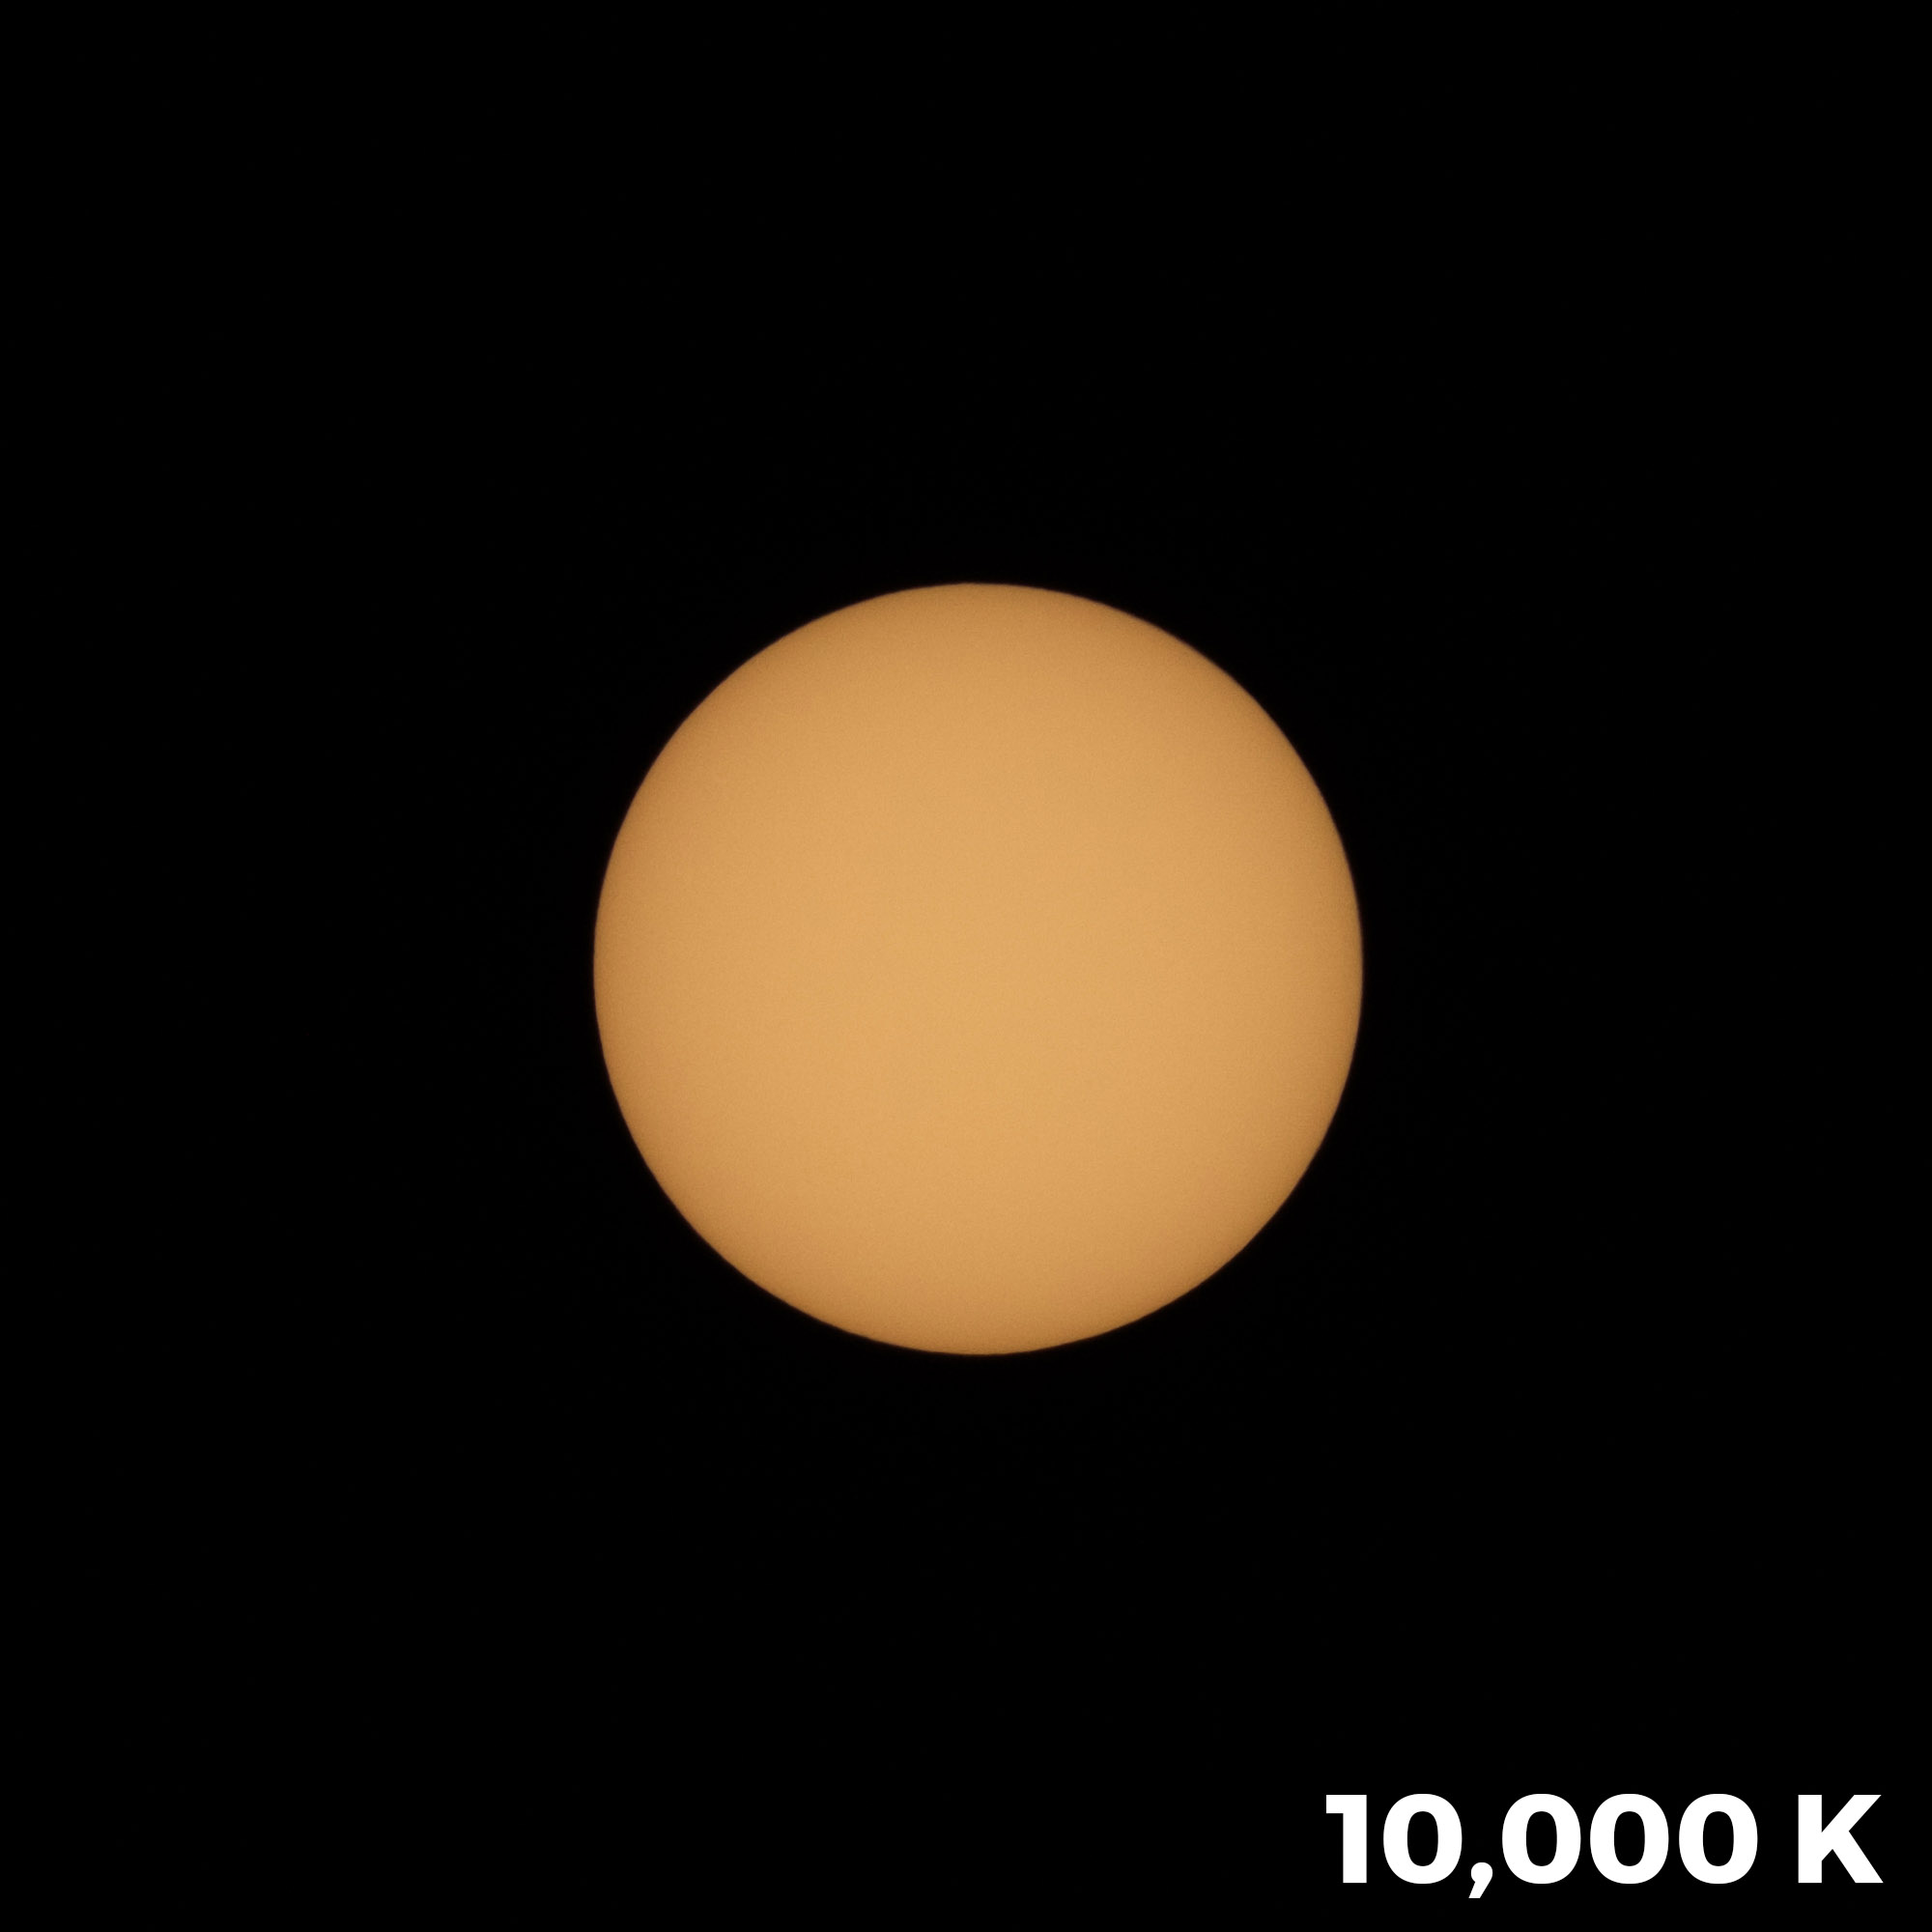
With Auto white balance, I found the Lee filter produced a clean white sun. I experimented with the white balance and preferred cranking it to 10,000 K for a nice yellow/orange sun that is more visually familiar. You can see the two compared below:

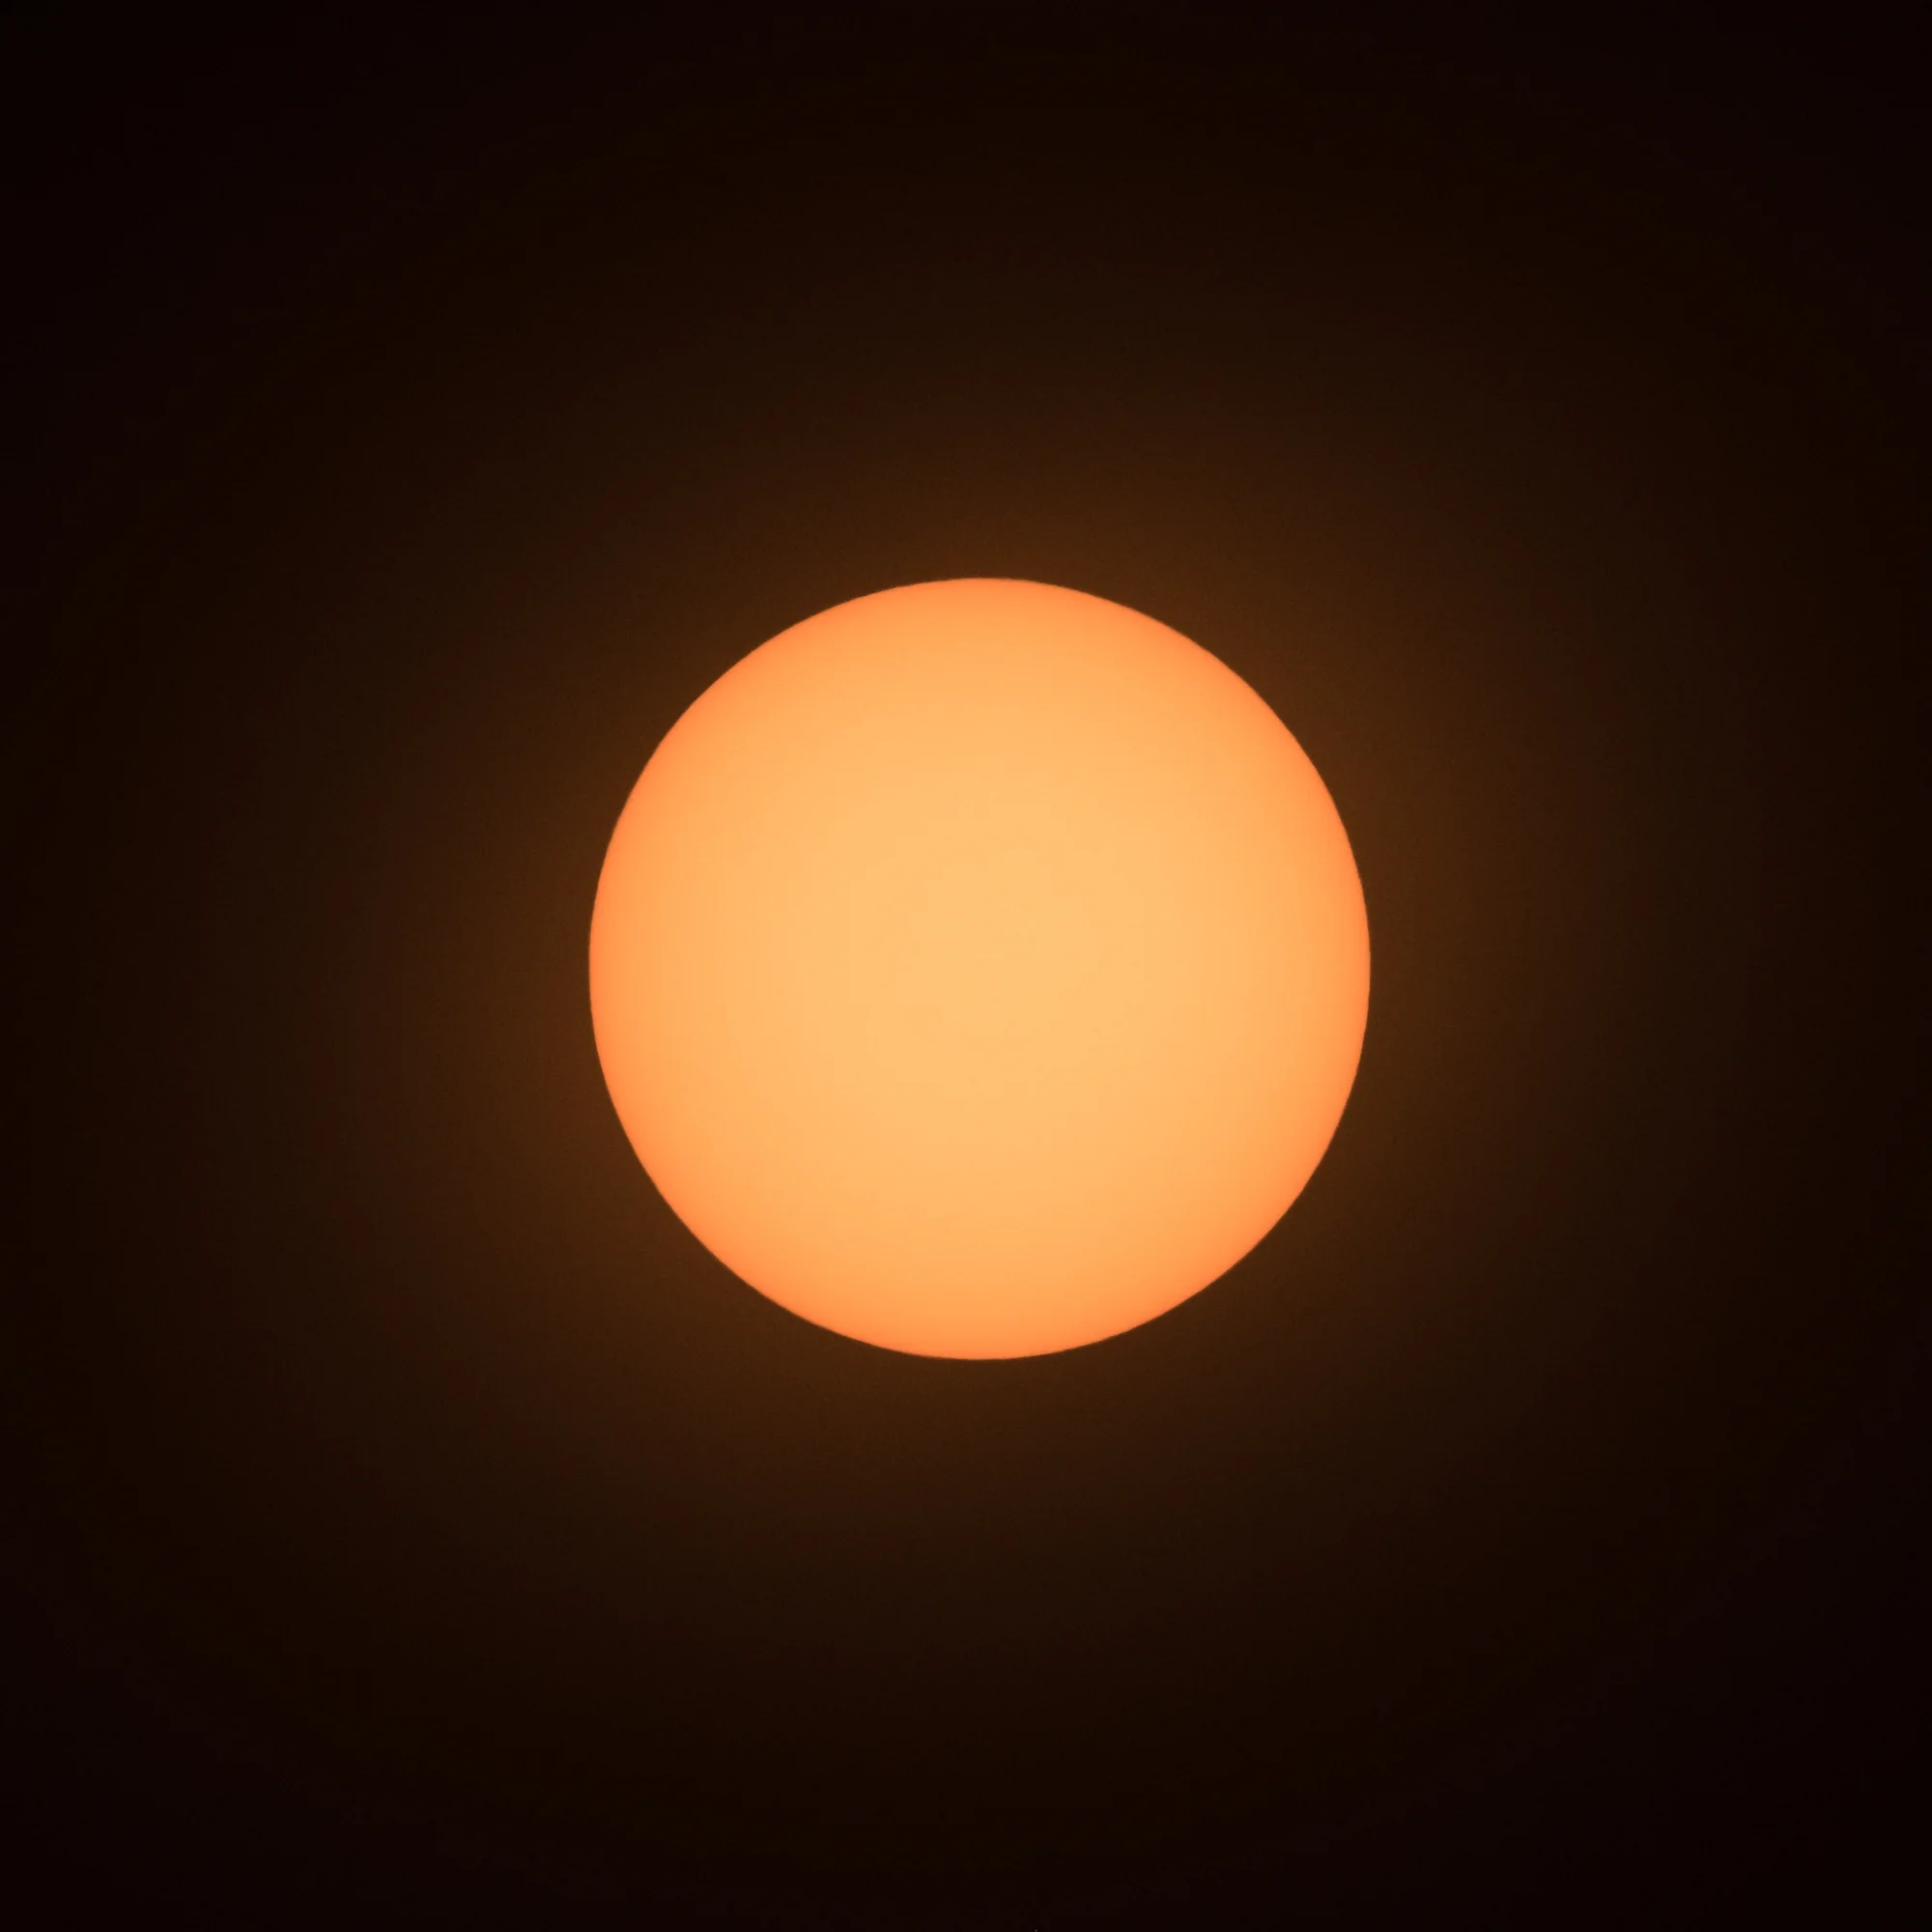
I also tested the Daystar slip-on filter and found that to be of very good quality as well. It was a bit deeper orange/yellow than the Lee with the white balance set to 10,000 K. I also found the Daystar to be 1 1/2 stops faster than the Lee, as my final exposure setting was 1/500, f/5.6, ISO 800.

Sun shot with Daystar filter at 10,000 K white balance. 1/500, f/5.6, ISO 800.

Sun shot with Daystar filter at 10,000 K white balance. 1/500, f/5.6, ISO 800.

Lens(es) and Game Plan

There are multiple ways to capture and create some unique images of the eclipse. Search Google Images to see what resonates with you.

I definitely recommend using a telephoto lens and getting a somewhat tight shot of the different phases of the eclipse. The careful thing to consider is not getting in too tight. When the total eclipse starts you’ll see the breathtaking corona light start to spill out from behind the moon. This can spread pretty far and create some beautiful patterns. If you are in too tight, you’ll frame it out.

When testing, I was using a 100-400mm lens on an APS-C crop sensor, and the far end of that focal range seemed like the sweet spot for a good telephoto capture. That’s 600mm to 800mm with a full-frame sensor, which you can achieve with really big glass or with a 1.4X or 2X teleconverter. But if you have a crop-sensor camera, that would be the one I’d lean on for this project.

The trick to the telephoto shots will be tracking the sun as it quickly moves through your frame. Depending on how tightly composed your shot is, this setup could require constant attention and adjustments. Having a sturdy tripod is a must, especially if you add a tracking device to a long lens and camera. Make sure your tripod head and legs are rated to hold the combined weight over a long period of time.

Many people will be using digiscoping (attaching a camera to their telescope) to get even closer images of the sun and eclipse. We really haven’t experimented with digiscoping at NPAN, but our good friend Todd Vorenkamp at B&H Explora discuses those considerations in his very informative article, “How to Photograph a Solar Eclipse.”

I’d also bring another, separate camera setup for capturing a wider view that includes the landscape. The telephoto phases of the eclipse are cool to capture, but they are generally featured against a dark black sky. If you use a medium telephoto or wide-angle, you can include some subject matter that gives your composition depth and scale. You’ll still need to have that solar filter on to capture more phases of the sun, but you’ll also want to get a properly exposed foreground—ideally once the uneclipsed sun is well out of the frame—to layer together in Photoshop.

Two tips to consider when using that technique:

  1. Underexpose the foreground shot so all the solar disks will stand out against that hopefully deep blue sky.
  2. Once the eclipse starts to happen, keep an eye on your settings and make adjustments to open up your exposure as the sun gets thinner and fainter.

Be Flexible and Keep an Eye on the Weather

This is going to be the most viewed and recorded solar eclipse ever. You’ll be able to watch it in and around populous cities such as Kansas City, St. Louis, Nashville and Charleston, as well as in national parks such as Great Smoky Mountains and Grand Teton, and in many rural national and state forests.

Do you want to experience this event in a city or town with tons of people and lots of rooftops and amenities, or do you want to go someplace more remote and get a darker sky?

Staying flexible with weather is key. There are plenty of apps (we like Weather Underground) that can share predicted cloud cover. It’s a good idea to have a Plan B and C that are within a 1- to 3-hour drive from your Plan A. You obviously want to avoid overcast and thick cloud cover, but sometimes stray clouds and wisps are unavoidable. Do your best to adapt or adjust—we are wishing you the clearest of skies, of course!

Most hotels are sold out within the path of totality, but campgrounds and private property are “renting” space to eclipse chasers. I will be leading a sold-out workshop with NPAN at a private ranch in the Centennial Valley in Montana, but we will dip down into Idaho to get into the path of totality. We will also be participating with Atlas Obscura and B&H Photo on a Total Eclipse festival in eastern Oregon that just sold out. (There is a wait list that they might open up—click here for more info.)

To find more events in areas that you will be close to, check out these listings:

Don’t forget to enjoy and EXPERIENCE it!

Sure, most of the United States will be watching the eclipse on TV, and that is … two-dimensional. But to actually experience the eclipse is something very special. Animals and humans both react to this astronomical phenomenon in extraordinary ways, and nothing can really prepare you for when the darkness takes over the land and sky. There is a reason people become eclipse chasers and travel the world to keep searching out this experience. Each eclipse and location is unique and different. We look forward to sharing photos of ours with you and vice versa.

A couple of other fun things to prep you for the eclipse:

  • Read Tyler Nordgren’s book Sun, Moon, Earth—A History of Solar Eclipses from Omens of Doom to Einstein and Exoplanets. We are also a big fan of Tyler’s other book, Stars Above, Earth Below—A Guide to Astronomy in National Parks. He makes the science of astronomy very engaging, easy to understand and to get excited about.
  • Send an eclipse to someone you love! The United States Postal Service has released a unique Total Eclipse of the Sun forever stamp. The stamps show the total eclipse, but when you touch them with your finger the eclipse reveals the moon. They used thermochromic ink that reacts to the heat of your finger! So stock up on these stamps and send a letter or post card from wherever you are experiencing the eclipse!

Download our Eclipse E-book

Finally, if you want to learn some more about how and where to photograph the eclipse, download our free Here Comes the Sun: 2017 Solar Eclipse Guide e-book today! It includes this article, along with a travel feature about all the units of the National Park Service in the path of totality, as well as recommendations about photography gear and services, and eclipse information and swag.

Carpe eclipse!

Gabriel Biderman is a partner and workshop leader with National Parks at Night. He is a Brooklyn-based fine art and travel photographer, and author of Night Photography: From Snapshots to Great Shots (Peachpit, 2014). During the daytime hours you'll often find Gabe at one of many photo events around the world working for B&H Photo’s road marketing team. See his portfolio and workshop lineup at www.ruinism.com.

UPCOMING WORKSHOPS FROM NATIONAL PARKS AT NIGHT

Expose to the Left: How to Really Maximize Image Quality at Night

Note: It has come to our attention that some readers are not seeing the photos in this post as intended. Please know you are not alone, that others have reported the same. See the Comments section below for more information.


We hear everyone in the photography industry talking about image quality, image quality, image quality. We especially hear about this in any circle of people chatting (or writing) about night photography. Conversations (and books, articles and blog posts) are rife with opinions and advice about how to push the limits of our cameras and lenses in order to get the best image quality in low-light situations.

But at what cost? We get so caught up in capturing all this dim light that we don’t notice that we’re making decisions that in every other photography situation are actually detrimental to image quality:

  • opening the aperture as wide as it will go
  • leaving the shutter open for long periods of time
  • jacking up the ISO to numbers far beyond what the photographers of yesteryear would even believe as factual

Ideally, night photographers need to be thinking the other way around: How do we improve our low-light photos in a way that capitalizes on everything we know about shooting in daylight? The answer is straightforward, and it all boils down to shooting with this philosophy, with this technique: Expose To The Left, otherwise known as ETTL.

What is ETTL?

Like its fraternal twin ETTR (Expose To The Right), ETTL is a way to maximize image quality, except while ETTR is used in daylight, ETTL is used at night.

How does it work? It’s simple. With your camera set to Matrix metering, shoot a test exposure that’s probably a couple of stops darker than the meter reading. You can just guess—accuracy doesn’t matter, kind of like with print film. Looking at your histogram, adjust the exposure downward and keep firing test frames until all the data is crammed up against the left side, or the “shady side,” of the graph. We push that histogram over by using a smaller aperture, a faster shutter speed, a lower ISO.

A perfect example is a photo I made in Gates of the Arctic National Park, of the wingless bats that live in Inverted Canyon. I was shooting under a new moon. My first-guess exposure was 20 seconds, f/2.8, ISO 6400, which resulted in a rather “traditional” histogram, as seen in Figure 1.

Figure 1. Initial, best-guess test exposure.

Figure 1. Initial, best-guess test exposure.

But I didn’t want traditional—I wanted ETTL and all the advantages that come with it. So I closed down the aperture to f/5.6 and dropped the ISO to 1600. That gave me a better ETTL histogram (Figure 2), but still not good enough.

Figure 2. The histogram of the same scene, stopped down quite a bit.

Figure 2. The histogram of the same scene, stopped down quite a bit.

So I cut another two stops of light by dropping my ISO again, to 800, and increasing the shutter speed to 10 seconds. The resulting histogram (Figure 3) was certainly close—close enough to be effective, in fact. But it resulted in what I call a “Thick Shady” histogram, wherein you can see that all the image data is pushed to the left, but you can still make out a slope of data curving up on that left side. By increasing my shutter speed to 2 seconds, I was able to narrow that to a slim line of histogram data (Figure 4)—or what’s known as “Slim Shady.”

Figure 3. My third exposure—not a bad one for ETTL, but we can get it even better. …

Figure 3. My third exposure—not a bad one for ETTL, but we can get it even better. …

Figure 4. Histogram of my final “Slim Shady” exposure. Perfect ETTL.

Figure 4. Histogram of my final “Slim Shady” exposure. Perfect ETTL.

What did I gain by doing this? Consider my initial, traditional-histogram exposure of 20 seconds, f/2.8, ISO 6400:

  • That 20 seconds introduced long-exposure noise.
  • That f/2.8 gave me paper-thin depth of field.
  • That ISO gave me high ISO noise.

All of which are bad for image quality.

However, my ETTL exposure was 2 seconds, f/5.6, ISO 800, which fixed every one of the dire consequences of that first exposure. You can see how sharp the final image is in Figure 5; no long-exposure noise, adequate depth of field, no high ISO noise. Moreover, f/5.6 is the sharpest aperture for the Nikon lens I was using, which further improved the final image. Click/tap to see the photo at full size. Not a blurry pixel in sight. Not a spot of noise. The image quality is perfect.

Figure 5. Wingless bats in Inverted Canyon, Gates of the Arctic National Park. 2 seconds, f/5.6, ISO 800. (Click/tap for larger view.)

Ancillary Advantages of ETTL

In addition to image quality, ETTL has other advantages.

As crazy as it sounds, you can “freeze” action even in the dark. Because you’re not worried about all the tedious challenges of maintaining highlights, midtones and shadow details, you can manipulate your shutter speed to almost anything you want. For example, while doing a night shoot at Upward Falls in North Cascades National Park, I didn’t want motion blur in the water. But because I was using ETTL, I was able to shoot at 1/60, f/4.5, ISO 2000. Subsequently, I got great image quality while freezing the action of the falls (Figure 6) despite the low light.

Figure 6. Upward Falls, North Cascades National Park. 1/60, f/4.5, ISO 2000. (Click/tap for larger view.)

Another side benefit of ETTL is that you can hand-hold your camera when making night images. Even under the new moon! Because you can shoot at those higher shutter speeds, you don’t really need to carry a tripod into the field with you. However, all five of us at National Parks at Night are Manfrotto Ambassadors, so we avidly recommend that you carry one anyway.

Drawbacks of ETTL

As great as ETTL is for improving image quality in night photography, there are some obstacles to work around.

For one, this exposure technique gets trickier when you’re light painting. It’s especially troubleshome when you’re using a sunbeam-like flashlight such as the Coast HP7R, because it completely ruins your hard-achieved left-biased exposure. How? By adding light. But don’t fretthere’s an easy solution.

Figure 7. Coast HP7R flashlight with snoot by Light Painting Brushes, modified for ETTL light painting.

Figure 7. Coast HP7R flashlight with snoot by Light Painting Brushes, modified for ETTL light painting.

If you’re using ETTL to determine exposure for a scene you need to light-paint, then get a snoot that fits onto the end of your flashlight, such as the Universal Connector made by Light Painting Brushes. Cover the far opening of your flashlight with a thick and subsequently expensive layering of gaffer’s tape (Figure 7, above). With this modified snoot on your flashlight, you won’t impair your ETTL exposure. This is exactly what I did to light-paint a night wildlife scene in Voyageurs National Park (Figure 8).

Figure 8. In Voyageurs National Park I got an opportunity to photograph these greater horned marmots. Unfortunately the moon was new, and it was winter in northern latitudes, so I needed to light-paint my subject—obviously quite cautiously. The need for light painting introduced a further obstacle to achieving a good ETTL exposure, which I circumvented by using the snoot method described above. (Click/tap for larger view.)

Another option is to apply a thick layer of black paint over the front of the flashlight lens. Just be sure to use removable paint, so you can peel it off, lest you have to head back down the trail in the dark. 

Along the same lines, a strobe is even more detrimental to ETTL, because even though that light burst comes and goes in a flash, it’s really bright. For this situation, I suggest foraging your closet for the case your strobe came in when you bought it. Then put the strobe in that case before firing it. Even better, see if you can buy an extra case and put the flash in both. Extras are pretty easy to find on eBay. (Well, maybe not now that I’m sharing this tip.)

Lastly, pixel-peepers will notice that the ETTL approach diminishes highlights a bit. But don’t worry about it. Just like Meghan Trainor sings in her catchy pop song—“It’s all about that bass, about that bass, no treble”—it’s similar for night photography. It’s all about the shadows, about the shadows, no highlights. After all, night photography is all about photographing within the biggest shadow in the whole world. Seize the shadow.

A Final Note on ETTL

Some photographers accomplish the ETTL effect solely in post-production. In other words, they photograph the scene with a “traditional” exposure. Then they import the photo to Lightroom, pull the Exposure slider all the way to the left, and then reduce the Shadows setting a tad. But the effect just isn’t the same. Get it right in-camera.

I suspect that the ETTL technique will be new to many people reading this, but I promise two things: 1) It will result in better image quality in your night photos. 2) It’s easy to learn, and fun!

If you decide to experiment with ETTL, please do come back and share your results in the Comments section.

Note: It has come to our attention that some readers are not seeing the photos in this post as intended. Please know you are not alone, that others have reported the same. See the Comments section below for more information.

Chris Nicholson is the author of Photographing National Parks (Sidelight Books, 2015). Learn more about national parks as photography destinations, subscribe to Chris' free e-newsletter, and more at www.PhotographingNationalParks.com.

UPCOMING WORKSHOPS FROM NATIONAL PARKS AT NIGHT