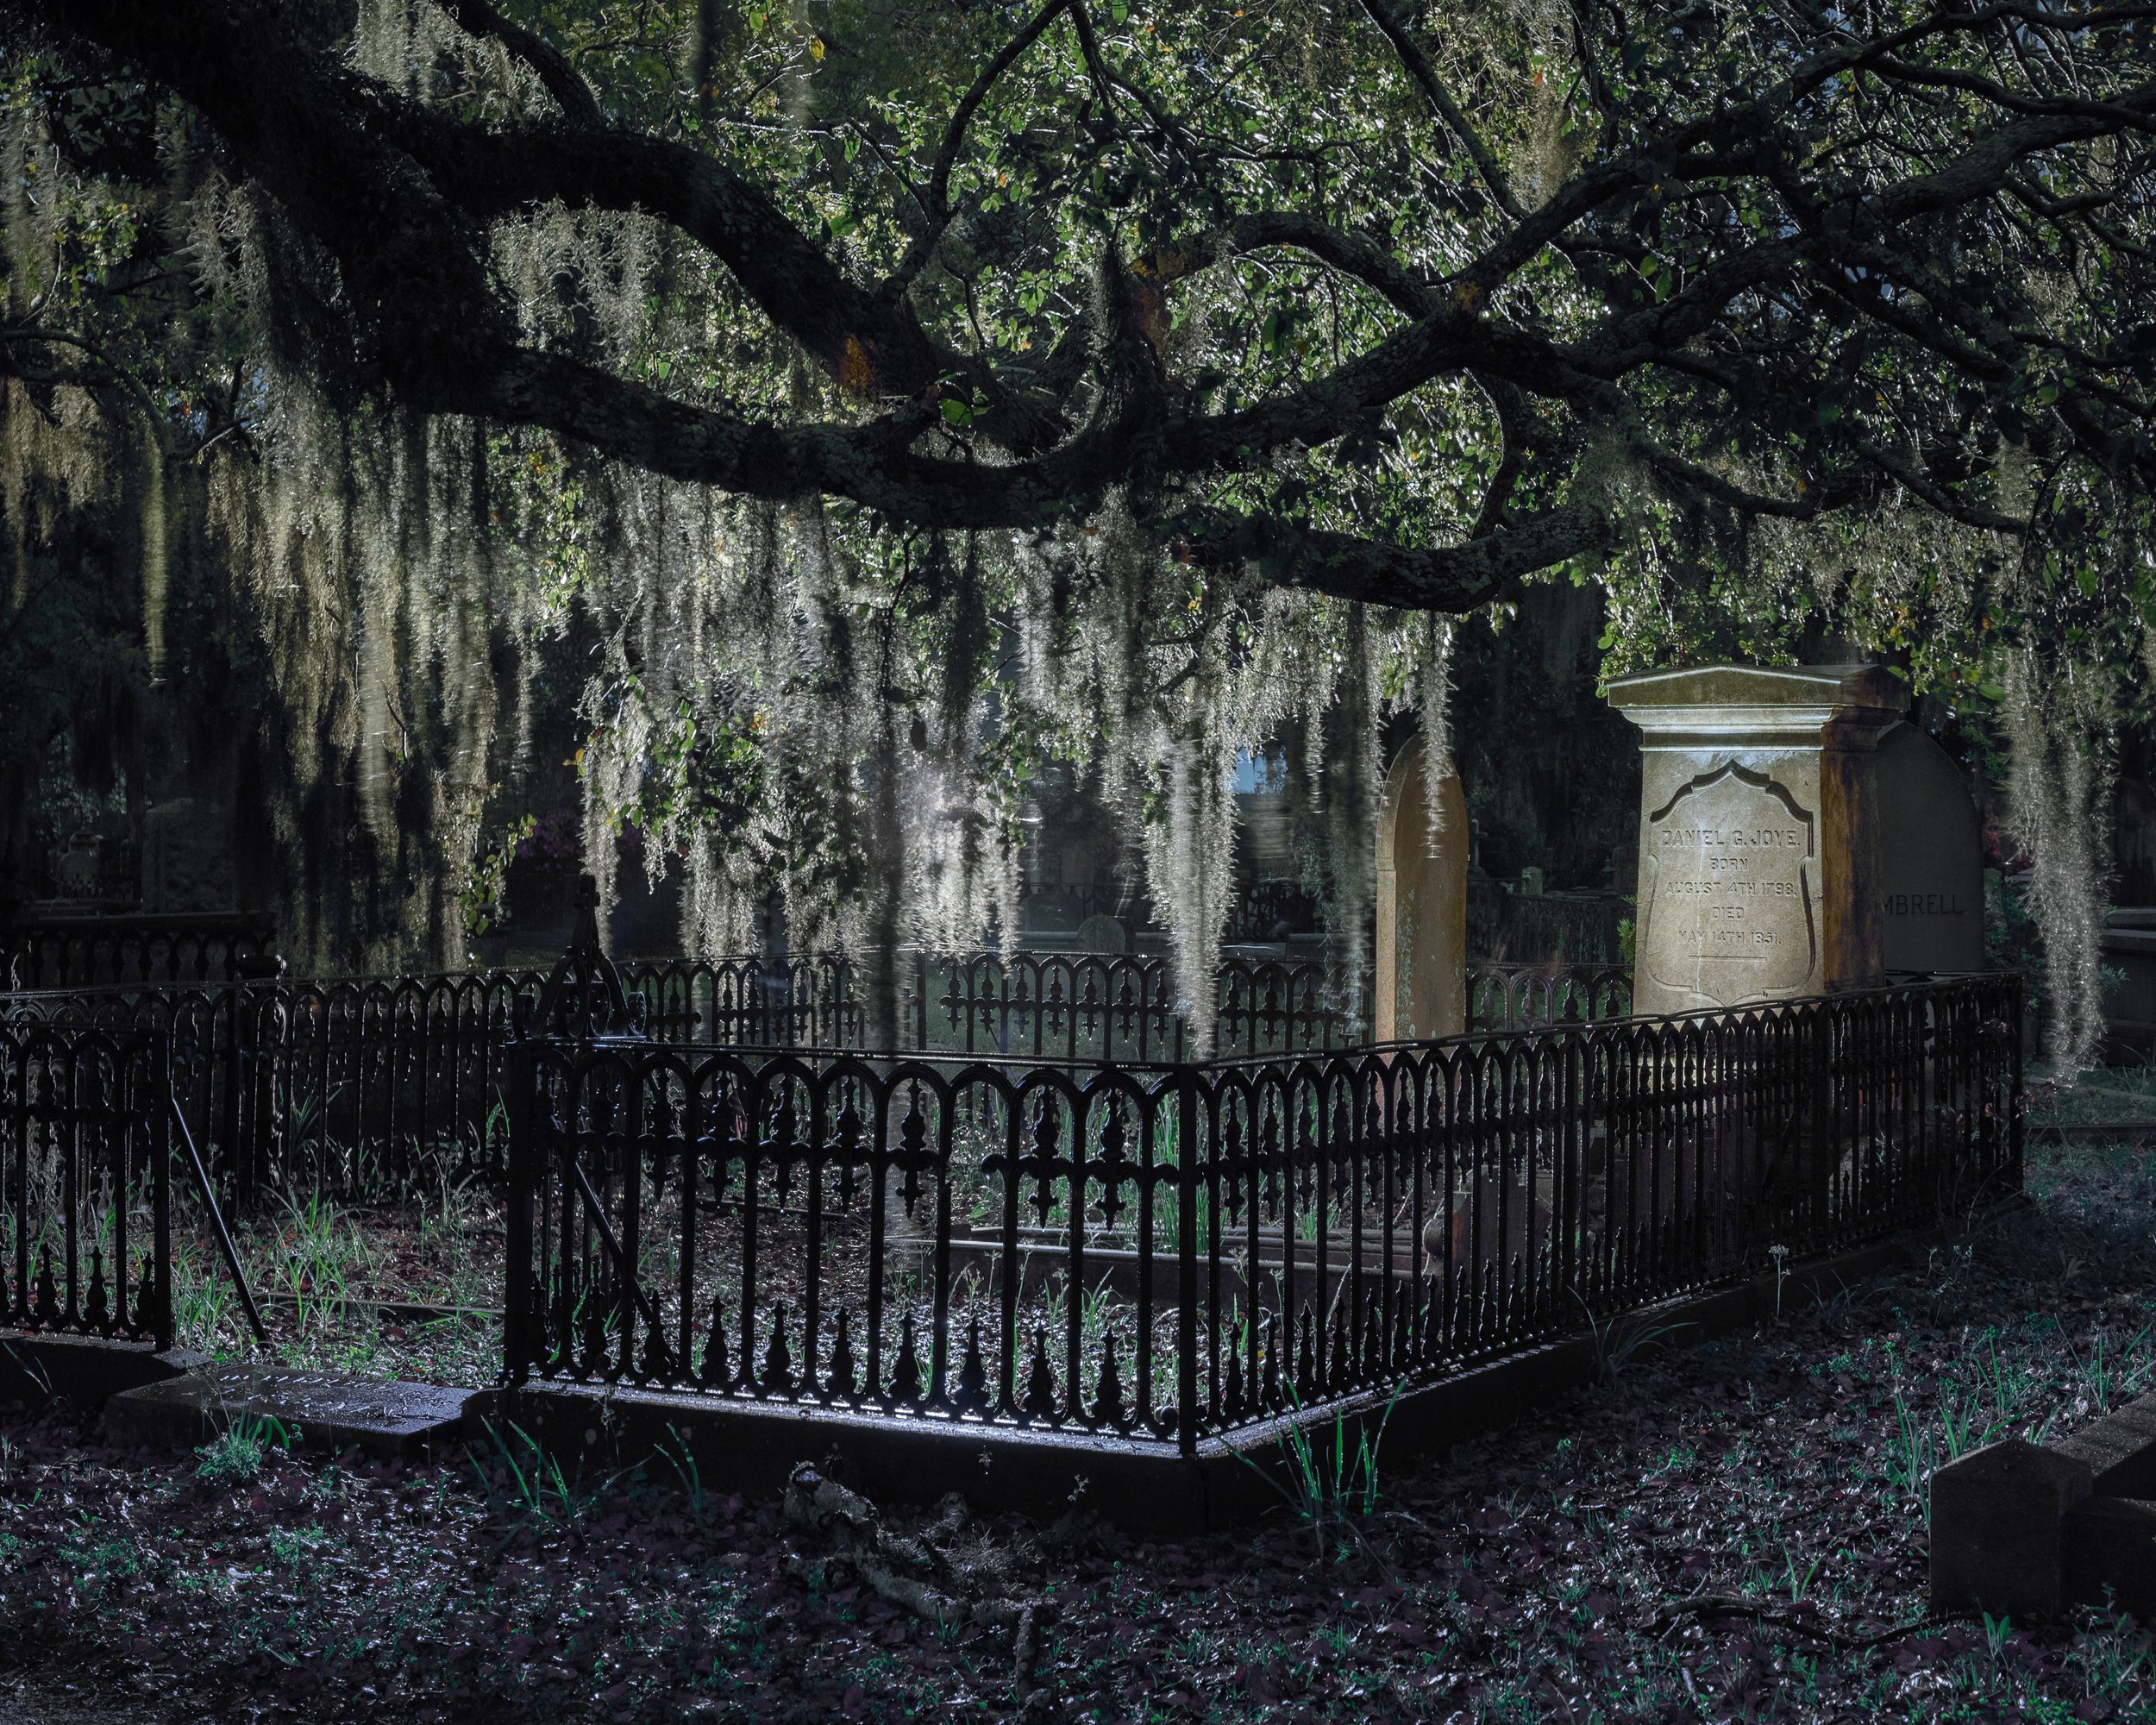
Paradise at Night: All 5 Utah National Parks are Now Dark-Sky Certified

This week the International Dark-Sky Association (IDA) announced that Zion National Park has been designated as their very newest international dark sky park. Kudos, booyah and way to go!

The bigger news surrounding that is this: With that designation, now all five national parks in Utah—Arches, Bryce Canyon, Canyonlands, Capitol Reef and Zion—have been recognized as international dark sky parks. (For more information, see the official press release.)

It’s quite an achievement, though not necessarily a surprise. National park lovers know how amazing all five of those places are, and anyone who has roamed or photographed them at night knows the beauty and wonder of those dark skies.

Of course, Utah’s grand landscapes and inspiring night skies aren’t limited to just those national parks. In fact, the state boasts the highest concentration of dark-sky areas in the world, with 24 such designations within its boundaries, including six national monuments and 11 state parks.

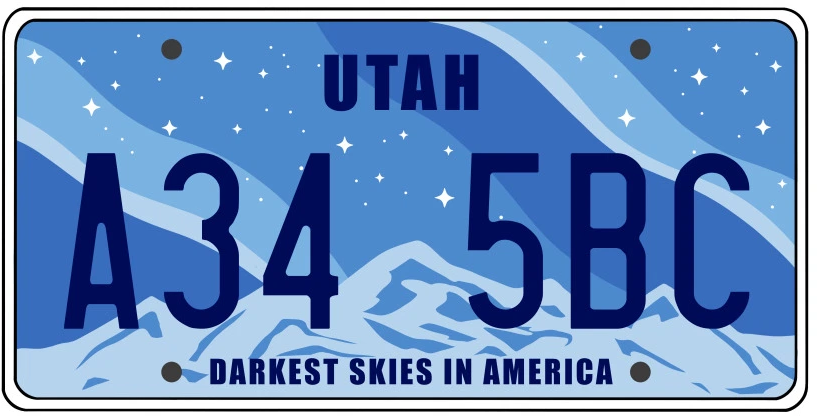
If you like night, Utah is a great place to be. Clearly. They even considered making a license plate saying as much:

license plate.png

To celebrate the news of all five of Utah’s national parks being recognized in this way, all five National Parks at Night instructors have pitched in one photo each as a small showcase of what you can expect from Utah’s “Mighty 5.”

Or, perhaps we should rename them the “Nighty Five”?


Arches National Park

by Tim Cooper

Given a name like Arches, you might expect the park to be a one-trick pony. Nothing could be further from the truth. Arches is a gorgeous location with an array of opportunities for the night photographer!

Nikon D4s with a Nikon 14-24mm f/2.8 lens at 15mm. 16 stacked exposures shot at 3 minutes, f/5.6, ISO 100.


Bryce Canyon National Park

by Matt Hill

Bryce Canyon is a Top 10 destination for me because of the extremely accessible canyon rim and extraordinary geological features, such as the hoodoos and sedimentary strata. It’s also cooler in the summer with elevations reaching 9,100 feet, which makes for better night photography conditions.

Nikon Z 6 with a Zeiss Distagon 15mm f/2.8 lens and FTZ Adapter. 198 seconds, f/2.8, ISO 3200.


Canyonlands National Park

by Chris Nicholson

Canyonlands is a wonder of geography and a wonder for the eyes. Every section of the park is amazing in its own way, but especially inspiring is Island in the Sky, where all around you are canyons within canyons within canyons. Not to mention some beautiful rock formations, such as the famous Mesa Arch.

Nikon D3s with a Nikon 14-24mm f/2.8 lens, light painted with a Coast HP7R flashlight. 25 seconds, f/5.6, ISO 6400.


Capitol Reef National Park

by Gabriel Biderman

When Chris, Matt and I did an epic road trip through Utah’s parks, we all fell in love with Capitol Reef. It’s remote and has outstanding, surreal landscapes created by ancient rivers carving through the geology of time. You can explore the backcountry of Capitol Reef by 4x4, but plenty of amazing scenes, like the Twins pictured above, can be found just off the road.

Nikon D5 with an Irix 11mm f/4 lens. 152 stacked exposures shot at 30 seconds, f/4, ISO 6400.


Zion National Park

by Lance Keimig

Zion is one of the crown jewels of our park system with its steep red cliffs and at least six deep narrow canyons carved by the Virgin River, including the famous Subway and the Zion Narrows. It’s an outdoor paradise with easy to strenuous hiking, biking, canyoneering and climbing, and wildlife abounds. I love it because there are plenty of hard-to-miss, grandiose photo opportunities, but even more subtle photogenic scenes for the observant photographer. Oh, and some very dark skies.

Nikon D750 with a 20mm lens. 6 minutes, f/8, ISO 800.


Your Turn

What do you think of all five of Utah’s national parks being designated as international dark-sky parks? We’d love to hear, and we’d love to see your night photos of these amazing places. Feel free to share in the comments, on our Facebook page or on Instagram (tag us @nationalparksatnight and/or hashtag us #nationalparksatnight).

Chris Nicholson is a partner and workshop leader with National Parks at Night, and author of Photographing National Parks (Sidelight Books, 2015). Learn more about national parks as photography destinations, subscribe to Chris' free e-newsletter, and more at www.PhotographingNationalParks.com.

UPCOMING WORKSHOPS FROM NATIONAL PARKS AT NIGHT

Muses from the Past: Alfonso Garcia Sanchez and Post-War Madrid at Night

Analyzing classic photographs can be an effective way to progress in one’s own work. The key is not to simply mimic someone else’s great ideas, but to use the knowledge that comes with reproducing the work of masters and move on to create something new. With this in mind, National Parks at Night's Lance Keimig offers this ongoing Muses from the Past series highlighting some of the early masters of night photography. We'd love to see any photographs you create after learning more about the pioneers of this niche—please share in the comments section!


I’ve been truly fortunate to be able to be both self-employed and to do work that I love for the last 30 years. Still, the goal that I set for myself to make a living exclusively as a night photographer eluded me until about ten years ago. With the exception of teaching night photography workshops, there have been relatively few times when I have been hired specifically for my night photography skill set.

I chose the specialty of architectural photography early in my career as I saw that as one of the best opportunities to shoot at night professionally. A few such assignments did come my way, but for the most part I was hired to shoot commercial interiors and institutional spaces. My fine art night work was carried by one of the better Boston art galleries until they closed, and as a result my work has been added to both corporate and institutional collections. For a number of years while living in Massachusetts, I worked with an art consultant who appreciated my vision, and she worked hard to convince clients that they needed night photographs hanging on their walls.

Very early in my career, way back in 1990, I almost sold a self-assigned project of images of the Port of Stockton in California. I had worked for a couple of months just to gain access to the property to photograph after hours, and eventually had a body of work that I was happy with. When I sent a selection of prints to my contact at the port, she was very enthusiastic and wanted to use them in their upcoming annual report.

Port of Stockton, California. This is about a 15-minute exposure on medium format Fuji color negative film, made by moonlight and mixed artificial lights in 1991. The combination of strange architecture and mixed lighting made for a surreal scene. The camera, lens and exposure are long forgotten, as there was no EXIF data in the nights of yore.

Had it come to pass, it would have been the brightest feather in my cap to date, but the CEO put the kibosh on the project. He rightly understood that the dark and mysterious images I made of his property did not reflect a vibrant and busy facility that moved tons of freight and cargo every day. My photographs did not convey the message that needed to be communicated by the report. I was disappointed, but he made the right decision––even if I didn’t appreciate it at the time.

But this post is not about me or my work. It’s about one of the more interesting night photography projects ever undertaken. Unlike my unpublished Port of Stockton photos, Rincones Del Viejo Madrid: Nocturnos was published as a book of night photographs. The images were made by Alfonso Garcia Sanchez and his two sons in 1950 and 1951.

A little background history is required to place this work in context, and to show why it was so ill-conceived.

Madrid in a Good Light, at Night

Spain was essentially a fascist dictatorship after Francisco Franco took power during the Spanish Civil War in 1936. Although the country officially claimed neutrality during World War II, it really supported the axis powers, and as a result it was politically and economically isolated at the end of the war.

The autarkic Falangist movement that dominated Spanish politics in the 1940s eventually yielded to a less isolationist faction within Franco’s inner circle as Spain looked to join the young United Nations and to be welcomed back to the world stage.

One effort toward that goal was a multipronged publicity campaign to polish Spain’s tarnished image, and the extravagantly printed book of photographs titled Rincones Del Viejo Madrid: Nocturnos was one of many such projects offered to dispel the notion that Spain was a dangerous place (a perception that came about largely as a result of the historical memory of Spain’s swashbuckling past, the Spanish Civil War and Franco’s cozy relationship with Germany and Italy during the war) and to instead show what a warm and welcoming place it truly was.

“Plazuela De La Morería—In the heart of old Madrid. It owes its name to the fact of having been the dwelling place of the Moors at the time of the conquest by the Christians. It was generally believed that the Spaniards expelled all of the Moorish inhabitants as they conquered one town after another. This is not so. After the conquest, Arabs and Christians lived together. The historical truth is that when the latter took Madrid, they fixed, in their generosity definite spaces for the former to live in.” (Rincones Del Viejo Madrid: Nocturnos)

The book shows romanticized scenes of quiet plazas and passageways of the Moorish Quarter, the oldest part of the city, lit by gaslights at night. The streets are mostly deserted, and the few human figures that populate the scenes are shadowy and mysterious. The photos are likewise moody, dark and ominous, and they are full of atmosphere. One thing they are not is welcoming. The scenes presented on the pages of this handsome and expensively produced volume would be more fitting illustrations to a murder mystery novel than to a tourist board promotion.

Each of the 41 images has a description of the location where the photo was taken in both Spanish and English. It’s doubtful that the book made much of an impact on international relations, and although Alfonso, as he was known, is one of the more important Spanish photographers of the time, he is not widely known for this work.

“Calle Del Cordon—This is one of the most felicitous hits of portraying the night in the venerable nooks, in old Madrid. The narrowness of the streets causes the buildings to look higher and weighed deeper down with mystery. It seems as if a curtain were raised behind which we perceive the decoration of fairy tales, of legend, and adventure.” (Rincones Del Viejo Madrid: Nocturnos)

In 2009 I had a conversation with photo historian Gerardo F. Kurtz, who introduced me to both Alfonso and the book. Unfortunately I’ve not been able to discover much else about this obscure publication since then, and only recently did I find an excellent copy online through AbeBooks.

Gerardo is one of the preeminent historians of photography history on the Iberian peninsula, and my email conversation with him was fascinating and revelatory in multiple ways on multiple topics. I’m excerpting a few of his thoughts on Rincones here in an attempt to convey both the motivation of the photographers and how the publication came to be.

Gerardo wrote to me:

“This production must have been conceived (and produced) in context of the then-just-developing forces that were behind the promotion of the city of Madrid as a tourist place, as a modern city and as a safe one. What this book states in that context of dangerous Madrid is obviously lost in our understanding, but the myths of nocturnal danger of Madrid—romantic views of the sword fights and of criminal violence—were certainly strong and had a good grip on collective understanding (misunderstanding one might better say).

“The general visual aesthetics of the whole book, not just of the images themselves, is clearly in tune with the rest of all the ‘official’ material produced in that period. In any case, this production is clearly not an outsider to its time and environment—it is far from something coming from the atelier of an artist trying to put forward his own vision. His vision is there, of course, but here one could hardly suspect it being the key issue put forward with the book.

“There has been, to my understanding, very little effort to understand the factors and prevailing views of the artists—like Alfonso—who worked during this peculiar period of time called the ‘el franquismo.’ My untrained view is that there was lots of talent involved in the propaganda efforts and that the regime was in fact very aware of the need to use and promote good talent, but alas, tuning it and putting it to the service of a social reality, at least more to a social reality than to a political one.

“Most now want to see only the political and perverse side of it all, and this has deeply distorted the understanding of the historical reality of that time. In any case, I have always understood Alfonso as one of those talented artists, phased into the scene, if not a direct part of it.

“His Nocturnos would be the typical material put at the service of an editorial idea, and his technical skills (here he is certainly bragging and telling us that photographically ‘it can be done’) were brought out to everyone’s view, but his images could still be understood as something produced by him as a free and talented artist. A complicated combination and a complicated issue.”

Alfonso’s Photos

Alfonso was an accomplished commercial photographer who as far as we know was not politically motivated, but who eagerly accepted this assignment as both a well-paying job and as a way to show off his photographic prowess in a technically challenging assignment. Photographic technology had advanced considerably in the 1940s, with new emulsions and new optics making night photography more accessible and good results more attainable than in the past.

“Calle Del Codo—In the background, The Plaza de la Villa. In the foreground, the house with the historical tower of Lujanes. The ground where the narrow lane is situated, belonged to the Vargas, who were knights in the town. The shape of the street is exactly like an elbow. The name was given by the Marquis of Grafal, Magistrate of Madrid.” (Rincones Del Viejo Madrid: Nocturnos)

Sancehz is not known to have made other significant night images, nor to be someone who was passionate about the aesthetic possibilities of night photography. The images are somewhat repetitive and not highly creative, but they are extremely well-executed and show remarkable control of the high-contrast scenes of his subjects. He often included streetlights in the images, and the level of detail in both the highlights and shadows reveals that he must have worked hard to create a strategy of exposing and developing his film for maximum detail.

To someone without firsthand knowledge of film-based photography, the images are probably not very exciting, but for the time when they were made, these photographs were quite the technical achievement.

“San Pedro El Viejo, Bajo La Escarcha De Enero—Behind the railing of Santisteban at the end of the Nuncio Street, there stands the church of san Pedro the Old with its proud tower. It is the oldest of the temples in Madrid among those of which have held through the course of times the devotion of the Madrid people. On the side of the Evangel in a chapel by itself lie the remains of the noble family of the Lujanes.” (Rincones Del Viejo Madrid: Nocturnos)

When placed into context of other thematic bodies of night photography from the 1930s through the 1950s––the work of Brassai, Harold Burdekin and John Morrison, Bill Brandt, Volkmar Kurt Wentzell and O. Winston Link—Alfonso’s Rincones Del Viejo Madrid stands out as an important project, as an early example of commissioned night photography as opposed to a personal project, as a historical record of an interesting chapter of Madrid’s history, and as a superb technical accomplishment in night photography.

Connecting with the Past

As I look back on my own career and at varied attempts to find paid night photography assignments alongside simultaneous self-assigned passion projects, I can’t help but think of the mixed emotions Alfonso may have felt at being hired for the Rincones project. It was clearly a posh assignment, and one that allowed him some creative expression and to showcase his technical expertise. On the other hand, it was work for hire to promote a political agenda, and we’ll never know if that bothered him or if it never even crossed his mind.

We are lucky that the work survives in an extravagantly produced goat-leather bound book with marbled endpapers and with high-quality photogravure printing. I’m quite fortunate to have been able to acquire my own copy of this rare book and to have had the privilege to learn about its history from Gerardo. I hope that you as well enjoy both the images and the history.

“Calle del Rollo—The lower part of this street, at the back of that of the Conde de Revillagigedo, was named Calle de la Parra (Vine Street). It was famous in the time of the Master Juan Lopez, professor of studies, in the town. He was fined for not hindering or punishing his pupils who stole the grapes from a vine. Vexed because of the fines and warnings, he kept in prison for three days, Miguel de Cevantes, who was the perpetrator of the scaling of the walls and the stealing of the grapes.” (Rincones Del Viejo Madrid: Nocturnos)

I’m always on the lookout for historical examples of night photography, especially by lesser or unknown photographers. The images of Brassai, Brandt and Link are well-known and widely published, but the discovery of the fascinating work of artists such as the Vargas Brothers, Burdekin and Morrison, and Alfonso broaden and expand our understanding of night photography as an oeuvre.

How many more glass plate masterpieces lay waiting to be discovered in dusty wooden crates hidden away in long-forgotten attics? Surely there were early photographers outside of Europe and America who found a passion for photographing by moonlight or streetlight, but whose work has never been seen. I’m still searching, and will report back to you with more Muses from the Past.  

Lance Keimig is a partner and workshop leader with National Parks at Night. He has been photographing at night for 30 years, and is the author of Night Photography and Light Painting: Finding Your Way in the Dark (Focal Press, 2015). Learn more about his images and workshops at www.thenightskye.com.

UPCOMING WORKSHOPS FROM NATIONAL PARKS AT NIGHT

Buzz Off! … Or, Mitigating Mosquitos While Photographing on Spring and Summer Nights

Photographing in the wilderness at night is always a wonderful experience. You’re standing under a dark sky pinpricked with starlight, breathing clean air, enjoying the soul of nature flowing through your … Ouch! … Freakin’ mosquito!

OK, I admit: Photographing in the wilderness at night is mostly a wonderful experience. One of the few downers can be those darn mosquitos, particularly in spring and summer. They buzz, they bite, they bother.

The mosquitoes in Congaree National Park can get so overwhelming that the park maintains a “Mosquito Meter” outside the visitor center.

Mosquitoes also populate some of the most amazing places to photograph at night. We surely don’t want to miss the experience of making night art in spaces such as Acadia, Yellowstone and Yosemite, right? So how can we mitigate the mosquito dilemma?

Recently I had a great opportunity to find out. In April we ran a workshop in Everglades National Park, which is home to about a bajillion of these little buggers. Fortunately we were there during mosquito low season, but in Everglades that just means their numbers are fewer, not zero. Plenty of these pesky critters buzz around at any time of year—enough to drive a night photographer to bed early, if you’re not prepared.

The Anhinga Trail in Everglades National Park is a beautiful place to photograph, night or day. But gosh yes, it has mosquitoes. Nikon D5 with a Nikon 24-70mm f/2.8 lens, boardwalk light painted with a Luxli Viola. 30 seconds, f/2.8, ISO 2000.

In the weeks ahead of the Everglades trip, I gathered what research told me were the best ways to keep mosquitos from ruining an outdoor experience. I brought them all with me, intending to test each in the marshy wilds of deep-south Florida.

The risks were great. Any product failure meant certain misery.

Here’s what I learned:

DEET

Ah, DEET. (Better known as diethyltoluamide.) This stuff has a dichotomous reputation. Many people use it as their go-to defense, but many others worry and wonder, “What does DEET kill first, the mosquito or me?” (To be fair, the EPA says not to worry about it.) Those in the middle make the compromise of using products with only a mild percentage of DEET, but the problem therein is that only more robust concentrations are effective for extended periods.

DEET.jpg

A few of our Everglades workshop attendees used DEET and they didn’t have much trouble with mosquitos. Good for them. Great for them! But I’m in that group that prefers not to put this stuff on. I don’t like using bug spray anyway—don’t like the smell, don’t like having it on my hands, don’t like applying chemicals to my skin. So DEET wasn’t even an option for me. Ideally I don’t want a mosquito barrier on my skin, I want a barrier that keeps mosquitos from getting to my skin.

If you’re in the camp of people who don’t mind using DEET, that’s fine, no judgement here. But let me leave you with this warning: After applying it to your body, wash your hands well. You don’t want that stuff getting on your camera gear. It can eat it.

Picaridin

Lance Keimig was running the Everglades workshop with me, and before traveling to Florida he read about picaridin. He liked the idea of the product because while it is a synthetic, it’s a synthetic version of a natural substance. It’s also purportedly effective in lower concentrations than DEET, repels a wider range of pests, is neither greasy nor odorous, and won’t damage plastics (i.e., pieces of photo gear). He liked the idea of picaridin so much that we went to four or five stores to try to find it, finally scoring a bottle at a Bass Pro Shops an hour from the park.

Lance used picaridin throughout the week, and he found it mostly effective—not amazing, but effective enough to keep using it. He was a little leery of the list of warnings accompanying the directions: Don’t get it near your eyes, nor on your lips, nor much on your ears, nor on cuts or skin irritations. Not exactly the worry-free product we’d hoped for, and not viable as whole-body protection, but Lance remained relatively uneaten.

Off Botanicals

I first bought Off Botanicals plant-based wipes while in Badlands National Park with Matt in 2019. We were night-shooting there during a particularly bad mosquito year, and these wipes were the most skin-friendly option I was willing to try. They worked just OK in Badlands, and for only an hour or so. In Everglades they performed the same. Mosquitos stayed away awhile, but Off Botanicals lost its effectiveness way closer to the beginning of a night shoot than to the end.

Badlands National Park can get a good number of summer storms, and with that rain can come massive mosquito problems, as Matt and I experienced in 2019. Nikon D5 with a Nikon 24-70mm f/2.8 lens. 1.5 minutes, f/8, ISO 800.

Badlands National Park can get a good number of summer storms, and with that rain can come massive mosquito problems, as Matt and I experienced in 2019. Nikon D5 with a Nikon 24-70mm f/2.8 lens. 1.5 minutes, f/8, ISO 800.

Thermacell

After a recommendation from a workshop alum and further information from credible sources, I had high hopes for Thermacell. This technology, available in devices of different sizes and shapes, forms a non-odorous cloud shield of about 15 feet in diameter, in which mosquitos can’t fly. If they try, they fall to the ground.

Thermacell’s reputation is that it’s the most effective method available for keeping mosquitos away. (The reputation is solid. I read one article about the top four mosquito repellents, and Thermacell was three of them.) Moreover, you don’t put it on your body—you put it near your body and just stay relatively close by.

But I proactively encountered a few problems that made Thermacell a nonstarter for night photography trips, at least for me:

1. You have to fuel up locally.

You can’t fly with the butane cartridges that fuel almost all of the Thermacell models. The company recommends packing everything but the butane, then buying that when you get on location. That’s more than I want to deal with on a trip. My midlife goal is for fewer logistics, not more.

(The Radius Zone and E55 models run on a battery, but they’re also a little larger than what most people would want to travel with, and they’re best used on flat surfaces. Also, if your shoot is in driving distance, this caveat won’t apply anyway.)

2. Stay away from water.

The active ingredient, allethrin, is harmless to every living thing besides mosquitos. Except that it’s also toxic to aquatic life. Do you know what you find a lot of in the Everglades, and in many, many of the natural settings I work in? Aquatic life. Do you know what I am personally evolved from? Aquatic life. Do you know where to find mosquitos most often? Near water.

Of course, I could still use Thermacell if I’m set up more than 15 feet from shore, but when I’m working around a big body of liquid, I often want to be right next to it, whether for photographing reflections, composing an angle up the coastline, getting as close as possible to an alligator, etc.

A good example of a bad place to use Thermacell—right next to Nine Mile Pond in Everglades National Park, which is full of aquatic life, including the alligator you can see if you look closely. Nikon D5 with a Nikon 14-24mm f/2.8 lens. 22 stitched frames shot at 6 seconds, f/2.8, ISO 5000 and 20 seconds, f/2.8, ISO 5000.

3. Stay still!

Here’s the big one: The 15-foot mosquito-free bubble takes 15 minutes to create, and is stationary. If I move to a different spot, then I need to move the Thermacell unit and then wait another 15 minutes to create another bubble.

That’s not a deal breaker alone, but the above also means that if I start wandering during long exposures (as I’m wont to do), or if I traipse about while light painting, or if I meander to talk to whomever I’m photographing with, then I’ll lose my protection. (On the other hand, I could maybe charge admission for others to meander to me?)

All of that together summed to this: I never took my Thermacell paraphernalia out of its package. (And because Amazon won’t accept return shipments of butane products, I lost the $80 I spent on it. I’m thinking this Thermacell kit will become a gift for someone who has a patio, where I’m sure it will live a long, happy, mosquito-free life.)

RynoSkin

RynoSkin is a clothing base layer that mosquitos (as well as ticks, no-see-ums and other biters) purportedly can’t bite through. I bought a full outfit: shirt, pants, socks and gloves. I was lookin’ snazzy.

I was skeptical, mostly because I had read several Amazon reviews that reported mosquitos bit right through the RynoSkin layer with no problem. But I tried it anyway, and was mostly happy—just not happy enough for this to be my favorite solution.

While wearing RynoSkin, I did not have a problem with mosquito bites, despite being surrounded by them on the Anhinga Trail, a real mosquito haven of the Everglades. Not one bite in 6 hours.

However, while wearing RynoSkin, I was warm. After all, it’s a base layer, in warm weather. RynoSkin did a decent job of not being as warm as it could be, but it was still a little too warm for comfort. I was constantly aware that I was wearing it.

There’s one positive caveat, however: The gloves worked great, and I can’t think of a better solution for keeping my hands bite-free. Hands are important in photography—we use them a lot—for changing lenses, for adjusting camera settings, for picking up Nikon lens caps off the ground. With the RynoSkin gloves on, I could meddle with my gear as much as I wanted without mosquitos being able to bite the hands that would otherwise swat them. The RynoSkin gloves get a permanent home in my bag.

Netwear

A screen keeps bugs out while letting air in. It does it well for a house, and it does it well as clothing. Yes, you can buy a net to cover your whole person. You can go from snazzy to dapper in one quick-change.

I didn’t test this option, because I didn’t want to. I figured it would be effective, but I prefer couture with a tighter weave, I like quick access to pockets (where I keep my flashlights and stuff), and I’d be concerned about the net catching on plants, tripod parts, python teeth, etc. So I made neither the financial nor time investment in a net suit. One of our Everglades attendees did, and she remained comfortable, mosquito-free and happy for the whole workshop.

However, I do own, and did use, a mosquito-net head covering. There’s just no viable alternative, in my opinion. RynoSkin does make a face mask, but that doesn’t seem like a comfortable option to me, and it also leaves the skin around the eyes exposed.

The head net, on the other hand, does not uncomfortably hug my skin, allows plenty of room for breathing and keeps mosquitos from reaching my face. Two potential irritations:

  1. It tends to hang right on your nose and cheeks, which I find uncomfortable—so I wear a ball cap under it, and the brim keeps the net a few inches away from my face. (You can also buy a head net attached to a hat, but I didn’t.)

  2. A head net reduces visibility a bit. Not the best thing when you’re working at night, particularly in places where you could potentially trip over a prehistoric creature. But if there’s anything Everglades has more of than gators, it’s skeeters, so I wore the thing.

Permethrin

Ah! I found my sweet spot, and I knew it almost immediately—after I hawed and hemmed about it for a few days.

Permethrin was recommended by another workshop alum who insisted I try it—as in, she sent a bottle to me even after I said no thank you. But now? Thank you!

You spray permethrin on your clothes, allow it to dry for four hours, and then go about wearing those clothes as you normally would. You don’t need to re-treat the clothes terribly often, as the application lasts for about six washes, or about 6 weeks.

I was skeptical. I didn’t want to be spraying bug repellent on my clothes—especially bug repellent that sticks enough to survive modern laundry detergent and a super-speed spin cycle.

But the alum and my research assured me that once permethrin dries, it’s completely nontoxic to everything, including mosquitos. So … wait, what? If it’s nontoxic to mosquitoes, then how does it prevent them from biting me? Because mosquitoes won’t land on permethrin-treated fabric. And if mosquitoes won’t land, then they can’t bite. It’s the mosquito barrier to the skin that I mentioned earlier.

Permethrin is available as a spray that you use to treat everything from shirts to pants to socks to shoes. (And I suppose gloves, now that I think about it.) You probably don’t want to apply permethrin to everything you own, but you could select one or two outfits of outdoorswear, treat them, then set them aside to change into when working in mosquito territory. After half a dozen washes or weeks, repeat.

I liked the permethrin solution for these four reasons:

  1. My treated clothes didn’t smell.

  2. I didn’t need a base layer.

  3. I didn’t need to carry any extra paraphernalia.

  4. Mosquitos never landed on me.

Permethrin in its liquid form does happen to be toxic, so you’ll want to wear rubber gloves and safety glasses when applying it, and you’ll want to work in a well-ventilated space, such as outside. If you prefer not to apply it yourself, you can buy pre-treated clothing at specialized outdoors stores such as REI and Amazon. This option comes with an additional advantage: the professional application lasts about 10 times as long.

My Final Strategy

Going forward, at least for now, I’ll be employing a mix of the above solutions in my effort to photograph at night without mosquitos bites. Namely:

bloodsucker-2028617_960_720.png
  • I bought a pre-treated permethrin shirt from REI. I like how it fits, so it has become part of my travel kit when photographing in places where I might encounter mosquitoes.

  • I self-applied permethrin to my favorite hiking pants. I may treat other clothing in the future, but for now I’m happy with one mosquito-proof outfit (i.e., these pants plus the aforementioned shirt). I don’t wear it all day; I keep it in my accessories bag (with my rain gear, first aid kit, etc.) to change into when needed.

  • I wear a head net on top of a baseball cap.

  • I keep RynoSkin gloves in my bag for when the mosquitos are active enough to go after my hands.

I haven’t worried about mosquito-proofing my trail shoes because, though I know it’s possible, I’ve never been bitten through them. However, permethrin also wards off ticks, so I’ll consider treating a pair of shoes the next time I’m heading into tick country.

And that, my fellow photographers, is how I’ve been staying free of mosquito bites while out on night shoots. I hope something in here helps you do the same. If you have any further tips or strategies that work for you, feel free to share them in the comments below or on our Facebook page.

Chris Nicholson is a partner and workshop leader with National Parks at Night, and author of Photographing National Parks (Sidelight Books, 2015). Learn more about national parks as photography destinations, subscribe to Chris' free e-newsletter, and more at www.PhotographingNationalParks.com.

UPCOMING WORKSHOPS FROM NATIONAL PARKS AT NIGHT

Size Matters: Understanding Image Resolution, and Why and When to Boost It

This week we’re showcasing post-processing. Want to learn even more about developing your digital photographs? Join Tim Cooper and Chris Nicholson on the Seattle waterfront this July for a weeklong Post-Processing Intensive workshop, including night shooting along the city shores of Puget Sound.


As we discussed in a recent blog post (“Supersize Me: Adobe Brings Us High-Quality Quadruple Enlargements”), Adobe’s new Super Resolution is a fantastic new tool to enlarge images for print. But how do you know when it’s needed? For a full understanding of image enlargement, we need to take a deep dive into file size, resolution and image resizing.

File Size and Resolution

The size of a file is talked about in several different ways. You could talk about the megapixels, megabytes or even file dimensions (width x length). For example, a photo from my Nikon Z 6 can be said to be a 25-megepixel file, or a 45-megabyte file, or a 6048 x 4024 file. In Figure 1 you can see how the Metadata panel in Lightroom shows a Z 6 image as having a file size of 44.93 megabytes and dimensions of 6048 x 4024.

Figure 1. Metadata panel in Lightroom.

If any of this seems unintuitive, then think of a piece of 4x8 plywood. It measures 4 feet wide and 8 feet long. Its area is 32 square feet. In addition, it has a certain weight.

Likewise, my Z 6 file is 6048 x 4024. It measures 6,048 pixels wide and 4,024 pixels high. Its area is 25 megapixels (6,048 pixels x 4,024 pixels = 24,337,152 pixels = 24.34 megapixels). Its “weight” is 44.93 megabytes.

Figure 2. 6048 x 4024 = 24.34 megapixels.

“Resolution” is the number of pixels in an image, expressed either as a total number or as dimensions (width x height). My Z 6 creates an image with a resolution of 25 million pixels (25 megapixels). But while megapixels is a great term for advertising camera models, as photographers we’re better served thinking in file dimensions.

Image Sizing

Screens and printers create images in very different ways. Screens are measured in pixels per inch (ppi) while printers are measured ­in dots per inch (dpi). Regrettably, these terms are often seen as interchangeable, even though they are not.

Screen Resolution

For example, my BenQ SW270C is a 27-inch monitor. Its resolution is 3840 x 2160. This means that the screen has 3840 pixels across its length and 2160 pixels from top to bottom.

Figure 3. Pixel dimensions of a BenQ SW270C photo monitor.

When you enlarge your image in Lightroom or Photoshop to 100 percent, you see only a portion of the photograph. This is because images from modern cameras have a higher resolution, or a higher pixel count, than the monitors they are displayed on.

At 100 percent magnification, one pixel on the monitor represents one pixel of the image. For this reason, 100 percent is sometimes called “actual pixels.” Figure 4 shows what is really happening behind the scenes: The image is much larger than the screen resolution can show at 1-to-1, so we see only the portion of the pixels that fit onto the screen.

Figure 4. The actual image size compared to the resolution of the monitor.

When you are viewing at 100 percent you are getting a very accurate view of the quality of your image. This is why it’s important to perform certain tasks such as noise reduction, sharpening and spot removal at this magnification.

These days tablets and phones are also used to view imagery. These devices have even less resolution than your computer monitor. Because modern cameras have such high resolutions, and because screens have comparably smaller resolutions, it’s very rare that you would need to enlarge or use Super Resolution on your photos just to view them on computer monitors or mobile devices.

Print Resolution

Printing, however, is a different story. Printers need a bigger file to create a quality image. To understand why, let’s look at the printer’s resolution. All printers (even the professional ones at labs) have a resolution of 300 dpi, with the sole exception being Epson printers, which print at 360 ppi.

The easiest way to understand the relationship between ppi and dpi is to look at the image in Photoshop’s Image Size dialog (Figure 5). To get there:

  1. In Lightroom select your image and choose Photo > Edit In > Edit in Adobe Photoshop.

  2. Once your image opens in Photoshop, choose Image > Image Size.

Figure 5. The Image Size dialog in Photoshop.

Notice the familiar pixel dimensions of 6048 x 4024. To see how large a print you can make from this file (without enlarging), simply change Pixels to Inches, and enter the ppi of your printer in the Resolution field. In this case (Figure 6), I can see that I could make a print of 13x20 inches on a 300 dpi printer without having to enlarge the image. (Or, as we see in Figure 7, I could make an 11x17 print on a 360 dpi Epson.)

Figure 6. This file could be printed at 13x20 on most printers.

Figure 7. The same file could be printed at 11x17 on an Epson printer.

Resizing Your Photographs

Changing the size of your images is completely normal. It actually happens often without you even realizing it. If you send a full-size JPG to Bay Photo and ask them to make a 30x45 print, they resize it. Every time you upload an image to Instagram, unless you specifically pre-size your image to 1080 pixels square, then it’s resized for you. Images you see on any website have all been resized.

Simply put, resizing is either throwing out or adding pixels to an image to make it fit its eventual use.

For example: Instagram currently displays images at a resolution of 1080 x 1080. To display my Z 6 image of 6048 x 4024 pixels on Instagram, it needs to be downsized (throwing out pixels). Conversely, to make a 30x45 print on a 300 dpi printer, my native resolution (as we saw in Figure 6) of 13x20 is not enough. I’d need to upsize it (adding pixels).

The act of upsizing or downsizing is also called “resampling.” Resampling can be done to an image in Photoshop or when exporting from Lightroom.

Resizing in Photoshop

When you want to resize an image using Photoshop, open the Image Size dialog seen in the above examples. If the Resample box is checked, then changing the pixels or inches will add or remove pixels from the image. Figure 8 shows that with the Resample box checked, changing the pixels to 1080 in width downsizes the image from 139.3 megabytes to a mere 4.44 megabytes.

Figure 8. The Image Size data shows how changing the width to 1,080 pixels downsizes the file from 139.3 megabytes to 4.4 megabytes.

Likewise, if you were making a print, you would open the Image Size dialog, change Pixels to Inches, and type in the desired width or height. Figure 9 shows that changing the height of this image to 30 inches will enlarge the file (adding pixels) from its original size of 139.3 megabytes to 696.6 megabytes.

Figure 9. The Image Size data shows how changing the height to 30 inches upsizes the file from 139.3 megabytes to 696.6 megabytes.

Notice that the aspect ratio in both cases has stayed the same. This image (as with most digital cameras) has an aspect ratio of 2x3. As long as the chain icon (circled in red in Figure 10) stays locked, then changing either the height or width will also change the other proportionally.

Figure 10. The chain icon on the left is locked, which keeps the aspect ratio constant. On the right the chain is unlocked, meaning you could disproportionately squeeze or stretch your image while resizing.

Resizing in Lightroom

If you want to resize with Lightroom instead, then you need to export the image (Figure 11):

  1. Select your image and choose File > Export, or click the Export button at the bottom left of the screen.

  2. In the Image Sizing section, check the Resize to Fit box and type your desired pixel length.

Figure 11. Exporting and resizing an image using Lightroom.

You have many choices within the Image Sizing box (Figure 12). If you want to size an image to use it on a screen (such as a monitor, website, Instagram, etc.), then all you care about is the number of pixels—the Resolution section, or pixels per inch, is irrelevant. Whether that’s set at 72 or 300 will have zero impact on your file and how it appears on a screen.

Figure 12. Options for resizing within the Image Sizing box.

However, if you want to size that file for print, then the Resolution section of this dialog becomes very important. Here’s the process:

  1. Select your image and choose File > Export, or click the Export button at the bottom left of the screen.

  2. In the Image Sizing section (Figure 13), check the Resize to Fit box and change “pixels” to “in” (i.e., inches).

  3. Type your desired length.

  4. Choose either 300 or 360 for Resolution (to match the dpi of the printer).

Figure 13. The proper settings for enlarging a file to make a 30x45 print for a 300 dpi printer.

As we saw earlier, if I wanted to use a file from my Z 6 to make a print larger than 13x20 on a 300 dpi printer, or 11x17 on an Epson printer, then I would need to upsize that file. Of course, if I crop the file, then I might need to upsize even for smaller print sizes. Figure 14 shows the same file that has been cropped. Now I could make only a 10x15 print—for anything larger, I would need to add pixels by resampling.

Figure 14. Our example image has been cropped. Now the maximum print size would be 10x15 at 300 dpi. If I wanted to print larger, I would need to upsize the cropped photograph.

Super Resolution

The problem with all of this is that from the beginning of digital photography, enlarging, or resampling, has been an obstacle. No one has yet found a way to add pixels to the resolution of an image that results in the same quality as the original, smaller file.

But programmers have always been chasing that goal. In the late 90s, third-party solutions such as Genuine Fractals were the answer. Then Photoshop caught up, and could produce the same quality with its upsizing algorithm. Then Adobe made that even better with the Preserve Details tool. All of these options (and more) were better than the previous best options, and that improvement continues with Super Resolution.

In short, Super Resolution is a superior way to enlarge your images, in the cases where you need to do so—which, as you’ve seen above, is only when you are making large prints.

A trip to Photoshop’s Image Size dialog will give you all of the information that you need to make the decision to upsize or not. If the answer is yes, then, for the best results, refer to my previous post on using Super Resolution.

And then what comes next? Keep an eye out for another upcoming post on this topic, wherein we’ll further explore image upsizing and demonstrate how to properly sharpen your upsized images for printing.

Tim Cooper is a partner and workshop leader with National Parks at Night. Learn more techniques from his book The Magic of Light Painting, available from Peachpit.

UPCOMING WORKSHOPS FROM NATIONAL PARKS AT NIGHT

In the Bag: Packing for a 3-Week Night Photography Trip

Note: As mentioned in the post below, Matt is about to embark on a 3-week night photography trip with Gabe. Follow their adventures via our next three installments of “NPAN Conversations” on the National Parks at Night Instagram account.


This is gonna be some trip! I’m about to leave for 3 weeks in the American southwest, where I’m co-leading a night photography workshop, attending a night photography conference, scouting some new locations, and creating some photo and video content in the field. And I need to pack for all of that in one bag.

What goes into one bag to cover all of that for one trip? Today I’m going to share that with you!

With all the uncertainties of the past year and of the next few weeks, it’s still exciting to curate and cull my gear for a trip. To be more specific about my needs, the following are my goals for the trip and the events I’m packing out for:

With all that on the plate, how do I pack smart, and how do I pack so that my bag is light enough to walk with for a few miles?

The first step: the bag. Introducing my new backpack, the Shimoda Action X50—aka “the Kitchen Sink 2.0.”

There’s a ton of surprises inside. So I made a video walk-through/breakdown of my gear and why it made the cut:

(a few hours later…)

Whew! Thanks for watching. On YouTube, there is a complete gear list with links, or you can download it here:

How are you gearing up for your next trip? What is essential? What did you leave by the wayside and why didn’t it make the cut? Let us know in the comments or on our Facebook page.

Matt Hill is a partner and workshop leader with National Parks at Night. See more about his photography, art, workshops and writing at MattHillArt.com. Follow Matt on Twitter Instagram Facebook.

UPCOMING WORKSHOPS FROM NATIONAL PARKS AT NIGHT