Portrait of a lunar eclipse. Nikon D5 with a Nikon 300mm f/2.8 lens. 32 frames shot at 1 second, f/2.8, ISO 51,200, noise-stacked in Sequator and blended in Photoshop with a moon exposure shot at 1/2 second, f/2.8, ISO 3200.
Note: We’re running this blog post today because tonight’s skies will feature the world’s last total lunar eclipse until the spring of 2025. See the end of the post for more information.
The Story
Since she was little, my daughter Maggie has been interested in astronomy. She could name the planets (in order) when she was 3. On summer nights she would lay a blanket on the grass outside, hone in on stars with my laser pointer, and ask me to look up their names in a sky-view app. In 2017 we road-tripped to see the solar eclipse, which she promptly labeled “the best thing I’ve ever done.” She was only 4, but I couldn’t disagree that the memory would remain on that list forever.
As Maggie has grown older (she’s 9 now) that interest has waned a little, somewhat supplanted by friends and music and drawing and painting and reading and swimming and making videos and any of the other hundred things that occupy her agile mind. Still, I’m never surprised when she wants to experience a celestial event—such as when she asked if we could go somewhere to see the total lunar eclipse last spring.
So we ventured to one of my favorite sections of the Blue Ridge Parkway, me toting my cameras, she toting the telescope that her grandmother and aunt had given her for Christmas.
Maggie watching the lunar eclipse through her telescope from the Blue Ridge Parkway last May.
The Location
The Blue Ridge Parkway stretches 469 miles between its northern and southern termini. That’s a long and varied destination for photography. For our experience I chose the area around Blowing Rock, North Carolina, because I know it has many valley-top overlooks, as well as the attractive landscapes of Price Lake, the Moses H. Cone estate, rolling fields, barns and so on.
Figure 1. PhotoPills’ Augmented Reality showed where the moon would be over Price Lake at the time of the eclipse.
I know the area well, as I’ve shot there many times (including with two National Parks at Night workshops). But PhotoPills scouting was still necessary because I needed to know where the moon would be during totality. Which of my favorite landscapes would be good for a moon photo at that particular time and date? I settled on Price Lake, as I could see that during totality the moon would be drifting over the tree line on the southeastern shore (Figure 1).
Alas, all good plans need a backup, especially when traveling with a kid. Maggie was bored waiting for the eclipse. We tried hunting for frogs, then hunting for spiders, then spotting fireflies. We watched the water flowing over the dam and listened for noises in the woods and guessed what made them. But these things didn’t hold her interest long enough. So, instead, we meandered up the parkway until the moon finally started to hide in Earth’s shadow, and then pulled into an overlook.
We set up her telescope, she promptly located the moon in the eyepiece, and the experience quickly became pretty freakin’ cool. She was enthralled—enough so that I knew I had time for a photo.
But from the overlook, I had no foreground worth shooting. By necessity, this would be a moon portrait, not a moonscape. I unpacked the longest lens I own, a Nikon 300mm f/2.8—a lens not quite long enough to fill the frame with the moon, but long enough so the moon would be more than just a red dot in the sky.
The Exposure
The trouble with telephoto lenses at night is that unless you’re using a hefty tracker, shooting star points is nearly impossible with one exposure. With a 300mm lens, a quick check of the Spot Stars calculator in PhotoPills revealed that I could use a shutter speed of only 1/2 to 1 second before my stars would begin to trail (Figure 2). That would require an ISO of 51,200, and that would produce way more noise than would be acceptable.
Figure 2. PhotoPills told me that to freeze the stars shooting with a Nikon D5 and a 300mm lens, I would need a shutter speed between about 1/2 second (in Accurate mode, right) and 1 second (in Default mode, left).
It also introduced a problem with the moon exposure: At 1/2 to 1 second at ISO 51,200, the moon would blow out.
So those were the two obstacles I needed to work around, and I chose two solutions:
Because freezing the stars required such a high ISO, I would need to noise-stack multiple frames. This would make the final image appear as if I shot it at a lower, cleaner ISO.
Because the first solution would result in the moon both blowing out and moving considerably during the exposures, I would need to shoot a separate frame of just the moon and then layer that on top of the noise-stacked frame in Photoshop.
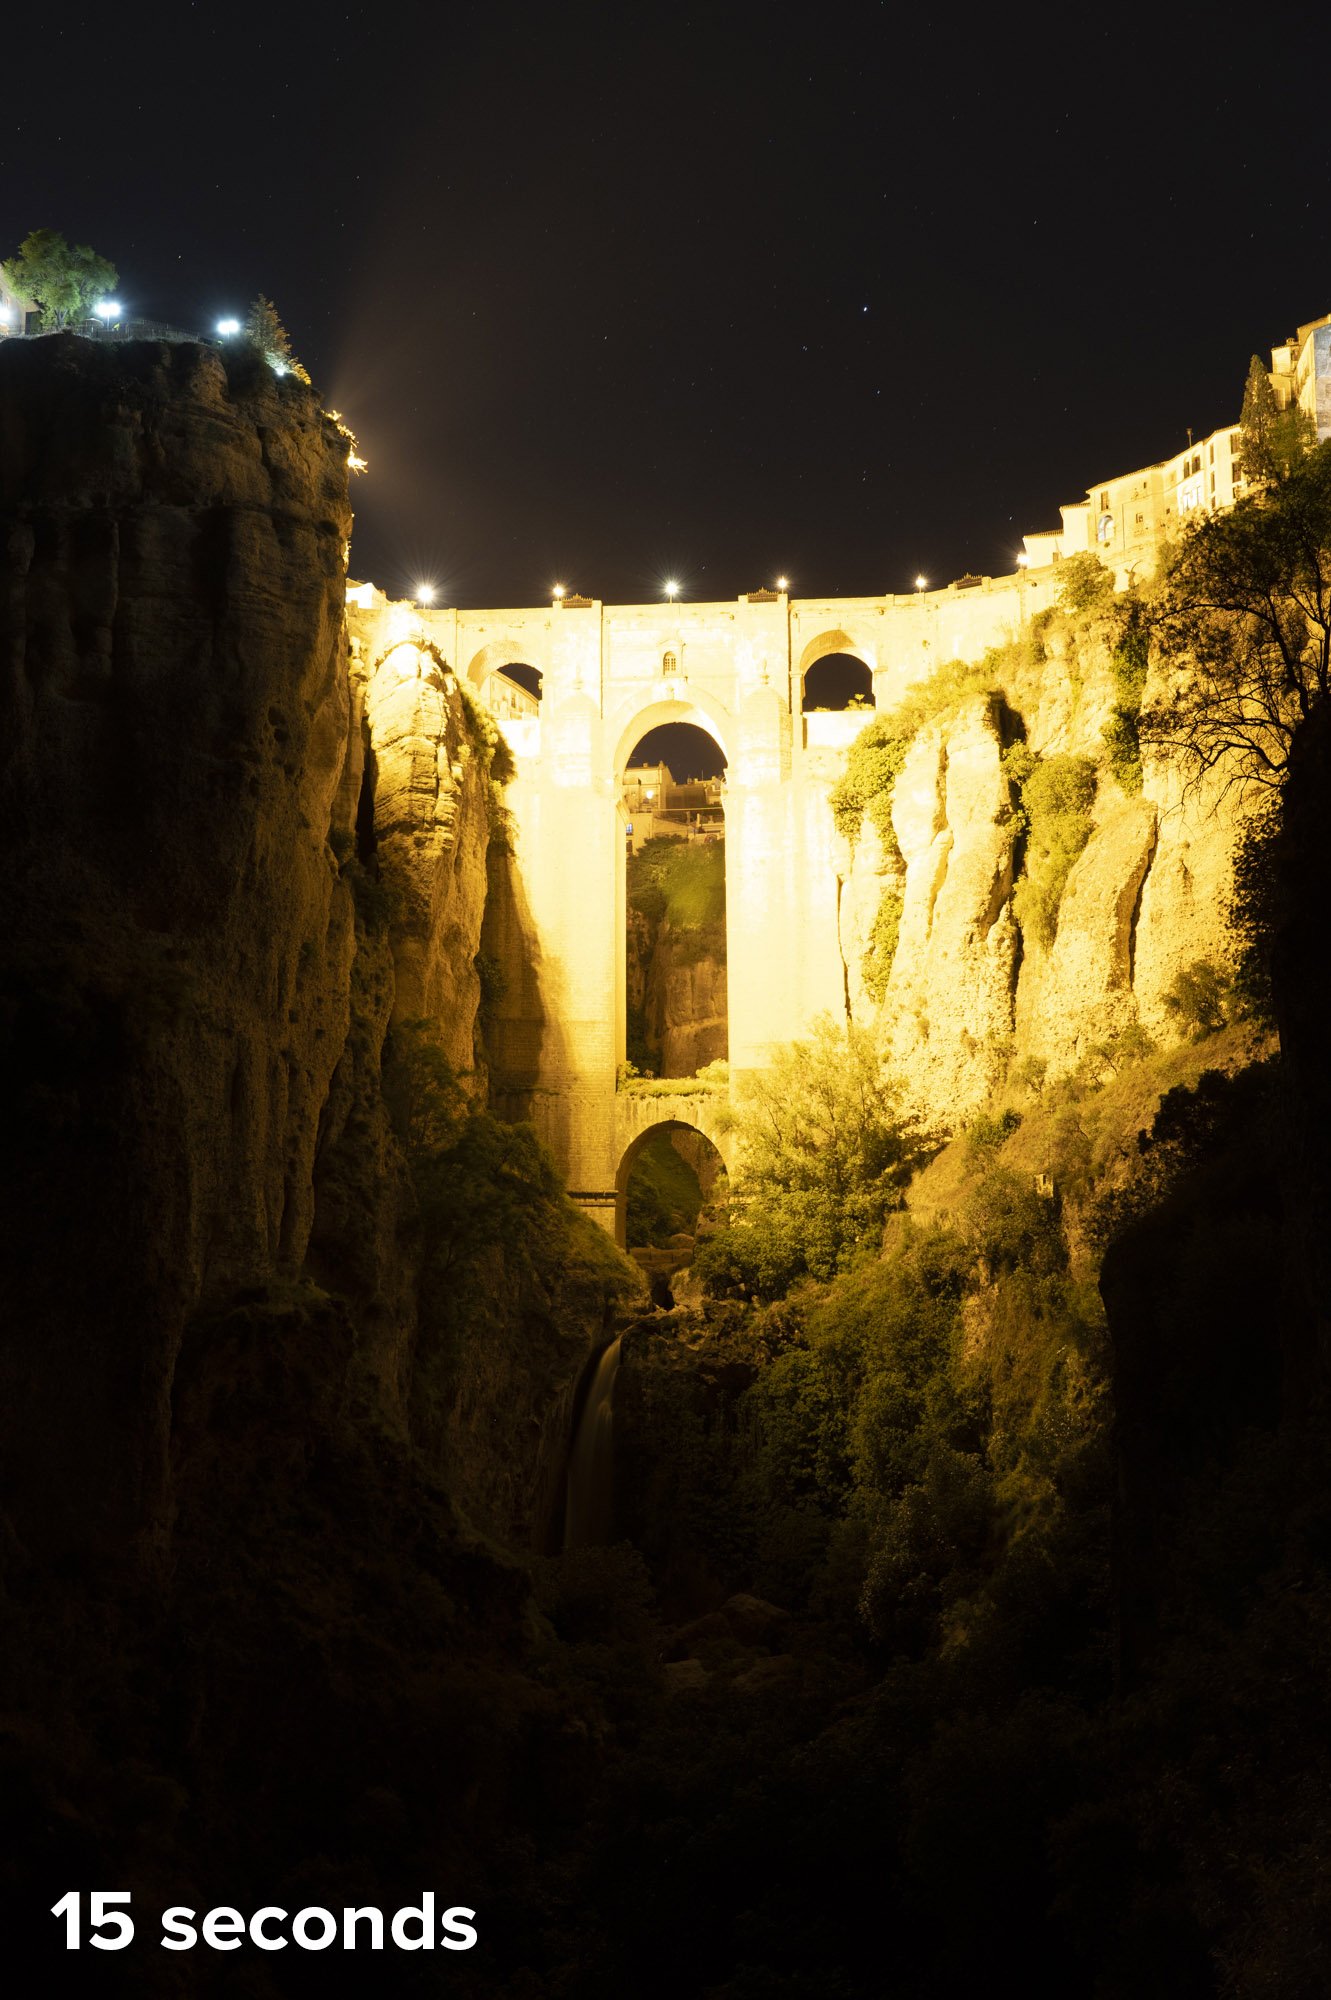
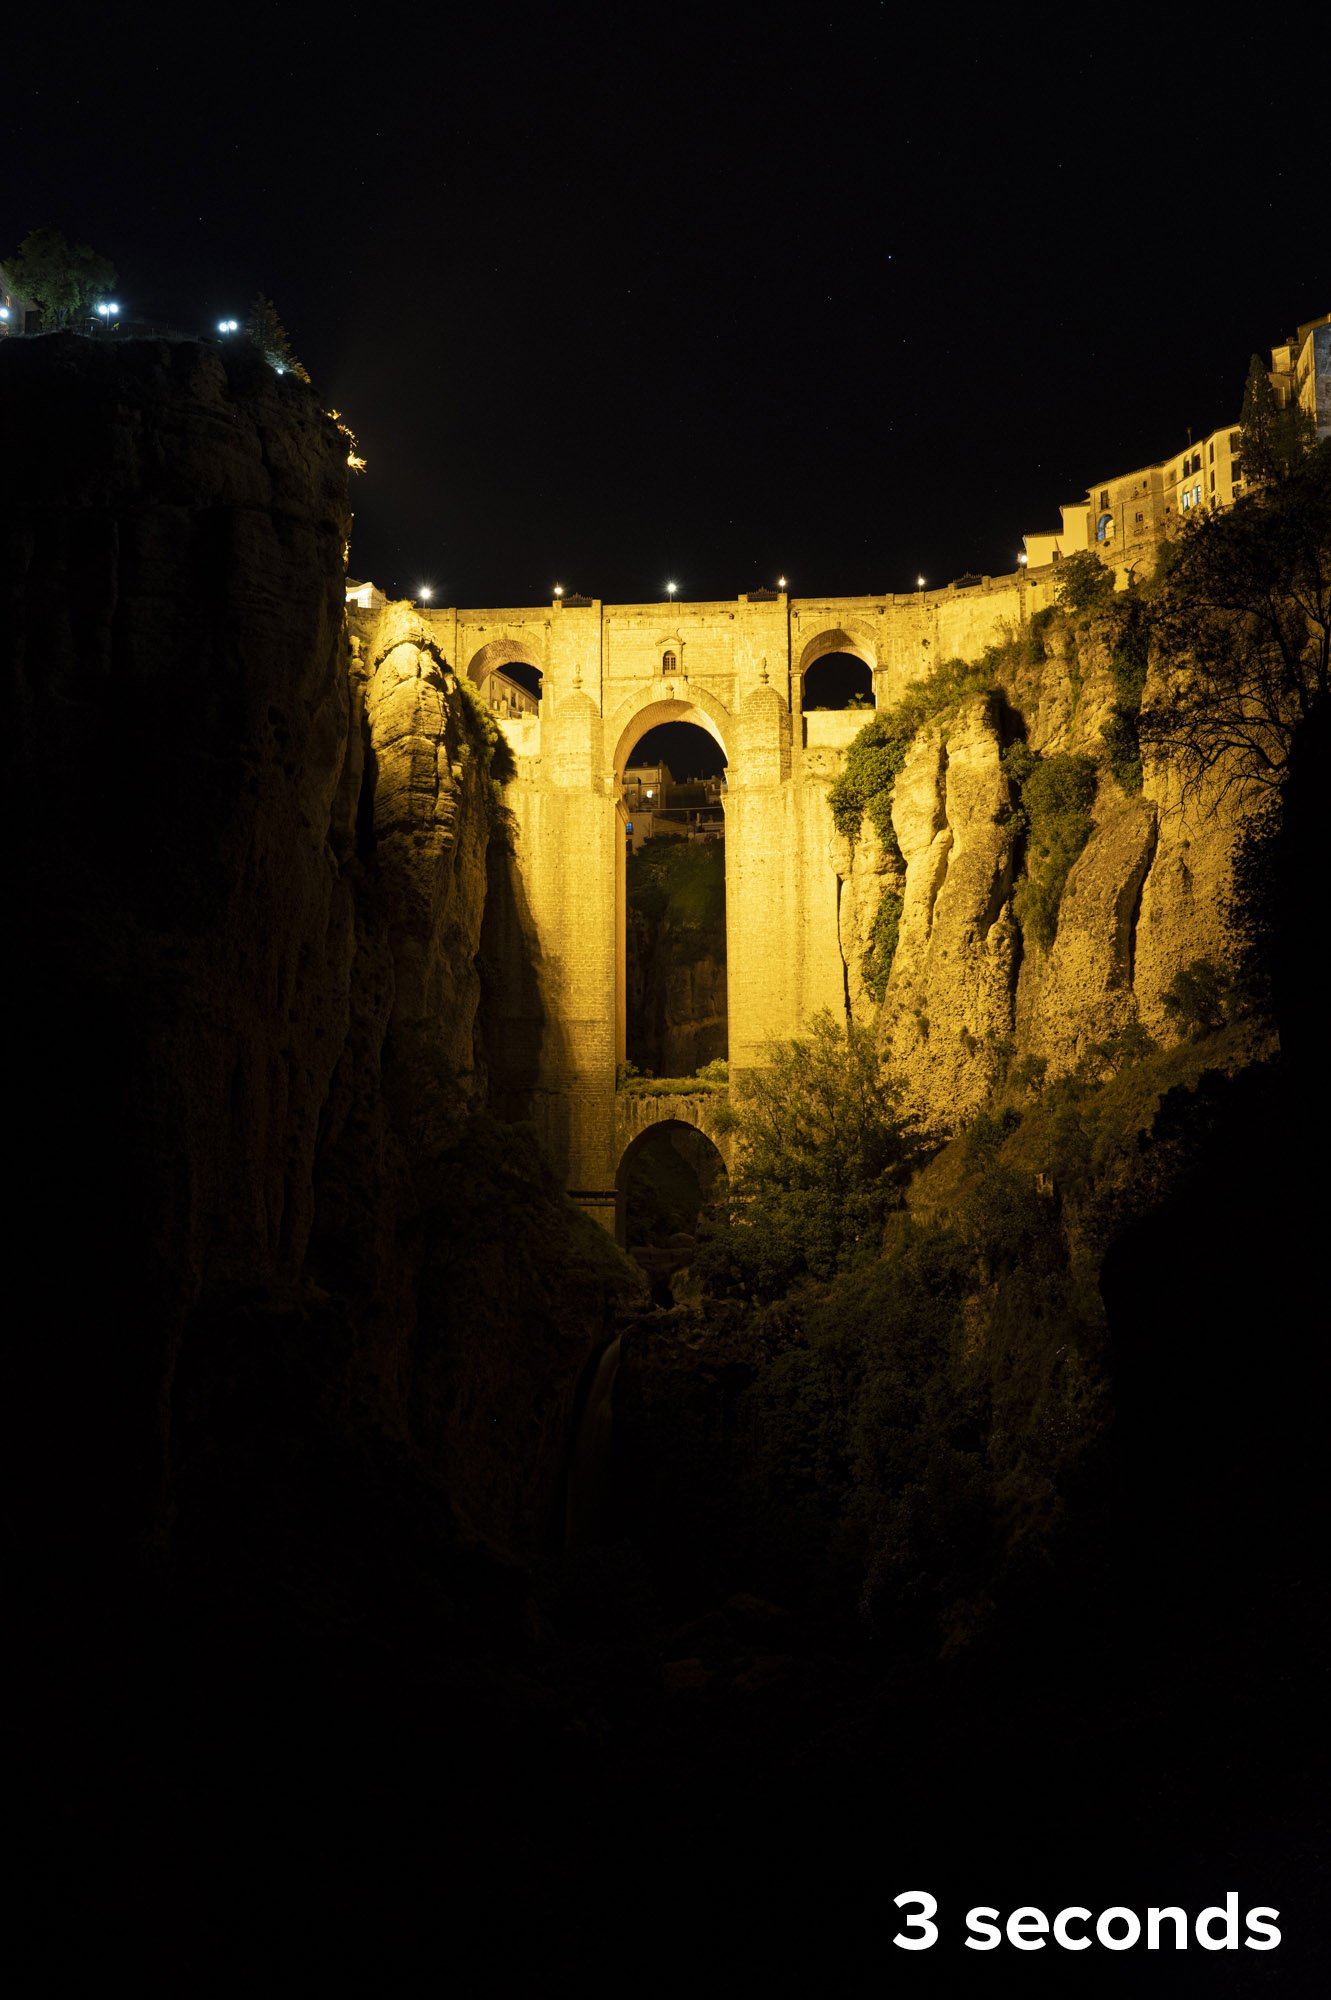
It was time to calculate my moon exposure. The moon moves quickly—a distance roughly equal to its diameter about every 2.5 minutes. That’s why shooting even a 20-second astro-landscape exposure can result in the moon beginning to “stretch out” and look oblong. With a wide-angle lens, I rarely shoot more than 10 or 15 seconds when the moon is in the frame. Using a telephoto meant I needed to shoot even faster.
I also wanted a lower ISO for the moon so it wouldn’t look too noisy against the clean, noise-stacked stars. I shot a few tests and decided that 1/2 second at ISO 3200 resulted in a moon that would be sharp enough to look good.
The Shoot
Now all I needed to do (that night, anyway) was capture the raw materials.
One remaining concern I had was vibrations causing a soft image. Vibrations are a constant concern when working with a telephoto lens, as well as when working at night. To minimize vibration, I took the following steps:
I mounted my setup on a sturdy tripod (the Gitzo 3541LS) with a sturdy, top-of-the line ball head (the Really Right Stuff BH55), and made sure everything was locked down tight. (My setup would have been even more solid if I’d used a gimbal head, but I don’t own one.)
I connected a wireless shutter release (the Nikon ML-L3). This meant I wouldn’t have to touch the camera to open the shutter, and because no cable was connected, I also wouldn’t accidentally introduce vibration by touching the remote.
I enabled Mirror Lockup on my Nikon D5. This feature separates the mechanics of raising the mirror from the mechanics of opening the shutter, so that the minor vibrations of the former have time to subside before the camera starts recording the image.
I enabled a 2-second Shutter Delay in the camera. This feature creates a delay between when the shutter opens and when the image begins to record, again to mitigate vibration that could be caused by moving parts.
I waited for any perceptible breeze to subside.
I shot multiple frames, because when you do that, one frame will always be sharper than the rest.
Figure 3. The moon foreground. Nikon D5 with a Nikon 300mm f/2.8 lens. 1/2 second, f/2.8, ISO 3200.
Once I was satisfied that I had a good moon foreground to work with (Figure 3—yes, the moon is a foreground in this photo), I changed the exposure to record lots of star points. I pressed the button on the remote, locked it down, and let the camera fire off 32 frames.
(Why 32? I’ll get into this more in a future blog post that focuses on noise stacking. For now, just know that combining 32 frames in stacking software provides approximately a 5-stop improvement in apparent noise. Because I was shooting at ISO 51,200, my final result would therefore look like I shot it at about ISO 1600—i.e., 5 stops lower. I knew I would be happy with the quality of that result.)
One final note about the shoot: Because the process took a little while, the moon moved considerably. Therefore, I needed to constantly readjust the framing to keep the moon in the center. Otherwise it would have flown clear out of my composition in about 10 minutes.
The Post-Production
Once home the next day, I dumped all the images into Lightroom and got to work.
The foreground frame was easy—I just chose the one with the sharpest-looking moon. I applied some basic adjustments to get the moon to look its best (the stars weren’t important in this frame), and that was that. Done.
The next step was to noise-stack the stars. If you have a Mac, the tool for this is Starry Landscape Stacker; I have a PC, so the right tool is Sequator.
Figure 4.
I asked Lightroom to reveal the location of the first star file in Explorer (Figure 4). From that folder I selected all 32 star files, and then I dragged them into the Sequator interface. I walked through all the processing options (I’ll be writing a how-to for Sequator soon—keep an eye on this blog—but if you use a Mac, see our post on Starry Landscape Stacker), and then let the software do its thing. (I didn’t worry about masking the moon in the stack, because I knew I’d be layering over the moon for the final version of the photo anyway.)
The result was a TIFF saved into the same folder as my raw files. I needed to load that TIFF into Lightroom. I did this by navigating to the folder, right-clicking and selecting Synchronize Folder (Figure 5), then following the prompts.
Figure 5.
With the TIFF loaded into my Lightroom catalog, I applied some basic edits to make the sky look good. The result was exactly what I’d hope for—a noise-free field of sharp, bright, sparkling stars.
The only problem was that blown out moon, which I was now ready to layer over. In the Lightroom grid, I selected the moon raw file and the star TIFF by Control-clicking on both. Then from the menu I chose Photo > Edit > Open as Layers in Photoshop.
With both images layered in Photoshop, I needed to mask out the dull sky from the moon foreground to reveal the sparkling, noise-free sky behind it. I figured the Object Selection tool would pick out that moon beautifully, so I chose the tool from the toolbar, clicked and drew a square selection around the moon, and the algorithm did the rest. I had a perfectly selected moon (Figure 6).
Figure 6.
Figure 7.
At the bottom of the Layers panel, I clicked on the Add Layer Mask button. This created a mask from my moon selection (Figure 7), revealing the sharp, noise-free stars from the background layer. However, a little cleanup remained.
The first issue was that during the shoot I’d had to continually reframe to keep the moon centered, and because the moon kept moving during the series of exposures, it was in a slightly different spot from frame to frame. Therefore, the moon wasn’t lined up perfectly with itself in the layered image (Figure 8), so I had to adjust its placement. I activated the Move tool and then used the cursor keys to nudge the moon into the right place (Figure 9).
Figure 8.
Figure 9.
The second issue was that the masking process had left a dark halo around the moon. Easy fix—just needed to massage the edge of the mask to cover up that halo. I selected the mask, then from the menu chose Filter > Other > Minimum (Figure 10). Knowing what radius value is correct is just a matter of looking at the live effect (with the Preview option checked), but it’s usually a very low number. In this case, 2 looked perfect (Figure 11), so I clicked OK.
(Note that depending on what processing artifact had created the halo, using Minimum may have made the problem worse. If it had, then Filter > Other > Maximum would have worked instead.)
Figure 10.
Figure 11.
The final issue was that the sharp moon was just a little smaller than the moon in the background, due to both exposure blooming and the halo edit. No problem—I just had to make the foreground moon a little bigger to hide the edges of the background moon.
I pressed Control-T to activate the Free Transform tool, but because I was zoomed in, I couldn’t see the bounding box and its handles. So to make the adjustment, I used the options bar (Figure 12). I made sure that the Maintain Aspect Ratio button was selected, and then clicked to put my cursor in the Set Horizontal Scale field. Again, I was just eyeballing the effect, watching what happens to the image as I made microadjustments. Using the cursor keys, I pressed up once to increase the scale to 101 percent, then again to 102 percent. It looked perfect (Figure 13), so I stopped there.
Figure 12.
Figure 13.
I saved and closed the image, made a final crop in Lightroom, and bumped up the Texture slider a bit to make the stars pop.
Was it worth all that effort just to get some more stars? Heck yeah! Use the slider in Figure 14 to see a straight-out-of-camera shot versus the fully processed final image. See how “three-dimensional” and detailed the final image looks?
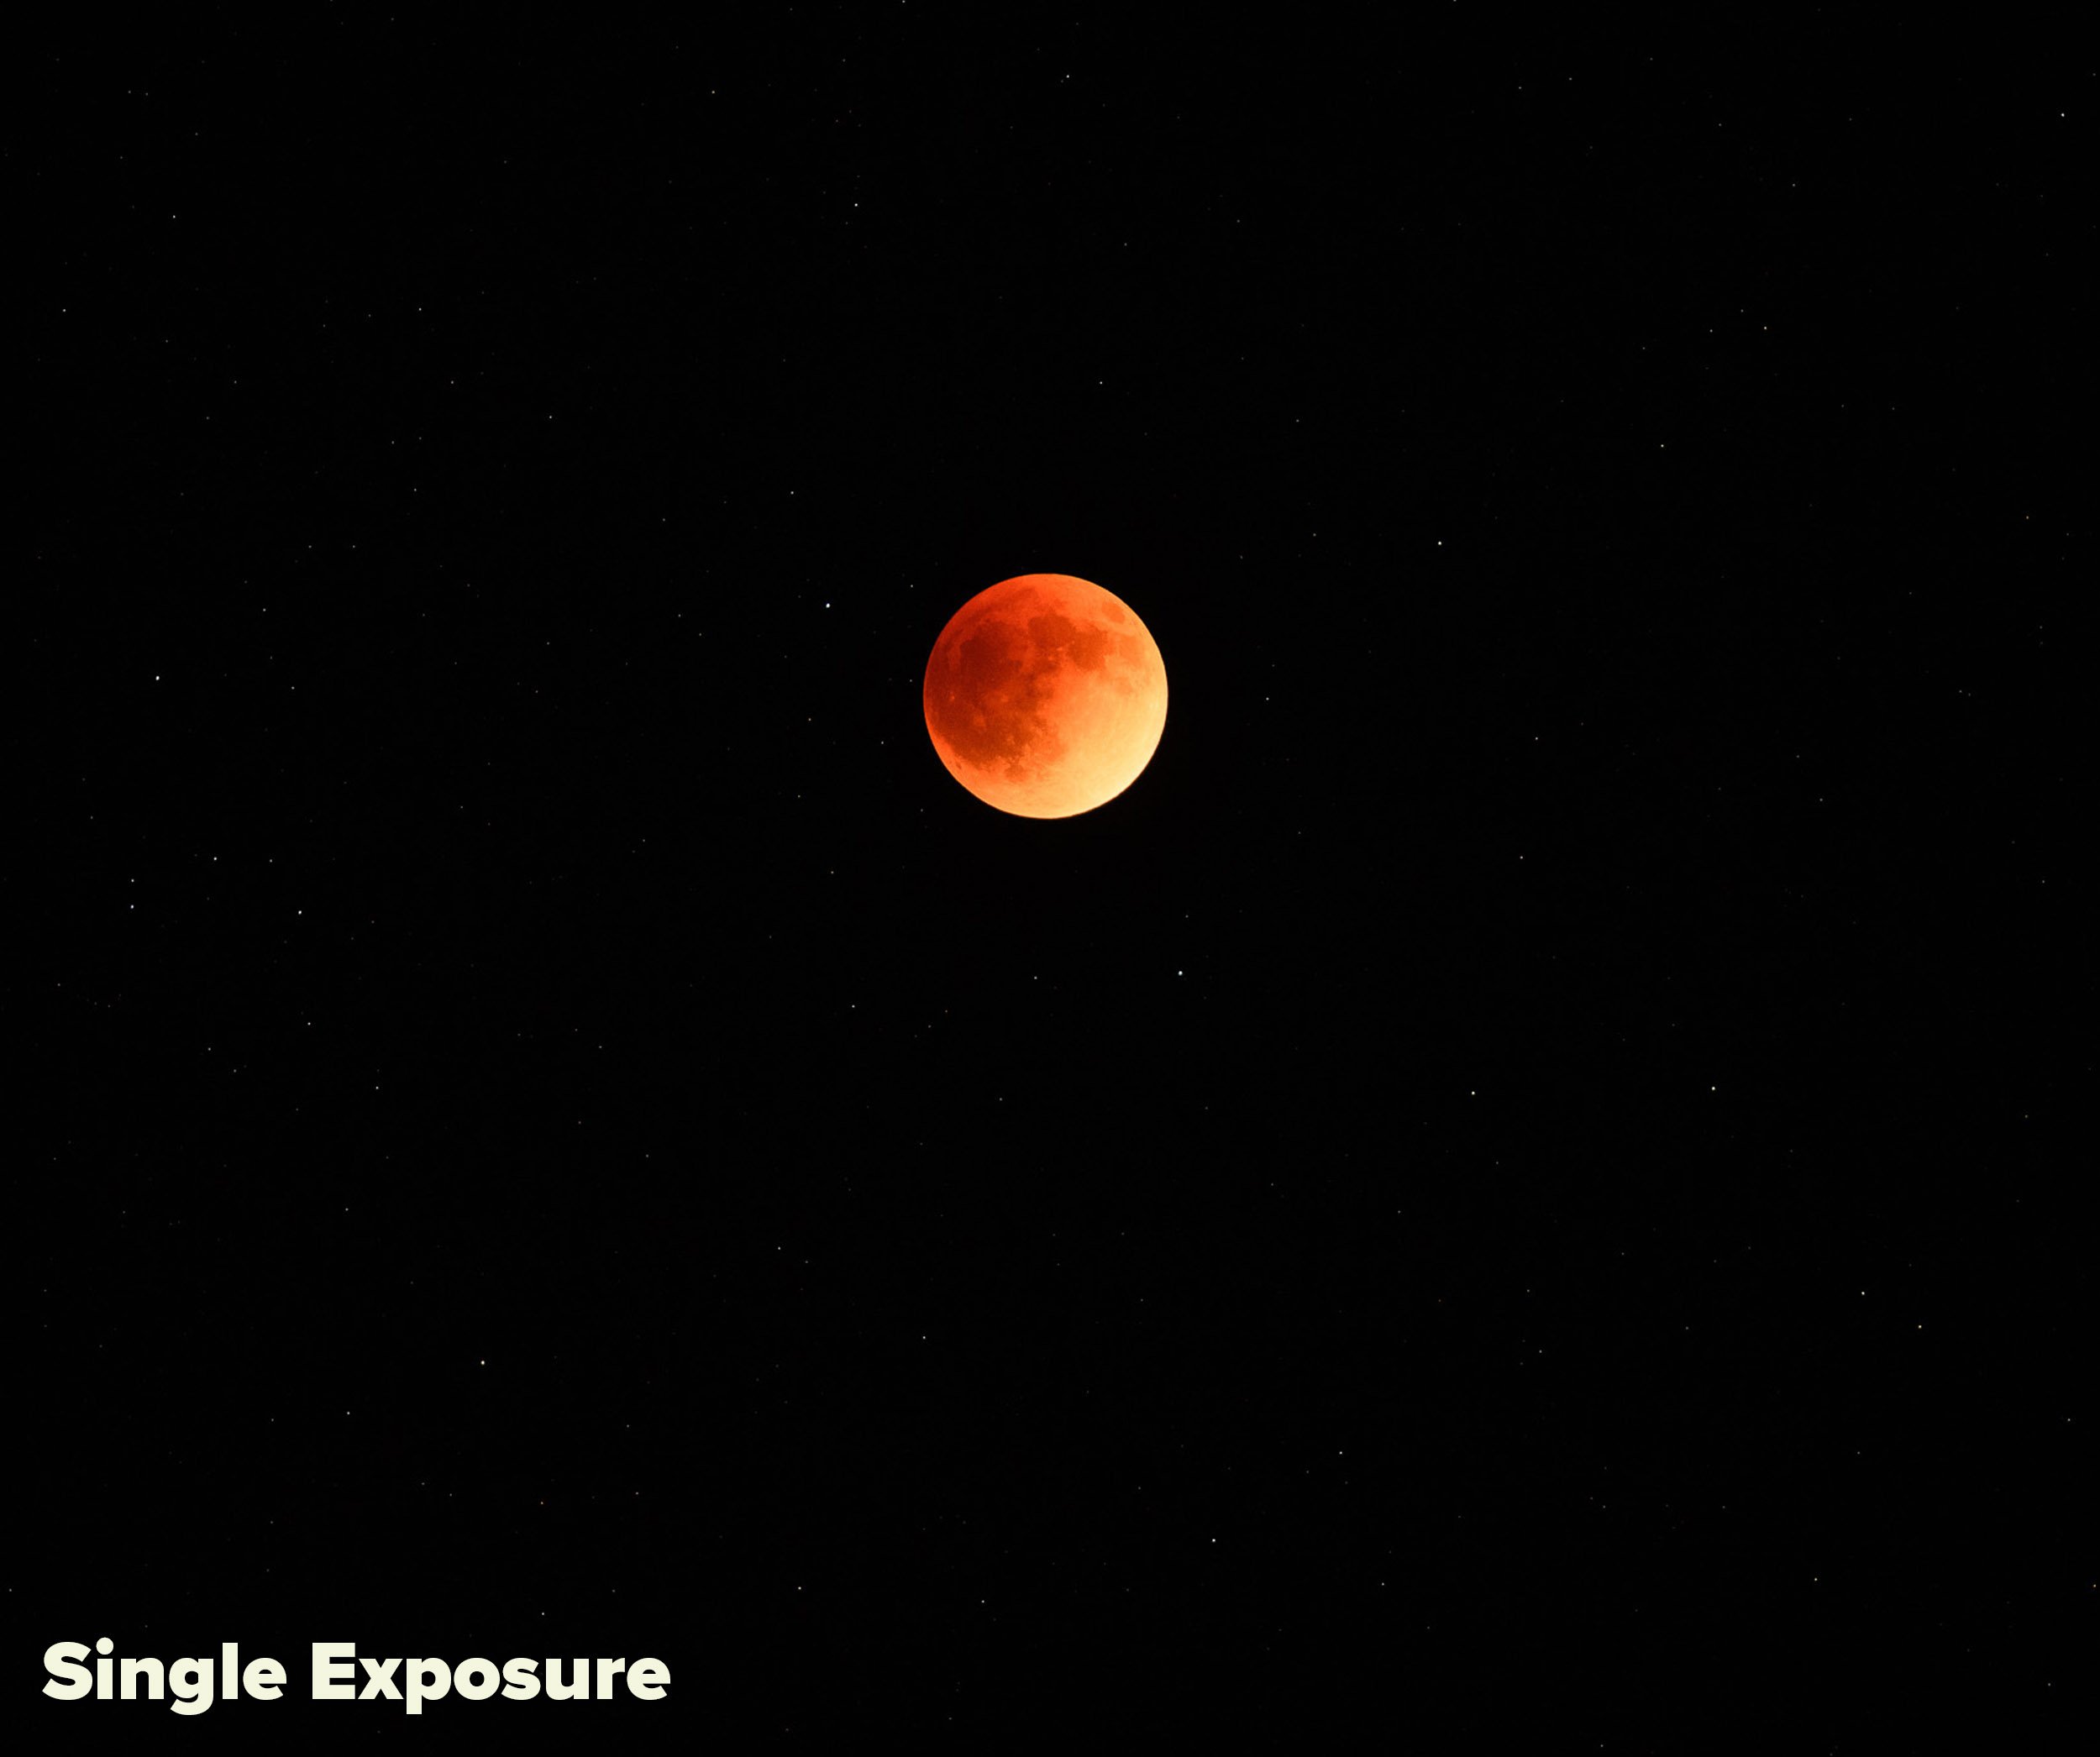
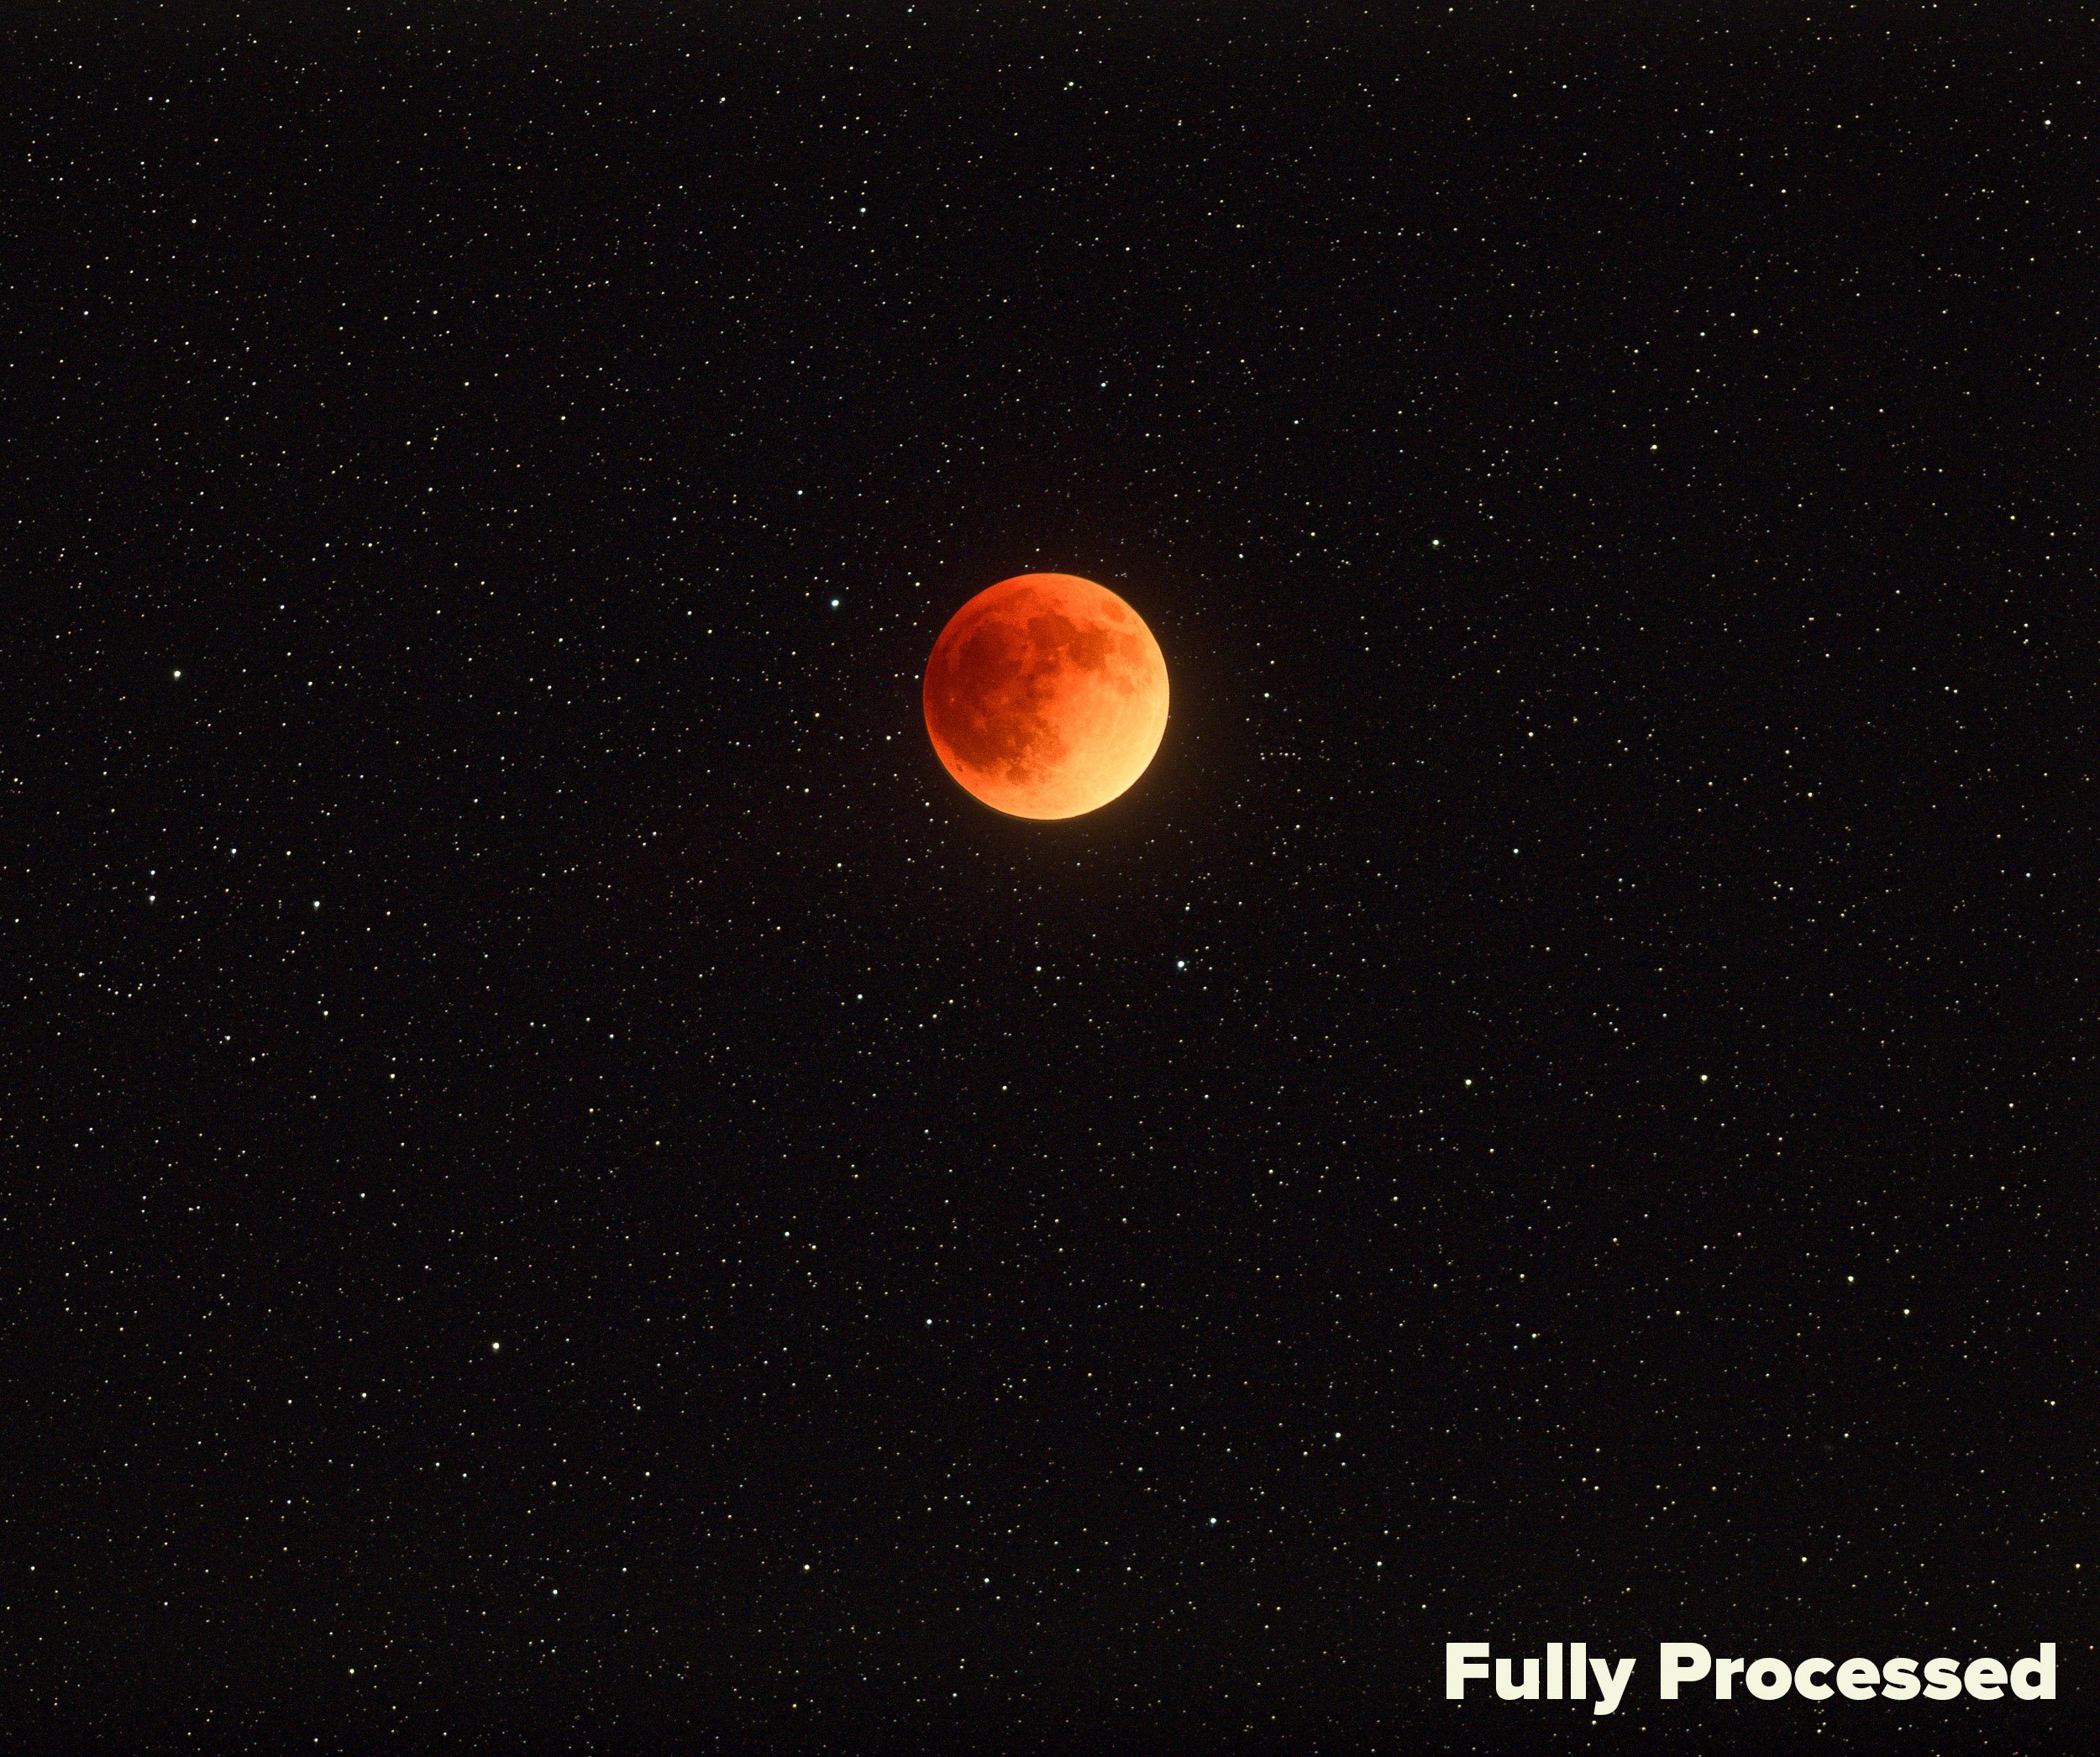
Figure 14.
Wrapping Up
Maggie thought it was pretty cool that I could take pictures of the moon (win for Daddy!), and she asked if she could try too. I let her fire off a few frames, and then we packed the gear into the car.
Figure 15. Lunar eclipse over Price Lake, Blue Ridge Parkway. Nikon D5 with a Nikon 300mm f/2.8 lens. 3 blended frames shot at 30 seconds (foreground), 15 seconds (stars) and 1/4 second (moon), f/2.8, ISO 6400.
The moon was still in shadow, so with Maggie’s permission we went back to Price Lake to create the astro-landscape photo of the eclipse that I had scouted earlier. That photo (Figure 15) was easier, as I didn’t need to shoot 32 frames to rid the image of high ISO noise. Just three exposures—one each for foreground, moon and sky—and we were done.
The timing of this post is intentional. Tonight the moon will fall into total eclipse again—for the second time this year, but for the last time until March 2025. If you’d like to create a photo like this, tonight is your last chance for 2.5 years.
Tonight’s lunar eclipse will begin at 3:02 a.m. EST, and totality will happen from 5:16 to 6:41 a.m. So it will take a commitment to photograph.
If you want to shoot this eclipse, of course other techniques are also options. For more ideas, see our blog posts:
“Moon Shots: What We Learned from Photographing the 2019 Lunar Eclipse”
“Shooting for the Moon: How to Photograph Earth's Little Cousin”
For more information about tonight’s big event, see the Space.com article “How to watch the Blood Moon lunar eclipse on Nov. 8 online, the last until 2025.”
Tomorrow and in the days ahead, we’d love to see your lunar eclipse photos. Share in the comments below, or on our Facebook page, or on Instagram (tag us @nationalparksatnight #nationalparksatnight #seizethenight).