For every person who asks a question, a good hundred more probably had the same question and didn’t ask. So we like to share the questions we get and the answers we give.
This installment of our “Five Questions” series features inquiries about moonrises, Laowa lenses, the Nikon D780, night panoramas and Acadia National Park.
If you have any questions you would like to throw our way, please contact us anytime. Questions could be about gear, national parks and other photo locations, post-processing techniques, field etiquette, or anything else related to night photography. #SeizeTheNight!
1: Rad Moon Rising
Supermoon over Death Valley National Park. Nikon D500 with a Nikon 80-200mm f/2.8 lens at 200mm. 1/200, f/8, ISO 800. © 2016 Lance Keimig.
Q: Last year when driving home I passed a small lake that had a huge red/pink full moon rising over it. I tried to find out when this may happen again. Unfortunately I did not see how to get an easy answer to when there would be another full moon rising while the sun is setting, so I reverted to tedious data lookup. How can I plan this easier? And when will the moon still have a pinkish glow—when it beats the sun in rising, or when the sun beats it in setting? — A.B.
A: The full moon always rises near sunset, never at sunrise. The full moon does, however, set at sunrise. (The opposite, for both cases, is true of the new moon.) Either way is a good way to shoot the moon near the horizon during soft light.
The exact times vary quite a bit—by up to as much as an hour, depending on the exact timing of the full moon. In some months, the best timing may be one day before or after the full moon. The moon rises about 45 to 55 minutes later each day during its 28-day cycle, but the sunset time varies by only a minute or two.
You can use PhotoPills or a website like TimeandDate.com to find out the date of the full moon each month, and then check the sunset and sunrise times within a couple of days of the full moon.
The “best” time for moon photography depends on the effect you are looking for, and the landscape where you are photographing. If you want a warm glow on the landscape, look for a moonrise that’s just before sunset. But I generally prefer a moonrise about 10 to 15 minutes after sunset, when the exposure balances nicely between the moon and the soft light on the land. By about 20 minutes after sunset, the exposure difference between the moon and the landscape is too great to capture in a single image.
The color in the moon is completely dependent on atmospheric conditions––the amount of dust, moisture or pollution in the air. The more particulates, the more color. When the moon is just rising, you are viewing it through hundreds of miles of atmosphere. When it is high in the sky, you are viewing it through a single layer of atmosphere, which is why it is almost always white. — Lance
2: Learning About Laowa
Venus Optics Laowa 15mm f/2 FE Zero-D lens for Nikon Z.
Q: I have the Nikon Z 6 and am looking for a wide-angle lens that I can use for night photography. I saw this lens on the B&H Photo website: Venus Optics Laowa 15mm f/2 FE Zero-D for Nikon Z. What do you know about this lens/company? Quality? Performance? Any info? — Terry K.
A: Summary: It’s a yes.
Why? Four reasons.
It’s an incredibly small, light, fast and sharp lens.
At f/2.8, the coma almost disappears, and at f/4 it’s totally gone. To see a technical test I did, download and open these files in Photoshop and zoom to 100 percent. The star-field boxes are 100 percent crops. The gray zoom boxes are exaggerated zooms at 800-plus percent to show the actual shapes of stars. (Note: These are totally unedited photos. The chromatic aberrations can be easily removed, but I chose not to remove them for what were just test images.)
The metal lens hood is reversible.
It beat my Zeiss Distagon (gasp!) in regard to coma. Wow. And I have an extra stop of light when I need it. And it’s half the size.
So, yeah, the Laowa is fab.
There is one major downside, however, which may or may not matter to you: It does not have electronic contacts. So you will not have the metadata in Lightroom that identifies the lens or which aperture was used for the photographs. — Matt
3: Switching from Canon to D780
Q: My Canon 6D has been pushed to its limits and I’m seeing too much ISO noise, so I’m looking into changing over to Nikon. Have you used the D780? — J.M.
A: The short answer: I’ll definitely be buying one. The image quality seems similar to or better than the Nikon Z 6, which is noticeably better than the D750 I’ve been using for several years. The D780 image quality at 12,800 is outstanding, and is definitely usable at 25,600. The camera also has extended shutter speeds down to 15 minutes.
They moved a couple of buttons around––which shouldn’t be an issue for you coming over from Canon. Other than that, it feels very comfortable and familiar for a Nikon user. I also like that they stuck with two SD card slots and didn’t go for the expensive XQD, or worse, one XQD and one SD slot.
For the long answer, see our recent blog post “Best of Both Worlds—The Nikon D780 Combines the Advantages of the D750 and Z 6.”
My suggestion is: Yes, jump on it! It may just be the last camera you’ll buy. — Lance
4: Night-Pano Follow-Ups
Bear Lake, Rocky Mountain National Park. Nikon D750 with a Sigma 35mm f/1.4 Art lens. Sixteen stitched frames shot at 10 seconds, f/2.2, ISO 6400. © 2018 Matt Hill.
Q: After reading your blog post on how to plan and shoot a panorama, I have a few questions:
I have an Acratech GP-ss ball head, which can be mounted upside down and used as a leveling base. So I presume I wouldn’t need a separate leveling base—or would you recommend having one anyway?
I want to rotate my setup exactly 30 degrees between each frame. How could I do that without turning on my headlamp?
I’ve seen some photographers use a Nodal Ninja Advanced Rotator. It has different settings with click stops to confirm you’ve reached a pre-set degree. I believe it could be of help as I wouldn’t have to engage my red light. Are you familiar with these rotators? — Roger R.
A: I’m so happy to see you’re inspired to get out and shoot some night panos! My answers:
I am a fan of having a separate leveling base (and I have the Acratech). It honestly doesn’t add much to the operating size and weight, and it benefits all my setups (not just panos). Leveling is simply faster with a leveling base than by adjusting tripod legs. That said, I have not attempted using the GP-ss inverted, but that’s a curious and wonderful thing it’s capable of doing!
You may consider getting some glow-in-the-dark model airplane paint and making 30-degree ticks on your pano base, as well as making reference points (two, three or four) on the top part. Come to think of it, I may do that myself!
I know two people I really trust who have used rotators, including Gabe. They require setup and calibration. But having those clicks is very helpful for confidence and maintaining your night vision.
There are other options for indexing rotators that have detents—be sure to examine the intervals you can choose:
Keep in mind that all this gear is great to have for leveling up control over the process of shooting a pano at night, but it’s not required. The most important thing is the proper planning and technique that we covered in the original post. Have fun with your panos! — Matt
5: Acadia Aspirations
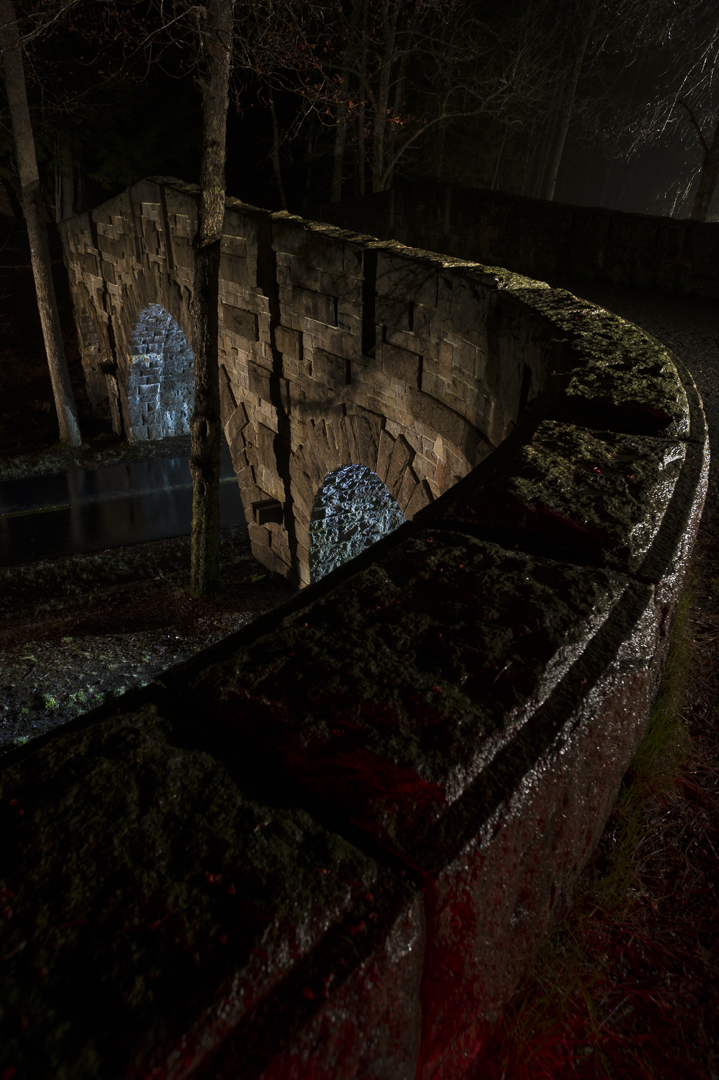
Eagle Lake, Acadia National Park. Nikon D3s with a 28-70mm f/2.8 lens, light-painted with moonlight and a Coast HP7R warmed with a 1/2 CTO gel. 20 seconds, f/8, ISO 3200. © 2017 Chris Nicholson.
Q: My husband and I are planning on going to Acadia. We’ve never been to Maine before. We started looking for places to go and stay mainly for night photography with ocean, rivers or lakes with views in or around the park. The area is huge! Was hoping you could give some suggestions on specific areas to stay and go. — Eileen M.
A: You could drive in pretty much any random direction, and you’ll be fine. 😊
Acadia is actually a pretty small park, relatively. But there’s a lot of diversity there for photography.
Anywhere along the Ocean Road will be great for coastal/ocean scenes, and if you’re up for a 20- to 30-minute walk, then I highly recommend Great Head at sunrise. Good spots more accessible from the car include Boulder Beach, Monument Cove and the cliffs in between; Sand Beach; and anywhere along the road between Sand Beach and where the road goes back into the forest.
For lakes, Jordan Pond and Eagle Lake are my favorites. And again, if you’re up for a hike, then I suggest taking the Jordan Pond loop trail all the way around (know that there is a short section that requires going over rocks). In that same area of the park, I recommend hiking up South Bubble for the views over Jordan Pond and the coast, then to Bubble Rock, then from there up to North Bubble, then along the ridge toward a beautiful granite overlook of Eagle Lake.
From late spring to early autumn, you can shoot the Milky Way over Eagle Lake from the main parking lot at the north end.
Also, if you want a quieter experience, check out the Schoodic Peninsula, which is the only part of the park that’s on the mainland. It’s about a 45-minute drive from Mount Desert Island. It has beautiful coastal scenery along almost the whole loop drive. At low tide you can walk out to Little Moose Island, which is beautiful as well. If there’s a storm while you’re in the area, the point of Schoodic Penninsula is where you want to be the next day to shoot the waves crashing on the rocks, in the last couple of hours of the tide coming in. (Just don’t get too close to the treacherous water.)
For more information, I can recommend two excellent photography guides: Photographing Acadia National Park: The Essential Guide to When, Where, and How and The Photographer’s Guide to Acadia, both written by photographer friends of mine, Colleen Miniuk-Sperry and Mike Hudson, respectively. You could also check out my book, Photographing National Parks, for some more general ideas on Acadia and for tips about scouting your shoot.
As for places to stay: Bar Harbor is the center of activity, and has restaurants, coffee shops, etc. It can also be “bustling” when a cruise ship is anchored. If you’d like a quieter experience, consider Southwest Harbor on the west side of the island (known locally as “the quiet side”).
Finally, it’s good to know that due to the current public health situation, Maine has instituted a temporary 14-day quarantine for visitors from out of state. The order is expected to expire sometime between July 1 and August 31, depending on the outcome of some pending regulatory decisions. You’ll want to confirm the status before traveling. — Chris


