Exposure

Five Questions: Tripod Cleaning, Condensation, Auto ISO and more

We get a lot of questions, we give a lot of answers, and we’re happy to share them all with you.

This installment of our “Five Questions” series features inquiries about keeping your tripod clean, predicting lens condensation, auto ISO, Super Resolution and computer displays.

If you have any questions you would like to throw our way, please contact us anytime. Questions could be about gear, national parks and other photo locations, post-processing techniques, field etiquette, or anything else related to night photography. #SeizeTheNight!


1. Sand & Salt & Tripods

Question:

I’m wondering if I haven’t cleaned or cared for my tripod enough. The lower leg sections have been a bit rough in movement, and although I’ve tried to wipe down or rinse, I do wonder if Moroccan sand, Death Valley dunes, Argentinian salt flats and just plain ol’ dirt is sneaking in. What’s the best way to care for a tripod? — Therese

If you’re shooting in a place like the sand dunes of Morocco, keeping your tripod clean will mean you’ll be keeping your tripod longer.

Answer:

Whenever you bring your tripod to very sandy destinations or submerge the legs in salty water, you should not collapse the legs until you can rinse them with tap water at home or the hotel. Then towel them off and let them air dry completely overnight.

If you needed to collapse your tripod while still in the field, then grit or corrosives may have gotten inside. In that case, try to do a more thorough job rinsing, and perhaps even disassemble the tripod legs and thoroughly rinse them individually.

If you’re in that type of environment for a few days or more, then also give the tripod a full rinse when you come home from your trip. That’s not common practice for most photographers, but it should head off any long-term complications you might otherwise encounter with dust, dirt and salt getting into the locks and inside the legs. — Gabe

2. Condensation Mitigation

Question:

Is there a good method of determining the likelihood of experiencing lens condensation during a night photography session? When (and when not) should I use a lens heater? — Jim B.

The photographic effects of unmitigated condensation.

Answer:

Checking a meteorological site for dew point and expected low temperature is the best way to anticipate a problem with lens condensation. If the expected low temperature is dropping toward the dew point, you will be likely to get moisture on your lens during an evening shoot.

To understand dew point, here is an explanation from the National Weather Service:

“The dew point is the temperature the air needs to be cooled to (at constant pressure) in order to achieve a relative humidity of 100 percent. At this point the air cannot hold more water in the gas form. If the air were to be cooled even more, water vapor would have to come out of the atmosphere in the liquid form, usually as fog or precipitation.”

In short, if the relative humidity is high and the temperature drops, these are the conditions where you are likely to experience condensation.

The best way to prevent condensation on your lenses is to apply your lens heater before condensation starts to form. If you anticipate it to be an issue, put your lens heater on the lens as soon as you take your gear out of the bag, which will ideally prevent the lens from dropping below the dew point. Waiting until after you already see dew on the front element is a recipe for spending most of the evening wiping the lens than shooting with it.

You already have a more high-tech dew solution, but night photographers should know there are also lower-tech alternatives. Simply attaching the lens hood will hold off dew for a while. And we highly recommend our good friend and Night Photo Summit speaker Kevin Adams’ LensMuff (below). It’s an adjustable and effective solution that does not require batteries, but instead relies on economical hand warmers. — Lance

3. Auto ISO a No-Go

Question:

How do I set auto ISO for dusk into night since the exposure changes so much? This also applies to the moonlit skies when the moon when rises or sets during a shoot, changing the ambient light. — Wendy K.

Answer:

I do not use auto ISO for still photography. I’d rather my exposure time (shutter speed) change and not the overall quality of my image (ISO).

However, if we’re talking about making time lapses, that’s another ball of yarn. In that case I might choose auto ISO so that I get more images as it gets darker instead of the fewer that would result from the shutter staying open longer.

If you are serious about day-to-night time lapses (or vice versa), you should consider getting something that does bulb ramping (aka “bramping”), such as the View intervalometer, ElysiaVisuals RamperPro3 Kit or MIOPS Smart+. These take a lot of the guesswork out of the process in lighting conditions that change radically. — Matt

4. When to Sharpen a Supersized Image

Question:

Thank you for the post on Super Resolution. Do you have any suggestions on when to apply sharpening to the original image? Should that be done before upsizing or after? — Kathy E.

Supersizing a Bryce Canyon photograph quadruples its size.

Answer:

When it comes to sharpening, I would always do that last, just like we have always advocated with any post-production process. Lots of things in post-production can change the apparent sharpness of an image, so you want to do those things before sharpening, so that you know how much sharpening you really need.

Likewise, sharpening changes the contrast of pixels at a micro level, and applying changes to those sharpened pixels later can introduce artifacts such as fringing and haloing where there wouldn’t have been any if your order of processing decisions had been different.

Always sharpen last. — Tim

5. Monitors of Mention

Question:

When Chris and Tim did the photo feedback session following their presentation at the Out of Chicago In-Depth conference, they mentioned a monitor brand that they are both happy with. If you would be so kind, please let me know that brand. I may be getting due for a monitor replacement. — Donald

Answer:

Tim and I both use BenQ monitors, in particular the SW2700PT (recently replaced in their lineup with the SW270C), which is designed specifically for photography. It’s a 27-inch display, which is plenty big for photo editing. Also, it covers 99 percent of the Adobe RGB color space, which is excellent for producing accurate color.

Another great feature is this: If you want to dig really deep on color accuracy, you can take advantage of BenQ monitors’ ability to store calibration settings right inside the display. This means you can set the monitor to make the color adjustments that result from your calibration profile, rather than having your computer’s operating system make those adjustments. This is referred to as “hardware calibration,” as opposed to the more commonly used “software calibration.” For more detail, you can read about this on BenQ’s website, but the takeaway is that this approach gives you better color depth, and theoretically means you won’t need to calibrate as often. — Chris

Chris Nicholson is a partner and workshop leader with National Parks at Night, and author of Photographing National Parks (Sidelight Books, 2015). Learn more about national parks as photography destinations, subscribe to Chris' free e-newsletter, and more at www.PhotographingNationalParks.com.

UPCOMING WORKSHOPS FROM NATIONAL PARKS AT NIGHT

Which Moon Phases are Best for Different Kinds of Night Photography?

Don’t go ’round tonight
It’s bound to take your life
There’s a bad moon on the rise
— John Fogerty

A bad moon may be on the rise. At least for an unprepared photographer. In addition to werewolves, waves and ancient planting customs, the phase of the moon has a strong influence on our night photography. Should we plan our shoots around the full moon? The first-quarter moon? Or is better to use the new moon? How do I plan for the third-quarter moon, and what does that even mean?

If you find yourself asking these questions, you’re not alone. The lexicon of the lunar cycle can be tricky sometimes, but the knowledge is helpful for creating your best nocturnal images. Why? Because different moon phases illuminate the night to different degrees and in different ways, and therefore different phases lend themselves to some kinds of night photography better than others.

To help make sense of the possibilities, here’s a brief primer on the phases of the moon and a guide to which types of photography are better suited for each.

Phasing In

The four distinct moon phases are new, first quarter, full and third quarter. It takes roughly one month for the moon to complete the full cycle from new to full and back to new. This means there is roughly one week between each full phase.

New Moon

The new moon could also be thought of as “no moon.” Because the moon is not visible to us, this phase provides the darkest skies and the least amount of light.

New-moon nights are great for capturing single-exposure star trails. Because there is no light in the sky (provided you are not near a city) you can leave your shutter open for hours without danger of overexposing. This elongated shutter time produces extremely long star trails. This is also a great time to capture those concentric rings around the North Star!

The new moon is also a great opportunity to capture the Milky Way—the darker the sky, the more dim stars we see.

First Quarter Moon

As the cycle progresses, the moon becomes a small visible sliver. We call this a crescent moon. Because it’s on the way to becoming “larger,” it’s called a waxing crescent.

The waxing crescent turns into the first quarter moon—the first full phase after the new moon. The name for this phase is a little confusing because at this point the moon is what most of us consider half full.

Waxing-crescent and half-moon evenings are still good for star trails—even single-exposure star trails. However, the closer the moon is to first quarter, the more light will “spill” into the sky, making the sky brighter. The somewhat lighter sky tends to hide the dimmest stars. It also means you can’t leave your shutter open all night long. Exposures of 15 minutes or so are still achievable, though, providing enough time to create star trails of acceptable length.

Waxing crescent moon. 20 minutes, f/2.8, ISO 100. The illumination on the mountains was provided by the city lights of nearby Sedona, Arizona.

Waxing crescent moon. 20 minutes, f/2.8, ISO 100. The illumination on the mountains was provided by the city lights of nearby Sedona, Arizona.

First quarter moons are great for practicing light painting. The longer exposures give you plenty of time to move around the scene illuminating your subject. But wait, can’t you light paint on new-moon nights? Sure! The only problem is that it’s completely dark and moving around the scene can be difficult. Most of the time you wouldn’t want to use your flashlight to light the way, as that illumination would become an unintended and unwelcome part of your scene. (See “Staying Invisible While Light Painting—The Art of Not Being Seen.”) Oftentimes first quarter moons provide just enough light to get around, without overpowering the sky and hiding dim stars.

First quarter moon. 10 minutes, f/5.6, ISO 200. In Arches National Park, Balanced Rock in the foreground is gently illuminated by the half moon.

First quarter moon. 10 minutes, f/5.6, ISO 200. In Arches National Park, Balanced Rock in the foreground is gently illuminated by the half moon.

Full Moon

On its journey from half to full, the moon becomes three-quarters illuminated, which is a called a gibbous moon. Because it is still getting larger, it’s called a waxing gibbous.

Approximately two weeks after (and before) the new moon, we are treated to the full moon in all of its glory. The full moon is a great time for mixing light painting and the night sky.

Full-moon nights can be so bright that it’s sometimes easy to forget it’s no longer daytime! It’s amazing how bright it is once our eyes become adjusted. This extra brightness makes it quite easy to move about the scene and can be crucial when trying to light paint from many different angles while navigating difficult terrain. It’s hard enough to concentrate on the timing and technique of light painting without adding in the concern of tripping or running into a tree because you can’t see.

Full moon. 20 exposures at 3 minutes, f/5.6, ISO 100 stacked in Photoshop. I painted the foreground tree with a Coast HP7R flashlight covered with an orange gel.

Full moon. 20 exposures at 3 minutes, f/5.6, ISO 100 stacked in Photoshop. I painted the foreground tree with a Coast HP7R flashlight covered with an orange gel.

So what’s the downside of shooting under a full moon? The very same brightness that makes it easy to see and move around also forces us into shorter exposure times. Instead of 15 minutes or half-hour exposures, you’ll need to be shooting 2- to 5-minute exposures. Star trails will be significantly shorter in length when shooting so short.

Is this is a problem? Absolutely not. For many photographers, though, longer trails are the desired outcome. Many folks feel that straight shots of just these short trails and a distant silhouette seem a bit boring. I agree, but I also find that the shorter trails are just fine as long as there is something else of interest in the scene. An interesting moonlit foreground, light-painted subjects, or even man-made illumination or car trails can do the trick.

The extra brightness of the sky in this phase also means that we’ll capture fewer stars.

Brighter sky = fewer stars
Darker sky = more stars

The trick here is to use wider apertures.

Wider apertures = more stars
Smaller apertures = fewer stars

Of course using wider apertures will also shorten your overall exposure, meaning shorter trails.

For that reason, "star stacking" is a common full-moon photography technique. Star stacking is the process of making many shorter exposures in the field and then stacking them together in post using Photoshop or another computer program. While no solution is perfect for all scenarios, star stacking is a great way to achieve longer star trails when the sky is too bright to leave your shutter open for 15 to 30 minutes.

Third Quarter Moon

As the week advances, the full moon starts to lose illumination and once again becomes three-quarters illuminated. Just like the partial moon earlier in the month, we call this phase a gibbous. But because the moon is starting to disappear or diminish, it’s called a waning gibbous.

The waning gibbous of course “shrinks” in size until it’s only half illuminated entering the next full phase, which is called the third quarter. From a photographic standpoint, the techniques and strategies for the third quarter moon are the same as for the first quarter. Moderately dark skies allow for long exposures, and a dimly lit landscape allows you to move about and light paint in relative safety.

Third quarter moon. 8 minutes, f/5.6, ISO 400.

Third quarter moon. 8 minutes, f/5.6, ISO 400.

As the moon loses illumination and continues through its final phase, it becomes what’s called a waning crescent. This last light of the night sky eventually disappears altogether and returns to its new moon (no moon) phase.

Phasing Out

The night sky is miraculous and a wonder to behold, and each phase of the moon offers unique opportunities to the prepared night photographer.

All disciplines of photography benefit from an intimate familiarity with the subject matter. Night photography is no different. Think about your goals as you plan for your shots. Do you want long star trails and an interesting silhouette? Think about shooting under a new moon. Are you interested in light painting a subject but including the sky? Perhaps first or third quarter moon would be best. Is the moonlit landscape your ultimate goal? Consider planning your shoot around a full moon.

Counter to what John Fogerty and Credence Clearwater Revival might have you believe, there is no such thing as a “bad” moon, at least for photography. You can shoot under any moon, as long as you remember which phases are best for different techniques.

For a great explanation of the moon phases complete with diagrams, check out the website MoonConnection.com. For more on light painting, check out Tim’s ebook, The Magic of Light Painting. For more on shooting at night, check out Night Photography: From Snapshots to Great Shots that Tim co-authored with our colleague Gabriel Biderman.

Tim Cooper is a partner and workshop leader with National Parks at Night. Learn more techniques from his book The Magic of Light Painting, available from Peachpit.

UPCOMING WORKSHOPS FROM NATIONAL PARKS AT NIGHT

Expose to the Left: How to Really Maximize Image Quality at Night

Note: It has come to our attention that some readers are not seeing the photos in this post as intended. Please know you are not alone, that others have reported the same. See the Comments section below for more information.


We hear everyone in the photography industry talking about image quality, image quality, image quality. We especially hear about this in any circle of people chatting (or writing) about night photography. Conversations (and books, articles and blog posts) are rife with opinions and advice about how to push the limits of our cameras and lenses in order to get the best image quality in low-light situations.

But at what cost? We get so caught up in capturing all this dim light that we don’t notice that we’re making decisions that in every other photography situation are actually detrimental to image quality:

  • opening the aperture as wide as it will go
  • leaving the shutter open for long periods of time
  • jacking up the ISO to numbers far beyond what the photographers of yesteryear would even believe as factual

Ideally, night photographers need to be thinking the other way around: How do we improve our low-light photos in a way that capitalizes on everything we know about shooting in daylight? The answer is straightforward, and it all boils down to shooting with this philosophy, with this technique: Expose To The Left, otherwise known as ETTL.

What is ETTL?

Like its fraternal twin ETTR (Expose To The Right), ETTL is a way to maximize image quality, except while ETTR is used in daylight, ETTL is used at night.

How does it work? It’s simple. With your camera set to Matrix metering, shoot a test exposure that’s probably a couple of stops darker than the meter reading. You can just guess—accuracy doesn’t matter, kind of like with print film. Looking at your histogram, adjust the exposure downward and keep firing test frames until all the data is crammed up against the left side, or the “shady side,” of the graph. We push that histogram over by using a smaller aperture, a faster shutter speed, a lower ISO.

A perfect example is a photo I made in Gates of the Arctic National Park, of the wingless bats that live in Inverted Canyon. I was shooting under a new moon. My first-guess exposure was 20 seconds, f/2.8, ISO 6400, which resulted in a rather “traditional” histogram, as seen in Figure 1.

Figure 1. Initial, best-guess test exposure.

Figure 1. Initial, best-guess test exposure.

But I didn’t want traditional—I wanted ETTL and all the advantages that come with it. So I closed down the aperture to f/5.6 and dropped the ISO to 1600. That gave me a better ETTL histogram (Figure 2), but still not good enough.

Figure 2. The histogram of the same scene, stopped down quite a bit.

Figure 2. The histogram of the same scene, stopped down quite a bit.

So I cut another two stops of light by dropping my ISO again, to 800, and increasing the shutter speed to 10 seconds. The resulting histogram (Figure 3) was certainly close—close enough to be effective, in fact. But it resulted in what I call a “Thick Shady” histogram, wherein you can see that all the image data is pushed to the left, but you can still make out a slope of data curving up on that left side. By increasing my shutter speed to 2 seconds, I was able to narrow that to a slim line of histogram data (Figure 4)—or what’s known as “Slim Shady.”

Figure 3. My third exposure—not a bad one for ETTL, but we can get it even better. …

Figure 3. My third exposure—not a bad one for ETTL, but we can get it even better. …

Figure 4. Histogram of my final “Slim Shady” exposure. Perfect ETTL.

Figure 4. Histogram of my final “Slim Shady” exposure. Perfect ETTL.

What did I gain by doing this? Consider my initial, traditional-histogram exposure of 20 seconds, f/2.8, ISO 6400:

  • That 20 seconds introduced long-exposure noise.
  • That f/2.8 gave me paper-thin depth of field.
  • That ISO gave me high ISO noise.

All of which are bad for image quality.

However, my ETTL exposure was 2 seconds, f/5.6, ISO 800, which fixed every one of the dire consequences of that first exposure. You can see how sharp the final image is in Figure 5; no long-exposure noise, adequate depth of field, no high ISO noise. Moreover, f/5.6 is the sharpest aperture for the Nikon lens I was using, which further improved the final image. Click/tap to see the photo at full size. Not a blurry pixel in sight. Not a spot of noise. The image quality is perfect.

Figure 5. Wingless bats in Inverted Canyon, Gates of the Arctic National Park. 2 seconds, f/5.6, ISO 800. (Click/tap for larger view.)

Ancillary Advantages of ETTL

In addition to image quality, ETTL has other advantages.

As crazy as it sounds, you can “freeze” action even in the dark. Because you’re not worried about all the tedious challenges of maintaining highlights, midtones and shadow details, you can manipulate your shutter speed to almost anything you want. For example, while doing a night shoot at Upward Falls in North Cascades National Park, I didn’t want motion blur in the water. But because I was using ETTL, I was able to shoot at 1/60, f/4.5, ISO 2000. Subsequently, I got great image quality while freezing the action of the falls (Figure 6) despite the low light.

Figure 6. Upward Falls, North Cascades National Park. 1/60, f/4.5, ISO 2000. (Click/tap for larger view.)

Another side benefit of ETTL is that you can hand-hold your camera when making night images. Even under the new moon! Because you can shoot at those higher shutter speeds, you don’t really need to carry a tripod into the field with you. However, all five of us at National Parks at Night are Manfrotto Ambassadors, so we avidly recommend that you carry one anyway.

Drawbacks of ETTL

As great as ETTL is for improving image quality in night photography, there are some obstacles to work around.

For one, this exposure technique gets trickier when you’re light painting. It’s especially troubleshome when you’re using a sunbeam-like flashlight such as the Coast HP7R, because it completely ruins your hard-achieved left-biased exposure. How? By adding light. But don’t fretthere’s an easy solution.

Figure 7. Coast HP7R flashlight with snoot by Light Painting Brushes, modified for ETTL light painting.

Figure 7. Coast HP7R flashlight with snoot by Light Painting Brushes, modified for ETTL light painting.

If you’re using ETTL to determine exposure for a scene you need to light-paint, then get a snoot that fits onto the end of your flashlight, such as the Universal Connector made by Light Painting Brushes. Cover the far opening of your flashlight with a thick and subsequently expensive layering of gaffer’s tape (Figure 7, above). With this modified snoot on your flashlight, you won’t impair your ETTL exposure. This is exactly what I did to light-paint a night wildlife scene in Voyageurs National Park (Figure 8).

Figure 8. In Voyageurs National Park I got an opportunity to photograph these greater horned marmots. Unfortunately the moon was new, and it was winter in northern latitudes, so I needed to light-paint my subject—obviously quite cautiously. The need for light painting introduced a further obstacle to achieving a good ETTL exposure, which I circumvented by using the snoot method described above. (Click/tap for larger view.)

Another option is to apply a thick layer of black paint over the front of the flashlight lens. Just be sure to use removable paint, so you can peel it off, lest you have to head back down the trail in the dark. 

Along the same lines, a strobe is even more detrimental to ETTL, because even though that light burst comes and goes in a flash, it’s really bright. For this situation, I suggest foraging your closet for the case your strobe came in when you bought it. Then put the strobe in that case before firing it. Even better, see if you can buy an extra case and put the flash in both. Extras are pretty easy to find on eBay. (Well, maybe not now that I’m sharing this tip.)

Lastly, pixel-peepers will notice that the ETTL approach diminishes highlights a bit. But don’t worry about it. Just like Meghan Trainor sings in her catchy pop song—“It’s all about that bass, about that bass, no treble”—it’s similar for night photography. It’s all about the shadows, about the shadows, no highlights. After all, night photography is all about photographing within the biggest shadow in the whole world. Seize the shadow.

A Final Note on ETTL

Some photographers accomplish the ETTL effect solely in post-production. In other words, they photograph the scene with a “traditional” exposure. Then they import the photo to Lightroom, pull the Exposure slider all the way to the left, and then reduce the Shadows setting a tad. But the effect just isn’t the same. Get it right in-camera.

I suspect that the ETTL technique will be new to many people reading this, but I promise two things: 1) It will result in better image quality in your night photos. 2) It’s easy to learn, and fun!

If you decide to experiment with ETTL, please do come back and share your results in the Comments section.

Note: It has come to our attention that some readers are not seeing the photos in this post as intended. Please know you are not alone, that others have reported the same. See the Comments section below for more information.

Chris Nicholson is the author of Photographing National Parks (Sidelight Books, 2015). Learn more about national parks as photography destinations, subscribe to Chris' free e-newsletter, and more at www.PhotographingNationalParks.com.

UPCOMING WORKSHOPS FROM NATIONAL PARKS AT NIGHT

A Guide to Getting Started With the Art of Light Painting — Part II

This is the second part of Tim Cooper’s primer on light painting. For the introductory materials for this topic, see “Part I.”

In my last post I talked about the basics of light painting. Now let’s dig a little deeper to see how we build an exposure for a light-painted photograph. This technique can be applied to many images, both simple (like the one in the examples later) and complex (like Figure 1).

Figure 1. ISO 100, f/8, 4 minutes. Nikon 14-24mm f/2.8 ED lens, Nikon D4, Coast HP5R flashlight.

Figure 1. ISO 100, f/8, 4 minutes. Nikon 14-24mm f/2.8 ED lens, Nikon D4, Coast HP5R flashlight.

This photo is a more complex light painting scenario that involved a lot of testing and different components of painting. But it started with the same concepts as below, and I worked out the final exposure in the exact same way.


Ambient Light and Test Exposures

For most light painting compositions, you’ll want an exposure between 30 seconds and 3 minutes to allow time to illuminate your subject. More complex scenes may require more time.

The first step is to establish your ambient exposure and composition using a high ISO. This will allow you to make test frames more quickly, because your shutter speeds will be in seconds rather than minutes. (To learn more about this, see Lance Keimig’s post from April, “Save Time by Using High ISO Testing to Set Up Your Night Shots.”

A great trick to use is often referred to as the Six Stop Rule, which says that when you close down your exposure by six stops, your original (test) shutter speed in seconds translates to the same shutter speed in minutes. For example, let’s assume you like an ambient-light test exposure that you made at ISO 6400 with a shutter speed of 1 second. You can then calculate your actual exposure—one long enough to allow for light painting—by closing down six stops of ISO and shooting for 1 minute rather than 1 second. Here are the steps, one stop at a time:

ISO 6400 for 1" equals
ISO 3200 for 2" =
ISO 1600 for 4" =
ISO 800 for 8" =
ISO 400 for 16" =
ISO 200 for 30" =
ISO 100 for 1 minute

The 1-minute exposure at ISO 100 now gives you time to illuminate your subject with your flashlight.

If you need even more time, remember that changing the aperture can also help. That 1-minute exposure could also be a 2-minute exposure if you close down your aperture by one stop (e.g., f/4 closes down to f/5.6, or f/5.6 closes down to f/8). Remember, though: Closing down your aperture makes the hole smaller, which in turn makes your flashlight “less efficient.” In cases where your flashlight is too bright, this will be to your advantage; in cases where your flashlight is barely bright enough, this will be a detriment.

Here is an example of how I used the Six Stop Rule to begin my light painting process.
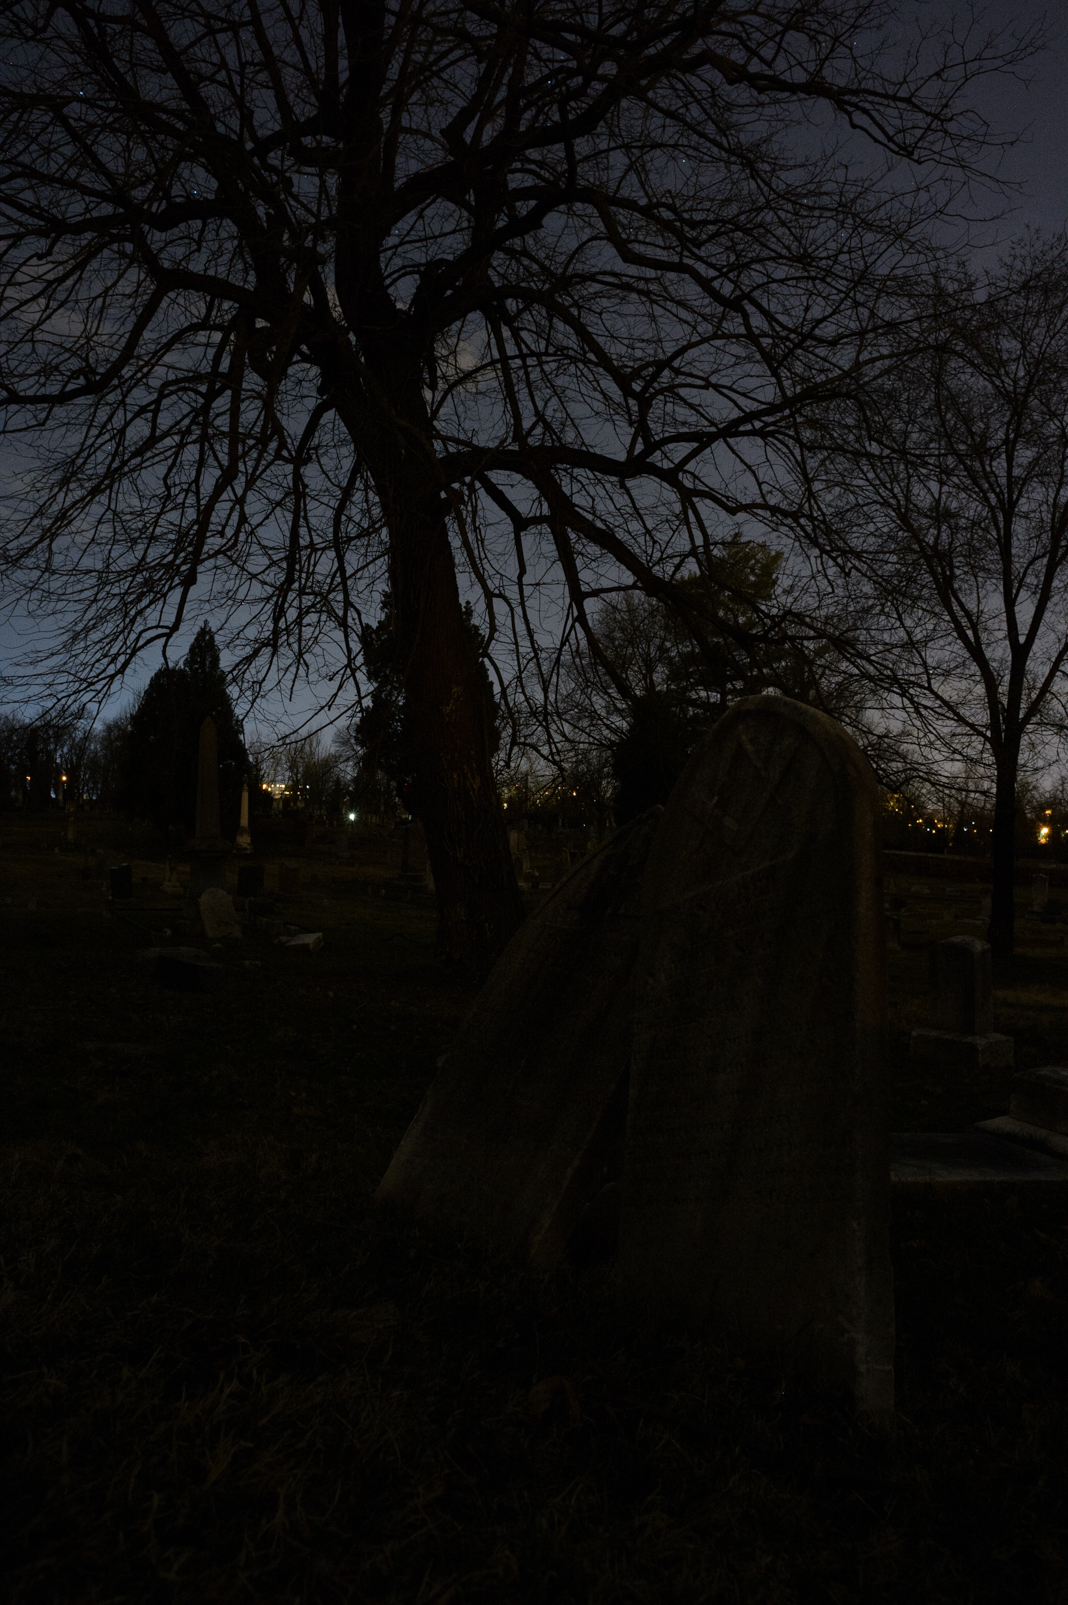
I began by putting my camera into Manual exposure mode with Matrix metering. Next, I set my ISO to 6400 and my aperture to f/11. I pointed the camera to the sky and adjusted my shutter speed so that the indicated meter read -1 (Figure 2). This setting makes the sky appear darker than at midday, but not black.

Figure 2.

Figure 2.

The resulting image (Figure 3) shows how the sky has a night feel and the foreground is completely black. This exposure was 4 seconds at f/11 with an ISO of 6400. The -1 setting on the sky is typical for me when shooting around city light, but is certainly not mandatory. You can experiment with different brightness levels to suit your taste.

Figure 3. ISO 6400, f/11, 4 seconds. 24mm f/2.8D Nikon Lens, Nikon D4, Coast HP5R flashlight.

Figure 3. ISO 6400, f/11, 4 seconds. 24mm f/2.8D Nikon Lens, Nikon D4, Coast HP5R flashlight.

Next, I used the Six Stop Rule to calculate my final exposure. Again, the Six Stop Rule states that 1 second at ISO 6400 equals 1 minute at ISO 100. My test exposure was 4 seconds, so my final exposure was 4 minutes. Figure 4 shows the 4-minute exposure with my first attempts at painting the head stones.

Figure 4.

Figure 4.

Add in the Light Painting

At this point it’s not necessary for me to run the full exposure while I test for light painting. I know the sky will look right at the 4-minute exposure, so now I am just testing the light painting. In other words, I’m building the final exposure one piece at a time.

Figure 5 was my next test shot. I painted the front headstones for longer (about 2 seconds for each stone). The total exposure for this shot was only 46 seconds, which makes the sky look black. But again, I’m not concerned about the sky at this point—I am simply trying to get my painting right for the main subject.

Figure 5.

Figure 5.

After a couple of more light painting test shots, I learned that I needed to increase the time I spent painting the front headstones to about 3 seconds each. I then placed my flashlight at a low angle and painted the grass around the stones. Now I had all the information I needed to create the final image, as seen in Figure 6.

Figure 6.

Figure 6.

This was taken using the full exposure of 4 minutes. The full exposure also gave me time to walk back into the scene and paint a few more monuments. Using Photoshop, I cloned out some of the brighter city lights at the rear of the cemetery to make for a less distracting background.

For more information about the equipment mentioned in this post, see the Our Gear page and the following links:

Learn more techniques from Tim Cooper’s book The Magic of Light Painting, available from Peachpit.

Upcoming workshops from National Parks at Night