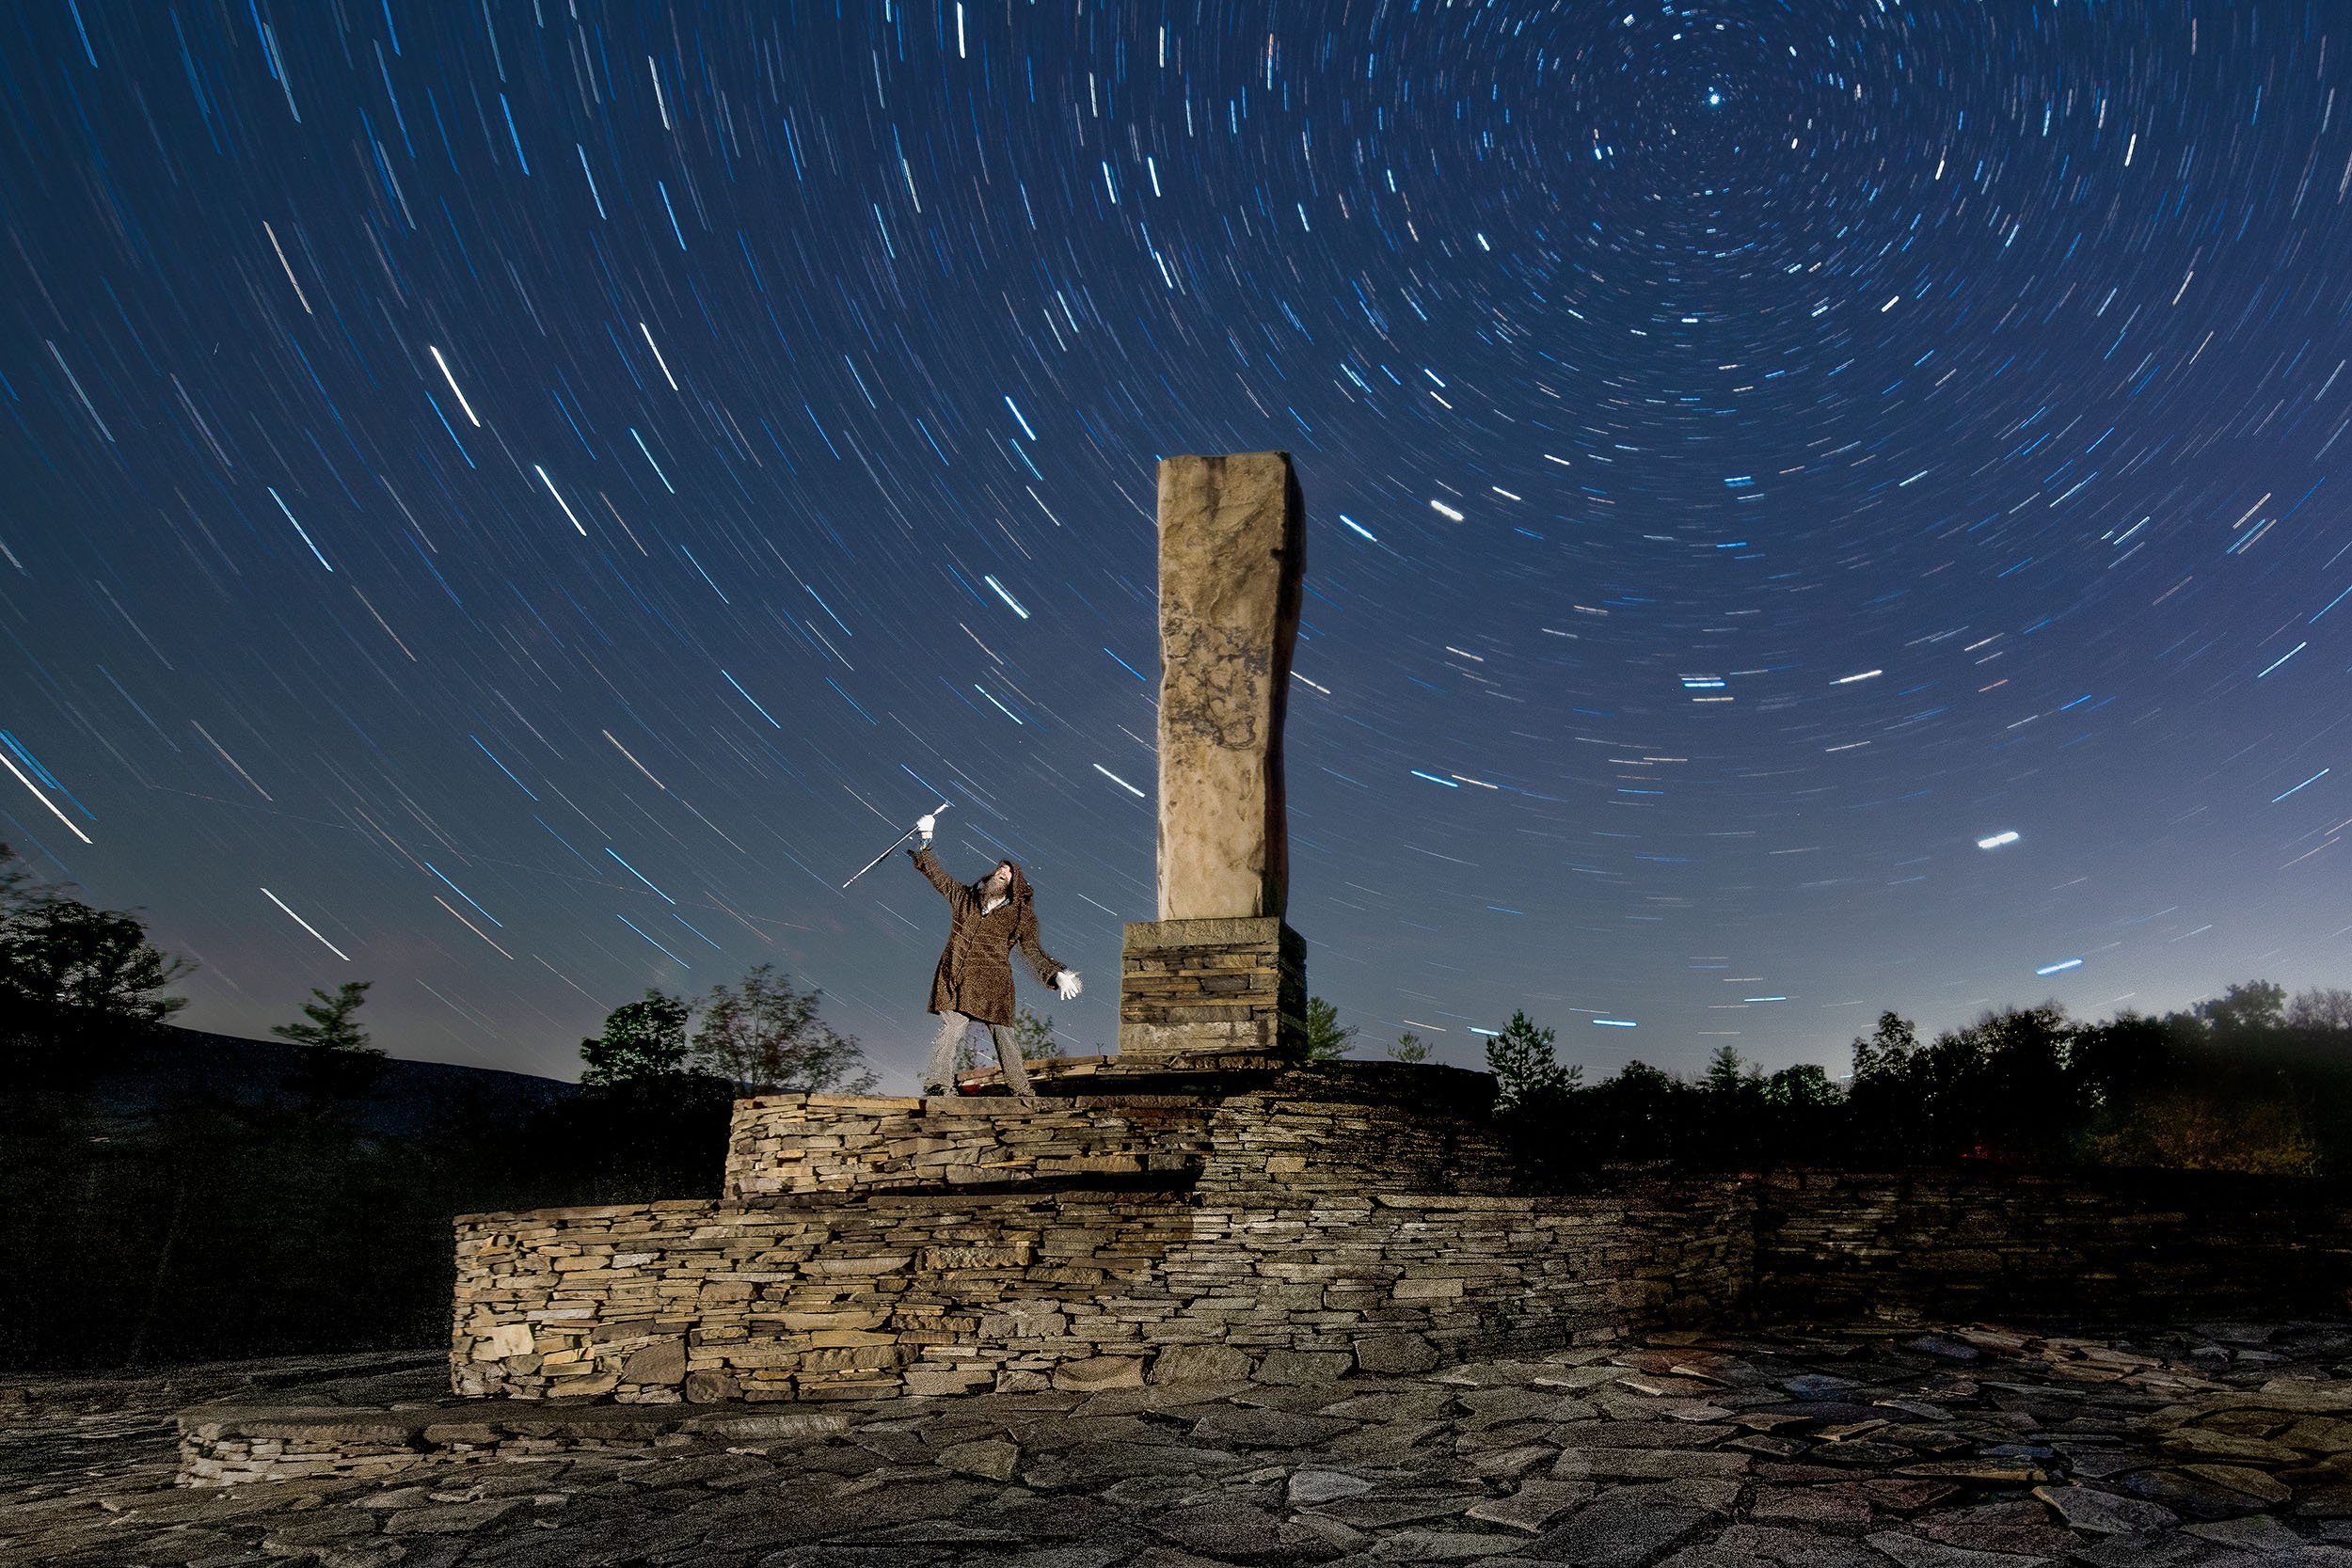
The Night Photographer's Guide to Star Stacking (Part I)

Note: This is the first in a three-part series about creating star trails with the stacking technique. Part I, below, covers how to shoot the raw materials. Come back soon for Part II, in which Tim goes over the required post-production, followed by Part III, in which he shows how to clean up the artifacts of the technique (such as plane trails).

To learn more about night photography techniques that involve photographing with processing in mind, attend our Shoot for the Edit: Colorado workshop in September 2022!


Night photographers are fortunate to have many ways to interpret a subject. The night sky can be captured with a stunning Milky Way core, or as a deep sea of stars that register as thousands of points of light. We can illuminate the foreground to give the sky a sense of place, use filters to give the stars a fantasy look or use longer exposure times to render the stars as trails across the sky.

Star trail photos are fun to shoot, and they bend reality by dilating time in a way that humans can’t otherwise perceive. Yet, shooting star trails is rife with potential obstacles, from camera limitations to stray light and more.

In a series of blog posts that starts today, I’ll show you how to create star trails by using a special technique that works around those potential problems: star stacking. In this first post I’ll discuss how to shoot for star stacking, in the next post I’ll cover how to process the images, and then in a third post I’ll teach how to rid your stacks of plane trails and other artifacts of the process.

Woodstock, New York. Nikon D850 with a Nikon 14-24mm f/2.8 lens. 3 frames shot at 25 seconds, f/4, ISO 100, stacked in Photoshop.

Why to Stack

There are two primary methods of creating star trails: capturing one long exposure or capturing many short exposures and stacking them together in Photoshop or other similar programs. The latter involves more post-production work, so why would we choose that? Let’s take a look at the pros and cons of each method:

One Long Exposure

Advantages:

  • No need for post-processing to create the star trails. All the trails are in the one image.

  • No fussing with a complicated intervalometer. Simply plug in a cable release, set your camera to Bulb, press and lock your cable release, and mark your watch. Turn off the cable release when the time is up. Easy.

Disadvantages:

  • You’ll need to use Long Exposure Noise Reduction (LENR). This is the feature that we turn on when shooting very long exposures (i.e., more than a few minutes). The problem is that this setting renders most cameras unusable for twice the exposure time. Setting your camera to shoot an hourlong exposure renders your camera unusable for anything else for 2 hours!

  • You may not always be able to shoot long exposures when there is a lot of moonlight or artificial illumination, because all that light can blow out your exposure.

  • With one long exposure you risk having your image ruined by any number of lighting mishaps. Someone could walk through your scene with a flashlight. Cars could illuminate parts of the landscape you preferred to be dark. The list goes on and on.

Multiple Shorter Exposures

Advantages:

  • No need for LENR. (In fact, you can’t even use it, because turning on the feature would create gaps in your star trails in the final stacked image.)

  • It’s easier to remove unwanted lights from any individual frame, or to mask in just one clean foreground.

  • It can be easier to incorporate light painting into your image without the worry of ruining your entire shot. In fact, you could even shoot different takes on your light painting and mask in your favorite.

Disadvantages:

  • Slightly harder to set up the exposures. You’ll need to use either your camera’s built-in intervalometer or purchase a separate corded or cordless intervalometer.

  • It requires more time in front of the computer.

Yellowstone National Park. Nikon Z 6 with a Nikon 14-24mm f/2.8 lens. 8 frames shot at 5 minutes, f/4, ISO 400, stacked in Photoshop.

The decision to shoot one long exposure or shoot many shorter exposures and stack them together during post-processing is often a matter of circumstances rather than a simple preference. You simply can’t make superlong exposures when there is a lot of moonlight. Also, if a lot of other people are around, you’d be wise to break up the total exposure time into smaller segments just to safeguard against accidents.

All in all, shooting shorter exposures and stacking them is now the more common way of creating star trails.

Shooting Star Stacks Step by Step

Capturing the night sky can be complex, with many different considerations to create the final image, and shooting a star stack certainly doesn’t make it simpler. Here’s a basic outline of necessary steps:

  1. Set White Balance.

  2. Set ISO.

  3. Determine and set aperture and shutter speed.

  4. Turn off noise reduction.

  5. Compose.

  6. Focus.

  7. Run a high ISO test.

  8. Calculate the final exposures.

  9. Program your intervalometer.

  10. Shoot.

Camera Settings

With any type of photography—day or night—we need to adjust our camera’s settings to suit the situation. Figure 1 shows a good general place to start for your nighttime test shots:

Figure 1.

High ISO Test Shots

Once your camera is set, you have a composition and you’ve focused your stars (see Chris Nicholson’s great post “8 Ways to Focus in the Dark”), it’s time to make some test exposures. The test exposures will help you fine-tune your composition and ensure your stars are sharp. We run these tests at high ISOs so that we can run them faster—we don’t want to waste time running tests that are 5 minutes each!

It’s easiest to start with a shutter speed that will render the stars as dots rather than dashes. This will help you determine if the stars are actually sharp. (It will also render a usable star point or Milky Way shot, so you’ll have that in the bag too!)

Calculating the proper shutter speed is best done using the night photographer’s best friend, PhotoPills. Open the Spot Stars pill (Figure 2). First, near the top right, choose the camera you’re using. (You can set the default in Settings, which is a great shortcut if you use PhotoPills a lot.) Then input your focal length and aperture.

Figure 2.

Figure 3.

PhotoPills will make its calculations and supply you with an ideal shutter speed according to the NPF Rule. This will be the maximum time you can open your shutter and still keep your stars as dots rather than dashes. For example, with my Nikon Z 6II and a 14mm lens, the NPF Rule tells me that I shouldn’t shoot any longer than 18.48 seconds (Figure 3). For the purpose of these test shots, I would round up to 20 seconds. (But if I was shooting for the Milky Way, I would round down to 15 seconds.)

At this point, you can fire a test shot. Zoom in on your LCD to ensure your stars are sharp.

Once your test exposures have determined that you have good focus, you no longer have to adhere to the NPF rule—after all, our eventual goal is to get those stars to trail. If test shots reveal sharp stars but an underexposed image, then increase your shutter speed since, again, trailing stars are your goal anyway.

Calculating Shutter Speed

Our aim is to star-stack, but we need to know how long in total we want to shoot. It’s best to start by figuring what one long exposure would be, and then work back to break it up into individual exposures.

Let’s assume the camera is now set to 30 seconds, f/2.8, ISO 6400. Let’s turn those points into some trails. To do that we’ll need to increase the shutter speed, and to compensate we’ll lower the ISO.

The Six-Stop Rule (Figure 4) is an easy way to make these changes. This rule states that for a given exposure, the amount of time in seconds at ISO 6400 equals that amount of time in minutes at ISO 100. (The difference between ISO 6400 and 100 is six stops, thus the name of the rule.) In our example exposure from above, 30 seconds at ISO 6400 translates into 30 minutes at ISO 100.

Figure 4.

Of course, maybe we don’t want to keep the shutter open for 30 minutes. That’s OK. The Six-Stop Rule has given us our base long exposure, and we can work our way up from there. Again sticking with our same example exposure from above, other usable equivalent exposures can be seen in Figure 5.

So if you wanted one long exposure to capture star trails you could use 30 minutes at ISO 100. If you wanted a longer exposure, you could stop down your aperture one stop and keep your shutter open for an hour. But for this tutorial on star stacking, we want more, shorter exposures.

Figure 5.

Calculating Shutter Speed for Stacking

You’ll use the same test shot data to calculate exposures for stacking.

Our initial test exposure of was 30 seconds, f/2.8, ISO 6400. This means we could shoot any of the following combinations and get the same overall brightness:

  • 30 minutes at ISO 100

  • 15 minutes at ISO 200

  • 8 minutes at ISO 400

  • 4 minutes at ISO 800

  • 2 minutes at ISO 1600

  • 1 minute at ISO 3200

The shorter of those combinations by themselves would not produce very long star trails. But when we shoot a lot of frames and stack them together later, these combinations will create trails as long as we want them to be. For example, to make an hourlong trail, you could:

  • shoot 15 4-minute exposures at ISO 800

  • shoot 30 2-minute exposures at ISO 1600

  • shoot 60 1-minute exposure at ISO 3200

You’re really free to choose whatever combination works best to achieve your vision.

Just keep one thing in mind: Because you can’t use LENR with this technique, you’ll want to keep your shutter speed short enough to avoid long exposure noise. This limit is different for different cameras in different conditions, so it’s a good idea to test your camera to learn how it behaves. But as a benchmark, a 2-minute shutter speed is safe for many cameras in most situations. If you don’t know for sure that your shutter can stay open longer without resulting in long exposure noise, then just stick with that 2-minute limit and you should be OK.

Death Valley National Park. Nikon Z 6 with a Nikon Z 14-24mm f/2.8 lens. 53 frames shot at 30 seconds, f/2.8, ISO 160, stacked in Photoshop.

Shooting the Raw Materials

We’re finally ready to make pictures!

When shooting the series of shorter exposures, you’ll want to shoot them consecutively with as little time in between each shot as possible. To achieve this you’ll take two steps:

  1. Turn off Long Exposure Noise Reduction. Again, LENR takes time after each exposure, which would create gaps in your stacked trails.

  2. Program your intervalometer. (Matt Hill has an excellent video on setting up an intervalometer.) If your camera has a built-in intervalometer and you’re comfortable using it, then of course you may do that. But we find that external intervalometers are usually a little easier to use, and they don’t have the shutter-speed limitations that the internal ones do. A key is to set the interval between your frames to as short as possible in order to minimize those gaps. For most intervalometers, the minimum interval is 1 second, which is short enough to get the job done.

In terms of how many frames to shoot, that depends on how long you want your trails to be. If you want an hour and you’re shooting 5-minute exposures, then you’ll need 12 frames. In that case, you can program your intervalometer to fire 12 times. Or you can set your intervalometer’s number of shots to infinity, and just stop it manually when you feel like you have enough to work with.

Once the intervalometer is set, click the start button, sit back and enjoy the night sky.

And while you’re at it, be sure not to touch your tripod! If your tripod moves even a smidge, your frames won’t align in Photoshop later. That can be fixed, but it’s best not to cause the problem to begin with.

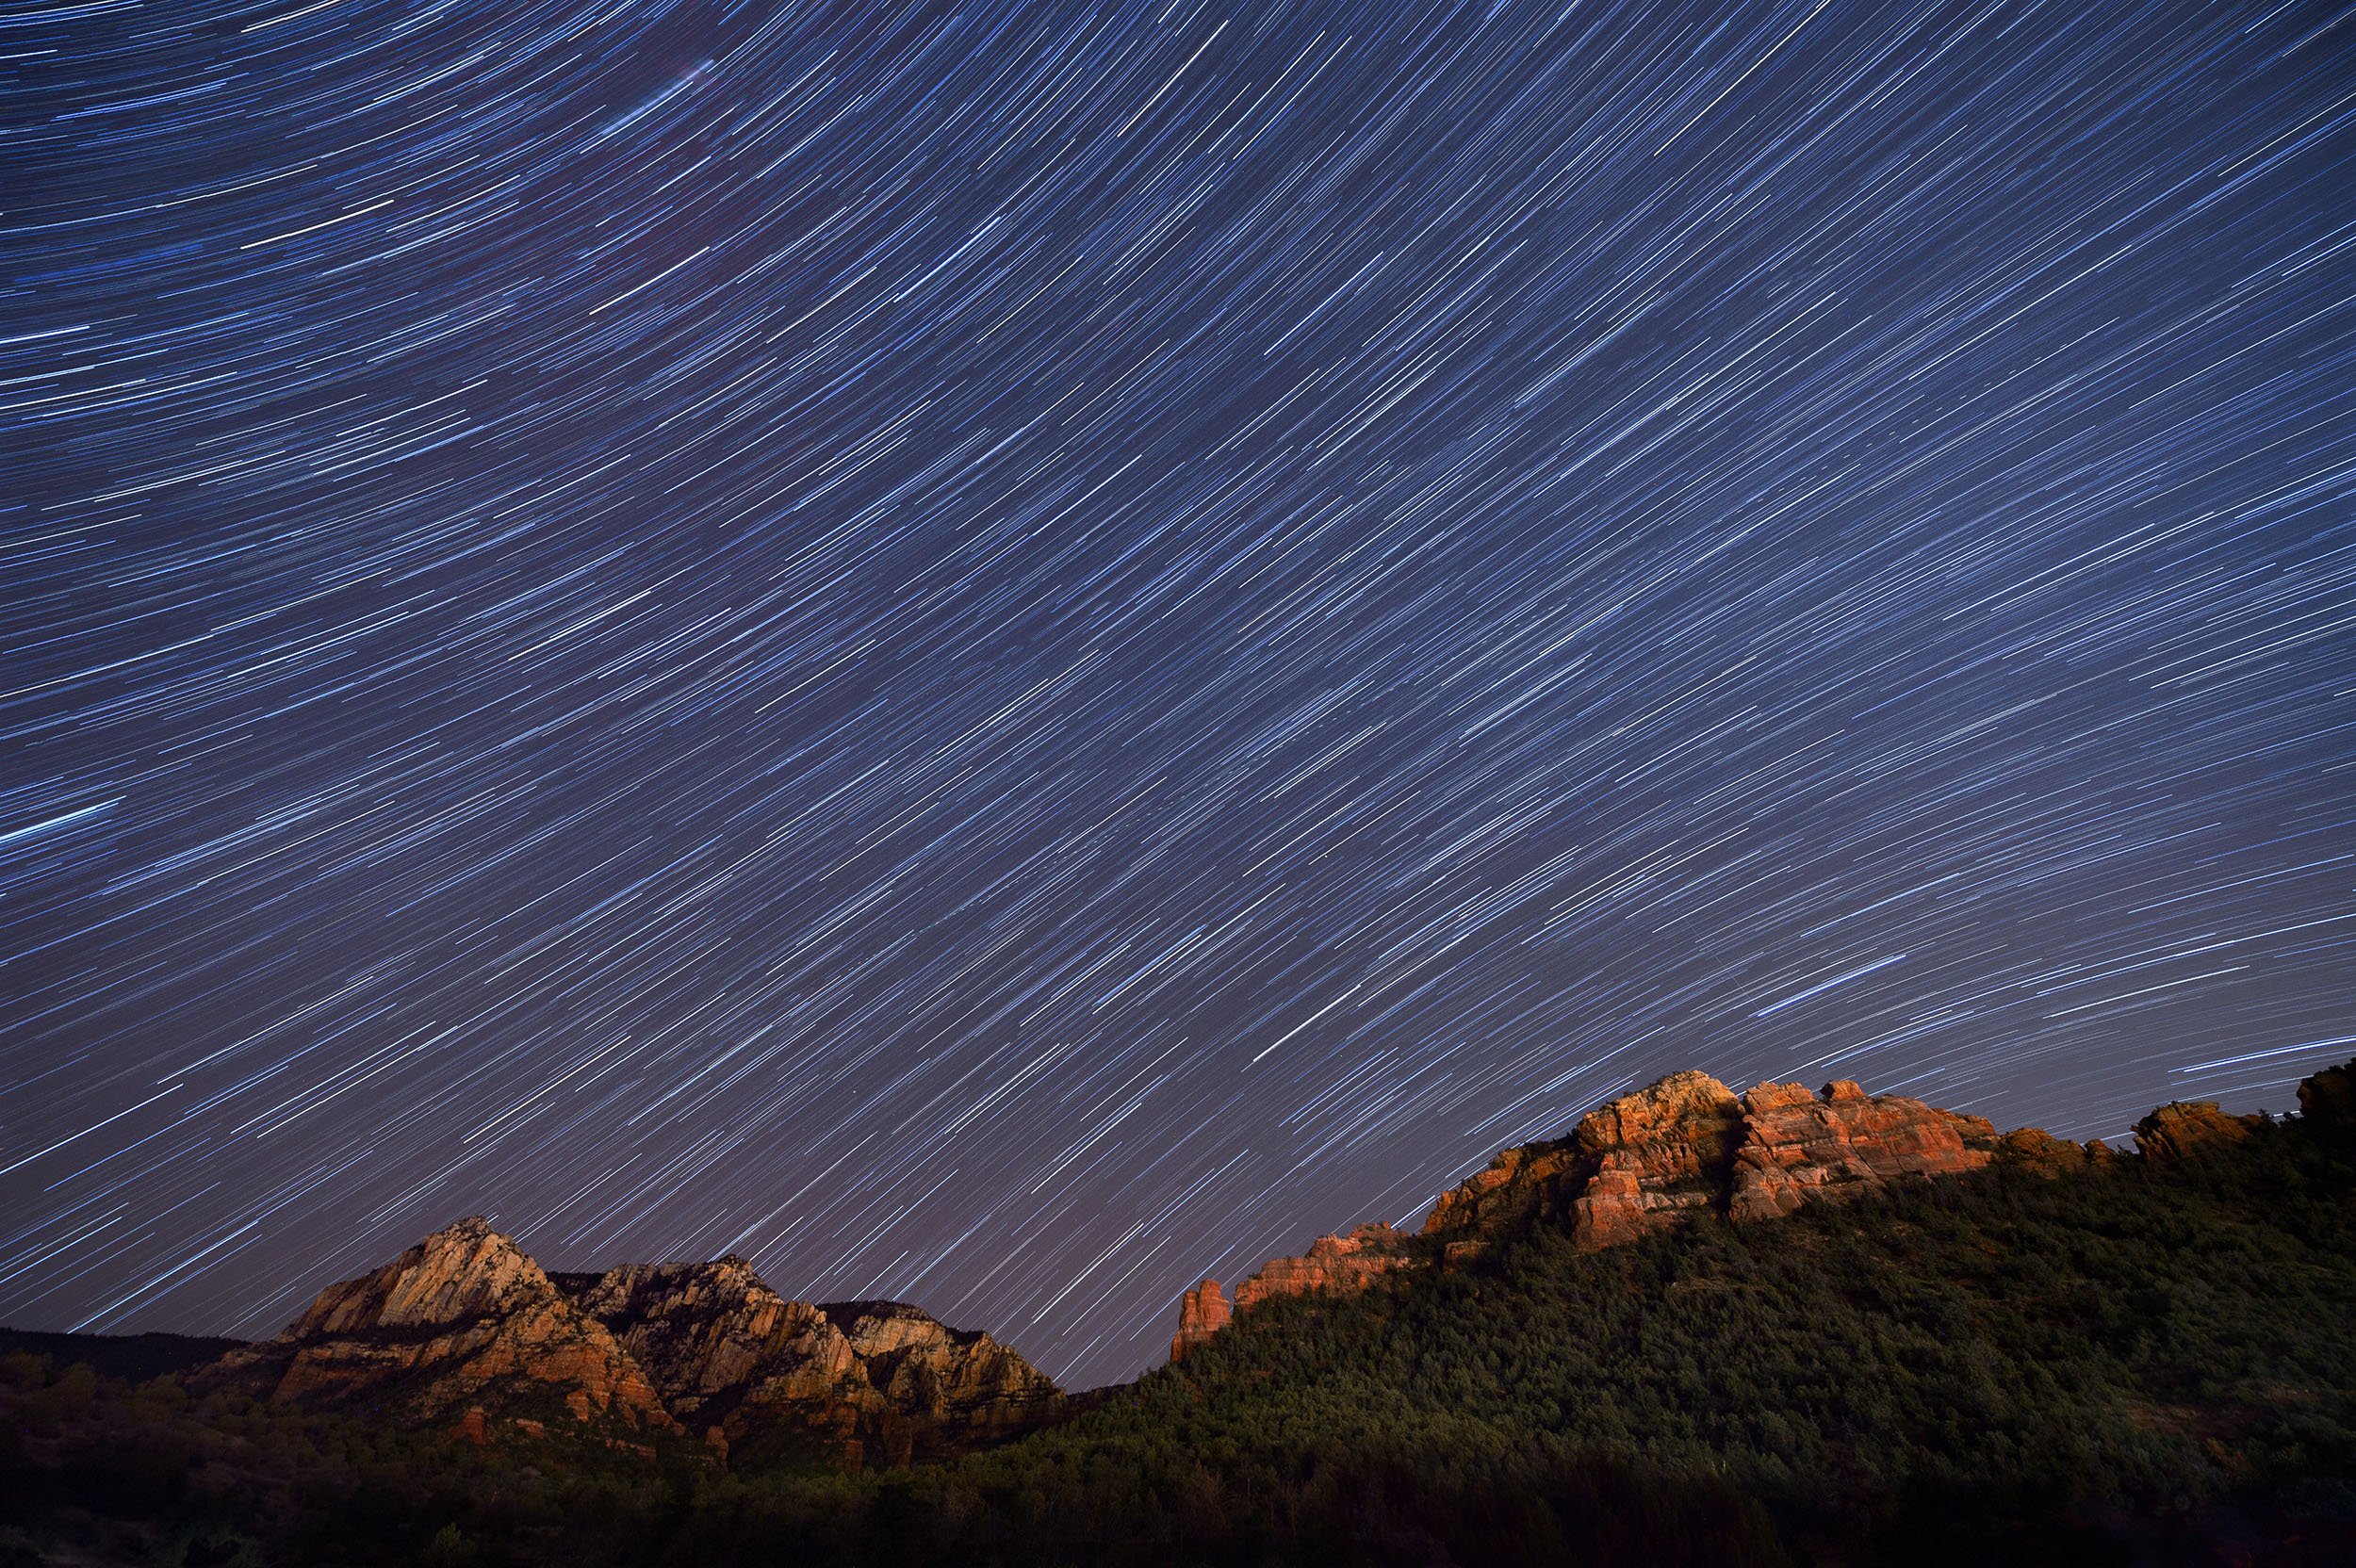
Sedona. Nikon D4s with a Nikon 14-24mm f/2.8 lens. 8 frames shot at 8 minutes, f/4, ISO 200, stacked in Photoshop.

Putting it All Together in Post-Production

Once your images are made, you’ll want to get to the computer to stack them into star trails. That’s the next step in your process, and it’s the next blog post we’ll publish. Stay tuned for Part II, coming soon.

Want to learn more about shooting for star tracking and then editing those images into trails? Join us for our Shoot for the Edit workshop in Colorado next month!

Tim Cooper is a partner and workshop leader with National Parks at Night. Learn more techniques from his book The Magic of Light Painting, available from Peachpit.

UPCOMING WORKSHOPS FROM NATIONAL PARKS AT NIGHT

Coming to Kanab? — Announcing the 2023 Nightscaper Photo Conference!

Back in February we announced that we acquired the Nightscaper Photo Conference. We were beyond excited, but a few months later we were beyond disappointed to have to postpone the 2022 event.

Now, however, we are back to the positive end of that excitement spectrum, as we get to announce the 2023 Nightscaper Photo Conference!

If you’re making plans for your 2023 spring Milky Way season, then include our conference in your schedule and level up your astro-landscape night photography skills. The 2023 conference will be held in the heart of the new moon week, May 18-21.

You’ll join other passionate photographers, scientists and inspirational speakers in Kanab, Utah. The daytime conference leaves plenty of room for going out at night with speakers, as well as with friends new and old. Several speakers will also be offering local workshops before and after the conference, so you can put together a pretty awesome night photography experience in one of the best places in the world for doing so.

The Nightscaper conference goes on for 4 days, starting each day in late morning to accommodate those who were out shooting the night before. Daily lunches are included, as well as one dinner.

Kanab, Utah. © 2022 Lance Keimig. Nikon D780 with a with a Tamron 15-30mm f/2.8 lens at 24mm. Stiched pano, frames shot at 15 seconds, f/3.2, ISO 12800.

Tickets

Tickets are on sale now. We are offering Conference (in-person) + Replays tickets for those who can travel or Replays-only for those who cannot travel but still want all that education and inspiration. Right now both are offered as limited-time Early Bird tickets, so grab yours at a discounted rate while you can!

Speakers

The current speaker lineup includes:

  • Mike Shaw

  • Jess Santos

  • Joshua Snow

  • Bettymaya Foott

  • Dr. Kah-Wai Lin

  • MaryBeth Niczenski

  • Forest Chaput de Sanintonge

  • Aaron King

  • Dr. Bryony Richards

  • Dan Zafra

  • Kristine Richer

  • Erik Kuna

  • Paul Zizka

  • Adam Woodworth

  • our team from National Parks at Night

  • and more speakers to be announced in the coming months

Over the 4 days the speakers will present more than 40 1-hour classes and four discussion panels. There will be plenty of time and space to network with the speakers and other attendees.

Follow Us for News

More information is coming, so stay tuned by following us on the Nightscaper Conference social media accounts:

Also, be sure to sign up for the email list to receive all conference updates right in your inbox.

Finally, join the Facebook group to share your night photos and to chat all things night photography.

Action Time

Now is the perfect time to register for the Nightscaper Conference. Save money by signing up for an Early Bird ticket.

We look forward to seeing you in Kanab next year!

Register today at nightscaper.com.

Matt Hill is a partner and workshop leader with National Parks at Night. See more about his photography, art, workshops and writing at MattHillArt.com. Follow Matt on Twitter Instagram Facebook.

UPCOMING WORKSHOPS FROM NATIONAL PARKS AT NIGHT

Returning to Scotland to Revisit Night Photographs of Yesteryear

In 2019 the five National Parks at Night instructors posted stories and images of places we had gone back to in order to re-photograph scenes.

For Matt Hill and Tim Cooper, conditions on a first visit prevented them from creating the images they’d had in mind. Chris Nicholson had a vision of what he wanted to do, but couldn’t quite make it work the first time. Gabe Biderman struck gold with a team collaboration on his first visit, and then different conditions provided an opportunity for an equally stunning but completely different image upon his return. I also experienced different conditions that allowed me to make a more compelling image when I revisited a lighthouse on the coast of Maine.

Usually it’s external circumstances that impact our images the most when we return to photograph a location, but sometimes the way we see or the way we remember a scene can influence how we respond to it.

This past spring Tim and I finally led a twice-postponed trip to the Orkney Islands after 2 years of Covid-related delays. It was worth the wait. This was my fifth visit to this special place, but I hadn’t been there since 2010. So obviously I was overdue to return.

The Orkney Islands. (Satellite imagery courtesy of Google Earth.)

I first went to Orkney in 1995 while traveling around Scotland on a jump-on-jump-off minibus tour. I had no idea what to expect, and had done no research before taking a ferry across the Pentland Firth and stepping back 5,000 years into the Neolithic landscape that exists simultaneously with a very modern culture.

That experience was life-changing. My memories of that first visit have always stayed with me, and Orkney is a place I feel permanently connected to.

I can’t really say what it was that made such an impression on my younger, impressionable self, but something sure did. In my mind, Orkney has become like Atlantis or Shangri-La over the years, taking on outsized, mythical proportions for a place where I’ve spent a total of about a month. Orkney is a special place to be, for sure––but try as I might, I cannot explain why I feel so drawn to these islands. I just know that I am.

Moreover, each time I visit, I find a new way to photograph it.

A younger me and group I took to Orkney in 2010.

Stromness, 2007.

Kirkwall, 2007.

In this post I’m sharing three pairs of images, the first made years ago on earlier visits and the second made on our tour in May 2022. Each of the original photographs is one that I’ve always loved, in part for the image itself, and in part for the memories it invokes.

The new images have their own stories and memories, built upon the earlier ones. They too have become part of my saga, interwoven with recollections of places, times and people. I don’t know that anyone will see the images after I’m gone, and that isn’t particularly important to me. For now, they serve as reminders of my past, just like those neolithic standing stones that dot the Orkney landscape reminding those who live there where they came from.

Our memories make us who we are and shape our world view. Our collective experiences of the past inform the way we interpret the present and think about the future.

I was almost as excited to return to the site of some of these photographs as I was to return to Orkney itself. I came with expectations, knowing that I was likely to be disappointed. Twelve years is a long time to expect that nothing will have changed. As I retraced my steps of previous visits, wondering what would be the same and what would be different, I thought about how I had changed in all those years, how the world had changed, and I thought of that old proverb: “We see the world not as it is, but as we are.”

Our memories make us who we are and shape our world view. Our collective experiences of the past inform the way we interpret the present and think about the future. No one can say with certainty why some memories are more poignant than others. Just as traumatic events might be forefront in our minds, or may be repressed into our subconscious, ordinary experiences can have similar dominant or subtle influences on our thoughts and behaviors.

In the end, travel photography is less about the images than the experiences. The images serve as reminders to take me back to places and times that are important to me. I hope that the viewer will enjoy and appreciate what I saw in these places, but I know that no one but me will feel what I do when I see them. That’s OK; I photograph for myself. It’s a thing that I do just for me, and that is a luxury that I truly appreciate. I feel very fortunate to be able to travel and see such remarkable places, and to be able to do what I love for a living.

Now let’s look at the photographs.

Revisit 1

The House of the Orcadian Poet George Mackay Brown in Stromness

2008. Ebony SW23 view camera with a Nikon 65mm f/4 lens, shot on Fuji Neopan Acros film. Exposure unrecorded.

2022. Nikon D780 with a Nikon 28 mm f/3.5 PC lens. Three blended exposures shot at 15, 30 and 60 seconds, f/11, ISO 100.

The earlier black and white image of George McKay Brown’s house in Stromness is one of my all time favorites, and appears on the cover of my first book. It was the last time I took my view camera on an international trip, and the last time I futilely pleaded with security at Heathrow to spare my film from their damaging X-rays.

I made the color image this past May on my first visit to the site since then. I was full of anticipation as I walked the mile or so along the main road through town to get to the house. There is a row of houses in between the street and the bay, and peering between the houses out to the water is irresistible.

As I looked between two of these structures about 100 yards from Brown’s house, I noticed an upturned and familiar dinghy with the faded and peeling name “MOLLYMAWK” staring back at me. This was the dinghy in the foreground of my original picture! It was still in town, apparently passed on to a neighbor, and now, by the looks of it, neglected. Oh, the changes!

I couldn’t make the same image, so I had to make a new one. I did, and it doesn’t compare to the aura of the original, and that’s OK. It was cathartic nonetheless.

Revisit 2

The Stones of Stenness

2007. Canon 5D with a Nikon 28 mm f/3.5 PC lens, lit with a Surefire G2 flashlight. 15 seconds, f/8, ISO 100.

2022. Nikon D780 with a Tamron 15-30mm f/2.8 lens, lit with three Luxli Fiddle and one Luxli Viola LED panels. 2 minutes, f/4, ISO 160.

The older image of the standing stones was made with a small group that I took to Orkney on one of my early tours before National Parks at Night was born.

More than the night it was made, the image reminds me of my first experience at the stones. I’d ventured out alone at night from the youth hostel where I was staying. I rode on a rented bicycle and wandered amongst the stones, both awed and somewhat uneasy.

When Tim and I were there this spring, I had this image in mind, but wanted to improve on the lighting. Luckily for me, I had Tim Cooper, master light painter, in tow. We worked together for about an hour to craft this image, using four Luxli panel lights on stands. It was a memorable night—one I’ll remember more for the experience shared with Tim than for the image.

Revisit 3

The Bluebell Woodland at Woodwick House, Evie

2010. Canon 5D Mark II with a Canon 24-105mm f/4 lens, lit with a Surefire G2 flashlight. 5 minutes, f/5.6, ISO 100.

2022. Nikon D780 with a Nikon 28 mm f/3.5 PC lens, lit with two Luxli Fiddle LED panels. Two sets of three exposures shot at 10, 30 and 90 seconds, f/11, ISO 100, blended and stitched.

Of all the places I’ve been in Orkney, perhaps nowhere is as dear to me as Woodwick. It’s a spectacular Victorian hunting lodge, on a gorgeous property secluded on its own private bay, with gardens and a wooded burn that flows out to the sea. And thousands of bluebells.

My first Orkney photo tour stayed at Woodwick House, which was at the time owned and managed by a non-profit trust with the best intentions and not nearly enough resources. The resident manager James served as host and chef and no doubt many other roles. He helped make our visit extraordinary in so many ways, but it was clear that he was understaffed and overwhelmed.

I had tried to bring other groups in years since, but James left long ago, and the place went from a 4-star bed-and-breakfast to rundown self-catering accommodations with a miserable reputation.

This year I tried in vain to reach my contact at the trust to see if I might be able to bring the group to photograph the grounds. Undeterred, but with serious trepidation, Tim and I went to check it out before the group arrived, and I was stunned to find it empty, neglected and for sale.

I showed Tim the grounds, the woodland, the burn with its many small cascades, and the bluebells, which have managed quite well on their own. They were, as I had hoped, in full bloom.

Tim and I photographed together, I with my old image in mind, Tim never having seen it. We came up with a composition that was different, but reminiscent, and worked together to light it. We wondered if we could get away with bringing the group later in the week. We did. I fantasized about buying and renovating Woodwick House as National Parks at Night’s European headquarters, which several of our group thought was a brilliant idea.

Lance Keimig is a partner and workshop leader with National Parks at Night. He has been photographing at night for 35 years, and is the author of Night Photography and Light Painting: Finding Your Way in the Dark (Focal Press, 2015). Learn more about his images at www.thenightskye.com.

UPCOMING WORKSHOPS FROM NATIONAL PARKS AT NIGHT

Five Questions: Barns, Filters with Auroras, Star Trail Settings and More

The night photography world is full of questions, and we’re happy to help with answers.

This installment of our “Five Questions” series features inquiries about photographing barns on the Blue Ridge Parkway, coma with Nikon Z lenses, moving a Lightroom catalog on a Mac, using filters when shooting auroras and settings for star trails.

If you have any questions you would like to throw our way, please contact us anytime. Questions could be about gear, national parks and other photo locations, post-processing techniques, field etiquette, or anything else related to night photography. #SeizeTheNight!


1. Clapboard on the Blue Ridge Parkway

Question:

I am thinking about traveling to the Blue Ridge Parkway to do some star photography and would love to do some light painting of old barns or structures. I am wondering if you have any locations you can recommend. — Michael S.

Mabry Mill, Blue Ridge Parkway. © 2021 Chris Nicholson. Nikon D5 with a Nikon 24-70mm f/2.8 lens, lit with four Luxli Fiddle LED panels. 30 seconds, f/2.8, ISO 6400.

Answer:

The Blue Ridge Parkway is a great place to find barns! But many are on privately owned or leased farms along the parkway; you could still shoot those, but would want to ask permission of course, especially if photographing them at night, and absolutely if you’re going to light paint them.

Sticking to barns that are not privately owned, here are some tips:

Stay north of Asheville. The section of the parkway south of Asheville (and even for a bit north) is mostly mountainous. The northern two-thirds of the parkway—perhaps safely stated as “north of the Linn Cove Viaduct”—is more rural and agricultural.

If you’re open to just historic clapboard structures that aren’t barns, you can’t drive more than a few miles without seeing some. These come to mind immediately: Mabry Mill, Puckett Cabin, Brinegar Cabin. Lots of others scattered about.

For barns in particular, off the top of my head: the Johnson Farm at Peaks of Otter (you’ll need to hike to it), Explore Park (though you’ll want to ask about access after 8 p.m., as it’s managed by the city of Roanoke) and the farm at Humpback Rocks Visitor Center. — Chris

2. Non-Coma Z Lenses

Question:

I just switched to the Nikon Z 6II and am looking for a recommendation for a lens without coma distortion. I have tried and returned two Rokinon 14mm f/2.4 lenses with severe coma. My preference would be a lens in the 14-24mm range. — Edmund

Answer:

You are going to love the Z 6II! The FTZ adapter works well, so it gives you lots of options, but both the Nikon Z 14-24mm f/2.8 and Nikon Z 24-70mm f/2.8 are among the very best lenses Nikon has ever produced. Pricey, but worth it. Another option (assuming you have the FTZ adapter) is the Nikon’s F-mount 14-24mm. There is nothing better than those three lenses at this time. — Lance

3. Moving Lightroom on a Mac

Question:

Is there a simple way to migrate Lightroom files on a Mac? I will soon have to bring in a new and larger external hard drive. — Julie P.

Answer:

Yes, and the process is actually pretty simple.

  1. With Lightroom closed, plug in the old drive and the new drive.

  2. Copy all of the information from the old drive to the new drive.

  3. Unplug your old drive and launch Lightroom. You will see question marks next to your folders, because Lightroom can no longer find your old hard drive.

  4. You need to locate the parent folder for your images. In Lightroom, navigate to the topmost folder in your Folders hierarchy. That may well be the parent folder, but it’s possible that the true parent folder is hiding above it. By right-clicking on that topmost folder, you will see an option to Show Parent Folder. This command will show the folder containing that topmost folder, if there is one.

  5. Right-click on your parent folder and choose Find Missing Folder. Lightroom will open your system’s Finder.

  6. Navigate to the new drive, then choose the matching parent folder and click Choose.

The parent folder and all of its subfolders (all on the new hard drive) will now be linked back with Lightroom. — Tim

4. Light Pollution Filters and Auroras

Question:

I just read your article on light pollution filters. Will these filters also be usable when shooting Northern Lights? — Claron K.

Answer:

Yes, I believe they would be useful for shooting Northern (or Southern) Lights when near inhabited areas. As auroras tend to be green, pink, purple and sometimes blue, the orange/yellow blocking ability would have a complementary effect. However, you could be lose up to 1 stop of light, so keep that in mind. — Matt

5. Star Trail Settings

Question:

I just reviewed your “How I Got the Shot: Lake McDonald” blog post about star trails. Phenomenal image! I have done a ton of research on how to do this kind of photo, but was hoping for a simple recommendation for settings and timing. I’ll be shooting with either a Nikon D850 or a Nikon Z 6 with a 14-24mm lens. — Darlene

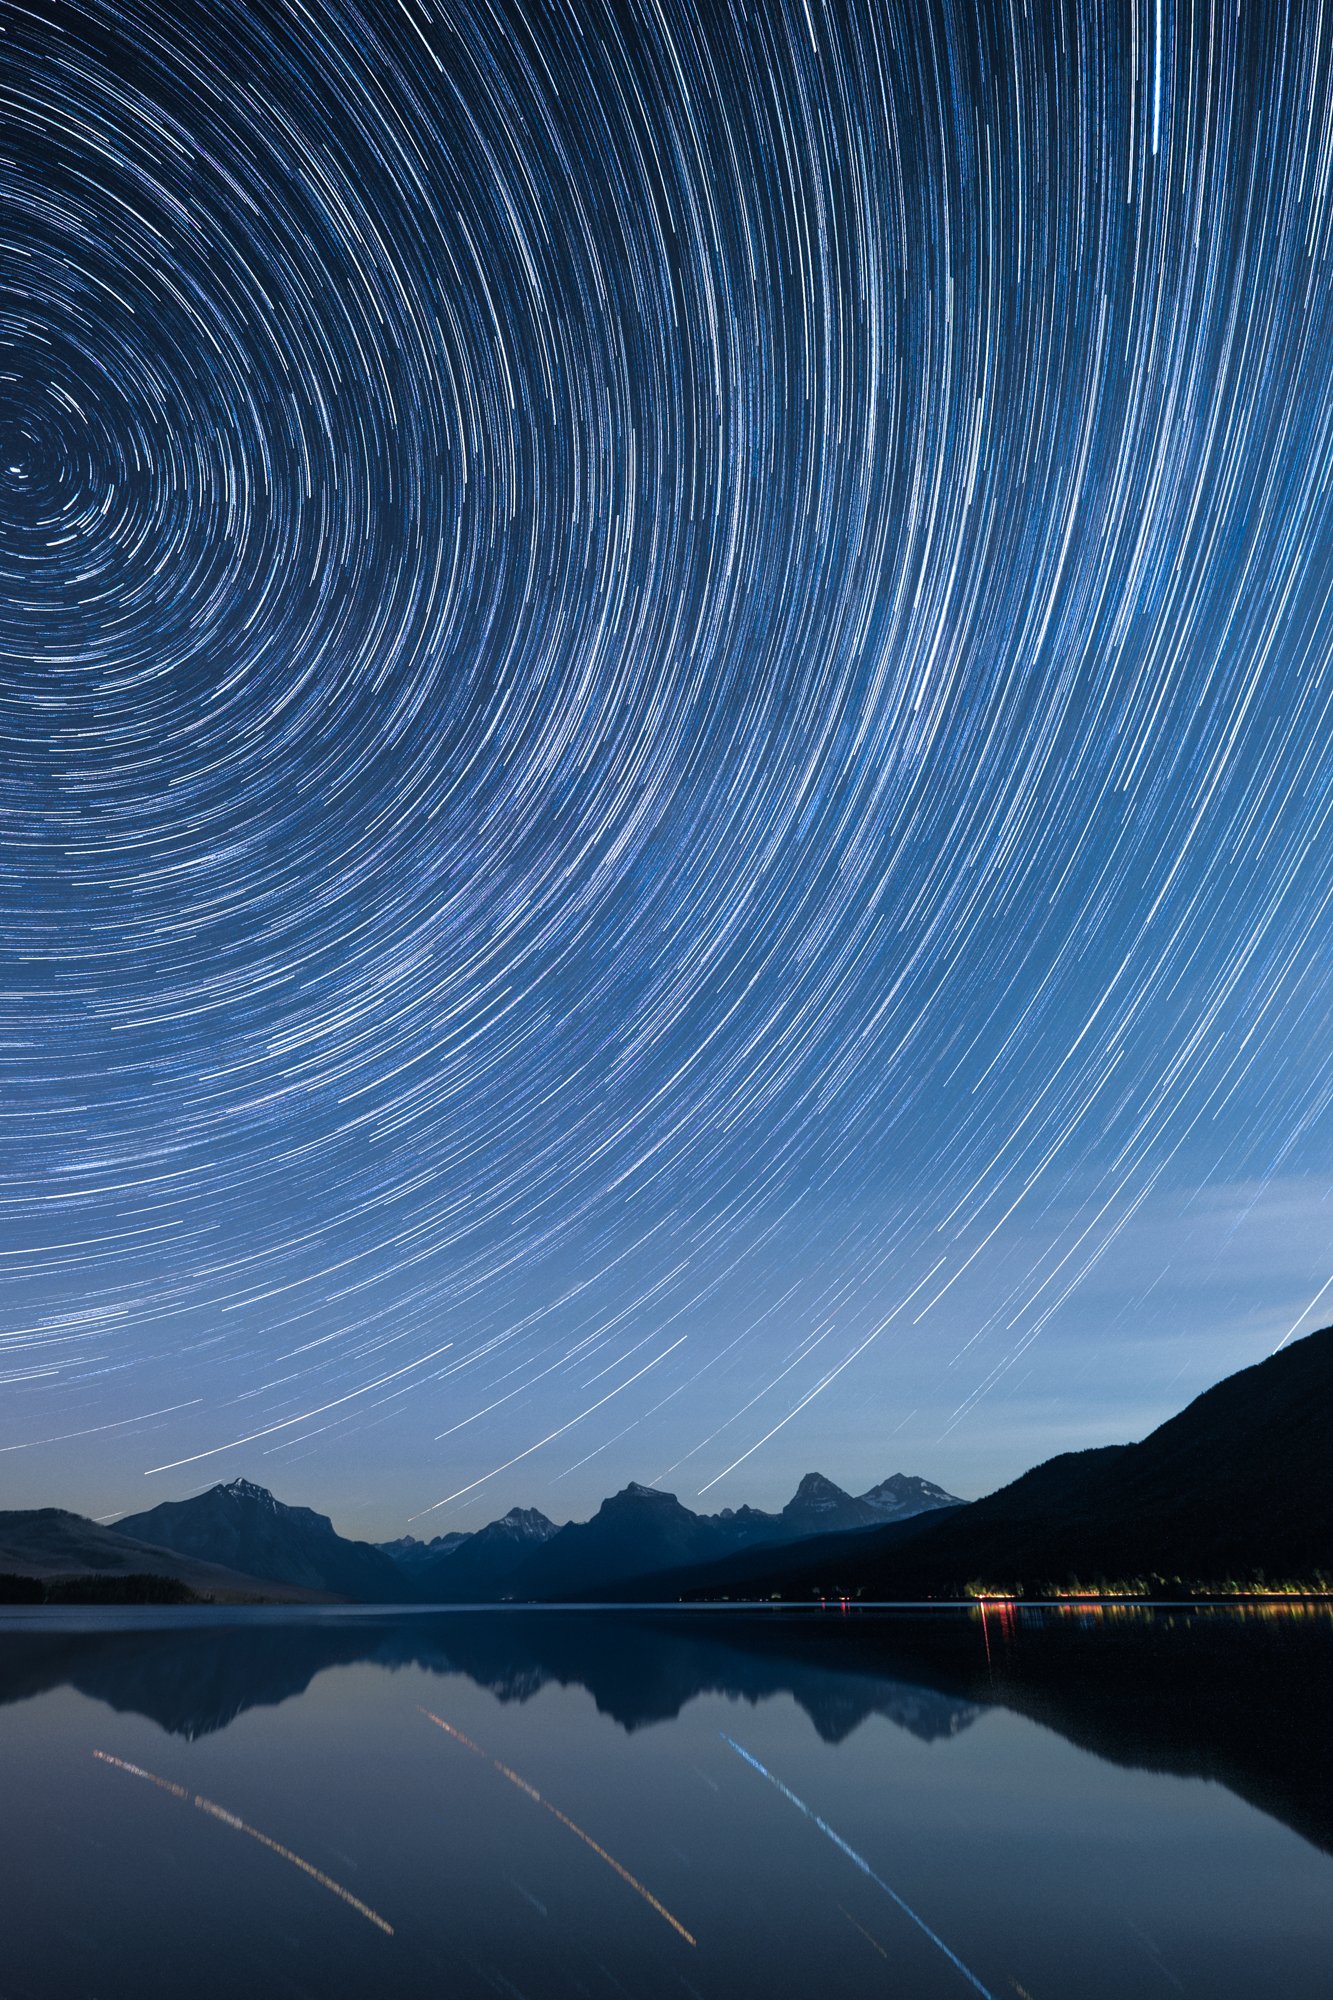
Star Circles Over Lake McDonald. © 2015 Gabriel Biderman. Fujifilm X-T1 with a Fujifilm 10-24mm f/4 lens. 41 stacked frames, each shot at 2 minutes, f/4, ISO 3200.

Answer:

There is no simple formula for star trails. You need to find the balance between a proper base exposure, how long you want to go, and image quality.

You can capture trails with either one long exposure or with multiple shorter exposures that you later stack in Photoshop. Single exposures are often best for up to 15-minute shots, but when you want longer trails you’ll most likely want to shoot multiple frames to stack.

Do a high ISO test shot to figure out the proper exposure. Then you want to get to a more optimal image quality setting. Lower your ISO to something you’re comfortable with in terms of noise (for example, maybe ISO 800), and then adjust your shutter speed accordingly to compensate.

Also consider apertures, in this regard: The wider the aperture, the higher number of stars will appear. While that might sound like a good thing, too many star trails could look too chaotic and distract from the rest of the scene. For example, on a dark night f/2.8 will show an overwhelming number of trails, while f/8 would create a more subtle effect. Under a full moon this isn’t so critical, as not as many stars are visible anyway. Either way, just be careful that you don’t stop down so much that you have to crank up your ISO and sacrifice image quality.

Another consideration is how long your camera’s shutter can be open without generating long-exposure noise (speckled red, blue and green confetti-like specks in your image). This noise is produced when a camera processor overheats during long exposures, but higher outdoor temperatures and lower humidity also play a factor. You have to learn what your camera can tolerate by running some tests in different conditions. For example, if the ambient temperature is 60 to 65 F or less then you can usually get away with 4- to 6-minute exposures, but if the temperatures are 80 F or higher then you might be limited to 30 seconds or 1 minute.

To counteract that effect, you might wonder about using long-exposure noise reduction (LENR). You can use that quite effectively if you’re shooting one long exposure for star trails, but it would be countereffective for stacking. The reason is that for most cameras, LENR disables the shutter after each exposure (for the same amount of time as the shutter speed), which would create breaks in your star trails.

The final decision is how long you want your star trails to be. When facing north for circumpolar trails, you want to shoot for at least 1 hour, and the longer the better. If you are facing east, west or south, you can get away with shorter total exposures—8 to 30 minutes might be sufficient. — Gabe

Chris Nicholson is a partner and workshop leader with National Parks at Night, and author of Photographing National Parks (Sidelight Books, 2015). Learn more about national parks as photography destinations, subscribe to Chris' free e-newsletter, and more at www.PhotographingNationalParks.com.

UPCOMING WORKSHOPS FROM NATIONAL PARKS AT NIGHT

How I Got the Shot: Puente Nuevo, Ronda at Night

Puente Nuevo, Ronda at Night. Nikon Z 6II with a Nikon Z 24-70mm f/2.8 S lens at 40mm. Foreground: shot with a 10-stop neutral-density filter at 20 seconds, f/11, ISO 100. Sky: 460 stacked frames shot at 3 seconds, f/8, ISO 800.

The Location

Dream location—conquered!

The rich history of Ronda, Spain, dates to the Neolithic Age. The Phoenicians, Romans, Muslims, Christians and the Spanish have claimed this remote outpost as their home. The Spanish Inquisition, Napoleon War and Spanish Civil War all had major impacts on the town. Ronda is proudly known as the birthplace of the modern style of bullfighting and has influenced and attracted such artists as Orson Wells and Ernest Hemingway to call it home.

Beyond this colorful past, what attracted me to Ronda were the images of this cliff-clinging town and the historic bridges that unite the old and new settlements over the 400-foot-deep gorge known as El Tajo. The most famous of the three bridges is the Puente Nuevo, or New Bridge, that was completed in 1793. (Imagine how old the older bridges are!) It could be one of the most dramatic bridges in the world and definitely one of the most photographed sites in Spain.

Figure 1. Puente Nuevo, or New Bridge, is in the mountaintop city of Ronda, Spain. (Satellite imagery courtesy of Google Earth.)

I had an image of this in my notes as a place to visit if I ever went to Spain again. Truth be told, that image has been in mind for a long, long time. I had been dreaming about Ronda and the New Bridge since I was a child.

One of my favorite children’s books growing up was Ferdinand the Bull, the story of a gentle bull who refused to fight. Ferdinand was from the Andalusia region of southern Spain, and there is a scene in the book where they send Ferdinand off to fight in Madrid. The illustration backdrop is Puente Nuevo!

Figure 2. The image I remember so well from Munro Leaf’s The Story of Ferdinand, illustrated by Robert Lawson.

The Shoot

In researching the town and looking at pictures of Puente Nuevo, I found very few pictures of the bridge at night, and none with stars. This is because the bridge is lit by sodium vapor floodlights that make it difficult to see anything in the pitch-black night sky.

The typical prime time to take photographs of Puente Nuevo is when the sun sets directly opposite the bridge, basking it with golden light, or during civil twilight when the sky is still a bright rich blue that perfectly complements the golden floodlights (Figure 3). But I’m always one for a challenge, so I set off to capture it at night.

Figure 3. Twilight at Puente Nuevo. Nikon Z 6II with a Nikon Z 24-70mm and a 10-stop neutral density filter. f/2.8 S lens at 40mm. 20 seconds, f/11, ISO 400.

My strategy was this: Combine a twilight blend with a star stack. This is a fairly common technique, but it would definitely prove to be difficult given the high contrast between the lit bridge and the surrounding darker rocks and sky.

So I hiked down the gorge to a vantage point I liked and shot the bridge during twilight. This foreground shot perfectly balanced the bridge and its lights (which had just come on) with the rocks and waterfall that were lit by the ambient light of twilight. I shot a few more frames and chatted with rock climbers and other folks coming down the path as I waited more than an hour for the stars to come out.

An additional challenge was the inky black sky of the moonless night. Having even a little moonlight would have helped the visual transition from a bright bridge to a more illuminated sky.

Yet another challenge was the lack of stars in the frame. With my naked eye I could see one star in my composition. I could have shot wider to include a bigger part of the sky that was unaffected by light pollution, but then the waterfall would have been too small and lost in the image. I chose a tighter 40mm focal length to get the viewer into the landscape, and I left one-fifth of the composition for the sky.

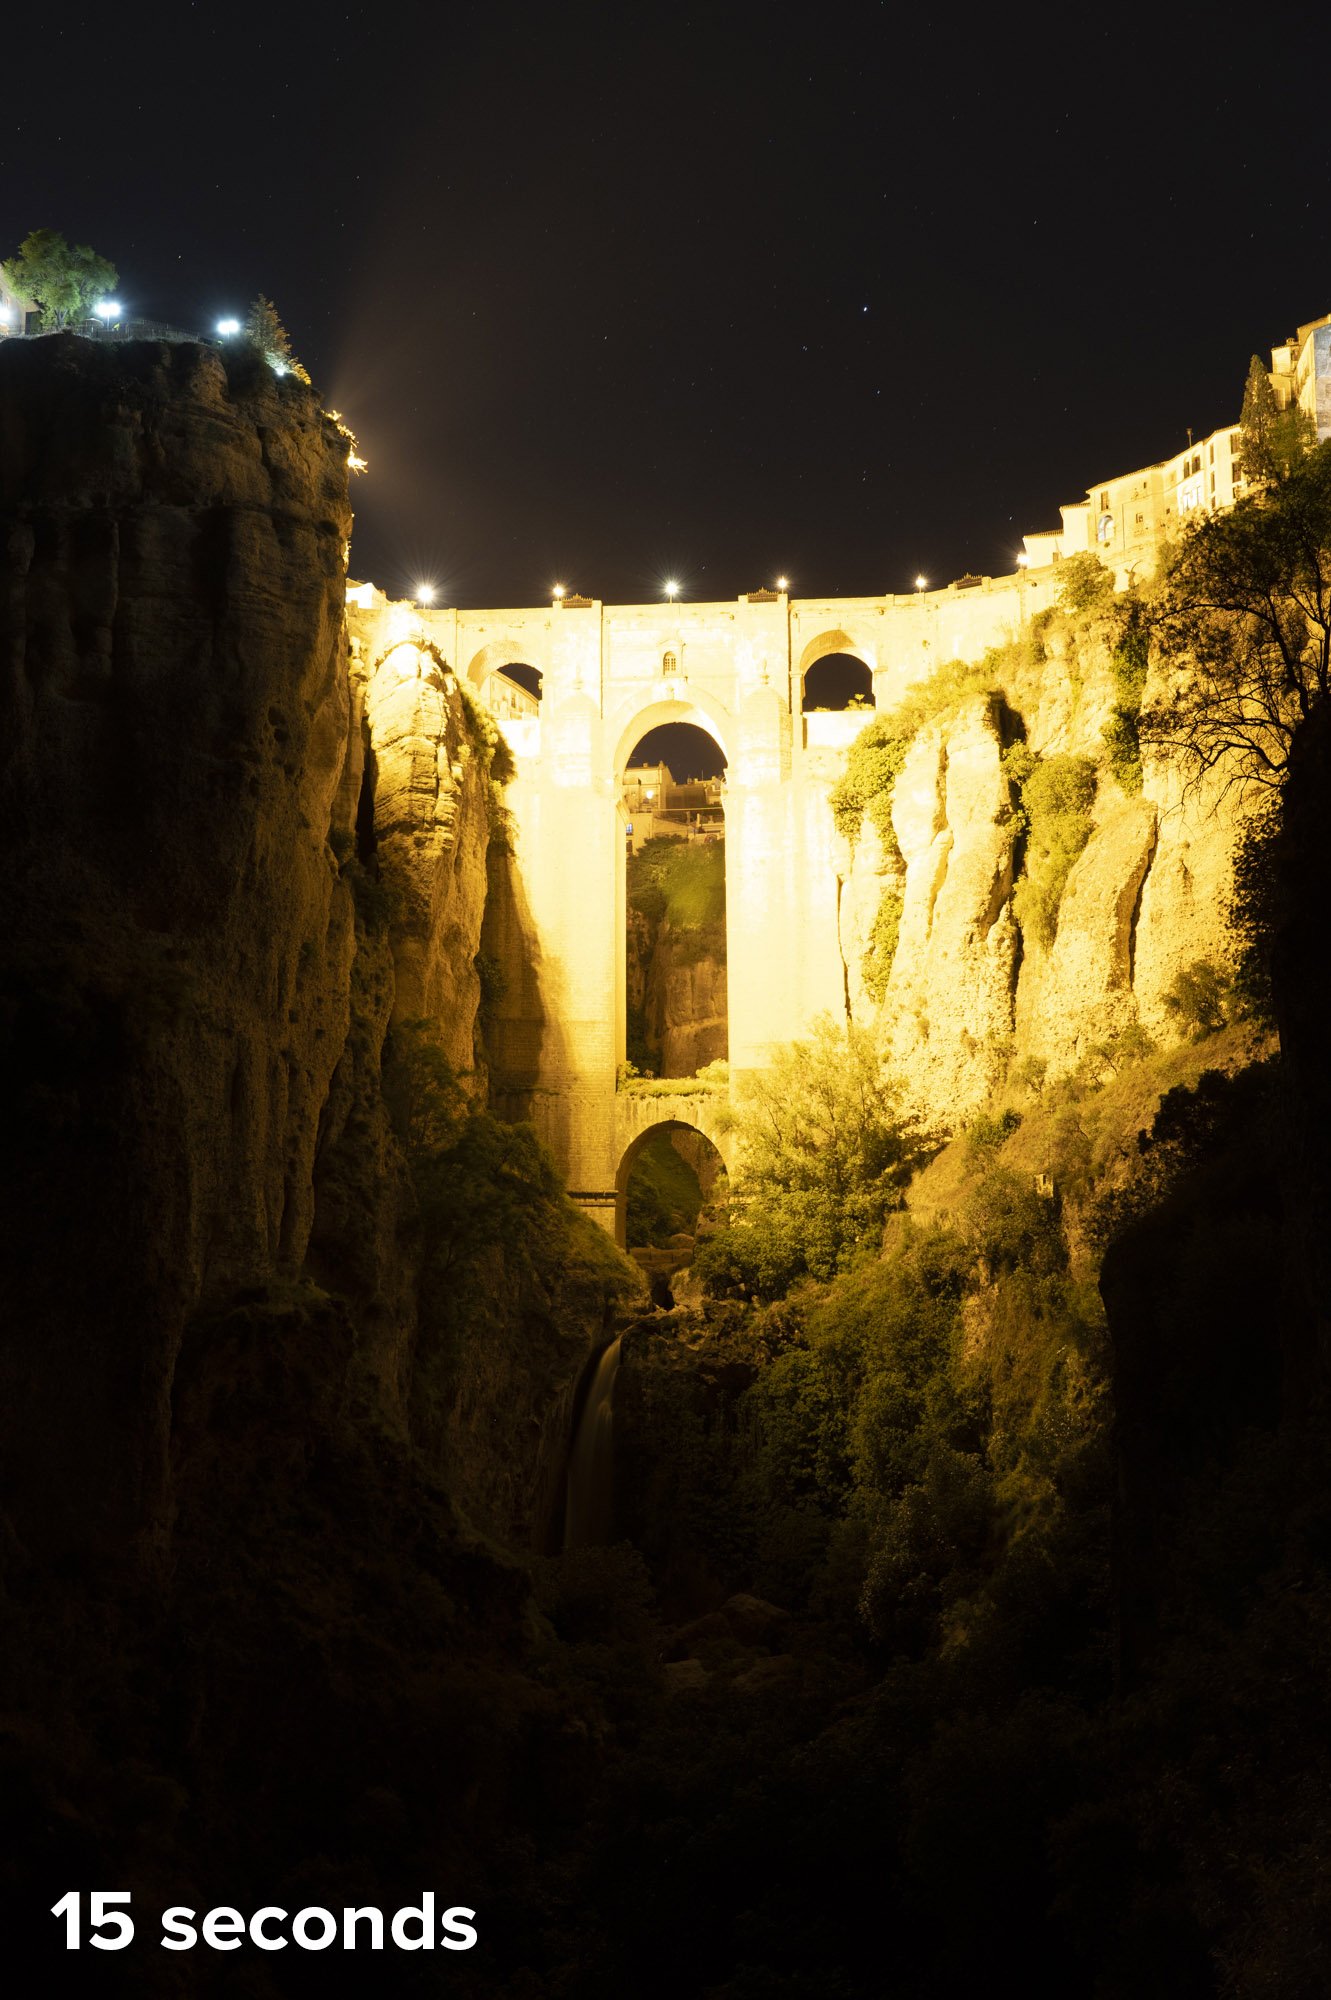
I could have opened my aperture to f/2.8 or gone to a high ISO to help my camera record more of the fainter stars, but that would have resulted in more of the streetlight spilling into the sky. Instead I chose an aperture of f/8 to control the direct light from the lamps and an ISO of 800 so the stars would retain some of their color and not blow out (Figure 4).

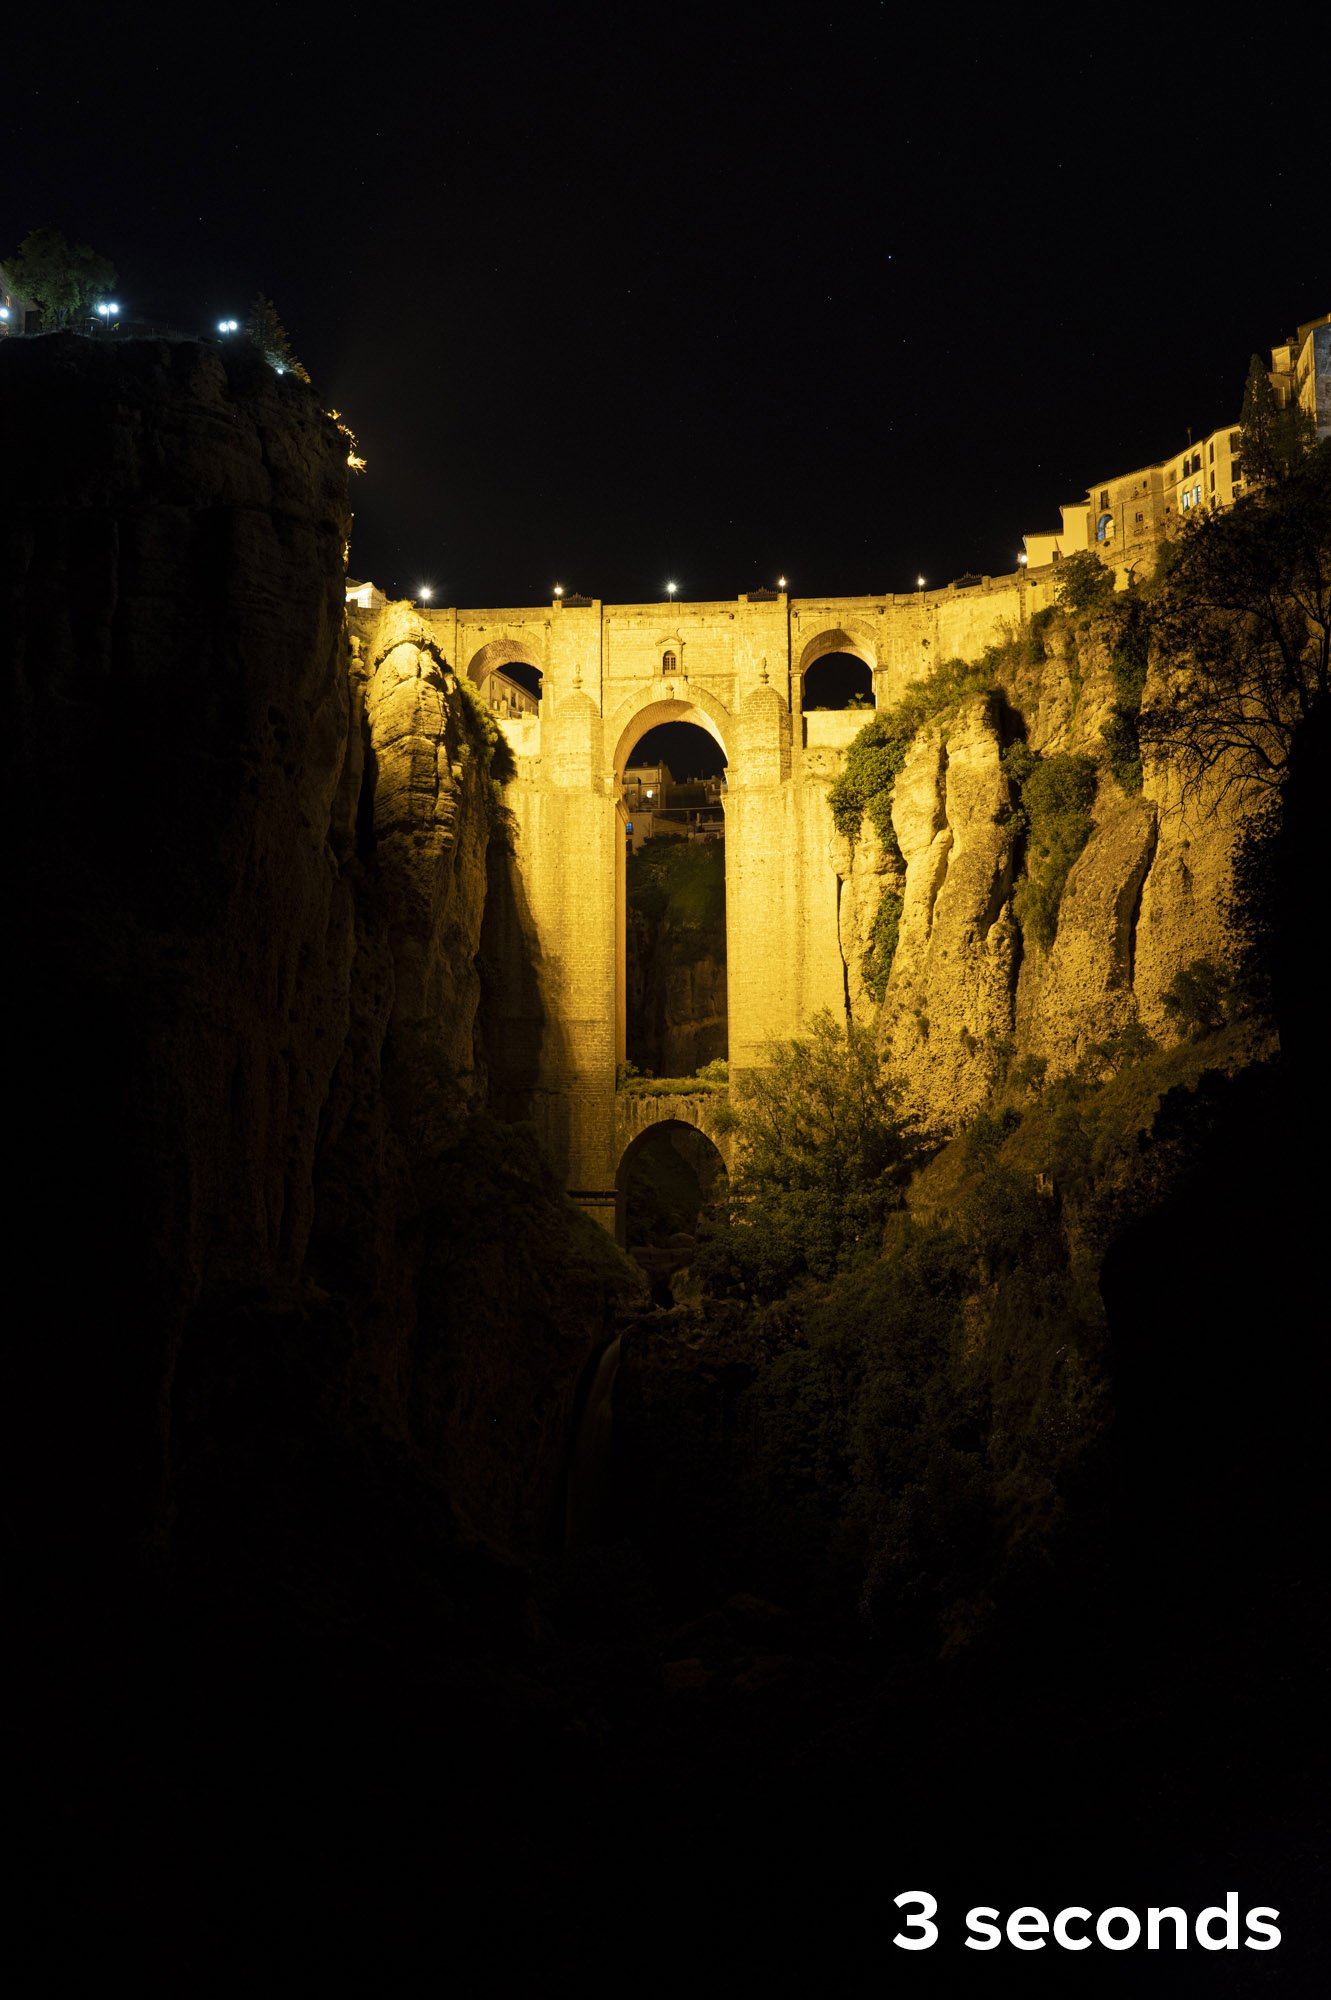
Figure 4. My first test shot was at 15 seconds, f/8, ISO 800. Note the spill of the streetlights into the night sky. I wanted to limit that so that blending in Photoshop would be easier. A 3-second shutter speed was the right balance, as it kept the bridge lights from not bleeding into the sky and still recorded more stars than my eyes could see.

It definitely felt weird to think of star-stacking a series of 3-second exposures. I would need a lot of frames to create a lengthy trail. But I felt this exposure gave me the best balance to blend everything together to create the final photograph that I was envisioning.

I was facing east, the only angle possible for this shot, so I knew the stars would trail downward toward the left. I planned for at least 1 hour of exposure, because I knew that would yield nice long star trails. I was shooting with my Nikon Z 6II, which is a 26-megapixel camera. With my shutter speed at 3 seconds, I used the built-in intervalometer to continually take successive shots.

As busy as this location is during the day, I bumped into only three people during my shoot. It is a bit of a hike down to the lookout, and people just don’t explore at night. So I dangled my feet over the fence and thought of Ferdinand the bull and all the historic places I had visited in Ronda that day.

After half an hour my eyes were adjusted enough and I could see that the brightest star had most likely moved out of the composition. That star had started in the middle of the frame, and because I was zoomed in with a 40mm focal length it had traveled a considerable distance to yield a long star trail. So even though I really didn’t see many other stars, I felt confident I had what I needed to put it all together in post.

The Post-Production

After loading the frames into Lightroom, I made only one adjustment: I turned off the automatic lens corrections. I always advise turning this off for stacking stars, otherwise you run the risk of creating moiré in the final stacked image. I was using 460 frames, which would result in about a 30-minute total exposure for the star trails.

Even though I have a fairly new souped up MacBook Pro M1, to stack 460 30-megabyte files would have definitely caused it to choke. So I stacked the images in sets of about 100 to create a series of five star trail images. Each stack followed this process:

  1. Select the frames in Lightroom.

  2. Choose Photo > Edit In > Open as Layers in Photoshop.

  3. In the resulting Photoshop file, select all the layers by clicking on the first, scrolling down, then shift-clicking on the last.

  4. Change the blend mode to Lighten.

  5. If desired, review the individual layers to edit out plane trails, stray light, etc.

  6. If desired to save hard drive space, flatten the layers.

  7. Save and return to Lightroom.

I then brought each of the five flattened stacks into Photoshop as layers, and used the Lighten mode on them to connect all the trails (Figure 5).

Figure 5. My five sequential star-stack images combined into one long stack.

Finally, I added the twilight shot as the top layer, and I and used a variety of masks and adjustment layers to match the exposures and blend them together as one cohesive image.

In the final photograph (Figure 6), look at the foreground areas outside what’s being illuminated by the streetlights. They are very dark, and that’s why I needed the twilight shot—just to bring out a little bit of detail in the rocks, waterfall and the rest of the foreground to make the overall image more pleasing, and to complete the visual story.

Figure 6. Nikon Z 6II with a Nikon Z 24-70mm f/2.8 S lens at 40mm. Foreground: shot with a 10-stop neutral-density filter at 20 seconds, f/11, ISO 100. Sky: 460 stacked frames shot at 3 seconds, f/8, ISO 800.

All in all this photograph took me about 1.5 hours of post-production work—the same amount of time I committed to shooting the image in the field!

Wrapping Up

Ferdinand didn’t want to fight, but I didn’t mind fighting all of those obstacles to get the shot that reminded me of one of my favorite stories from boyhood.

I’m pretty happy with it. I set out to create a complex photograph of a dream location under conditions I couldn’t control. I put my stamp on it, and hopefully inspired you to seize the night no matter what the scenario!

Gabriel Biderman is a partner and workshop leader with National Parks at Night. He is a Brooklyn-based fine art and travel photographer, and author of Night Photography: From Snapshots to Great Shots (Peachpit, 2014). During the daytime hours you'll often find Gabe at one of many photo events around the world working for B&H Photo’s road marketing team. See his portfolio and workshop lineup at www.ruinism.com.

UPCOMING WORKSHOPS FROM NATIONAL PARKS AT NIGHT