aurora

Five Questions: Nikon Z 8 for Night, Perseids, Aurora Apps and More

The night photography world is full of questions, and we’re happy to help with answers.

This installment of our “Five Questions” series features inquiries about the new Nikon Z 8, locations to shoot the Perseids, aurora apps, filter systems and an Irix lens.

If you have any questions you would like to throw our way, please contact us anytime. Questions could be about gear, national parks and other photo locations, post-processing techniques, field etiquette, or anything else related to night photography. #SeizeTheNight!


1. The Nikon Z 8 and Night Noise

Question:

Since the Nikon Z 8 was announced this week, do you have an opinion about it with respect to night photography and noise, and how it compares to Nikon’s other mirrorless cameras? I’m currently shooting with a D850, which I really like but it’s getting long in tooth. In your opinion, what is the best high-res Nikon mirrorless camera for night photography at this point? — Jeff

Answer:

Three of our team members shoot with the Nikon Z 6II, one with the D780 and one with the D5. Between all of us, we’ve shot the Z 7 and Z 9, but none of us owns one, and none of us intends to own one. That tells you something about our preferences, but it doesn’t mean those are bad cameras, even for night photography. Shooting priorities matter.

We haven’t done methodical comparisons between the Z models, and the Z 8 is not yet shipping, so we have no experience with that model. But from our experience shooting Z cameras, here’s what we know:

We have found that the Z 6II has a slight edge in high ISO characteristics, with the Z 9 not that far behind. The Z 8 features the same 45.7-megapixel full-frame sensor and Expeed processor as the Z 9, so the former should perform as well as the latter does for a high-resolution camera at night. In other words, the Z 8 is kind of a mini Z 9, so we’d expect the same results.

That would mean the Z 6II would still be the best option for low-light photography in terms of high ISO noise, all things being equal.

However, all things usually aren’t equal. There is a lot that goes on in determining the best noise characteristics of any given camera. You could do a side-by-side test by shooting the same scene with all of same parameters, but that may not be the best test for night photography.

For example, when shooting to freeze star points, you need to use a faster shutter speed on a camera with a higher pixel count than you would on one with a smaller pixel count to achieve the same visual result. This means you need to use a faster ISO on that higher-resolution camera. Now you are no longer comparing apples to apples.

The Z 8 autofocus is sensitive down to -9.0 EV, making it the best camera autofocus for low-light photography.

There are other considerations with the higher pixel count as well. Such as:

  • Do you like to do a lot of star stacking? High-resolution files can really bog down that process due to their sheer size.

  • Do you like to make giant prints? If so, a higher-resolution camera could be a great choice.

  • Another consideration would be the better low-light focusing the Z 9 and Z 8 have—a feature called “Starlight View.” If you have trouble focusing at night, this capability alone may trump everything else.

  • The Z 8 simulates the Z 9 in high-speed capture, advanced auto-focusing capabilities and superhigh-resolution video. If you like to shoot sports and wildlife in addition to night photography, those robust features would be a huge asset.

In short, we have not shot with the Z 8 yet so we can’t really say how it will compare with the other Z models. We do look forward to getting our hands on one and putting it through its paces, but seeing as none of us shoots with the other higher-resolution cameras, my guess is that our collective preference will remain the Z 6II. — Tim

2. Perseids from the Curb

Question:

Can you recommend someplace I could go to photograph the Perseid Meteor Shower where I’d have the possibility of an outstanding foreground and dark sky for the meteors? One caveat: I have a knee issue. — H.

PhotoPills confirms that Great Sand Dunes National Park could be a great Perseids option.

Answer:

It sounds like you need a good roadside location. You also definitely need someplace with a north/northeast view and no light pollution in that direction, nor a mountain range blocking the sky.

Great Sand Dunes National Park is awesome for those criteria. You can shoot roadside and have the dunes in front of the mountains with the sky above. I’d even be tempted to attempt a vertorama with a blue hour bottom and star field above.

Badlands National Park also has some spectacular pull-outs where you could do the same. The beaches of Olympic National Park fit the bill, but the ones with the best foregrounds require at least a little bit of a walk, and slippery stones may be troublesome if the tide is receding. At Crater Lake National Park, shooting from the lodge over Wizard Island could be amazing. — Matt

Note: For more information about shooting meteor showers, be sure to check out our e-book Great Balls of Fire.

3. Tracking Auroras

Question:

Can you share the aurora tracking app that you use? — Deborah C.

Vatnajokull National Park, Iceland. © 2023 Chris Nicholson. Nikon D5 with a Nikon 14-24mm f/2.8 lens. 4 seconds, f/4, ISO 6400.

Answer:

The answer is ... several! I’m on Android, and I use My Aurora Forecast. Lance, Tim and Matt are on iPhone, and they use Aurora Forecast (Lance, Tim), My Aurora Forecast & Alerts (Matt) and SpaceWeatherLive (Matt).

We recommend using more than one. Pooling info from different sources can give a more accurate picture of what might happen and where. Also, it can be nice to set up an automated alert—sometimes we can end up shooting auroras on a night we didn’t know they’d happen. — Chris

4. Finding a Filter System

Question:

I’d like to get a filter system that works with my lenses—primarily an 82mm and 95mm. But I also have a very concave lens (the Sigma 14-24mm f/2.8), so I’m thinking I need a 150mm system. — Rachna

Answer:

Welcome to the wonderful world of filters! This is a great way to extend long exposures during the day and night.

I’m a fan of square systems, as they offer the most versatility. Going down the path you suggest, I suggest you invest in these three things:

  1. NiSi 150mm Filter Holder for Sigma 14-24mm lens

  2. the adapter rings for 105mm, 95mm and 82mm filter threads

  3. Starter Kit that includes 6-stop, 10-stop and 3-stop graduated 150mm neutral density filters

This is pricey but gets you everything you need, albeit in a big kit. (Most people who invest in 150mm filters find them cumbersome, but that’s the way it goes.)

Alternatively you can use rear ND filters for the Sigma and then use 100mm filters for your other lenses. This would be more cost-efficient, as well as a smaller footprint on your lenses and bag. The caveat is that there are no rear graduated ND filters, so scenes that would normally call for them would need to be shot with multiple exposures and blended in post.

But if you do choose to go that way and use a 100mm square filter system, the NiSi V7 Advance Kit includes pretty much everything you would need except the 95mm adapter. However, the caveat with this system is that the circular polarizer will work only with lenses 82mm or smaller.

Another thought is that most mirrorless lenses are smaller than their DSLR counterparts, and they don’t have bulbous front elements. Therefore, switching to mirrorless also facilitates a more compact and cost-efficient filter system.

Finally, why do I keep recommending NiSi? There are lots of filter systems that are great. I happen to like NiSi because they are a good value. I’ve been using them for more than 5 years and couldn’t be happier. — Gabe

5. Eyeing the Irix 21mm

Question:

I have a Canon R6 mirrorless camera and I’m looking for a good, fast astro lens. I noticed you recommended the Irix 15mm f/2.4 lens. Is the Irix 21mm f/1.4 good for astro too? — Jim

Answer:

I’ve shot with the Irix 15mm for years and am quite fond of it. You need to stop down to f/3.2 to eliminate most of the coma. I have not shot with the 21mm yet but will be receiving one soon. Based on their other f/1.4 lenses, I’d expect that you’ll need to stop down to f/2.8 or thereabouts to minimize the coma.

The main thing for you and the R6 is that these lenses are DSLR-mount only. If you don’t mind using the adapter, then I’m sure either would be a great lens for you—the choice just depends more on your style of shooting. The 15mm focal length is quite wide, so you really need a foreground.

My first choice would be the Canon 15-35mm f/2.8, which wide open should get you coma similar to the stopped-down Irix lenses. But if that is not in your budget, I’d go with whichever of those Irix lenses fits your shooting style the best. — Lance

Chris Nicholson is a partner and director of content with National Parks at Night, and author of Photographing National Parks (Sidelight Books, 2015) and Photographing Lighthouses (Sidelight Books, 2023). Learn more about national parks as photography destinations, subscribe to Chris' free e-newsletter, and more at www.PhotographingNationalParks.com.

UPCOMING WORKSHOPS FROM NATIONAL PARKS AT NIGHT

Editing Auroras: How to Post-Process Your Northern Lights Photos

If you’ve read our previous blog post, or if you’ve been reading the news, or if you’ve been outside at night in the past two weeks, then you are already aware of the fantastic displays of auroras that have been dazzling observers even at latitudes that hardly ever see the phenomenon.

We were fortunate to have experienced these auroras on our recent photography tours to Iceland and Norway’s Lofoten Islands, which was the subject of last week’s post (“Spring Solar Storm Brings a Week of Amazing Auroras”), as well as the subject of our Instagram feed all this past week (and next).

Auroras over Gimsoystraumen, Lofoten Islands, Norway. Nikon Z6 II with a Nikon Z 14-24mm f/2.8 lens at 14mm. 6 seconds, f/2.8, ISO 3200.

If you’re outside shooting at night, such an amazing display of northern (or southern) lights tends to generate a lot of of frames to bring home. And that translates into a lot of post-processing on the to-do list.

We’d like to help. So we decided to create a tutorial on how to process your beautiful aurora images.

In This Video

In the following video I’ll show you how I use Lightroom to maximize the visual power of auroras in your night photos. I’ll cover:

  • techniques to control contrast and brightness

  • the Dehaze, Exposure, Shadows and Whites sliders, and how they can be used to better separate auroras from the surrounding sky

  • using profile corrections to even out the sky

  • local and global adjustments to target individual areas of the scene

Your Turn

Have you been out photographing the auroras? We’d love to see your photos! Share in the comments below, or on our Facebook page, or on Instagram (tag us @nationalparksatnight #nationalparksatnight #seizethenight).

Tim Cooper is a partner and workshop leader with National Parks at Night. Learn more techniques from his book The Magic of Light Painting, available from Peachpit.

UPCOMING WORKSHOPS FROM NATIONAL PARKS AT NIGHT

Spring Solar Storm Brings a Week of Amazing Auroras

Science makes much predictable, but sometimes the universe still surprises us. It did so again this week, as the strongest solar storm in over half a decade slammed into our planet, creating amazing displays of auroras that extended halfway down the Northern Hemisphere.

The phenomenon started early in the week, when a coronal hole 20 times wider than Earth appeared on the face of the sun. The resulting solar winds were directed right at us, and soon aurora forecasts were sending the Kp index through the atmosphere.

Even before that, reports of Northern Lights were reverberating throughout the night photography world. Over the past 10 days we’ve seen posts on Instagram and Facebook, and received photos and questions from our friends and workshop alums.

Better still, we happened to be running two international night photography tours at the time, both in places perfect for viewing auroras: Iceland’s south coast and Norway’s Lofoten Islands. Both locations provided front-row seats to the most inspiring northern lights show we’ve seen in years.

Below are some of the images we’ve made over the past week and a half.

Vatnajokull National Park, Iceland. © 2023 Lance Keimig. Nikon D780 with a Tamron VR 15-30mm f/2.8 G lens. 6 frames shot at 13 seconds, f/4.5, ISO 5000, stitched in Adobe Lightroom.

Flakstadpollen, Norway. © 2023 Tim Cooper. Nikon Z6 II with a Nikon Z 14-24mm f/2.8 lens. 4 seconds, f/2.8, ISO 6400.

Iceberg in Vatnajokull National Park, Iceland. © 2023 Lance Keimig. Nikon D780 with a Tamron VR 15-30mm f/2.8 G lens, light painted with a Luxli Fiddle. Exposure 20 seconds, f/3.2, ISO 1600.

Nappskaret, Norway. © 2023 Tim Cooper. Nikon Z6 II with a Nikon Z 14-24mm f/2.8 lens. 2 seconds, f/2.8, ISO 6400.

Nappskaret, Norway. © 2023 Matt Hill. Nikon Z6 II with a Laowa 15mm f/2 lens. ISO 3200, f/2.8 and 2 seconds.

Lofoten Islands, Norway. © 2023 Matt Hill. Nikon Z6 II with a Laowa 12mm f/2.8 lens. 6 frames shot at 3 seconds, f/4, ISO 6400, stitched in PTGui.

Vatnajokull National Park, Iceland. © 2023 Chris Nicholson. Nikon D5 with a Nikon 14-24mm f/2.8 lens. 10 seconds, f/5.6, ISO 6400.

Aurora over Iceland. © 2023 Chris Nicholson. Nikon D5 with a Nikon D5 with a Nikon 14-24mm f/2.8 lens. 2.5 seconds, f/2.8, ISO 3200.

More Information

Want to learn more about this solar storm? Check out:

Want to learn more about photographing auroras? Check out our blog posts:

Your Turn

Have you been out photographing the auroras this week? We’d love to see your images! Share in the comments below, or on our Facebook page, or on Instagram (tag us @nationalparksatnight #nationalparksatnight #seizethenight).

And by the way, the show isn’t over. Auroras are continuing to dazzle dark-roaming photographers. So get out there and seize the night!

Chris Nicholson is a partner and director of content with National Parks at Night, and author of Photographing National Parks (Sidelight Books, 2015) and Photographing Lighthouses (Sidelight Books, 2023). Learn more about national parks as photography destinations, subscribe to Chris' free e-newsletter, and more at www.PhotographingNationalParks.com.

UPCOMING WORKSHOPS FROM NATIONAL PARKS AT NIGHT

Five Questions: Barns, Filters with Auroras, Star Trail Settings and More

The night photography world is full of questions, and we’re happy to help with answers.

This installment of our “Five Questions” series features inquiries about photographing barns on the Blue Ridge Parkway, coma with Nikon Z lenses, moving a Lightroom catalog on a Mac, using filters when shooting auroras and settings for star trails.

If you have any questions you would like to throw our way, please contact us anytime. Questions could be about gear, national parks and other photo locations, post-processing techniques, field etiquette, or anything else related to night photography. #SeizeTheNight!


1. Clapboard on the Blue Ridge Parkway

Question:

I am thinking about traveling to the Blue Ridge Parkway to do some star photography and would love to do some light painting of old barns or structures. I am wondering if you have any locations you can recommend. — Michael S.

Mabry Mill, Blue Ridge Parkway. © 2021 Chris Nicholson. Nikon D5 with a Nikon 24-70mm f/2.8 lens, lit with four Luxli Fiddle LED panels. 30 seconds, f/2.8, ISO 6400.

Answer:

The Blue Ridge Parkway is a great place to find barns! But many are on privately owned or leased farms along the parkway; you could still shoot those, but would want to ask permission of course, especially if photographing them at night, and absolutely if you’re going to light paint them.

Sticking to barns that are not privately owned, here are some tips:

Stay north of Asheville. The section of the parkway south of Asheville (and even for a bit north) is mostly mountainous. The northern two-thirds of the parkway—perhaps safely stated as “north of the Linn Cove Viaduct”—is more rural and agricultural.

If you’re open to just historic clapboard structures that aren’t barns, you can’t drive more than a few miles without seeing some. These come to mind immediately: Mabry Mill, Puckett Cabin, Brinegar Cabin. Lots of others scattered about.

For barns in particular, off the top of my head: the Johnson Farm at Peaks of Otter (you’ll need to hike to it), Explore Park (though you’ll want to ask about access after 8 p.m., as it’s managed by the city of Roanoke) and the farm at Humpback Rocks Visitor Center. — Chris

2. Non-Coma Z Lenses

Question:

I just switched to the Nikon Z 6II and am looking for a recommendation for a lens without coma distortion. I have tried and returned two Rokinon 14mm f/2.4 lenses with severe coma. My preference would be a lens in the 14-24mm range. — Edmund

Answer:

You are going to love the Z 6II! The FTZ adapter works well, so it gives you lots of options, but both the Nikon Z 14-24mm f/2.8 and Nikon Z 24-70mm f/2.8 are among the very best lenses Nikon has ever produced. Pricey, but worth it. Another option (assuming you have the FTZ adapter) is the Nikon’s F-mount 14-24mm. There is nothing better than those three lenses at this time. — Lance

3. Moving Lightroom on a Mac

Question:

Is there a simple way to migrate Lightroom files on a Mac? I will soon have to bring in a new and larger external hard drive. — Julie P.

Answer:

Yes, and the process is actually pretty simple.

  1. With Lightroom closed, plug in the old drive and the new drive.

  2. Copy all of the information from the old drive to the new drive.

  3. Unplug your old drive and launch Lightroom. You will see question marks next to your folders, because Lightroom can no longer find your old hard drive.

  4. You need to locate the parent folder for your images. In Lightroom, navigate to the topmost folder in your Folders hierarchy. That may well be the parent folder, but it’s possible that the true parent folder is hiding above it. By right-clicking on that topmost folder, you will see an option to Show Parent Folder. This command will show the folder containing that topmost folder, if there is one.

  5. Right-click on your parent folder and choose Find Missing Folder. Lightroom will open your system’s Finder.

  6. Navigate to the new drive, then choose the matching parent folder and click Choose.

The parent folder and all of its subfolders (all on the new hard drive) will now be linked back with Lightroom. — Tim

4. Light Pollution Filters and Auroras

Question:

I just read your article on light pollution filters. Will these filters also be usable when shooting Northern Lights? — Claron K.

Answer:

Yes, I believe they would be useful for shooting Northern (or Southern) Lights when near inhabited areas. As auroras tend to be green, pink, purple and sometimes blue, the orange/yellow blocking ability would have a complementary effect. However, you could be lose up to 1 stop of light, so keep that in mind. — Matt

5. Star Trail Settings

Question:

I just reviewed your “How I Got the Shot: Lake McDonald” blog post about star trails. Phenomenal image! I have done a ton of research on how to do this kind of photo, but was hoping for a simple recommendation for settings and timing. I’ll be shooting with either a Nikon D850 or a Nikon Z 6 with a 14-24mm lens. — Darlene

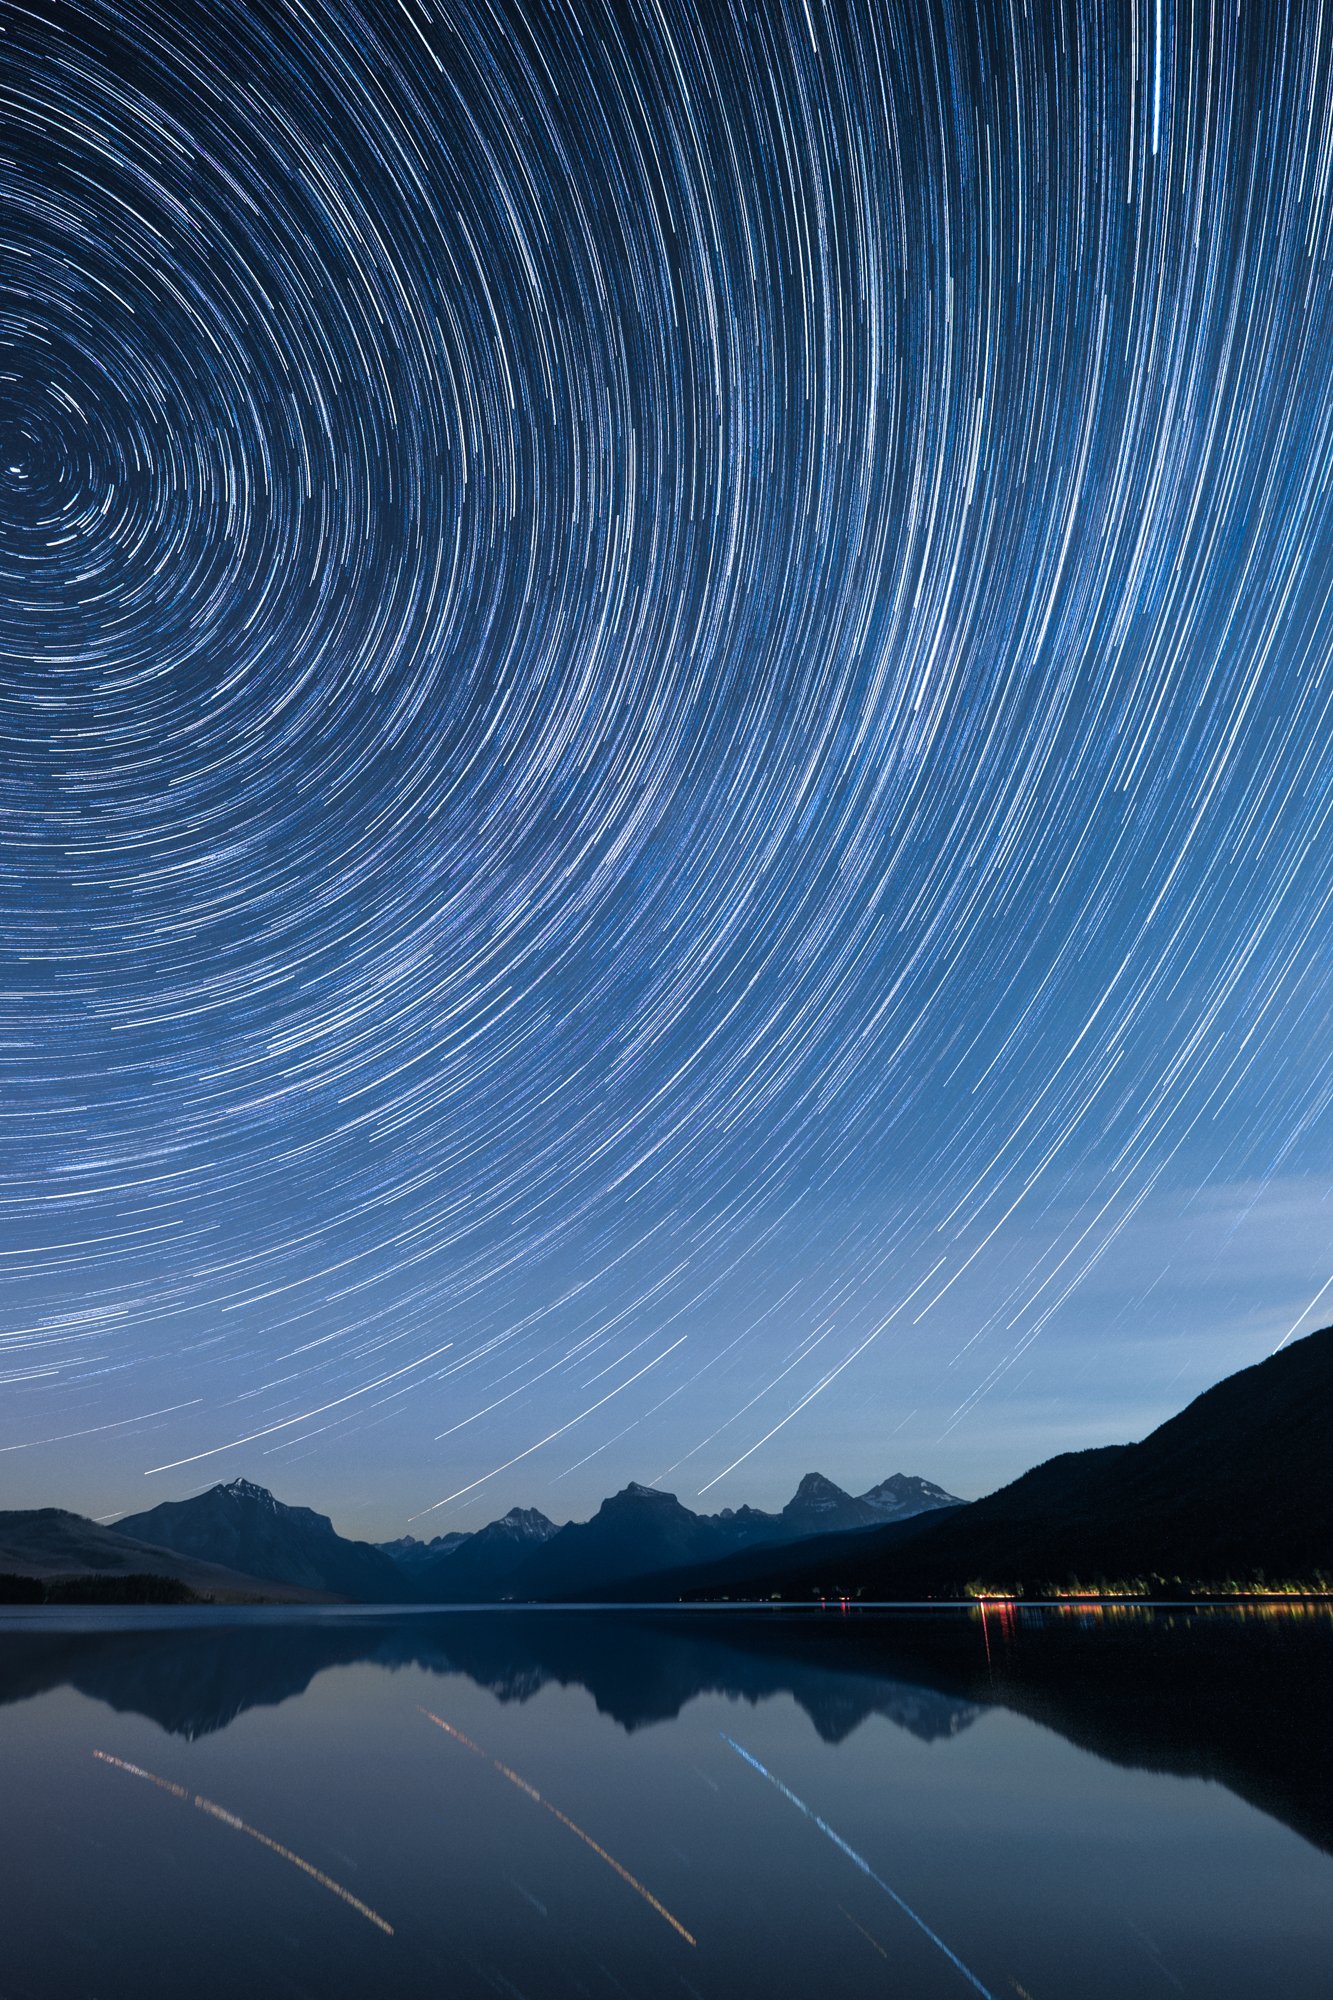
Star Circles Over Lake McDonald. © 2015 Gabriel Biderman. Fujifilm X-T1 with a Fujifilm 10-24mm f/4 lens. 41 stacked frames, each shot at 2 minutes, f/4, ISO 3200.

Answer:

There is no simple formula for star trails. You need to find the balance between a proper base exposure, how long you want to go, and image quality.

You can capture trails with either one long exposure or with multiple shorter exposures that you later stack in Photoshop. Single exposures are often best for up to 15-minute shots, but when you want longer trails you’ll most likely want to shoot multiple frames to stack.

Do a high ISO test shot to figure out the proper exposure. Then you want to get to a more optimal image quality setting. Lower your ISO to something you’re comfortable with in terms of noise (for example, maybe ISO 800), and then adjust your shutter speed accordingly to compensate.

Also consider apertures, in this regard: The wider the aperture, the higher number of stars will appear. While that might sound like a good thing, too many star trails could look too chaotic and distract from the rest of the scene. For example, on a dark night f/2.8 will show an overwhelming number of trails, while f/8 would create a more subtle effect. Under a full moon this isn’t so critical, as not as many stars are visible anyway. Either way, just be careful that you don’t stop down so much that you have to crank up your ISO and sacrifice image quality.

Another consideration is how long your camera’s shutter can be open without generating long-exposure noise (speckled red, blue and green confetti-like specks in your image). This noise is produced when a camera processor overheats during long exposures, but higher outdoor temperatures and lower humidity also play a factor. You have to learn what your camera can tolerate by running some tests in different conditions. For example, if the ambient temperature is 60 to 65 F or less then you can usually get away with 4- to 6-minute exposures, but if the temperatures are 80 F or higher then you might be limited to 30 seconds or 1 minute.

To counteract that effect, you might wonder about using long-exposure noise reduction (LENR). You can use that quite effectively if you’re shooting one long exposure for star trails, but it would be countereffective for stacking. The reason is that for most cameras, LENR disables the shutter after each exposure (for the same amount of time as the shutter speed), which would create breaks in your star trails.

The final decision is how long you want your star trails to be. When facing north for circumpolar trails, you want to shoot for at least 1 hour, and the longer the better. If you are facing east, west or south, you can get away with shorter total exposures—8 to 30 minutes might be sufficient. — Gabe

Chris Nicholson is a partner and workshop leader with National Parks at Night, and author of Photographing National Parks (Sidelight Books, 2015). Learn more about national parks as photography destinations, subscribe to Chris' free e-newsletter, and more at www.PhotographingNationalParks.com.

UPCOMING WORKSHOPS FROM NATIONAL PARKS AT NIGHT

10 Silver Linings: Our Favorite Night Photographs of 2020

If you were to wrap up everything that was 2020 into a single long-exposure frame, I’m confident it would be overexposed. (Too soon?)

But that’s not how we do it around here. We take our time. We are choosy. We are deliberate. We expose for the shadows, yet retain critical details in the highlights. We exercise the right to turn our tripod around 180 degrees and shoot the other way. Why? Because the next best shot is somewhere near the infinite focal point of our lives: night photography. 

Now we embark on the hardest quest of the year: to each choose only two frames to represent our favorite creative photographs from of 2020. Please enjoy the highlights from each of our agonizing selection processes. Keep in mind, we (mostly) love all of our photos. But these rose to the top.


Chris Nicholson

Comet Neowise, Monhegan Island

Comet Neowise, Monhegan Island, Maine. Nikon D5 with a Nikon 24-70mm f/2.8 lens. 5 seconds, f/2.8, ISO 25,600; 16 images stacked in Sequator.

One of the nice surprises of 2020 was Comet Neowise. It was a gift to anyone who had been longing to be outside under night skies again, especially photographers. It first appeared at night at the beginning of our July workshop in the Mid-Coast region of Maine, and it really started to shine during our subsequent workshop on Monhegan Island and in Acadia National Park.

It was on Monhegan that I made this image. Lance and I had been shooting on the island for two nights alone, then two nights with the group. On the last of those evenings, in the extra-late hours, I found myself alone on an extra-quiet trail along the rocky shore. I came upon this house and cottage, with the comet nestled quietly in between.

What I didn’t see through the dimly lit window was the perfectly framed head of someone sleeping on a pillow. That detail became apparent only when viewing the long exposure on my laptop display the next morning. Sometimes surprises make the image, and for me that was certainly the case here. Aesthetically I had liked the photograph before, but once I saw the sleeper, I loved it.

The open window and the sleeping would-be stargazer under the comet-adorned night sky all combine to tell the tale of what it felt like to be outside and at peace again.

Moon Over Mobius

Moon over Mobius Arch, Alabama Hills National Scenic Area, California. Nikon D5 with an Irix 11mm f/4 lens, light painted with a Luxli Viola. 20 seconds, f/8, ISO 3200.

In October I was finally able to visit and photograph Alabama Hills—a place I’d seen many photographs of, as Lance, Tim and Gabe have shot there plenty.

Night photographers are of course drawn to rock formations, and Alabama Hills offers a nearly infinite supply of them. Perhaps the most famous, especially for photographers, is Mobius Arch. The day I photographed it was (and still is) the only day I’ve been there, but I was able to shoot it in amazing late-afternoon light, and later in serene moonlight. Yet those two opportunities were hours and hours apart.

I’d spent most of the evening helping workshop participants in other spots, ranging from right next to the cars in the parking lot (where folks were shooting star-panos of the mountain range that flanks the boulder-strewn landscape) to locations far and off the trail (where others were shooting star circles over that same landscape). Only at the end of the night did I return to Mobius, with the last two participants alongside. The three of us worked quietly together, each honed on our own ideas of how to interpret the scene.

I worked on this particular take for about 20 minutes. I already knew the exposure and the light painting approach from previous takes. The trick, though, was following the moon as it set behind Mobius, inching the tripod along the ground, keeping la luna framed right at the edge of the arch from one exposure to the next, until I finally captured what I was hoping for.

Gabriel Biderman

Utakleiv Beach, Lofoten

Utakleiv Beach, Lofoten. Nikon Z 6 with a Nikon Z 14-30mm f/4 lens at 17mm. 8 seconds, f/4, ISO 12,800.

I feel very blessed to have gone to such a special place as Norway prior to the world turning upside down.

Lofoten was an epic experience, but our nights were tricky. Clouds and snow were our constant companions. We kept an eye on the weather and the Kp index to try to predict our best chance at capturing the northern lights.

Finally we saw a good report. The forecast for the elusive aurora opening was going to be from 8 to 9 p.m.—a narrow window before the clouds would roll back in.

We knew the perfect place to go: Uttakleiv Beach. We had spent a day at Uttakleiv earlier in the trip, so we were familiar with the terrain. It has seaside mountains to give scale and water to reflect the night sky.

I’ve never seen a weather forecast be so on point. When we arrived, the overcast skies made the situation seem like a bust. But at 8:00 on the dot, the skies cleared and the magical green lights started their dance. For most of our group, this was the first time witnessing auroras, but to be honest, even for the experienced, this night was pretty special.

For one hour we danced with the northern lights, aiming our cameras as the auroras moved along the purple skies. It was truly magical. And it lasted, as predicted, for one hour. For all of us who shared a night under the northern lights, we’ll carry the experience forever.

Summit Bridge, Red Hook

Summit Bridge, Red Hook. Mamiya 7 with a Mamiya 65mm f/4 lens. 30 seconds, f/8, ISO 100 (Fujifilm Acros II).

Upon returning from Norway, my “adventures” consisted of my apartment in Brooklyn and the surrounding areas. As frustrating as it was not to be under the stars of our national parks, I fell back in love with my “backyard” and film.

I live in Carroll Gardens in Brooklyn. It is a quaint neighborhood where everyone is proud of their front garden. I battled my stir craziness during the pandemic by taking night walks in the neighborhood. I dusted off one of my favorite film cameras—my medium format Mamiya 7—and got back to the basics of shooting film. Brighter urban lights make film exposures fairly easy to determine. 2020 also welcomed the return of Fujifilm’s Acros 100 (now II), which has the least reciprocity of any film on the market and makes long exposure film shots relatively easy.

My walks would often lead me to neighboring Red Hook, which features a mixture of industrial buildings, wharfs, cobblestone streets and old-school residential homes.

Summit Bridge, a small bridge that takes pedestrians up and over the Brooklyn Queens Expressway, unites our two neighborhoods. I’ve walked over it a thousand times, but this time all the elements of the scene clicked for me. I saw lines leading up to the beacon of light. Heck, there were lines galore! The lines of the steps connected with the lines of the rails, which intersected with the lines of the spear-headed fence, and the light reflecting on the brick building also leads the eye to the fence, which all leads back to the focal-point light.

I shot this just two weeks ago. The image is a perfect bookend for a year that started in a distant archipelago and ended very close to home.

Lance Keimig

Portland, Oregon

Portland, Oregon. Nikon D780 with a PC-E Nikkor 28mm f/3.5 lens. 8 seconds, f/8, ISO 100.

Probably like most people, 2020 was not my most productive year, photographically or otherwise. All in all, I count myself lucky though. We managed to hold a few workshops, stay healthy, and fill most of our 2021 workshops and tours. The at-home stress test with my partner Katherine only brought us closer together, despite both of us dealing with ongoing family crises. I’m coming out of this horrible year in better shape than a lot of people, and am grateful for it. Creatively, the year is a write-off, and that’s OK, all things considered.

Katherine and I went to Portland, Oregan, to help celebrate a friend’s birthday in late February, just as the COVID-19 scare was beginning. While there we got together with another old friend who took us out night-shooting in an industrial area that just happened to be near a brewery that Gabe said Katherine and I had to visit. (We did.)

One of the things I came to realize in this truncated year was that I really miss urban night photography. It’s where I started, and I plan to get back to it in a big way when COVID subsides.

This image might not have a lot of appeal to most people, but I love the simplicity of it. The repeating shapes, the backlighting, the shadows, the minimal colors. It’s the kind of image I used to make all of the time, and want to make again. I guess that I also like it because it represents the last moments of freedom before we were all overwhelmed by the pandemic.

Acadia National Park

Eagle Lake panorama, Acadia National Park, Maine. Nikon D750 with a Sigma 24mm f/1.4 Art lens. Five stitched images shot at 15 seconds, f/2, ISO 6400.

Chris and I were joking that I’d be submitting Comet Neowise images as obvious favorites, because that’s pretty much the last time I took a night photograph. I do have a couple of decent comet photos, but it was this pano of Eagle Lake in Acadia National Park (made during the comet’s peak) that I chose to share here. Many of you know that Acadia is one of Chris’ favorite parks, and I was very happy to have been able to spend some time with him there this summer as part of the two back-to-back workshops we somehow managed to pull off in Maine in July.

I’m generally not a landscape photographer, nor a big Milky Way shooter, but this was such a gorgeous scene, and such a peaceful place to be in such a calamitous time, that the memories of being there that this image brings back make it my second pick for my favorite images of the year.

I’m thinking now how snapshots to the non-photographer serve mainly as memory triggers to take one back to a time and place from the past. I guess the same can be true for professional photographers too, as that’s what this image does for me. It’s a bookmark in time, in this case for a brief reprieve from the nonstop barrage of bad news that was 2020. But—this year is coming to an end, and if we are diligent, and a bit lucky, as we round the corner into 2021, things will start to brighten, and new opportunities will await. I’m ready for them.

Matt Hill

Lance on the Racetrack

Lance Keimig on Racetrack Playa, Death Valley National Park. Nikon Z 6 with a Venus Optics Laowa 15mm f/2 FE Zero-D lens. 20 seconds, f/5.6, ISO 1600.

If I could sum up 2020 with one image, it would be this pensive portrait of Lance on Racetrack Playa in Death Valley National Park.

That workshop seemed to be foreshadowing the year ahead of us. We were plagued with adversities. From sand storms to power outages to a scarcity of fresh food, only tenacity on everyone’s part brought us to a successful end. This included our alumni, the workshop leaders and the surprise guests (Gabe and Tim).

My consideration of this image includes the crisp starry sky, the crusty playa and the soft memory of where Lance lingered, considering what occupied his attention at that moment. In the distance you can see other people forming their own relationship with the night sky. Plus, the sign of perhaps other strangers arriving or departing in the car trail on the far side.

2020 will hopefully fade into insubstantiality as this instance of Lance’s pondering did. But hopefully the tenacity and lessons we bring with us will have a more permanent home in our decision-making process.

It’s my wish that we will employ more empathy. Take a little more time to consider the perspective that distance from “normal” offers. And to take the hope one can find in this and apply it to making the things we find important thrive.

Molly Diptych

Diptych of Molly on the Hudson River. Nikon Z 6 with a Venus Optics Laowa 15mm f/2 FE Zero-D lens, lit with a LumoPro LP180 speedlight and a Nanlite Pavotube II 6C. Left: 10 seconds, f/4, ISO 3200; right: 6 seconds, f/3.5, ISO 100.

If you could truly render your perception of another being into a descriptive portrait, how would you approach executing it? I ask myself this before many portrait shoots.

This particular diptych of night portraits was the culmination of something I hold very dear: the opportunity to collaborate with other creative people. Such as the subject of these portraits and the team around this shoot.

Molly, who posed for these, has layers upon layers of truths she finds crucial and things about the world she works tirelessly to improve. From social justice to art, her strength of character and determination were elements I wanted to preserve and to enhance.

Being a fellow artist and photographer, Molly was able to offer contributions that went beyond posing in front of the camera. Her willingness to collaborate, with clear ideas on how she wanted to pose, and her willingness to stand in the murky Hudson River on a warm July night all yielded a rich session with many images I love.

For a few years we were promising to make some art together. And this was really one of the first few chances. I’m happy. And I believe the diptych of Night Paper on the left and a light painting night portrait on the right speak to each other.

The best ideas really require getting other people involved to render the vision. The other people I want to thank are Kelly Mena for producing the video shoot preceding the Night Paper shoot, and my wife Mabel for being my stalwart creative support on the video and portrait shoots. And for that matter, practically everything else.

For me, 2020 will always be a time of exploring the realities and concepts behind isolation, safety and security. This portrait pair is one glimpse into a topic I want to explore even more.

Tim Cooper

Steam at Excelsior Geyser

Steam at Excelsior Geyser, Yellowstone National Park. Nikon Z 6 with a Nikon 14-24mm f/2.8 lens at 20mm. Two blended images shot at 6 seconds, f/2.8, ISO 1600 (foreground) and 15 seconds, f/2.8, ISO 6400 (background).

During our Yellowstone National Park workshop in September, Chris and I brought the group to one of the largest and best-known thermal features in the park: Grand Prismatic Springs. It’s known almost exclusively for the glowing oranges and yellows of the algae and bacteria mats that surround the deeper blues of the spring. But even there, there’s much more than just one shot. And sometimes that other take can be the hero image.

While walking the location, I noticed a car coming down the road backlighting the profuse steam generated by nearby Excelsior Geyser. The play of light and shadow through the steam was simply fantastic. I knew I had to somehow capture it by the end of the night.

By the time the group left, the shot was much more challenging to make. When I exposed for the steam and car lights, the sky rendered pitch black. On the other hand, exposing for the sky overexposed the steam. This situation called for two different exposures at different times.

For the image of the sky, I waited for a break in the steam and exposed to capture Jupiter and the stars. For the next image I had to wait for an oncoming car to backlight the steam—which by that time of night took awhile. After several attempts I finally made the images I would use to create the final composite.

The backlit moving steam and the tree and mountain silhouette came together to create an ethereal image that, for me, perfectly captured the mood of the scene.

Colorado Silky Way

Silky Way over Last Dollar Road, Colorado. Nikon Z 6 with a Nikon 50mm f/1.8 lens. Two blended images shot at 2 minutes, f/2.8, ISO 320 (foreground) and 8 minutes, f/2.8 ISO 160 (background).

The San Juan Mountains of western Colorado is one of my favorite places in the world. I’ve been running workshops there every year since 1995, and I never tire of the area or the scenery. When I am there, I am inspired.

I made this image during our workshop in October, at the end of our traverse over Last Dollar Road, one of the lower mountain passes in the area. Chris and I had chosen this location as a spot where we could photograph both the sunset and, later, the Milky Way. After an awe-inspiring drive, we arrived just in time to time to frame up some shots of the sunset and then plan our blue hour compositions. Once these were made, we left our cameras set up and waited for the end of astronomical twilight. The skies were perfectly clear and every participant made great images of the galactic core.

Upon arrival, I had envisioned my final shot as a tack-sharp image of the core, but after experimenting with shutter speeds, I decided on an 8-minute exposure instead. Eight minutes of exposure is generally too short to create desirable trails when using a wide angle lens, but with the longer focal length of 50mm the trails are perfect. The narrow view of this lens also compressed the foreground and magnified the core to create the look that some call the “Silky Way.”

Your Turn

So there you go—from Maine to California, and even to Norway, and from a plethora of places in between—our favorite photographs from 2020.

Now we’d like to see yours! Please share your favorite night image from the past year, either in the comments below, on our Facebook page, or on Instagram (tag @nationalparksatnight). And then let’s all march forward together into 2021, when we’ll find new nights and new inspiration.

Matt Hill is a partner and workshop leader with National Parks at Night. See more about his photography, art, workshops and writing at MattHillArt.com. Follow Matt on Twitter Instagram Facebook.

UPCOMING WORKSHOPS FROM NATIONAL PARKS AT NIGHT