Spring Solar Storm Brings a Week of Amazing Auroras

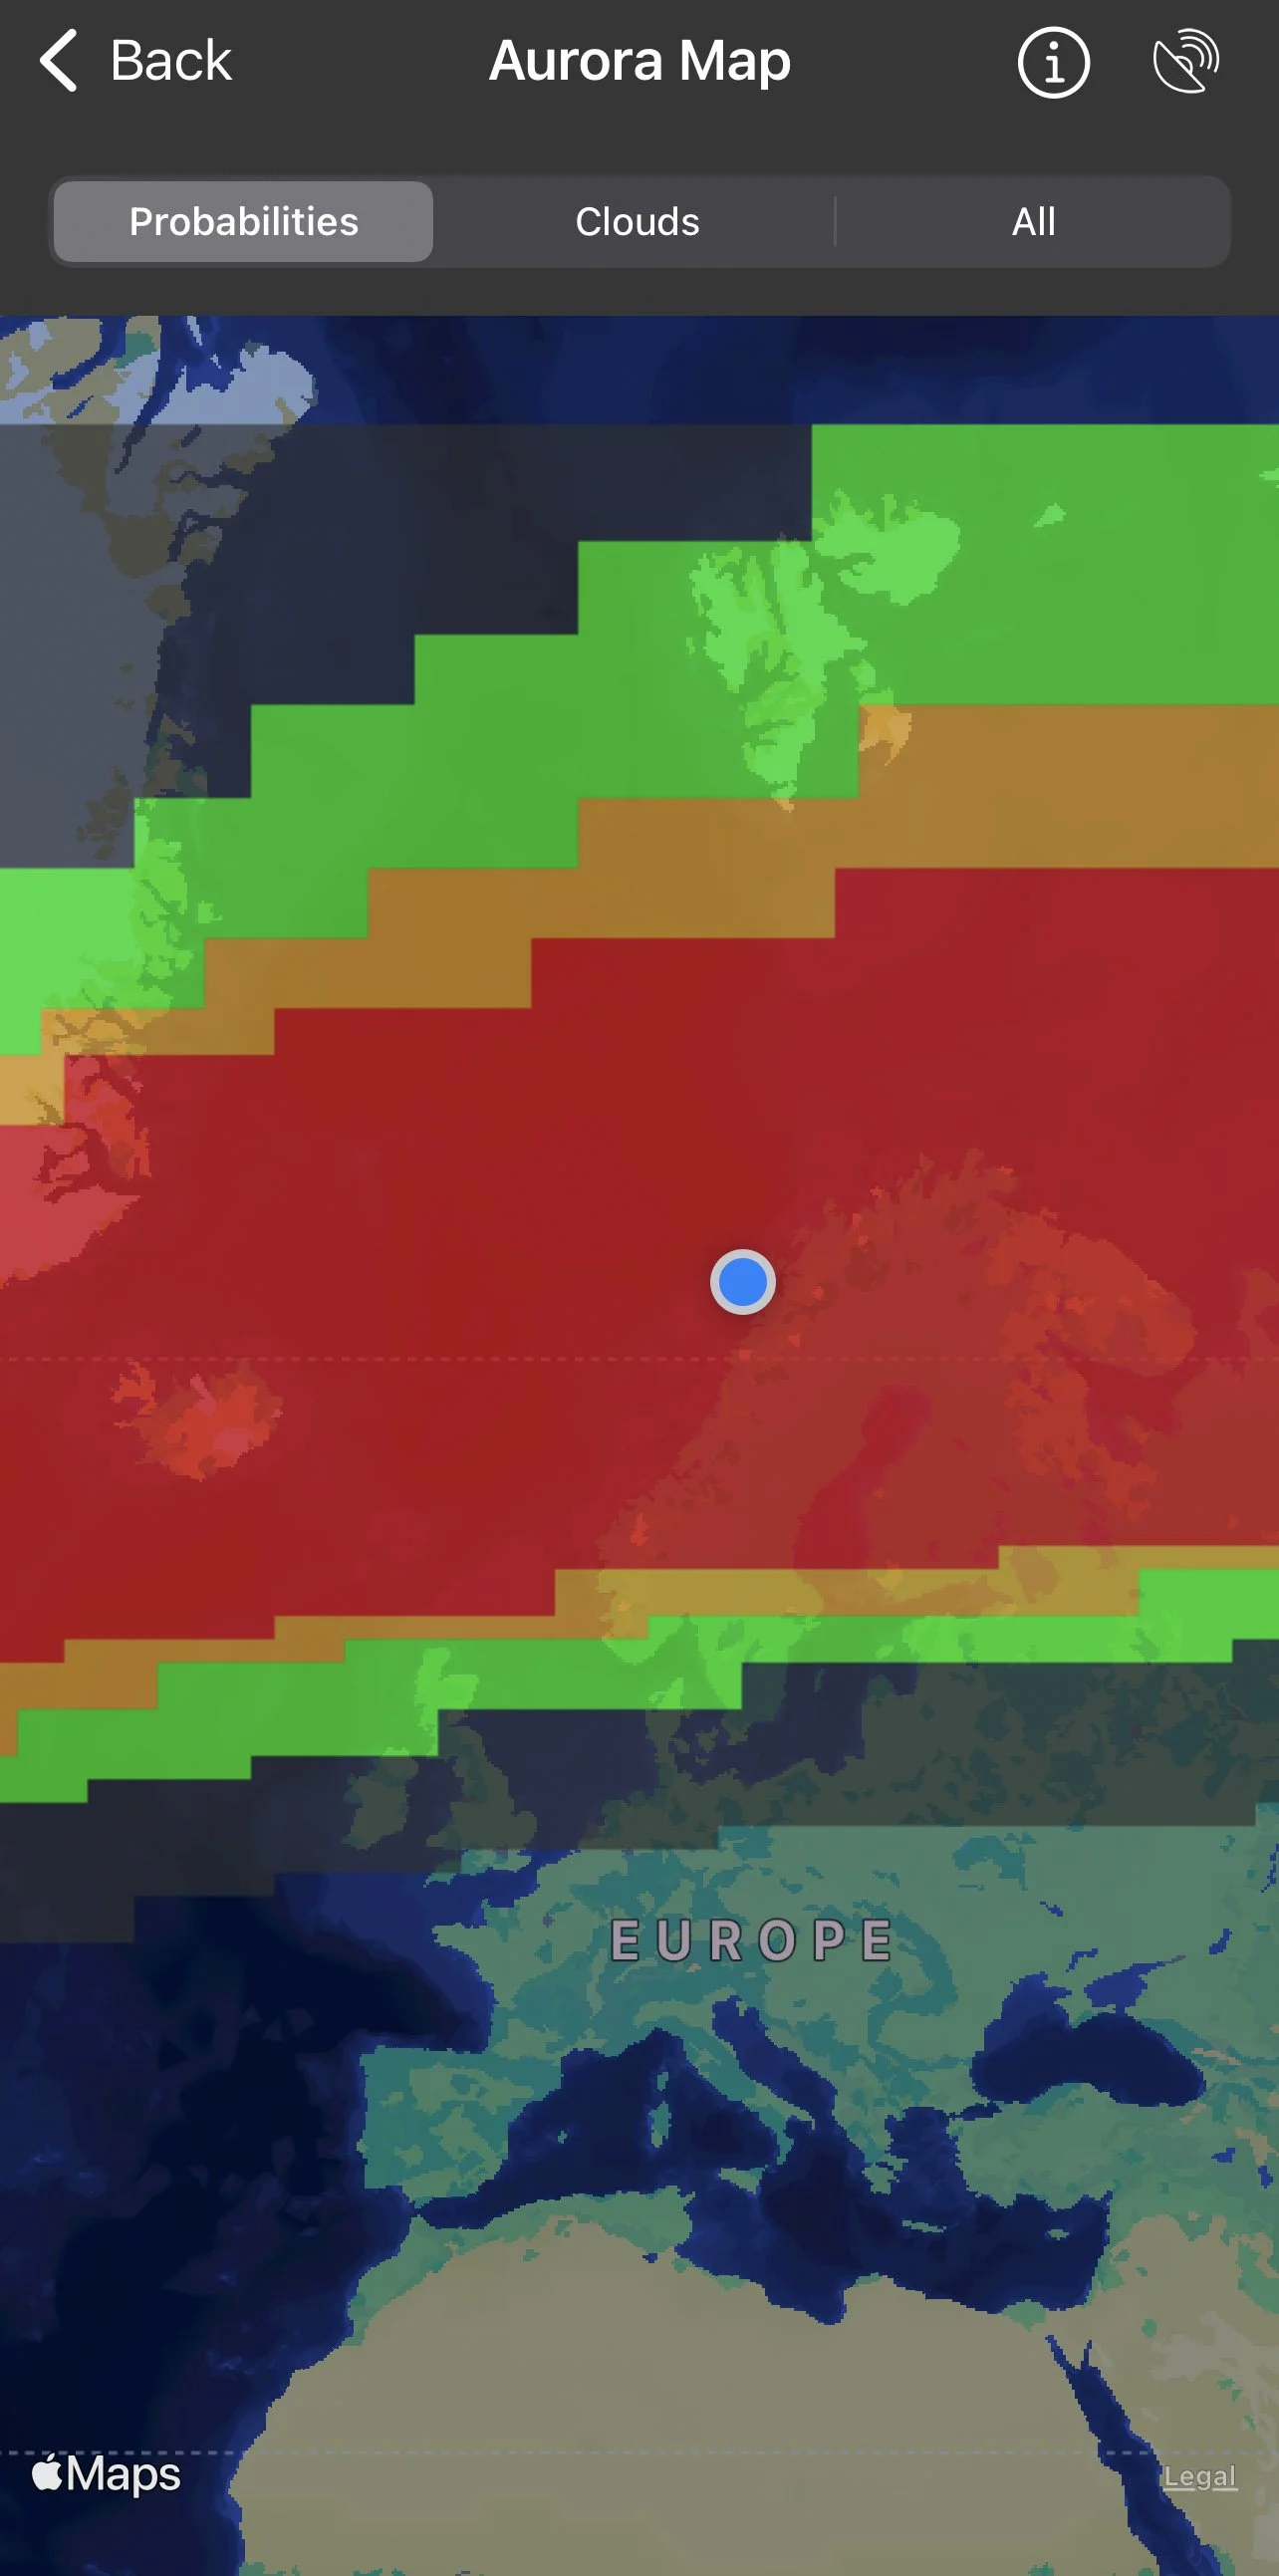
Science makes much predictable, but sometimes the universe still surprises us. It did so again this week, as the strongest solar storm in over half a decade slammed into our planet, creating amazing displays of auroras that extended halfway down the Northern Hemisphere.

The phenomenon started early in the week, when a coronal hole 20 times wider than Earth appeared on the face of the sun. The resulting solar winds were directed right at us, and soon aurora forecasts were sending the Kp index through the atmosphere.

Even before that, reports of Northern Lights were reverberating throughout the night photography world. Over the past 10 days we’ve seen posts on Instagram and Facebook, and received photos and questions from our friends and workshop alums.

Better still, we happened to be running two international night photography tours at the time, both in places perfect for viewing auroras: Iceland’s south coast and Norway’s Lofoten Islands. Both locations provided front-row seats to the most inspiring northern lights show we’ve seen in years.

Below are some of the images we’ve made over the past week and a half.

Vatnajokull National Park, Iceland. © 2023 Lance Keimig. Nikon D780 with a Tamron VR 15-30mm f/2.8 G lens. 6 frames shot at 13 seconds, f/4.5, ISO 5000, stitched in Adobe Lightroom.

Flakstadpollen, Norway. © 2023 Tim Cooper. Nikon Z6 II with a Nikon Z 14-24mm f/2.8 lens. 4 seconds, f/2.8, ISO 6400.

Iceberg in Vatnajokull National Park, Iceland. © 2023 Lance Keimig. Nikon D780 with a Tamron VR 15-30mm f/2.8 G lens, light painted with a Luxli Fiddle. Exposure 20 seconds, f/3.2, ISO 1600.

Nappskaret, Norway. © 2023 Tim Cooper. Nikon Z6 II with a Nikon Z 14-24mm f/2.8 lens. 2 seconds, f/2.8, ISO 6400.

Nappskaret, Norway. © 2023 Matt Hill. Nikon Z6 II with a Laowa 15mm f/2 lens. ISO 3200, f/2.8 and 2 seconds.

Lofoten Islands, Norway. © 2023 Matt Hill. Nikon Z6 II with a Laowa 12mm f/2.8 lens. 6 frames shot at 3 seconds, f/4, ISO 6400, stitched in PTGui.

Vatnajokull National Park, Iceland. © 2023 Chris Nicholson. Nikon D5 with a Nikon 14-24mm f/2.8 lens. 10 seconds, f/5.6, ISO 6400.

Aurora over Iceland. © 2023 Chris Nicholson. Nikon D5 with a Nikon D5 with a Nikon 14-24mm f/2.8 lens. 2.5 seconds, f/2.8, ISO 3200.

More Information

Want to learn more about this solar storm? Check out:

Want to learn more about photographing auroras? Check out our blog posts:

Your Turn

Have you been out photographing the auroras this week? We’d love to see your images! Share in the comments below, or on our Facebook page, or on Instagram (tag us @nationalparksatnight #nationalparksatnight #seizethenight).

And by the way, the show isn’t over. Auroras are continuing to dazzle dark-roaming photographers. So get out there and seize the night!

Chris Nicholson is a partner and director of content with National Parks at Night, and author of Photographing National Parks (Sidelight Books, 2015) and Photographing Lighthouses (Sidelight Books, 2023). Learn more about national parks as photography destinations, subscribe to Chris' free e-newsletter, and more at www.PhotographingNationalParks.com.

UPCOMING WORKSHOPS FROM NATIONAL PARKS AT NIGHT

The Night Photographer's Guide to Star Stacking (Part II)

Note: This is the second in a three-part series about creating star trails with the stacking technique. Part I covered how to shoot the raw materials. In Part II, below, Tim goes over the required post-production. Later he’ll follow up with Part III, in which he’ll show how to clean up the artifacts of the technique (such as plane trails).


Previously I wrote about the in-field steps for creating star trails from multiple exposures. Now we’re ready for the next step, which is how to process those images into one final star trail photograph. And, as a bonus, I’ll include a light-painted foreground shot into the mix!

While there is a variety of software that can process raw files, Photoshop is still the industry standard for compositing images. In this post I’ll use Lightroom and Photoshop to complete our star stack.

The Lightroom Steps

Once your images are downloaded, all the frames for your stack should be together, because you shot them sequentially. For this example, my images are in a Lightroom folder called Inyo Mine (Figure 1).

Figure 1.

At this point you could bring the frames into Photoshop to stack them, but I recommend doing as much editing to the images as possible before sending them over. This could be as little as altering the exposure or as extensive as masking and removing plane trails from each image. I prefer to make adjustments beforehand to maximize the advantages of the raw workflow—once the frames are in Photoshop, they’ll be rasterized and any subsequent image adjustments could possibly hinder image quality in a way that wouldn’t happen earlier in the process.

However, you should note one caveat: We have seen that the more edits you make before stacking, the higher the chance that the final image will suffer from moiré. Now, you might never see moiré, but some photographers do, and some see it more often. The incidence of moiré can vary from one camera model to the next—for example, we tend to see it more with higher-resolution cameras.

The problem with moiré is that it can’t be edited out, so it needs to be avoided. As you’re getting into stacking for star trails, if you notice that you encounter moiré in your final images often, then it might just be more efficient to do your basic image edits after stacking rather than before. (More on this in a little bit.)

Either way, the edit we see that most often causes moiré in a stack is Lens Corrections—in fact, it’s common. So that’s the one adjustment you might want to make a habit of waiting until later to make.

However much editing you decide to do, you should ensure that global adjustments are the same on all of the images. Select all of the frames by clicking on the first, holding the Shift key, then clicking on the last (Figure 2).

Figure 2.

For this example I adjusted the White Balance, increased the Exposure and Whites, and added a touch of Dehaze on the first star trail image. We want these all of our global adjustments to be applied to all of the star trail frames, otherwise the stars will look different at various spots in the final trails. To apply the edits to all the frames, with all of the star trail images selected, click the Sync button (Figure 3), click Select All, then click Syncrhonize. (You’ll notice that I did not include the light-painted image with this sync, as I want to edit that separately.)

Figure 3.

Now that the global adjustments are synchronized across all of the star trail frames, you can make any edits that may be needed on individual files, such as removing plane trails, masking etc. At this point I made some adjustments to the light-painted foreground (Figure 4).

Figure 4.

Once all of your editing has been done, return to the Library module and again select all of the images you wish to stack (Figure 5). Notice that in this case I have selected all of the star-trail frames as well as the light painting frame.

Figure 5.

Choose Photo > Edit In > Open as Layers in Photoshop (Figure 6). This command does a lot of work for you in the background. It takes each of your raw files, make copies and converts them to TIFF, then sends them to Photoshop, each as an individual layer in one document. Depending on your Lightroom settings, this may produce a PSD or TIFF file. Either is fine.

Figure 6.

The Photoshop Steps

Once the frames begin opening in Photoshop you’ll see them appear as different layers in the Layers panel. The bottommost layer will show as “Load Layers” (Figure 7); this indicates that Photoshop is still opening and placing new files into the document. Be patient with this step. It could take a while depending on how many frames you are using.

Figure 7.

Once the images have been loaded you’ll see the Layers panel filled with your individual frames (Figure 8).

Figure 8.

Click on the top layer, hold the Shift key, then click on the bottom layer (you may have to scroll down a bit). This selects all of the layers so that our next step will apply to all layers in the file.

Now it’s time to change the blending mode, which is how we’ll combine the stars that appear in the different layers. The blending mode is set with a dropdown menu located near the top of the Layers panel (Figure 9).

Figure 9.

We want to change the blending mode to Lighten. With all of the layers still selected, click on the arrow for the blending mode dropdown menu, then from the options, select Lighten (Figure 10). Witness the magic. All of your stars have now combined to create trails.

Figure 10.

How did this work? Imagine the individual layers as individual photo prints stacked on a table. No matter how large the stack, you would see only the topmost print. It’s the same with layers.

However, changing the blending mode on all of the layers to Lighten tells Photoshop that the brightest part of each layer should show through all the way to the top. This means that wherever there is a star in the sky, it will show through.

Figure 11 shows an enlarged portion of the sky, and I have turned off the visibility of all the layers except one (circled in red). This was done by clicking the eyeball off for all the other layers, thus turning off their visibility.

Figure 11.

In just that one layer, you can see that the star trail is quite short. But when I activate another two layers, the trail lengthens (Figure 12).

Figure 12.

This is because the stars on these layers are brighter than the darker sky in the same spots on the other layers. Remember that with the Lighten blending mode, the brightest areas of each layer show through. So when all of the layers are visible (eyeballs turned on) and their blending mode is set to Lighten, you will see all of the star trails from each layer (Figure 13).

Figure 13.

Moiré

Note that this is the point where you might see moiré. It can be caused by the processing algorithm creating just slightly different pixels from one layer to the next. Zoom in to the sky and look for moiré, which will appear as a pattern of bands of somewhat lighter and darker pixels, such as in Figure 14. If you see that, you cannot edit it out. Your best bet is to close file (don’t bother saving), go back to Lightroom, undo some edits, and then re-create your layered Photoshop file.

Figure 14.

In that case, here’s how to troubleshoot:

  1. As mentioned earlier, the adjustment that we most often see causing moiré in a stack is Lens Corrections. If Enable Profile Corrections is on, turn it off, create the stack again, and see if that fixes the problem.

  2. If not, then it’s back to Lightroom. Zero out your most aggressive edits (Shadows at 100?!) and try again.

  3. If you’re still getting moiré, zero out all of your edits, create your stack, and then edit your final image in Lightroom.

We have seen only one case ever where these steps didn’t solve an issue with moiré.

If you are working with only star trail layers, with no light painting layers, then you could be finished at this point. Feel free to jump ahead to “Saving the File” at the end of this post.

Masking Around a Different Foreground

It’s been a while since I mentioned it, but remember the other image I opened as a layer, the one with the light painting? Because the lighting in that one layer is brighter than the dark foreground in all the other layers, all that light painting shows through—again because of the Lighten blending mode. More magic!

However, that light painting layer is causing one problem. That exposure was not made sequentially with the others. I shot the light painting frame before I started shooting the star trail frames. It has stars in it too, and because the blending mode for that layer is also set to Lighten, those stars are showing in the stack.

Figure 15 shows the image with the light painting layer turned on. You can see all of the stars (circled in red) from the exposure I made while light painting. This exposure was shorter, so the stars appear as dots rather than small trails.

Figure 15.

I do want the light-painted foreground from this layer, but I don’t want those star points to appear in the sky and break up my star trail pattern. The solution? Mask out the sky from that layer.

Masking

Selecting and masking in Photoshop is a deep subject and we could spend a summer of Sundays plumbing its depths. To keep this simple, we’ll use a powerful (and somewhat new) selection tool called Select Sky.

The goal is to keep the sky of the light-painted layer from showing in the stacked final image, while still letting the foreground show. This means we want a selection of the foreground for our mask. But in this case (and in many cases), it’s easier to select the sky and then invert that selection so that we have the foreground selected instead.

I begin by clicking on the light painting layer (Figure 16). Clicking on this layer tells Photoshop that when I start using selection tools, the selections will be based on the information from this layer. Then I choose Select > Sky.

Figure 16.

Then I choose Select > Inverse to change the selection to the foreground (Figure 17).

Figure 17.

The selection of the foreground is now active (shown by the marching ants in Figure 18).

Figure 18.

To turn this selection into a mask, all we have to do is click on the Add a Mask icon (Figure 19).

Figure 19.

The newly created mask on the light painting layer (circled in Figure 20) allows the foreground to show (as indicated by the white area of the mask thumbnail) but blocks the sky from showing (indicated by the black area).

Figure 20.

Saving the File

Once you’re done, you’ll want to save the file and send it back to the Lightroom catalog. To do so, select File > Save, then File > Close. Once back in Lightroom, you can continue fine-tuning the edits with a more familiar set of controls.

However, there’s a potential hitch when it comes to saving. Image files with lots of layers can be quite large. The more frames you stacked, the larger the final file will be. The problem is that PSD files cannot be larger than 2 GB, and TIFF files cannot be larger than 4 GB. If your layered image is larger than those limits, Photoshop will complain, and you’ll need to make a decision. You may:

  1. Flatten the layers (select Layer > Flatten Image), which will dramatically reduce the size of the file. This means Photoshop can save the file as a PSD or TIFF, which has the added benefit of taking up less space on your hard drive. However, your layers will be gone forever, so if you want to make layer-level changes in the future, then you’ll need to go through the whole process again.

  2. Save the file as a PSB, which is Photoshop’s large-document format. Simply select File > Save As, and choose “Large Document Format (*PSB)” as the file type. This will allow you to keep all your layers, but will of course use more room on your hard drive.

More Potential Steps

Creating star trails by stacking images has a lot of advantages, but it can also create some artifacts, such as plane trails, or stray light from flashlights or from cars driving by. Working with those artifacts is the next step in your process, and I’ll cover that in the next and final blog post in this series. Stay tuned for Part III, coming soon.

Tim Cooper is a partner and workshop leader with National Parks at Night. Learn more techniques from his book The Magic of Light Painting, available from Peachpit.

UPCOMING WORKSHOPS FROM NATIONAL PARKS AT NIGHT

Ready for Inspiration, Education and Fun? — Announcing the 3rd Annual Night Photo Summit

We are thrilled to announce the return of the Night Photo Summit!

Now in its third iteration, the Night Photo Summit is a 3-day virtual conference that celebrates everything night photography. Each year we aim to make it a little bigger, a little better, and to bring you even more opportunities to learn, to be entertained and (of course) to Seize The Night!

We know that there are many night photography enthusiasts out there who are looking to connect and learn, so we created the summit to exalt in the joys of our shared passion. Perhaps you’re hunkered down for the long cold winter, not able or ready to travel, but still keen to expand your knowledge and be better prepared for the coming Milky Way season. Maybe you’d like to learn a new technique to broaden your horizons, or simply long for that kick in the pants that a healthy dose of inspiration can provide.

The Night Photo Summit has all that covered––and then some.

Join us from February 3-5, 2023, to experience 3 days of dynamic presentations from 35-plus world-class photographers, authors, artists, astronomers, and national park and dark-sky activists.

Sessions and Speakers

This year’s summit features sessions on creativity, auroras, publishing photography books and lighthouses, as well as (of course) night photo techniques, including image capture, different ways of combining exposures, lighting, mobile night photography, post-processing and more.

There are classes for all levels, including a series of five recorded presentations that cover all the fundamentals of night photography. You’ll have access to those before the summit begins if you’d like a refresher, or to get you up to speed if you are just getting started in night photography.

There are intermediate and advanced level courses, as well as instructive, inspirational and informative sessions covering a wide range of topics. All in all, the programming totals over 45 hours of learning and virtual adventure.

Our incredible lineup of speakers and talks includes:

  • Albert Dros: “Cities Come to Life After Sunset”

  • Alyn Wallace: “Night Sky Wonders”

  • Chris Nicholson: “Photographing Moonlight”

  • David Zapatka: “USA Stars and Lights: A Lighthouse Project”

  • Dirk Ercken: “Light Painting from Within the Scene”

  • Elia Locardi: TBA

  • Forest Chaput: “Choosing a Telescope (and Other Equipment) for Deep Sky Astrophotography”

  • Gabriel Biderman: “9 Parks at Night”

  • Harold Ross: “Light Painting the Still Life”

  • John Paul Caponigro: “Naked Eye, Camera Eye, Mind’s Eye”

  • Joseph DePasquale: “Unveiling the Infrared Universe with the James Webb Space Telescope”

  • Katrina Brown: “Designing the Night with Light”

  • Ken Lee: “Behind the Book: My Path to Publishing a Monograph”

  • Kevin Adams: “365 Nights: A Year of Inspiration”

  • Lance Keimig: “Know Your Options: Decisions That Lead to Your Best Images”

  • Matt Hill: “Color Management for Night Photographers”

  • Michael Frye: “Reducing Noise with Star-Stacking”

  • Noel Thomas: “Astro Time-Lapse Techniques”

  • Pete Mauney: “Plane Trails at Night: Visualizing Human Networks”

  • Phill Monson: “How to Put Nature First as Creators”

  • Rachel Jones Ross: “A Field Guide to Photographing the Northern Lights”

  • Rafael Pons: “Moon Photography Planning (from Beginner to Pro)”

  • Royce Bair: “Starlight Blends”

  • Russell Preston Brown: “New Developments in Mobile Night Photography”

  • Sandra Ramos: “How to Keep Your Instagram Account from Being Hacked”

  • Sherry Pincus: “Things That Go Bump in the Night: Staying Safe in the Wilderness”

  • Susan Magnano: “Spark your Creativity with Luminescent Portraits”

  • Tim Cooper: “5 Photoshop Techniques for Night Photography”

  • … and more to be announced!

Sponsors & Giveaways

Every attendee will be automatically entered into drawings for a large number of giveaways from our generous sponsors, as well as amazing session-specific giveaways from speakers. More info on that to come!

How to Join Us

If you’re into night photography, or if you want to get into it, this is an event you absolutely do not want to miss.

Tickets are $399, and include:

  • 3 days, more than 35 instructors, over 45 hours of inspiration, instruction and fun

  • a Fundamentals series of video classes available on-demand before the summit weekend

  • 1 year of access to re-watch all of the courses

  • a live image review session

  • exclusive glow-in-the-dark summit T-shirt (mailed to attendees with U.S. addresses, and we may be able to help those from other countries too!)

  • personal access to product experts from manufacturers and developers sponsoring the event

  • giveaways throughout the duration of the summit

  • an unprecedented opportunity to connect with like-minded photographers passionate about the night

Moreover, if you purchase your ticket by January 13 at 2 p.m. EST, you’ll get your shirt and a swag bag (USA only) before the summit!

Registration is available now, so sign up today and mark your calendars to join National Parks at Night for the world’s third online Night Photo Summit!

JOIN US ON SOCIAL MEDIA

As if that isn’t all enough, we’ll be releasing plenty more information over the next few weeks. To stay tuned in to it all, we invite you to follow the summit social media accounts on:

We are very much looking forward to seeing you online next month. In the meantime, feel free to ask us any questions via the social media accounts above, in the comments below, or through the Night Photo Summit webpage.

Seize the night … online!

Lance Keimig is a partner and workshop leader with National Parks at Night. He has been photographing at night for 30 years, and is the author of Night Photography and Light Painting: Finding Your Way in the Dark (Focal Press, 2015). Learn more about his images and workshops at www.thenightskye.com.

UPCOMING WORKSHOPS FROM NATIONAL PARKS AT NIGHT

Hanging Ten: Our Favorite Photos of 2022

As time seems to accelerate with each passing year, we can look back at 2022 as when the world got its collective groove back. If 2020 is best remembered as the year we’d rather forget as the full force of Covid shut down the globe, and 2021 was a year of starts and stops as one variant after another reared its ugly head, then 2022 is the year we hit full stride and really got back up to speed.

Here at National Parks at Night, we ran a full schedule of workshops and tours, including a couple that had been twice rescheduled due to the pandemic. We ran 23 workshops and tours, six of which were international trips, including our first aboard a sailboat and our first to the Faroe Islands. We also welcomed some wonderful new people into the National Parks at Night community with our first Intro to Night Photography workshop in Death Valley.

It was a productive year for image-making too. Tim dug deeper into blue hour blends. Matt focused on rendering astro-landscapes through panoramas, vertoramas and little planets. Chris leaned into natural-looking foregrounds for night photos, whether blue hour blends, moonlit foregrounds, long exposures to fill in shadows, or employing Low-level Landscape Lighting (LLL) with a dim and cool light. Gabe leveled up his post-processing skills, getting more comfortable with blending, masking, stacking and compositing. I used new LLL tools to repurpose lighting skills I had developed a couple of decades ago.

It’s always a challenge to pick our favorite images of the year, but it’s also a great opportunity to look back at the images we made, to revisit the places we went, and especially to remember the people we traveled and worked with while making those images.

Below you see each of our top two picks from the night photographs we made in 2022.


Chris Nicholson

Moon Over Mount Baker

Nikon D5 with a Nikon 14-24mm f/2.8 lens. 10 seconds, f/5.6, ISO 800.

The Mount Baker Wilderness is one of my favorite places in the world. It’s part of Mount Baker-Snoqualmie National Forest, in a stretch of Washington state’s North Cascades mountains, bordering the wilds of North Cascades National Park. Walking the trails is like walking at the edge of heaven.

Gabe and I brought a group to the area this summer. We stayed in a chalet in the mountains for a couple of nights, where we had access to some of the most beautiful alpine scenery in the U.S. On the second night we took a short hike, and I looked for an interesting way to photograph an area I’d shot twice before. The moon over Mount Baker was calling to me—the balance of moonlight between the sky and landscape was perfect—but I was struggling to find an intriguing foreground.

I walked a little further up the trail, turned a bend around some large glacial erratics, and came upon this expanse of ice and snow. Perfect! I had to climb one of those erratics to get the angle right. The boulder didn’t have enough room for both me and my tripod, so setting up was a little precarious—but worth the trouble.

I spent a lot of time this year working on natural-looking foregrounds to night photos, and using moonlight is one of the techniques I most enjoy. The serenity and dynamics that combine in this scene are a perfect example of why.

Star Trails Over Ocean Cliffs, Acadia National Park

Nikon D5 with a Nikon 24-70mm f/2.8 lens. 20 minutes, f/6.3, ISO 200.

From one corner of the mainland to the other, I moved from North Cascades in summer to Acadia in fall. On our last night in the latter, I brought Matt and a couple of our friends to one of my favorites spots in the park—one of my favorites for either photography or hiking or even just for enjoying the sound of waves swishing onto the cliff-bottom shores.

I made this photo while waiting to make another. I’d scouted a composition that required facing west, which is the last direction of sky to get dark at night. I wanted to stay productive while waiting, so I wandered around the rocks and eventually found this eastward view toward the entrance to Frenchman Bay.

Long exposures aren’t always easy to visualize, and that was the case with this setup. I wasn’t sure I’d like the image. But I had time, so I dilated it into this exposure. And when it was done, I was very glad I’d opened the shutter.

The scene was bathed in moonlight, so I didn’t need to do any blending or light painting to get detail in the foreground. There was so much moonlight, in fact, that the stars were getting a bit washed out—so I mounted a polarizing filter to make the moonlit sky pop a little better.

Once all that was done, executing the photograph was a matter of a simple 20-minute exposure and some easy tweaks in post.

Gabriel Biderman

Liberty Bell, Milky Way and Car Trail

Nikon Z 6 with a Nikon Z 14-24mm f/2.8 lens. Foreground: 2 minutes, f/4, ISO 1600; sky: 8 seconds, f/2.8, ISO 12,800.

I was incredibly fortunate in 2022 to travel 70,000 miles, to 4 countries, to 15-plus national parks, adding almost 50,000 clicks to my cameras. Needless to say, I explored and taught a lot under the stars.

One of the most epic trips was my 3 weeks in the Pacific Northwest where I visited all three of the national parks in Washington, none of which I had previously been to. I was excited most about the least visited one, North Cascades National Park.

Known as “the American Alps,” North Cascades is challenging to explore, but once you peel back the layers it just gets better and better. The craggy mountains reminded me of the ancient peaks of Lofoten. And of those, Liberty Bell, to me, won the prize as the most distinguished of the peaks. It doesn’t hurt that—in this photo, anyway—the Milky Way rises above it and car trails act as a mirror below the peak.

We brought our workshop here and figured we’d stay for an hour or 2, but we all fell so in love with this location that we ended up staying the whole night.

There aren’t many times that I choose one spot to set up and happily stay all evening. But we had so much fun. We were all careful to compose with the Milky Way and add the road below. Some of us composed horizontally and some vertically. Most of us were shooting noise stacks because after we took our twilight base shot it got really dark and we were pushed to ISOs of 12,800 and beyond.

We’d shout out whenever a car was coming up the valley, and you’d hear the triggers firing, as well as our giggling that we’d captured another successful image of several awesome elements coming together.

We could feel the world rotating and the Milky Way moving closer and closer to the peak. Should we stay to see how it looks coming out of the top? Will it look like a volcano erupting with space dust?

The answer is yes, but that is a picture for another time. This one was similar to many that our group shot, and I don’t care. It genuinely brings me back to Liberty Bell and the excitement we all shared when all the stars, cars and mountains aligned.

Auroras Over Sleeping Bear Dunes National Lakeshore

Nikon Z 6II with a Nikon Z 24-70mm f/2.8 lens. 8 seconds, f/2.8, ISO 12,800.

Sleeping Bear Dunes National Lakeshore is one of my favorite places in the park system. The sand dunes, picturesque farmsteads, historic buildings and pristine dark skies keep me coming back for more. The people who live in the small towns that dot this Lake Michigan region are so warm and welcoming that I feel right at home.

I created this image during a workshop I teach for the Glen Arbor Arts Center. We experienced auroras on two nights! Sleeping Bear is at the 45th parallel, the halfway mark between the equator and the North Pole. That’s pretty far north for Michigan’s Lower Peninsula and the area is definitely prone to green, red and purple auroras.

This night was magical. We were chasing spiking and Steve auroras, and we settled on composing the light show and stars in reflecting pools of water. We were having a blast, but the composition was missing … well, the human element, to express how excited both the atoms and we were. So I set up the intervalometer and walked to the other side of the pool, careful to place myself close to the water so the reflection would be from head to toe.

Lance Keimig

Thurmond Train Station, New River Gorge National Park

Nikon D780 with an Irix 30mm f/1.4 lens. Two blended exposures of 15 seconds and 2 minutes, f/3.5, ISO 800.

I had long been aware of the semi-ghost town of Thurmond, West Virginia, as it reminds me of the sort of location used by O. Winston Link, train night photographer extraordinaire and one of my heroes. I had expected it to be a highlight of my visit to New River Gorge National Park, and the little town did not disappoint.

On the afternoon of the night I visited, there had been a tremendous thunderstorm, and all but emergency power was out in the area. Luckily for me, this also caused the few trains that passed through the town that evening to stop at Thurmond station and wait for traffic down the line to clear. Their headlights provided ample illumination and just the right atmosphere when combined with the heavy wet summer air lingering in the gorge after the storm.

I didn’t think that the train would stay put long enough for me to make some good exposures, but after a minute or two staring at the scene and feeling as if I’d been transported back in time, I hustled down the track to a point halfway between the resting engine and the red signal lights that were holding the train in place.

I set up low to the ground and quickly determined that multiple exposures would be required to hold detail in both the highlights and shadows. I made a number of exposures, leaving myself options to either manually blend a couple of layers or to make an HDR composite if that turned out to be the better option. It did. I was excited that a car approached from across the river, lighting part of the bridge and filling in some shadows in an otherwise dark part of the frame.

I spent the whole night enraptured by the little town, thinking of Link, and feeling so pleased to finally get to create images in his footsteps.

Eidi, Faroe Islands

Nikon D780 with a Tamron 15-30mm f/2.8 lens at 15mm. 3 minutes, f/4.5, ISO 800.

During our pre-workshop scouting in the Faroe Islands, Tim and I took a slight diversion to the outskirts of the little town of Eidi to check out a soccer pitch near the coast that we had seen as we came down the mountain above the town. I was much more interested in the town, but Tim saw the potential of this coastal view.

We didn’t shoot that day, but we did come back with the workshop one night after a wonderful Ethiopian meal prepared especially for our group at Rose’s Cafe a few miles away.

We didn’t get to do as much night photography as we had hoped, in part due to the weather, and in part due to sheer exhaustion from the long, full days we were experiencing. It was in fact raining off and on this night, but the group toughed it out and we photographed at the water’s edge for about an hour and a half. At one point the clouds opened up with the moon rising behind them, and that combined with waves crashing on the rocky shoreline and a long exposure made for one of my favorite images from our 18 days in Faroe, and of the whole year.

The Faroe Islands were a new destination both for me and for National Parks at Night in 2022, and in a year full of outstanding adventures with outstanding colleagues, it stands out as my favorite recent trip and the place I’m most excited to get back to.

Matt Hill

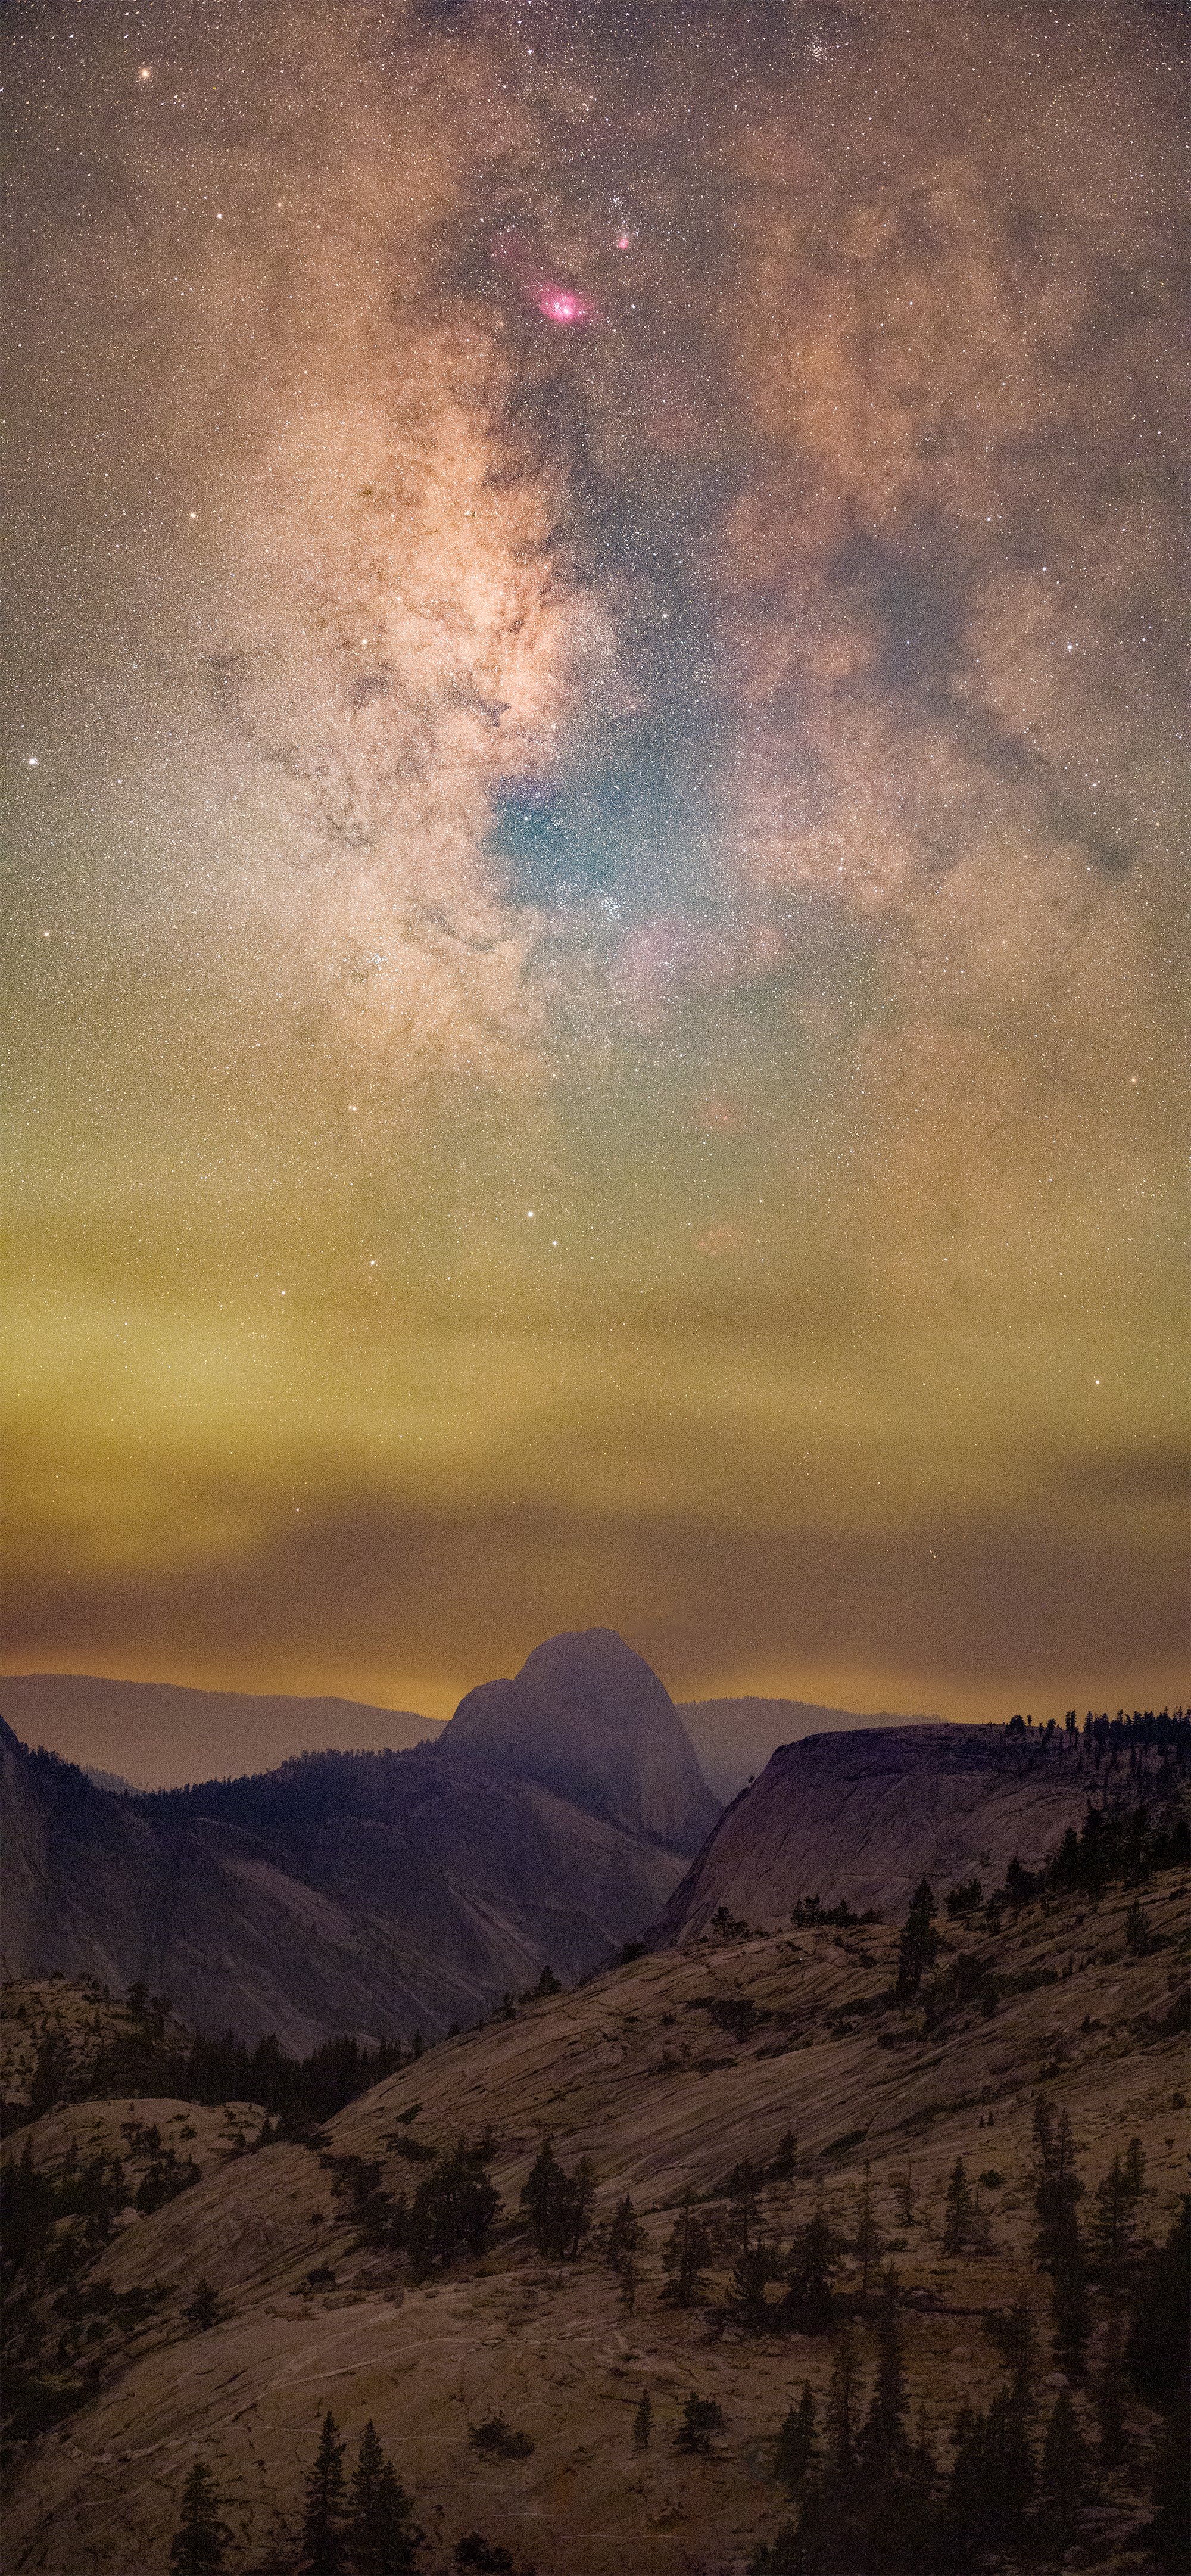
Half Dome Forest Fire Tracked Vertorama

Astro-modified Nikon Z 6 with a Nikon 70-200mm f/2.8 lens and FTZ Adapter; foreground tracked with a Benro Polaris. 30 seconds, f/2.8, ISO 12,800.

When Lance and I were in the Eastern Sierra for a workshop this year, there were scattered forest fires that occasionally blew smoke in a direction that affected us. At Olmsted Point there is a spectacular view of Half Dome, and the Milky Way core was going to line up vertically over it. What an opportunity!

Alas, upwind of the iconic peak was a forest fire and the smoke was drifting right into the view. Some people might pout, stomp their feet, shake their fists at the heavens and shout, “I want clear skies!”

Not me. I saw that smoke and said, “Wow, now this isn’t something I’ve ever seen before! It’s something real that is happening now and tells a story of the drought and fire cycles. How can I make this work for an image?”

It was after twilight, but the fire and starlight provided enough illumination for exposures at ISO 12,800. And I wanted Half Dome, which is quite diminutive from that vantage, to really stand out. So I put on a 70mm lens and composed for a vertorama where the landscape and sky were exposed at the same settings to blend well.

I shot with my astro-modified Nikon Z 6 to pull out more of the reds and magentas. I exposed the sky first to see how well the stars poked through the low smoke layer. Using the Benro Polaris to track that image for 30 seconds was a breeze.

Liking the results, I recomposed the landscape frame to include the granite valley walls leading up to Half Dome, and then completed the two-panel vertorama.

Animus Forks Little Planet

Nikon Z 6II with a Laowa 12mm f/2.8 lens. Foreground: 18 blended frames shot at 1/4, 1 and 4 seconds, f/11, ISO 800; sky: 10 stacked images shot at 15 seconds, f/4, ISO 12,800.

When we arrived at the abandoned mine town in Colorado at 11,000-plus feet, I was awestruck. I wanted to try to get everything I saw and felt into one photo. Reasonable, right? Of course. A spherical panorama would solve that! And PhotoPills showed me that the Milky Way arch from mountain peak to mountain peak would make for a strong “Little Planet” edit.

So I set up a tripod along the river’s edge and embarked on the most ambitious panorama I’ve ever attempted. (Watch your inbox for a blog post dedicated to the process from tip to tail.) The short story is that I made an HDR multi-row panorama of the landscape, left my setup in place and walked away for a few hours. I came back when the Milky Way hit the right position, then made sets of pano images of the sky to noise-stack in post.

I stitched the landscape and sky images separately in PTGUI Pro, then blended them in Photoshop. I did this process twice to find just the right shape for the little planet projections.

It was a risky idea, but I am super proud of how it turned out. And it’s inspired me to attempt even more blue hour spherical panorama blends in the future.

Tim Cooper

Northern Lights Near Fredvang, Lofoten Islands, Norway

Nikon Z 6II with a Nikon Z 14-24mm f/2.8 lens, lit with a Luxli Fiddle panel light and a Coast HP7R flashlight. 5 seconds, f/2.8, ISO 3200.

Sought after by photographers and night sky enthusiasts, the northern lights are a bucket list item for many folks. On our March trip to Norway, I was lucky enough to witness these amazing lights over one of the world’s great landscapes: the Lofoten Islands. While there are many places to view the aurora borealis in the Northern Hemisphere, not all supply the dynamic mix of mountains and beaches that Lofoten provides.

Three days after the group arrived we were treated to our first aurora opportunity. Keeping an eye on several aurora tracking apps, we headed out with high hopes. As we were photographing at a local beach, they finally appeared. The mix of waves, mountains and clouds with auroras was beautiful, but it soon petered out. We decided to try another location in the hopes they would reappear.

I’ll never forget the excitement in the van as we recounted the beauty we had just witnessed along with the fun of chasing some more. Once we arrived at our new location, we quickly scrambled out of the van and got to work.

I remember snapping a couple of quick frames before I headed along a trail that led to an inlet. Turning around I saw the trail leading directly back to the glow of green. Beautiful!

To be sure I captured something, I snapped a few quick shots. Then I set up a Luxli Fiddle to illuminate the foreground. This panel light coupled with a handheld Coast HP7R flashlight brought out the texture of the grasses and helped define the trail. I was in heaven.

It felt like I shot a thousand images while watching the auroras dance and change shapes. Everyone had plenty of time to capture the magic. The northern lights are truly phenomenal and experiencing them with like-minded folks was a true gift.

Star and Car Trails Near Checkerboard Mesa

Nikon Z 6II with a Nikon Z 14-24mm f/2.8 lens. 30 stacked frames shot at 30 seconds, f/4.0, ISO 800.

I love lines in my photographs. Both real and implied lines generate impressions that influence the feel of the photo. Converging lines suggest speed, vertical lines suggest stability and horizontal lines give a feeling of calm. My favorite lines, however, are curved ones. These lines are elegant. They are in no rush to get you through the composition, and they make you slow down and take in more detail.

Car trails and star trails are two very common types of lines we encounter in night photography. The National Parks at Night team will tell you that my love of car trails borders on an obsession. It was no surprise to Chris, then, when I found this scene while we were scouting locations for a spring workshop in Zion National Park.

Climbing up from the Zion-Mount Carmel Highway near Checkerboard Mesa, we were searching for dramatic red rock formations to use as foregrounds. The eastern side of the park is noted for its swirling sandstone and solitary trees, so these subjects were in my mind’s eye as we climbed the ridge.

Not finding my imagined scene, I switched from looking for a particular subject to seeing what the area offered. That type of “searching for a specific thing” has often made me miss great opportunities, so I am glad I was able to switch mental gears that night.

After walking around with an open mind I saw the road bisecting the peaks and leading straight to the sky. I was thrilled. In typical (for me) fashion, I made plenty of images to capture the best car trails and many more to capture the night sky. To round it off, I had to make several frames using different focus points to ensure that the foreground was sharp front-to-back at my wide-open aperture setting.


Your Turn

What was your favorite night photograph of 2022? We’d love to see it! Share in the comments below, or on our Facebook page, or on Instagram (tag us @nationalparksatnight #nationalparksatnight #seizethenight). Be sure to tell a story too—the technical aspects, the challenge overcome, or a tale of the experience.

Then … have a Happy New Year!

Lance Keimig is a partner and workshop leader with National Parks at Night. He has been photographing at night for 35 years, and is the author of Night Photography and Light Painting: Finding Your Way in the Dark (Focal Press, 2015). Learn more about his images at www.thenightskye.com.

UPCOMING WORKSHOPS FROM NATIONAL PARKS AT NIGHT

Five Questions: Holiday Lights, Metal Prints, a Southern National Park and More

‘Tis the season of giving. You’ve given us questions, and we’re giving you answers. Unwrap below.

This special holiday installment of our “Five Questions” series features inquiries about photographing Christmas lights, choosing a surface for metal prints, Congaree National Park, Irix and Sony lenses, and how Lightroom affects raw data.

If you have any questions you would like to throw our way, please contact us anytime. Questions could be about gear, national parks and other photo locations, post-processing techniques, field etiquette, or anything else related to night photography. #SeizeTheNight!

1. Dashing Through the Holiday Lights

Question:

I’m hoping you can solve a mystery for me and my photography students. When they created a zoom-blur photo of holiday lights, some streaks were solid and some were dotted. None of the lights appeared to be blinking. So does this have to do with the cycling of new LED lights? The exposure times were 1 second or longer, which I would think would be long enough to compensate for flicker. What’s the solution to get solid lines, if we can? — Kathy E.

This is one of the photos Kathy E. is asking about. Click on the image to view the photo larger and see full the effect. © 2022 James Steele. Nikon D7500 with a Nikon 70-300mm f/4.5-6.3 lens. 1 second, f/11, ISO 200.

Answer:

The intensity of LED lights is controlled by increasing or decreasing the frequency of their flicker. What you’re seeing is a result of that.

We almost never see this effect with photo/video lights because the manufacturers know about shutter speeds and they keep the frequency much faster than any shutter speed that photographers would conceivably use. However, with cheap light sources, like Christmas lights, the manufacturers don’t care; the lower refresh rate of the LED pulsing will be captured by the camera.

So, in short, the lights were blinking—faster than the eye could see, but not the camera’s eye. If you see that some lines are dotted and some aren’t, that means that the lights were cycling at different rates—some fast enough for the shutter speed, and others too slow.

To keep the lines from becoming dotted during a zoom-blur, I would try zooming more slowly during a longer exposure. (Stop down everything, and maybe even add a neutral density filter.) That way the light will have more time to burn into the pixels while they’re pulsing during your zoom. — Matt

Note: For more about how to photograph holiday lights, see Gabriel Biderman’s post “Seize the Season.”

2. Metal Mettle

Question:

What finish do you recommend for metal prints of astro photos from Bay Photo Lab? — Alan A.

When hanging a metal print opposite a window, consider avoiding a high-gloss surface, as the window light will cause glare. High-gloss prints are best hung at a 90-degree angle from a window.

Answer:

This is a very subjective question with answers that depend on two main factors:

1.       What is your personal taste?

2.       Where will the print hang?

I feel that most of my night images benefit from being printed on a more luminous surface. For metal, I tend to print on high-gloss surfaces. Lance prefers the mid-gloss option. My wife prefers my work printed with a satin finish because glare really annoys her. So as you can tell, personal taste can vary from person to person!

However, understanding what each finish can bring to your space—and how it’s affected by your space—is also key. If you are going to hang a print directly across from a window, then satin might be your best option as you’ll want to have minimal glare. I tend to hang most of my prints at a 90-degree angle to the windows, where even high gloss shows little to no glare.

Bay Photo recently announced their Performance EXT coated metal surfaces, which have additional coatings to extend print life in direct sunlight or outdoors. This addresses another important factor: Most of my images are in a bright room, and my oldest Bay Photo metal prints are 5 years old and show no signs of fading. I recently replaced some metal prints from another printer—those were around the same age but were starting to fade. I have not used Bay’s EXT coating yet, but I advise considering it if your prints get direct sunlight.

If you are new to the metal game, I suggest getting a sample pack made in a smaller size before committing to a surface you are unfamiliar with. Bay offers sample packs in 4x6, 5x7 and 8x12 inches with either standard coating or EXT.

Finally, if you are new to using Bay Photo, be advised that they offer a 25 percent discount on your first order. — Gabe

3. Photographing Congaree

Question:

Have you ever photographed in Congaree National Park in South Carolina? It is only a few hours’ drive from my house and I’ve been thinking about going there, but I’m not sure if the park offers many good landscape opportunities. — Arnie

Congaree National Park boardwalk loop trail. © 2016 Chris Nicholson. Nikon D3s with a Nikon 24-70mm f/2.8 lens. 1 second, f/11, ISO 800.

Answer:

I’ve been to Congaree several times. It’s a very pretty park, but it’s primarily forest. (Floodplain forest, in particular. More on that in a bit.) As you may already know, forest photography is challenging because it’s very much about making compositional order out of natural chaos. So if you’re into that type of challenge, then Congaree can be amazing. (It’s also good for spider and snake photography.)

There are some other compositional elements to work with, but most take some effort to get to: the Congaree River (which needs to be hiked to), several ponds (which need to be hiked to) and Cedar Creek (which should really be paddled). The one exception is the 2.4-mile boardwalk trail that starts (and ends) behind the visitor center; that trail is an easy way to get around that section of park, and is an attractive subject as well.

My personal feeling is that aside from the annual show of synchronous fireflies, Congaree is better for daytime photography than nighttime, and it’s better still in overcast light or fog.

The park is probably at its aesthetic best when it floods, which happens about 10 times per year—the caveat being that those conditions drastically minimize how much of the park you can access. But even with the restricted access, the reflections of the forest in the floodwater can be ample fodder for photography. — Chris

4. Sony vs. Irix Lenses

Question:

In one of Lance’s presentations he recommended the Irix 15mm T2.6 Cine lens as the best for capturing the Milky Way. I am now using a Sony a7R IV camera body with two different lenses for night shooting: the Sony 16-35mm f/2.8 GM and the Sony 20mm f/1.8 G. What is the possible improvement I might achieve with the Irix lens? — Ed H.

Answer:

I’ve looked at your photos, and you do not seem to have a problem focusing, which could have been one reason to switch.

Of the lenses you mentioned you already own, both have some noticeable coma, but neither to a catastrophic level. Stopping down the 20mm to f/2.5 should clear it up nicely. Coma on the 16-35mm will vary across the focal lengths, and with it being an f/2.8 lens, you’d likely need to stop down to f/4 or more to get rid of it.

If you need something wider, or if further testing of the 16-35mm tells you that you need to stop down to f/4 or smaller at 16mm, then the Irix 15mm will probably be a little bit better. Other advantages of the Irix are that it’s a touch wider, and it’s easier to focus and to keep in focus. I like to stop down the Irix to f/3.2 to get rid of its minimal coma.

If those advantages don’t resonate with you, then stick with your two Sony lenses. What you have seems to be working. — Lance

5. Raw Permanence

Question:

When importing, does Lightroom add edits or adjustments? If so, is there a way to import raw files as shot in camera? I was told by another photographer that Lightroom always applies filters or edits on import, so instead of importing directly into Lightroom, she moves images from a card to an external drive, and then imports to Lightroom from the external drive, thus preserving her original in-camera files. — Christie

Answer:

Your friend is partly right and partly wrong.

Yes, Lightroom applies some standard edits. These are the same types of edits that Canon software would apply when importing Canon raw files or Nikon software would apply when importing Nikon raw files. Most of them are under-the-hood stuff, such as sharpness, noise reduction, etc. These are basically the same types of edits that are applied to a JPG when it’s produced in-camera. They don’t really change the look of the image so much as refine it to compensate for imperfections in how the image data was captured.

If there is a change in how the photo looks after importing, the likely cause is that the profile Lightroom is applying in the Develop module doesn’t match the in-camera profile you used when shooting. Immediately upon import you see the camera-generated JPG preview, and then very quickly Adobe updates this preview with their interpretation of that file based on the Lightroom profile that’s being applied. In some cases, this can drastically change the look of your photo. (You can read more about this, and how to fix it, in our post “How to Make Your Lightroom Rendering Look Like Your Camera Preview.”)

Not to worry, though. These settings are not permanent.

In fact, none of the edits that Lightroom applies are permanent. They are simply a recorded set of instructions that tell Lightroom how to render the raw data when you view it on screen or export it later. Those instructions are stored in the catalog database and/or a sidecar file, not in the image file. The actual raw file never changes—only the instructions on how it should be previewed, copied or printed. And those instructions can be reset, altered, updated and reset again, all while never making any change to the raw file.

You can prove this by making drastic changes to a photo in Lightroom and then opening the raw file in another program. When you open it in, say, Nikon Capture NX-D, you won’t see any of the Lightroom edits—because, again, those edits are not stored in the raw file.

Therefore, having another copy of raw files in their “original state” is completely unnecessary—it’s a waste of hard drive space. Of course, we do highly recommend backing up your photo files, but that’s a whole other blog post. (Stay tuned.) — Tim

Chris Nicholson is a partner and director of content with National Parks at Night, and author of Photographing National Parks (Sidelight Books, 2015) and Photographing Lighthouses (Sidelight Books, 2023). Learn more about national parks as photography destinations, subscribe to Chris' free e-newsletter, and more at www.PhotographingNationalParks.com.

 UPCOMING WORKSHOPS FROM NATIONAL PARKS AT NIGHT